Web Panel
The Laravel install: installing it, and then every screen you will actually use.
Item: Learnify LMS
Server Requirements
Anything that runs a modern Laravel application will run Learnify. The installer checks every item on this list and refuses to continue until they pass, so you never find out about a missing extension halfway through.
| Requirement | Minimum |
|---|---|
| PHP | 8.3 or newer |
| MySQL | 8.0 or newer (MariaDB 10.6+ also works) |
| Web server | Apache or Nginx with URL rewriting |
| PHP extensions | BCMath, Ctype, cURL, DOM, Fileinfo, GD or Imagick, JSON, Mbstring, OpenSSL, PCRE, PDO, PDO MySQL, Tokenizer, XML, Zip |
| PHP settings | allow_url_fopen on; upload_max_filesize large enough for your lesson files |
| Writable | storage/ and bootstrap/cache/ |
| Cron | One entry, every minute |
Point the domain at the public folder, not at the project root.
Serving the project root exposes .env.
Create the Database
Create one empty database and one user with full rights on it. Use utf8mb4 with
utf8mb4_unicode_ci so every language and emoji stores correctly.
CREATE DATABASE learnify CHARACTER SET utf8mb4 COLLATE utf8mb4_unicode_ci;
CREATE USER 'learnify'@'localhost' IDENTIFIED BY 'a-strong-password';
GRANT ALL PRIVILEGES ON learnify.* TO 'learnify'@'localhost';
FLUSH PRIVILEGES;
Do not create any tables. The installer runs the migrations.
Run the Installer
Upload the contents of WebSourceCode, point the domain at public, then open
https://yourdomain.com/install.
Requirements
Every extension, permission and PHP setting is checked and shown with a pass or fail. Fix anything red before continuing.
Database
Host, port, database name, user and password. The installer connects, writes
.env, then creates the tables and default data on a page of its own — if that is interrupted, submit the form again and completed steps are skipped.Admin account
Your name, email and password. This becomes the owner account.
Done
The installer sets
APP_INSTALLED=truein.envand locks itself, then hands you the login link.
No php artisan key:generate is needed — the wizard creates APP_KEY on its first page.
It also runs fine on your laptop under php artisan serve: that dev server restarts itself whenever
.env changes, so the wizard shows a short “saving…” page while it comes back.
If the database step fails or times out, the error is shown on the same form and
written to storage/logs/laravel.log. Fix the cause (usually credentials or a missing PHP
extension) and submit the same form again — migrations already applied are skipped, so nothing needs
dropping. The installer raises the PHP time limit itself; on hosts that ignore that, a second submit finishes
the job.
Shared hosting. Nothing needs symlink(): if the host disables it,
uploads under /storage are served through PHP automatically. There is no ionCube loader and no
licence server to reach.
Setup Wizard & Getting Started
After a fresh install, the first visit to the dashboard opens a three-step setup wizard (you can press Skip for now; run it again any time from Settings → Setup wizard):
- Your academy — name, logo, language and the currency course prices are entered in.
- How you teach — Just me (you sell your own courses), Marketplace (other instructors apply, publish and earn a share; set your commission here) or School or institute (teachers you add yourself, batches and student fees — turns on the Fees module). Tick I will create courses from this account to teach from the admin account.
- Getting paid — bank transfer / bKash / Nagad details shown at checkout. Card and online gateways are set up later under Payments → Payment Gateways.
Finishing opens the course builder (or the dashboard). Everything the wizard sets stays editable under Settings. Sites updated from an earlier version never see the wizard unless you open it.
Getting started checklist. The admin dashboard shows five steps — site name and logo, a payment method, email (SMTP), your first published course and background tasks — each with a button to the right page. Steps tick themselves off from the site (offline payment only counts once its bank details are filled in), and the card disappears when all are done or when you press Hide this list.
Teaching from the admin account. The owner account the installer creates is an administrator, not an instructor. The wizard tick box, or Create courses myself on the checklist, adds the course builder to your menu. Courses you create publish straight away (the button says Publish instead of Submit for review), and their sales stay site revenue — your own instructor share is 0 %, so no payout is owed to yourself.
“Just me” menus. A single-teacher site hides the marketplace menus it will not use: instructor applications, tutor requests, payouts, companies and departments. The pages still work by their address, and choosing Marketplace or School in the wizard brings the menus back.
Updating & Demo Mode
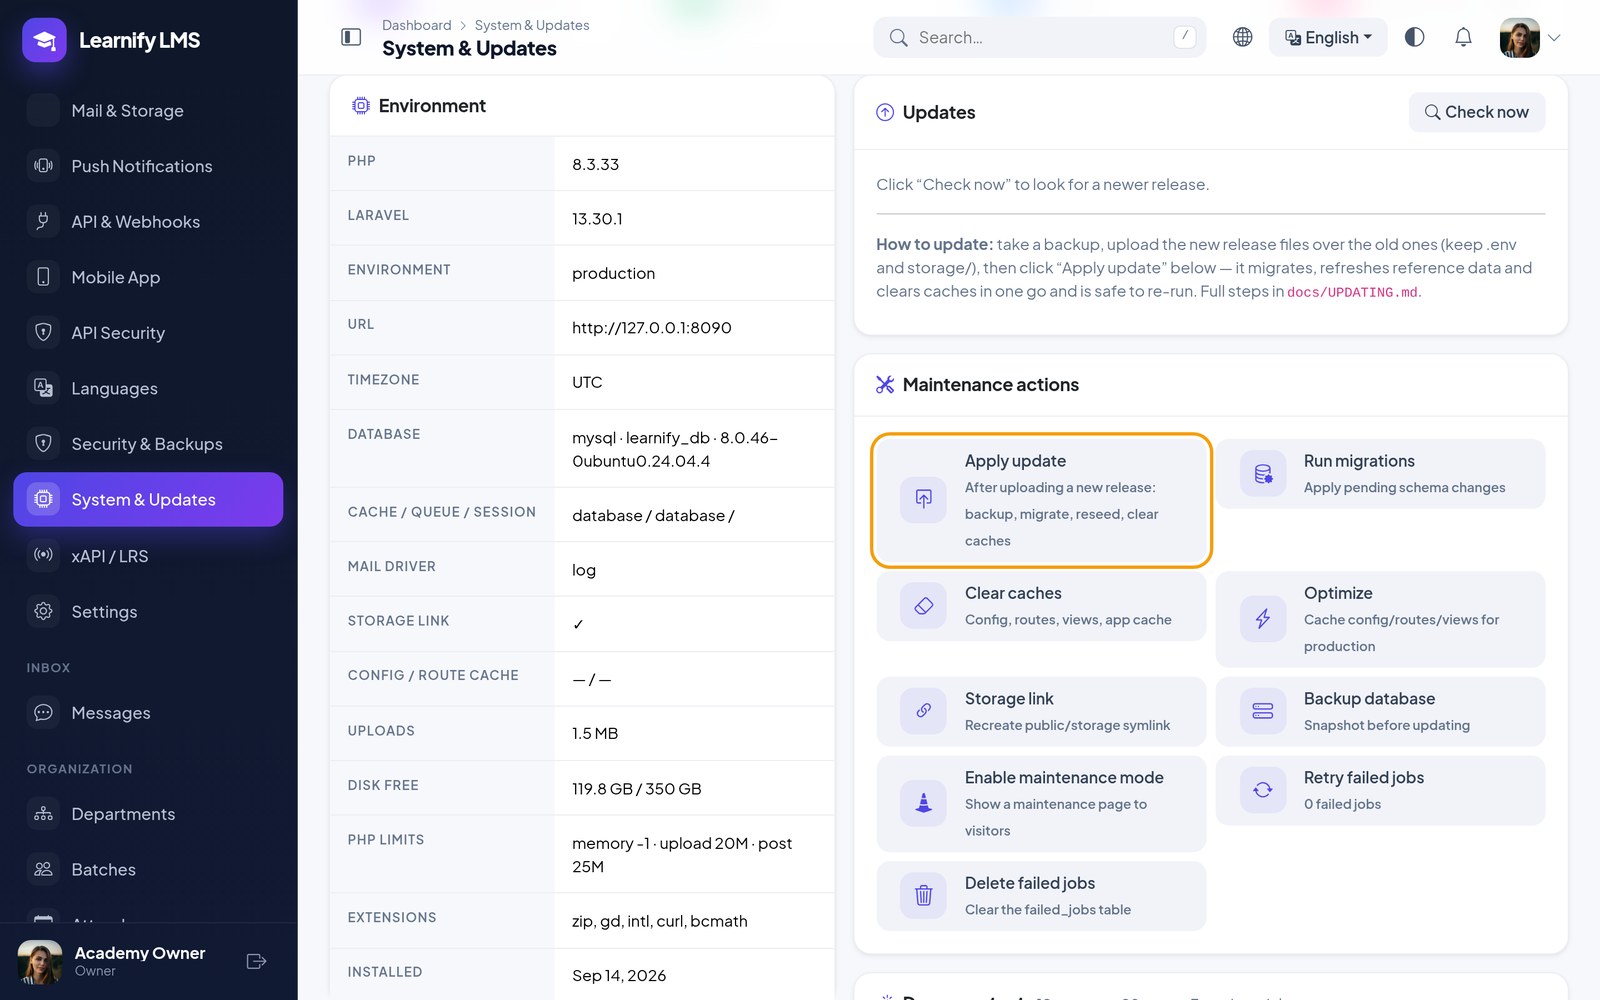
Three ways to update, all ending in the same result — migrations run, roles/permissions (including super-admin/owner) are re-synced to the release, and caches are cleared:
- Automatic (recommended) — Admin → System & Updates → Automatic (upload ZIP). Pick the release ZIP and click Install update: it extracts the package, backs up the folders it is about to touch, swaps them in and runs the upgrade — no SSH, no file manager.
- Manual, with SSH — take a backup (Security & Backups), upload
the new files over the old ones keeping
.envandstorage/, then run one command:php artisan learnify:upgrade - Manual, no SSH (FTP/cPanel) — copy the new files in by hand, then either
click Apply update on the System page, or, if you are signed in as a super-admin/owner, open
/admin/system/quick-syncdirectly in the browser — no form, no maintenance window, just migrate and re-sync the super-admin/owner permission set.
Skip as many versions as you like. Every release carries all earlier database changes and
cleans up files earlier releases shipped, so you can go straight from any older version to the newest one
— there is no need to install the versions in between. Installs older than 1.2.0 do not have the ZIP
uploader yet: update them once with one of the manual methods above (copy the files, then Apply update
or php artisan learnify:upgrade); after that, every later update can be a one-click ZIP upload.
Your courses, users, orders, payments, settings and uploads are kept; a lesson that used the retired Google
Drive source becomes an External URL lesson with the same link.
Every step is idempotent — if it stops on an error, fix the cause and run it again; finished
steps are skipped. Your custom code, settings, uploads and translations are all in the database or
storage/, so nothing you changed in the admin panel is lost.
Demo mode is for your own showcase site. With APP_DEMO=true in .env,
password changes, account deletion and settings that could take the site down are refused with a friendly
message, and the scheduler wipes and reseeds the whole site every hour (php artisan demo:reset runs it
by hand and refuses to run when APP_DEMO is off). System & Updates also loads one of five
niche demo datasets — academy, school, coaching, corporate or marketplace — into a normal install, and
removes them again in one click.
Performance. The defaults run anywhere. For more than ~50 people online at once: turn on
OPcache, run php artisan optimize after each upload, switch cache, session and queue to Redis in
.env, and raise PHP-FPM’s pm.max_children (about RAM ÷ 60 MB). Keep
lesson video on YouTube, Vimeo, Bunny, Cloudflare or S3 rather than streaming MP4s through PHP.
Release Notes
Version 1.7.0
- A paid order is never shown as failed — on every hosted gateway, a payment the gateway has not confirmed yet, or a gateway that is down or times out, now stays pending and the buyer sees “awaiting confirmation — no need to pay again”. Only a definite decline, cancel or expiry marks it failed. A background check every 10 minutes (no cron job needed) asks the gateway again and completes the order as soon as it confirms. Stripe bank debits (ACH, SEPA, Boleto) and PayPal captures that are still clearing wait instead of failing, and bKash, SSLCommerz and Mercado Pago payments complete even when the buyer never came back to the site. See Payment confirmation.
- Razorpay webhook — Razorpay now confirms payments to your site directly (event
payment_link.paid, signed with your secret). The Stripe and Razorpay gateway cards show the webhook address to register. - Check with gateway — on an order page (Orders → All Orders), a pending or failed payment has a button that asks the gateway right away and completes the order if it was paid. The page also shows why the gateway refused the payment or has not confirmed it yet.
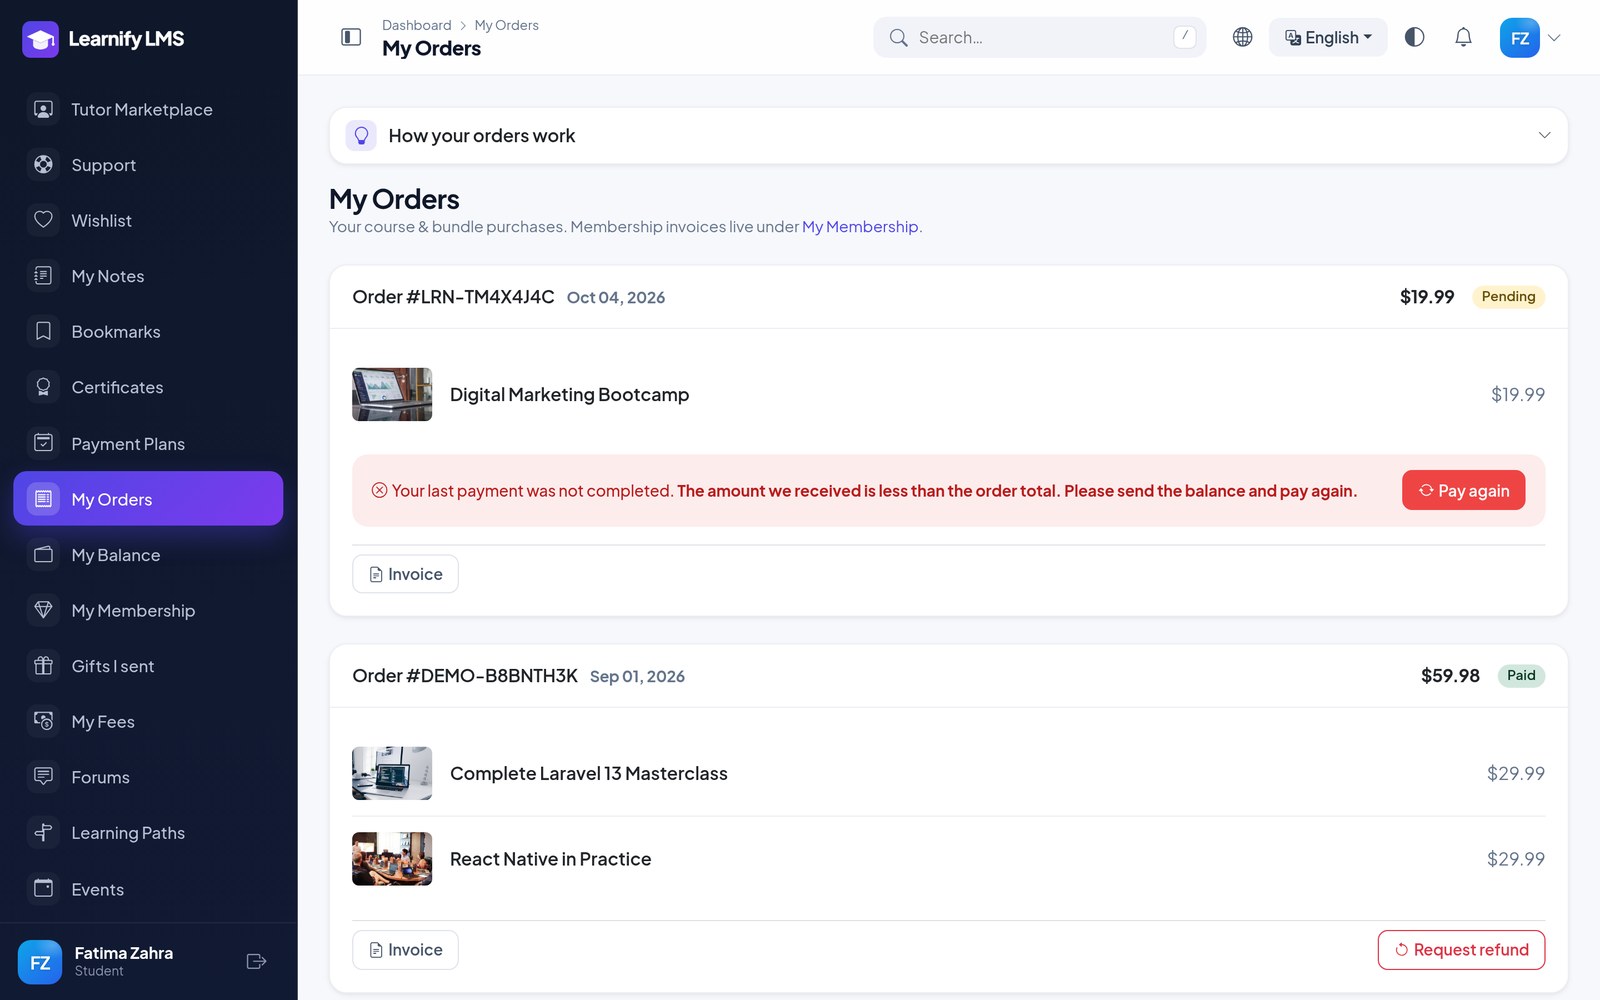
- Check payment status — learners see this button on a pending order in My Orders and can confirm a payment themselves.
- Payment alerts — a card on the admin dashboard shows payments awaiting confirmation and payments that failed in the last 24 hours, with links to the orders.
- Test keys — a button on the Stripe, PayPal, Razorpay, Paystack, Flutterwave, Mollie, Xendit, Square, Mercado Pago and bKash cards under Payments → Payment Gateways checks your saved keys with the gateway before you go live.
- Security & billing hardening — checkout always charges the course’s current price; instructor earnings and payout balances count paid orders only; every gateway return is checked with the gateway itself, including the amount and currency; a refund takes back the access, seats and earnings the order gave; payment plans charge only the first part at checkout; paid events are sold through the normal checkout; and paid lessons, downloads, assignments and live classes need a valid enrolment on the web and in the app.
- Mobile app 1.7.0+5 — paid events open the payment screen for the ticket, the payment result says when a refund is on its way, and paying again for an out-of-date order returns to the cart. See Mobile App.
- Fixes — layout fixes in the certificate designer, the action buttons on the admin users list and reviewer photos on course pages.
- Upgrading — copy the new files, then run
php artisan learnify:upgradeor Apply update. If you use Razorpay, add the webhook (see Payment confirmation). Optionally runphp artisan lms:repair-billingonce to fix data written by older versions: it waives instalment parts for buyers who were already charged in full, takes back memberships, gift codes and event places that earlier refunds left open, and recounts course student numbers. It only reports what it would change until you add--apply. To re-check one payment that is stuck, runphp artisan payments:reconcile --payment=<id>.
Version 1.6.0
- Private 1-on-1 sessions: instructors publish paid or free time slots in their own timezone (up to eight hours, in the built-in classroom or on their own meeting link; overlaps with other slots and live classes are blocked). Learners book from the instructor’s profile (Book a private session) or Private sessions, pay through the normal checkout and gateways, and join the private room when it opens. Cancelling before the start sends paid bookings to refund review, and the instructor marks the session completed. Also in the mobile app (Profile → Private sessions) and the REST API (
/api/v1/bookings) - No cron job or queue worker needed: scheduled tasks (live-exam results, email campaigns, expiries, backups) and queued jobs now run by themselves while people use the site — a task whose time passed while nobody was visiting runs on the next visit. Adding a server cron (or having your host open a secret cron address every minute) still gives exact timing and takes over automatically; System Health shows which one is running
- Setup wizard after installing: academy name, logo, language and currency; the kind of academy — Just me, Marketplace (with your commission) or School; and your bank / mobile-wallet details for checkout. Skippable, and you can run it again from Settings → Setup wizard
- Getting started checklist on the admin dashboard — site name and logo, a payment method, email, your first course and background tasks — that ticks itself off as you go and disappears when everything is done
- Teach from the admin account: one click (or a tick in the setup wizard) adds the course builder to your own menu; your courses publish straight away without a review step and their sales stay site revenue. A “Just me” site also hides the marketplace menus it does not need (instructor applications, payouts, companies)
- Edit what you wrote instead of deleting and re-adding it: question-bank and quiz questions (past attempts keep their answers), course FAQs, video checkpoints, notes, forum topics and replies (until the topic is closed), course Q&A questions and answers, and company departments — each limited to its author, or an admin / the company manager where that applies
- Quizzes show one question per page: progress bar, numbered navigator with answered questions marked, Previous / Next, and a warning about unanswered questions before submitting. The timer, auto-submit and proctoring work as before, and every question stays on one page if JavaScript is off
- Course review workflow: instructors send a draft or rejected course to the admin with Submit for review / Resubmit for review; it stays unpublished until approved
- Translations: one shared catalogue for the website and mobile-app strings. Admin → Translations imports and exports JSON or CSV with a preview of every change, “merge” or “fill missing only” modes and a sample template to translate offline; translation editing also works on demo sites. API:
GET /api/v1/translations/{code} - Lesson player: playback speed and captions on YouTube lessons, resume where you left off on YouTube, uploaded and HLS videos (the position is saved on pause and when you leave), a “Try again” message when playback is interrupted, and keyboard controls (Space, ← / → to skip 10 seconds)
- Mobile app catches up with the website: it loads your own translations from the server (edits and imports under Admin → Translations reach the app, and a language you add later works without a new app build); videos resume where the learner stopped on any device and count watch time, so lessons with a minimum-watch rule can be completed in the app; learners edit their notes, course Q&A and forum posts; instructors send a draft or rejected course for review
- Live classes and private sessions in the built-in classroom open inside the mobile app with camera and microphone (join / leave attendance included); Zoom, Google Meet and custom meeting links still open in their own app. Meeting links up to 2,048 characters are accepted. On the free public meet.jit.si server the instructor must log in to start a meeting — add your own Jitsi server or 8x8 JaaS keys under Settings → Live classroom so instructors start without a login
- SEO & AI search: new Settings → SEO tab with a default meta description, a default share image for Facebook / WhatsApp / LinkedIn / X, a “hide this site from search engines” switch for staging and demo sites, extra robots.txt rules and an llms.txt introduction.
robots.txtandllms.txtare now generated automatically with your own domain and catalogue; the sitemap adds learning paths, bundles and events and leaves out login-only forum pages; instructor profiles and the FAQ page get structured data; dashboard and login pages are kept out of search results - Marketing pixels: Add to Cart now fires for courses, bundles and memberships (Meta Pixel, GA4 and TikTok), and View Content, Add to Cart and Initiate Checkout share the same product IDs for catalogue ads and retargeting
- Dashboard: the sidebar is grouped into collapsible sections; only the section for the open page starts expanded and opening one closes the others (choose “Flat list” under Settings → Appearance for the classic menu); the collapsed sidebar shows your favicon instead of a cropped logo and the name of each icon on hover; a Messages icon in the top bar shows unread messages
- Live chat: visitors (guests or signed-in learners) chat with your team from a floating button on the website; you answer in Admin → Live chat with unread counts and open / closed conversations. It works on any hosting by checking for new messages every few seconds, and becomes instant when you run Laravel Reverb (add the
REVERB_*keys to.env, runphp artisan reverb:start, then switch on realtime under Settings → Chat buttons) - Chat buttons: the same floating button can also open WhatsApp (with a pre-filled message), Facebook Messenger and email — live chat and each link have their own on / off switch under Settings → Chat buttons, so you can hide one without losing its number. Plain links to the visitor’s own apps, so no third-party script is loaded. All of them are switched on in the demo
- Dashboard customizer (sliders icon in the top bar): light / dark, brand colour, sidebar style, corners, font and a compact density preview instantly and are kept per browser; admins can Save for everyone to make it the site-wide look. Limit it to admins and instructors under Settings → Panel
- Phones and right-to-left: no more sideways scrolling on 360 px screens (public header, login / register, home categories in Arabic); dashboard stat tiles sit two per row; long titles shorten inside their cards; the review form, lesson player controls, learning-path track and instructor application fit small screens; dashboard tables (orders, reports and more) swipe sideways instead of cutting off columns; and on Explore courses the filters open from a Filters button as a bottom sheet, so the courses show first
- Website footer, all from Settings and hidden while empty: social icons now link to your profiles (Facebook, X, Instagram, LinkedIn, YouTube, TikTok); Google Play / App Store download buttons; WhatsApp, address and office hours under Get in touch; a “We accept” row listing the payment gateways you have switched on; and one link column of your own (new Settings → Footer tab)
- Demo content: every demo lesson now uses an on-topic video that can be embedded (the old demo video was blocked from embedding by its owner); existing installs are updated automatically when you apply the update
- Fixed: YouTube lessons could only be started in fullscreen (and on phones); a lesson whose YouTube video was removed or blocked from embedding now says so instead of “check your connection”; duplicate “From name” field and missing menu icon on Mail & Storage; unlabelled marks fields in the question-bank form; misaligned file and import-mode fields on Translations
- Everything new is translated into Bangla and Arabic, on the web and in the app
- Upgrading — copy the new files, run
composer install --no-dev --optimize-autoloaderagain (1.6.0 adds thelaravel/reverbpackage for live chat), thenphp artisan learnify:upgradeor Apply update for the new migrations. No files are removed. A cron job is now optional.
Version 1.5.0
- Test series as a separate product — instructors create them under Instructor → Test Series → New Test Series (quizzes only, no video lessons). They have their own catalogue (
/test-series) and details pages, go through the normal cart, checkout, coupons and gateways, and show a “Test Series” badge in My Learning. The admin course list filters by type; the API takesGET /api/v1/courses?type=course|test_series. Passing every active quiz moves progress, completes the test series and issues the certificate. See Test Series. - Quizzes on course pages — course details pages list the course’s active quizzes (question count and exam window) under the lessons; buyers get “Take quiz”, visitors see a lock.
- Live exams — a quiz can have a Publish results at time. Until then learners and parents see only “Answers submitted” on web, API and app. When the time passes,
quizzes:publish-resultssends each participant their score and merit rank (in-app, e-mail, push; template Exam result published). Needs the cron job runningphp artisan schedule:runevery minute. See Live Exams & Results. - Merit list and rank — tick “Show merit list and rank to learners” on a quiz. Ranked on the first attempt (marks, then time taken; equal results share a rank). Learners see rank, percentile, highest and average marks and the top 100; instructors get a Merit rank column, the full list and a CSV export. API:
GET /api/v1/quizzes/{id}/merit. See Merit List & Rank. - Subject-wise analysis — questions take a Subject (or inherit the question bank’s subject; CSV import column 12
subject). Results show correct / wrong / skipped, accuracy and score per subject with the weakest subject called out; instructors see class performance by subject. See Subject-wise Analysis. - Exam Calendar — Learning → Exam Calendar on the web and in the app’s Profile menu, with “Add to calendar” (.ics). API:
GET /api/v1/exams/calendar. See Exam Calendar. - Paid tests follow the lesson access rules — a refunded, expired or ended enrolment can no longer open or submit the course’s quizzes (web and API), members are enrolled on first open, and draft quizzes are closed to learners (instructors and staff still see them).
- Free samples — on a paid course the quiz option is labelled Free sample — no purchase needed, asks for confirmation when ticked (also enforced on save) and shows a Free sample badge in the quiz list. On free courses it stays “Open to all learners”.
- API fixes — quiz results follow the quiz’s “show results immediately” setting;
GET /api/v1/quizzes/{id}/attemptsworks for standalone tests that belong to no course; the guardian API’s quizscorereturns the percentage. - Mobile app — Tests tab, Explore Type filter, rank and subject breakdown on the result screen, Merit list and Exam Calendar screens; YouTube / Vimeo lessons play inside the app (“Error 153” fixed), fullscreen on Android, the screen stays awake during a lesson. See Mobile App.
- Bangla and Arabic — everything new is translated, on the web and in the app.
- Upgrading — two new migrations, run by
php artisan learnify:upgradeor Apply update; no files are removed. Make sure the cron job is in place so live exam results go out.
Version 1.4.0
- EPS gateway (Bangladesh — cards, bKash, Nagad, Rocket, netbanking), 21 gateways in total.
- Kashier rebuilt on Kashier’s Payment Sessions API — Learnify asks Kashier for the payment result itself instead of trusting the browser return, Kashier also calls a per-payment webhook, and refunds work from the admin panel. After updating, add your Kashier Secret Key under Finance → Payment Gateways → Kashier; until then the gateway shows “Enabled but missing keys”. Payments started before the update still complete.
- Every screen follows the chosen language — validation, login, password-reset and pagination messages, the “How it works” help boxes on every panel page, 404/403 error pages, status, module, currency and account names, and counts with correct plurals (Arabic uses all six plural forms). The mobile app is translated into Bangla and Arabic too, with right-to-left layout for Arabic.
- E-mails and notifications in the recipient’s language — each user’s language is remembered when they switch it; the API answers in the language of the
Accept-Languageheader, which the app sends. - Translations page — saves only the strings you changed, one page at a time (large languages no longer hit PHP’s
max_input_varslimit), includes the validation and login messages, and your edits there now take effect. The update removes old saved copies of the shipped text so new translations show. - Fixes — the current lesson in the lesson-player sidebar is visible again; on right-to-left languages the discount badge no longer covers the category badge on course cards.
Version 1.3.0
- 13 more payment gateways, 20 in total — Square, Mollie, Paystack, Flutterwave, Razorpay, Cashfree, Xendit, Mercado Pago, PayTabs, Paymob, MyFatoorah, Kashier, SSLCommerz, bKash, Nagad, aamarPay and shurjoPay join Stripe, PayPal and Manual. The gateway page is grouped by region and shows coverage, currencies, a docs link and sandbox credentials for each.
- More ways to grow and get paid — Paymob, MyFatoorah and Kashier gateways (20 in total), Meta Conversions API (server-side Purchase event), import a whole YouTube playlist as lessons, review moderation, Ask the instructor on course pages, an instructor own-referral commission rate, a System Health checklist (
php artisan learnify:health), and “Pay again” after a rejected offline payment — all on the web and in the mobile app. - Offline payments ask for proof — bank, cash and mobile-wallet buyers enter a transaction ID and can attach a receipt (web and app). Staff see both on the Manual Payments page, with duplicate-ID warnings; a rejection can carry a reason that is emailed to the buyer. Payment instructions are set under Settings → Commerce.
- Fairer instructor commission with coupons — the instructor/platform split is now taken on the price actually paid after the coupon (tax excluded). Previously it used the list price, so a heavily discounted or free order still paid the instructor in full.
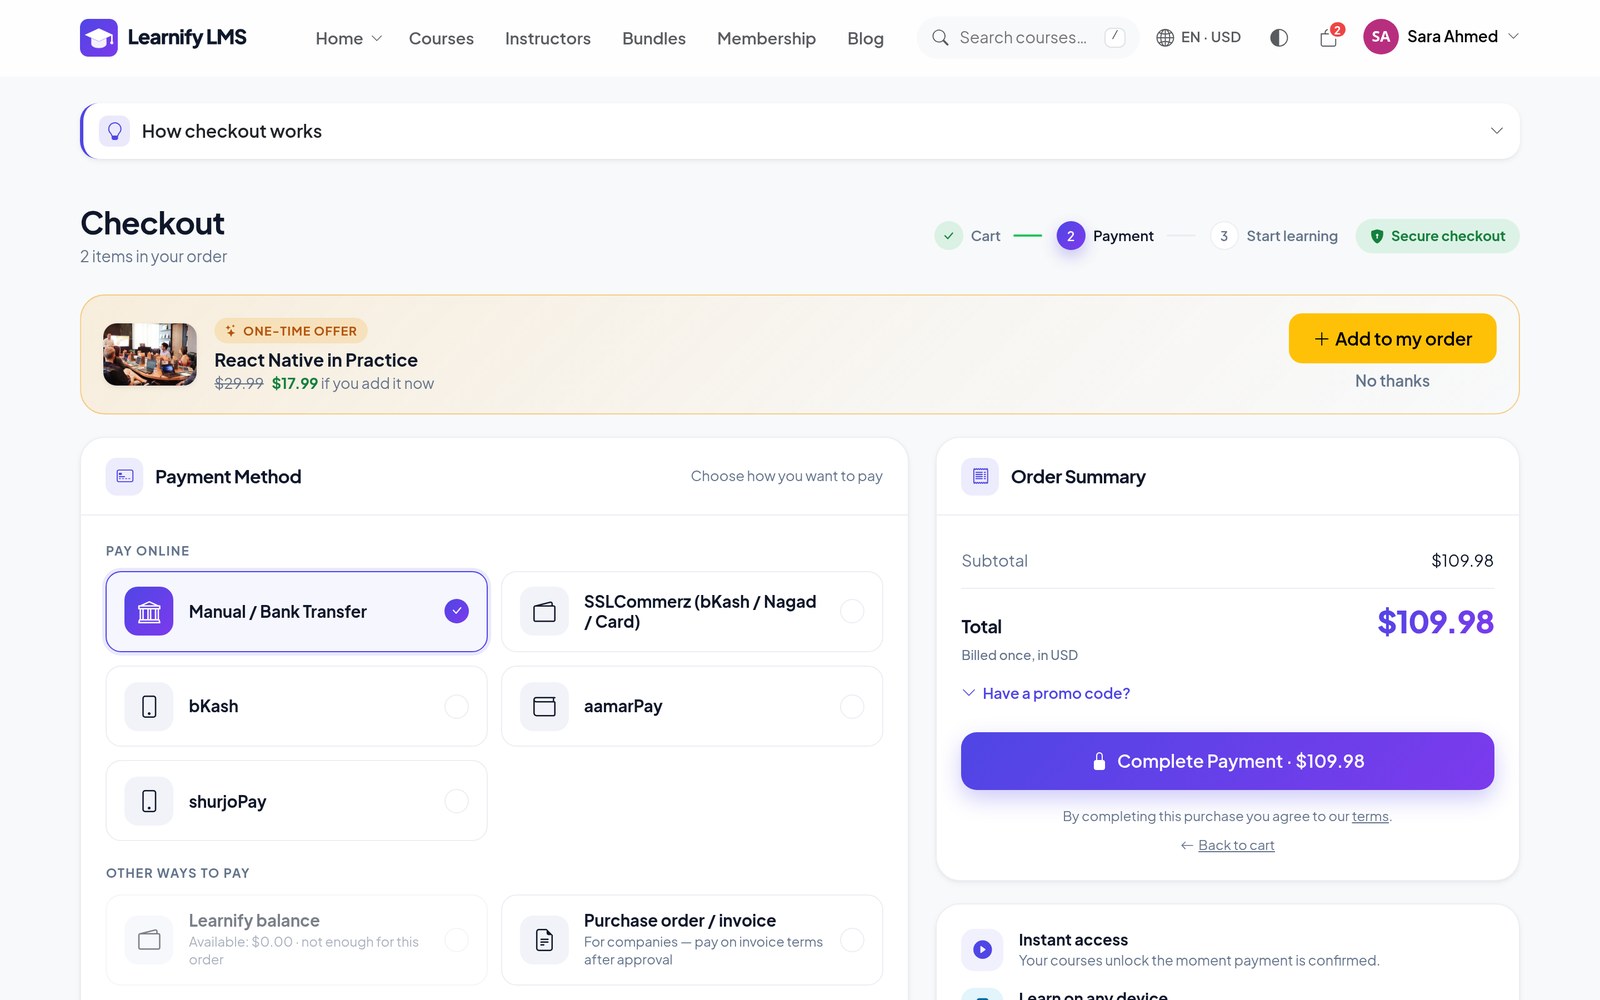
- Checkout and order page redesign — step indicator, order bump, wallet and purchase-order options, trust badges.
- 4 website templates — Aurora, Academy, Editorial and Nova, with an admin preview bar (
?template=) to try one before applying it. - Toast notifications — flash messages and notifications appear as toasts instead of banners.
- Mobile app logo — upload a logo just for the app under Admin → Mobile App (splash, home header, login); it falls back to the site logo.
- Demo logins — one-tap Student and Instructor chips on the login page of a demo site only; never Admin, never on a real install.
- Bangla and Arabic translations complete (about 2,700 strings each).
Version 1.2.0
- One-click automatic update from Admin → System & Updates, plus the manual/cPanel path with an Apply update button and the super-admin quick-sync URL.
- Every update path re-syncs the super-admin/owner role to the release’s full permission set.
Version 1.0.0
Initial release.
Cron & Queue
Since 1.6.0 no cron job is required. Scheduled tasks (drip release, campaigns, payouts, backups, live exam results) and queued jobs run by themselves while people use the site, at most once a minute and after the page has been sent; a task whose time passed while nobody was visiting runs on the next visit.
For exact timing on a quiet site, add the scheduler entry anyway — it takes over automatically:
* * * * * cd /path/to/your/site && php artisan schedule:run >> /dev/null 2>&1
If your host only lets you open a web address on a timer (cPanel wget, cron-job.org), use the secret
cron address shown on System → Health under Scheduler. That page also shows whether the
scheduler runs on visits or from a server cron.
For queues and workers, see Common Setup.
Manual Install (optional)
If you prefer the command line to the wizard:
cp .env.example .env
composer install --no-dev --optimize-autoloader
php artisan key:generate
# set DB_* in .env, then:
php artisan migrate --seed
php artisan storage:link
php artisan optimize
# then set APP_INSTALLED=true in .env
The package ships without a vendor/ folder, so composer install is
required (PHP 8.3 and Composer 2 on the server or on your machine, then upload the result). The LDAP sign-in
library declares ext-ldap; on a host without that extension run
composer install --no-dev --optimize-autoloader --ignore-platform-req=ext-ldap — everything
except LDAP / Active Directory sign-in works normally.
After a manual install, delete or block /install so nobody can re-run it.
What Visitors See
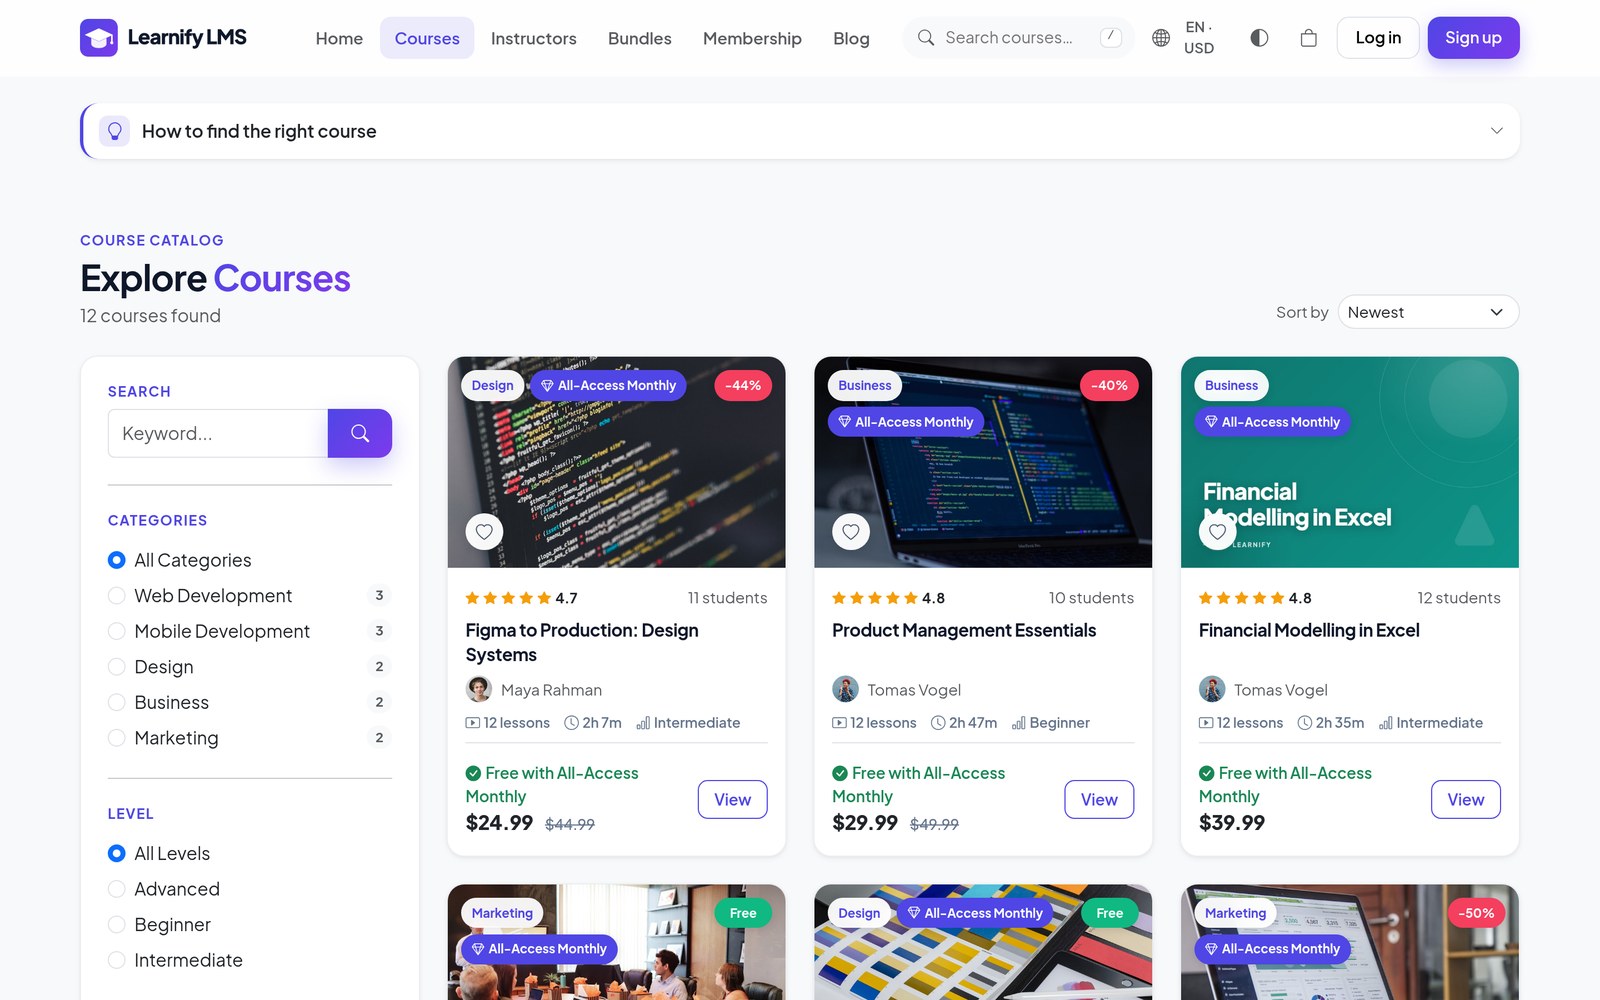
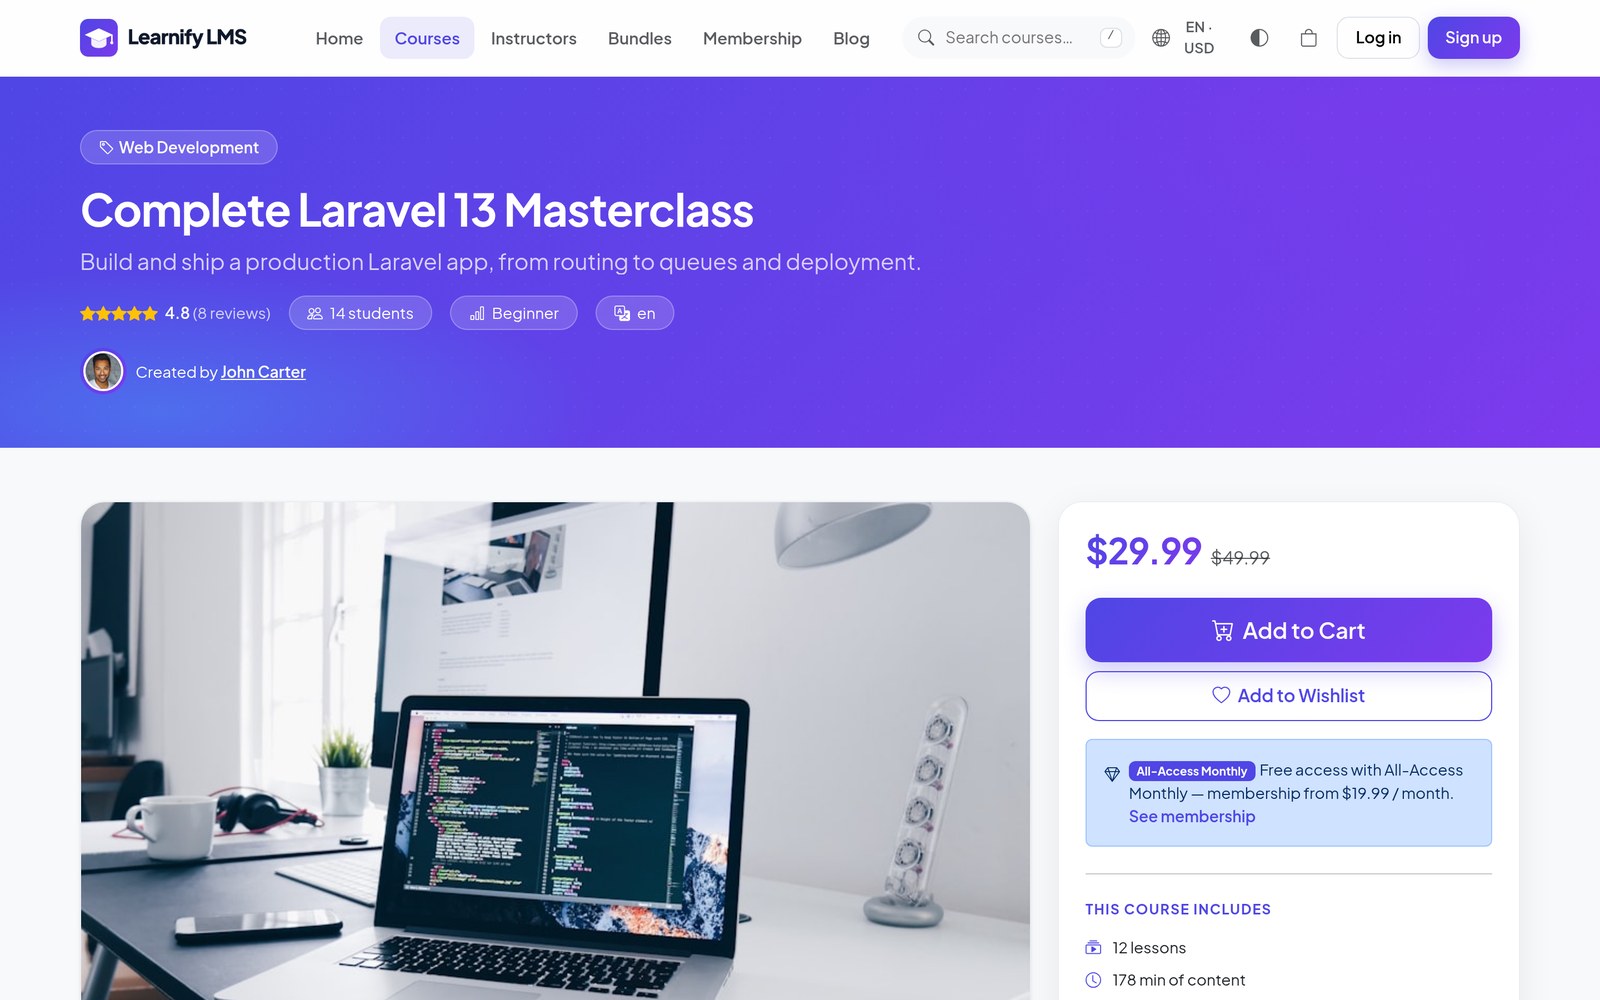
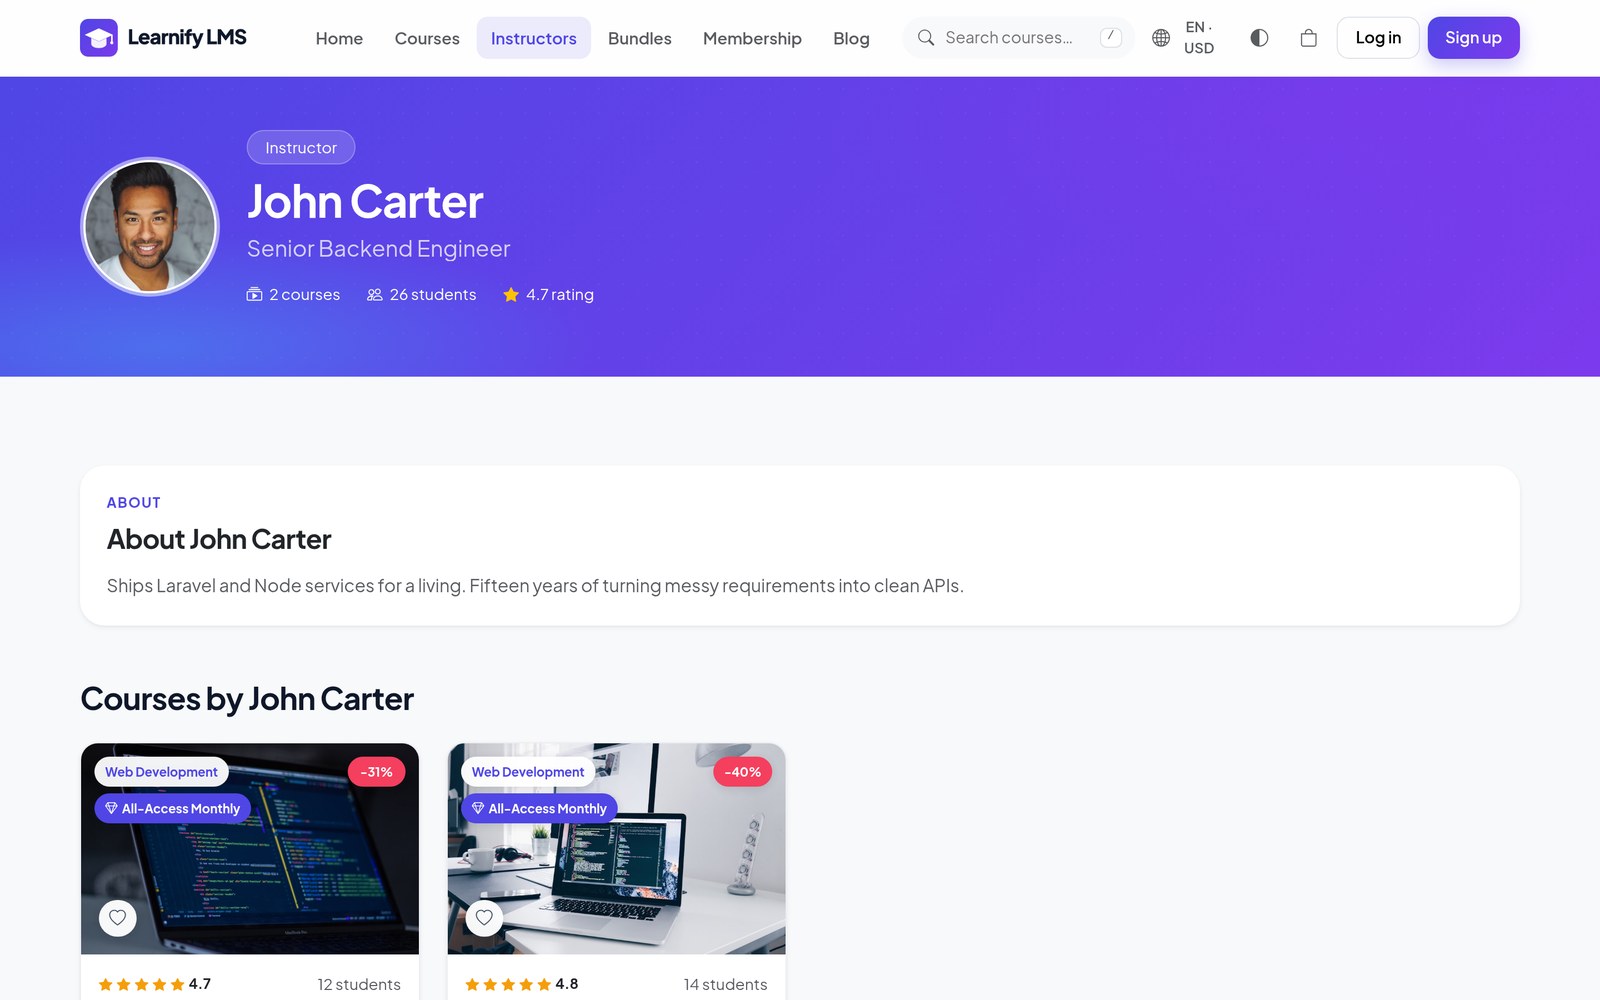
The public site is the shop window: a homepage you assemble from blocks, a searchable catalogue, course pages with curriculum and reviews, instructor profiles, bundles, memberships, a blog and events.
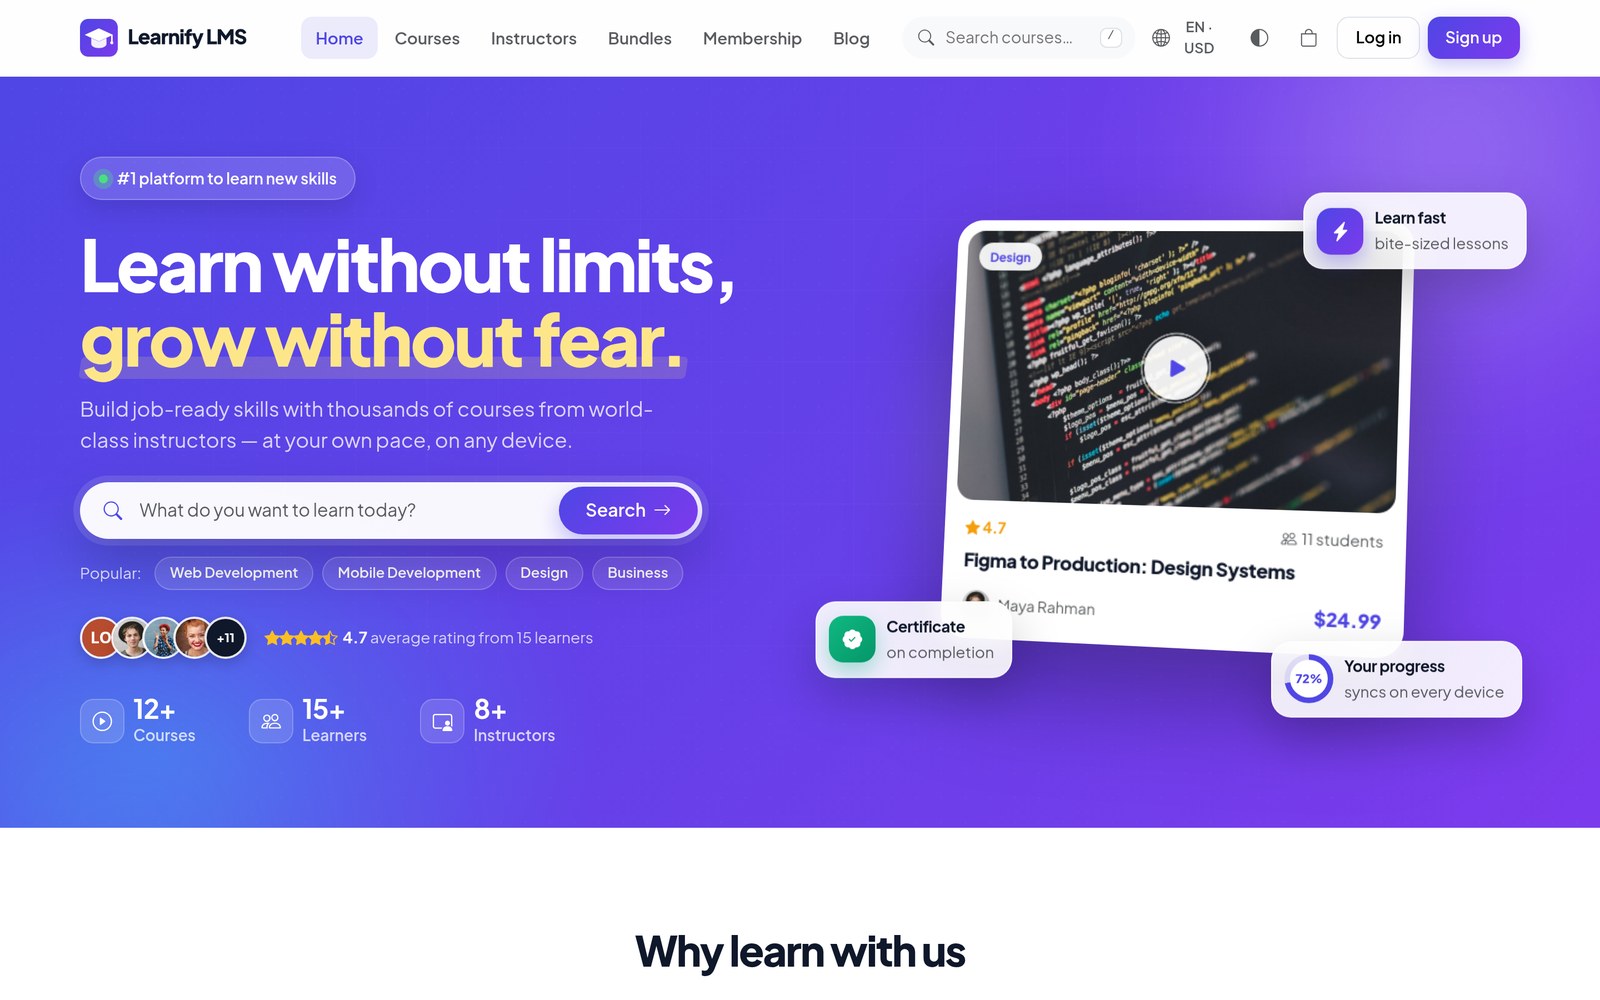
Homepage Builder
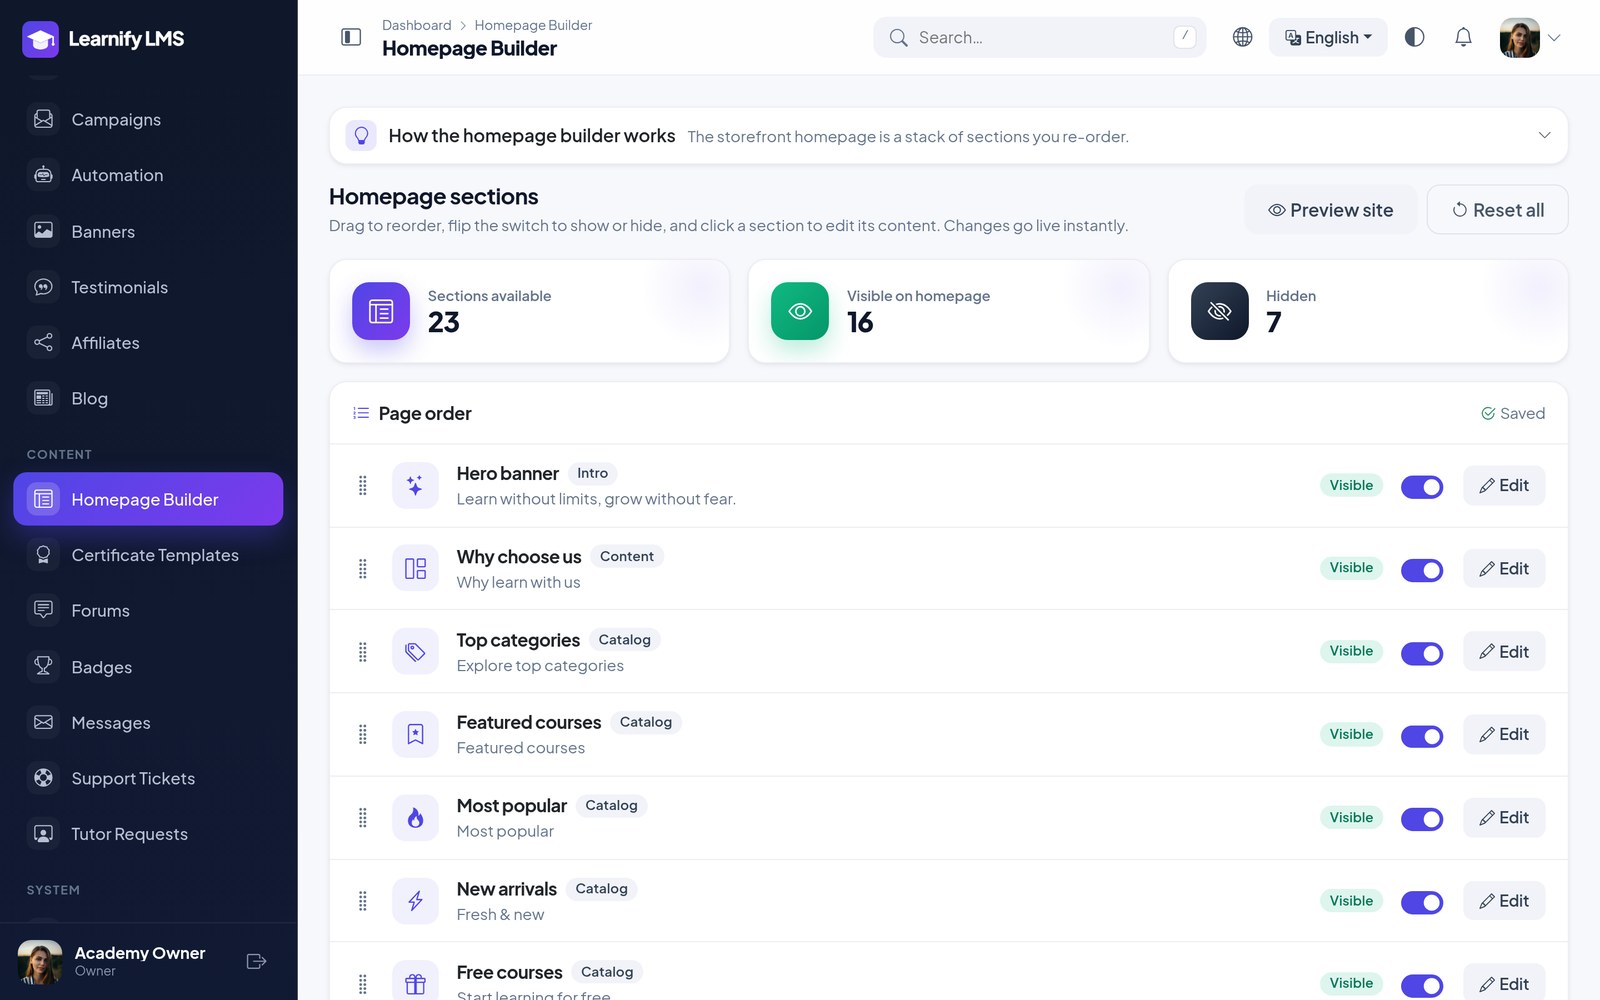
System → Homepage lists 23 sections — hero, categories, featured courses, counters, testimonials, instructors, blog, call to action and the rest. Toggle a section off to hide it, drag to reorder, and open one to edit its heading, text and which records it pulls.
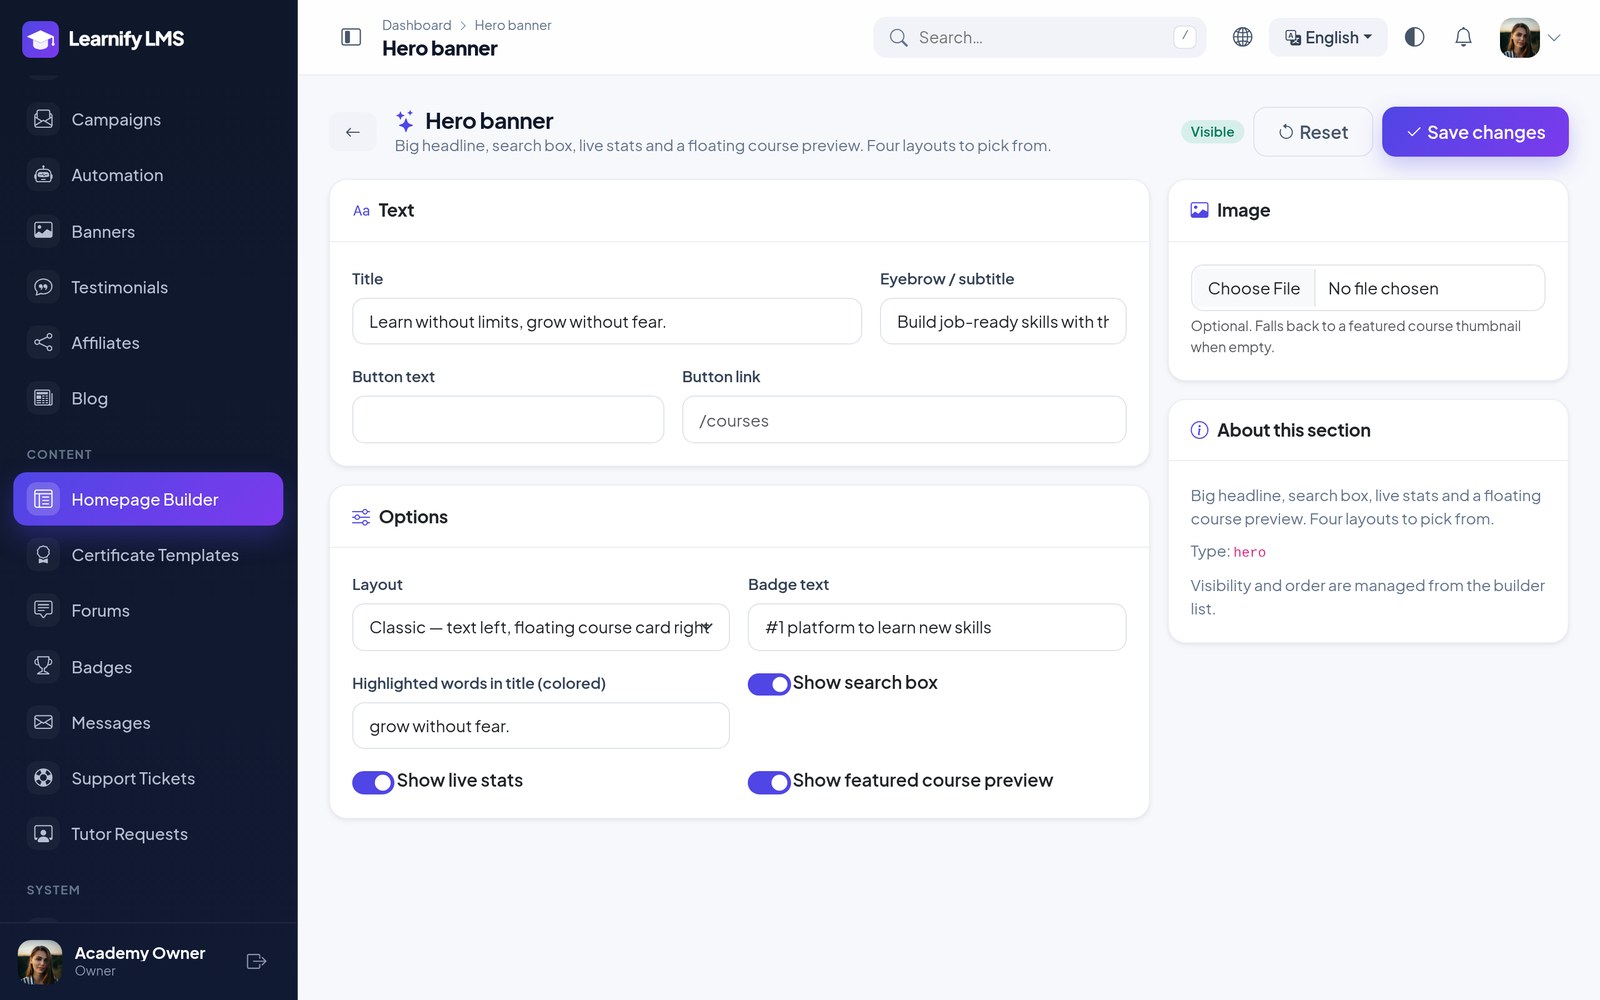
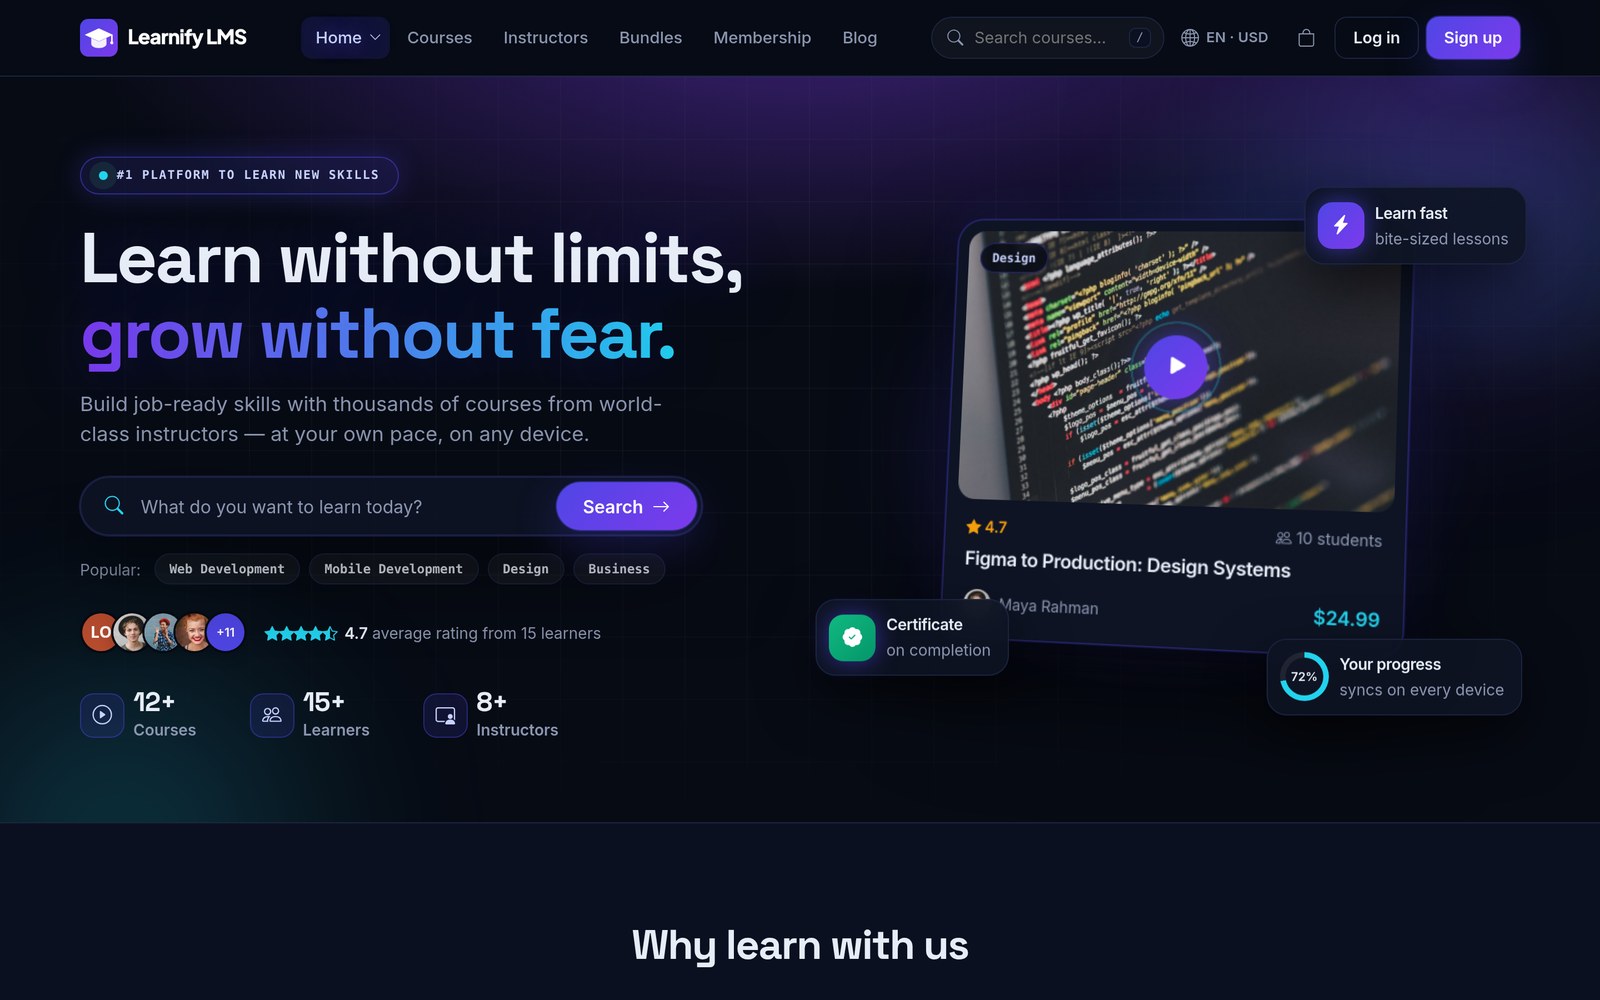
The Hero banner has four layouts under its Layout field: Classic (copy on the left, a floating course card with glass chips on the right), Centered (headline over a fanned three-course showcase and a stats bar), Photo (your uploaded image as a full-width backdrop with a glass panel) and Bento (light background, gradient headline, a grid of tiles). All four use the Appearance colours, show learner avatars, the average rating and the most popular categories as quick links.
This is the fastest way to make the site look like yours. You can rebuild the whole front page without touching a template.
Website Templates
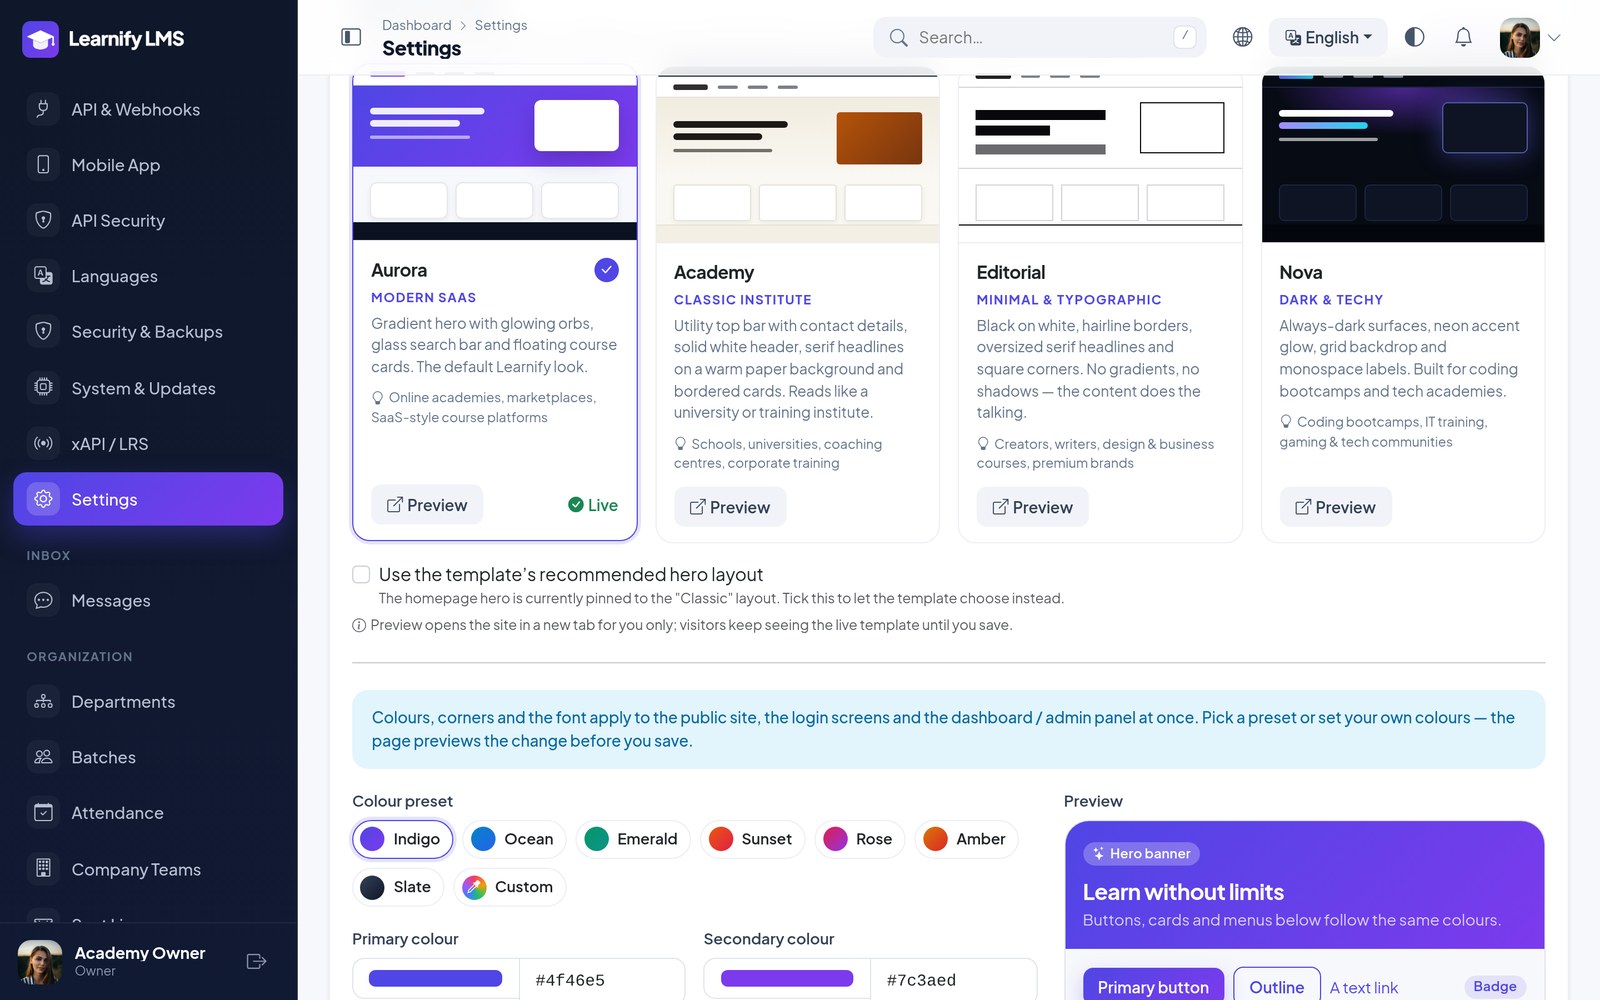
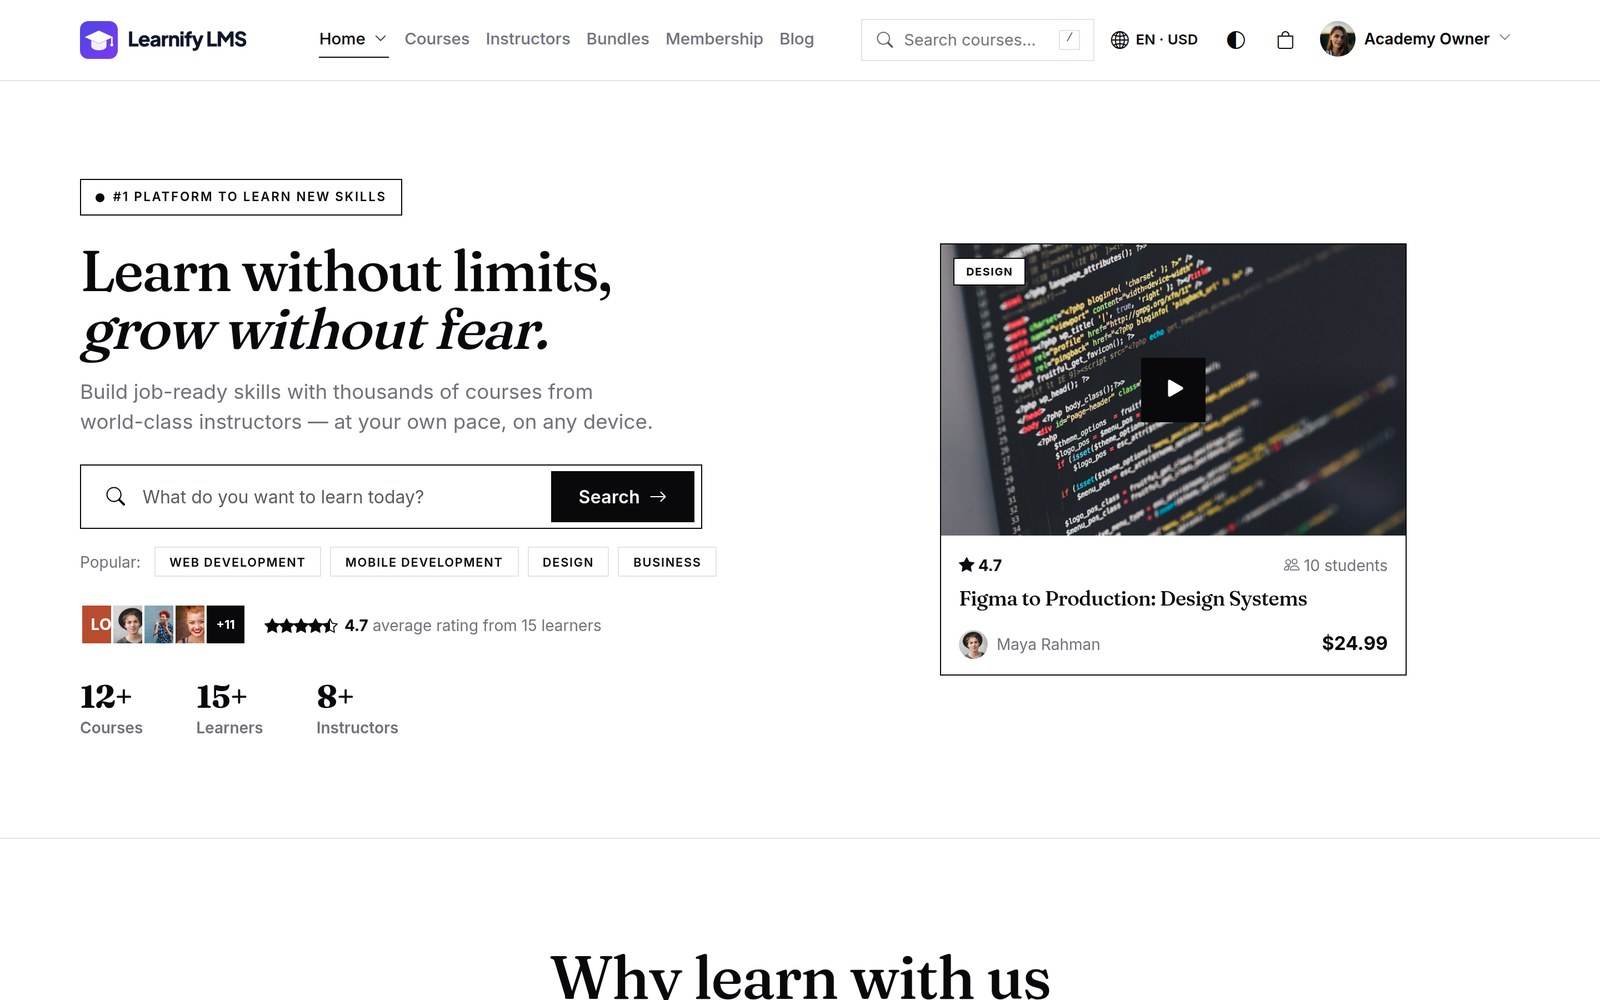
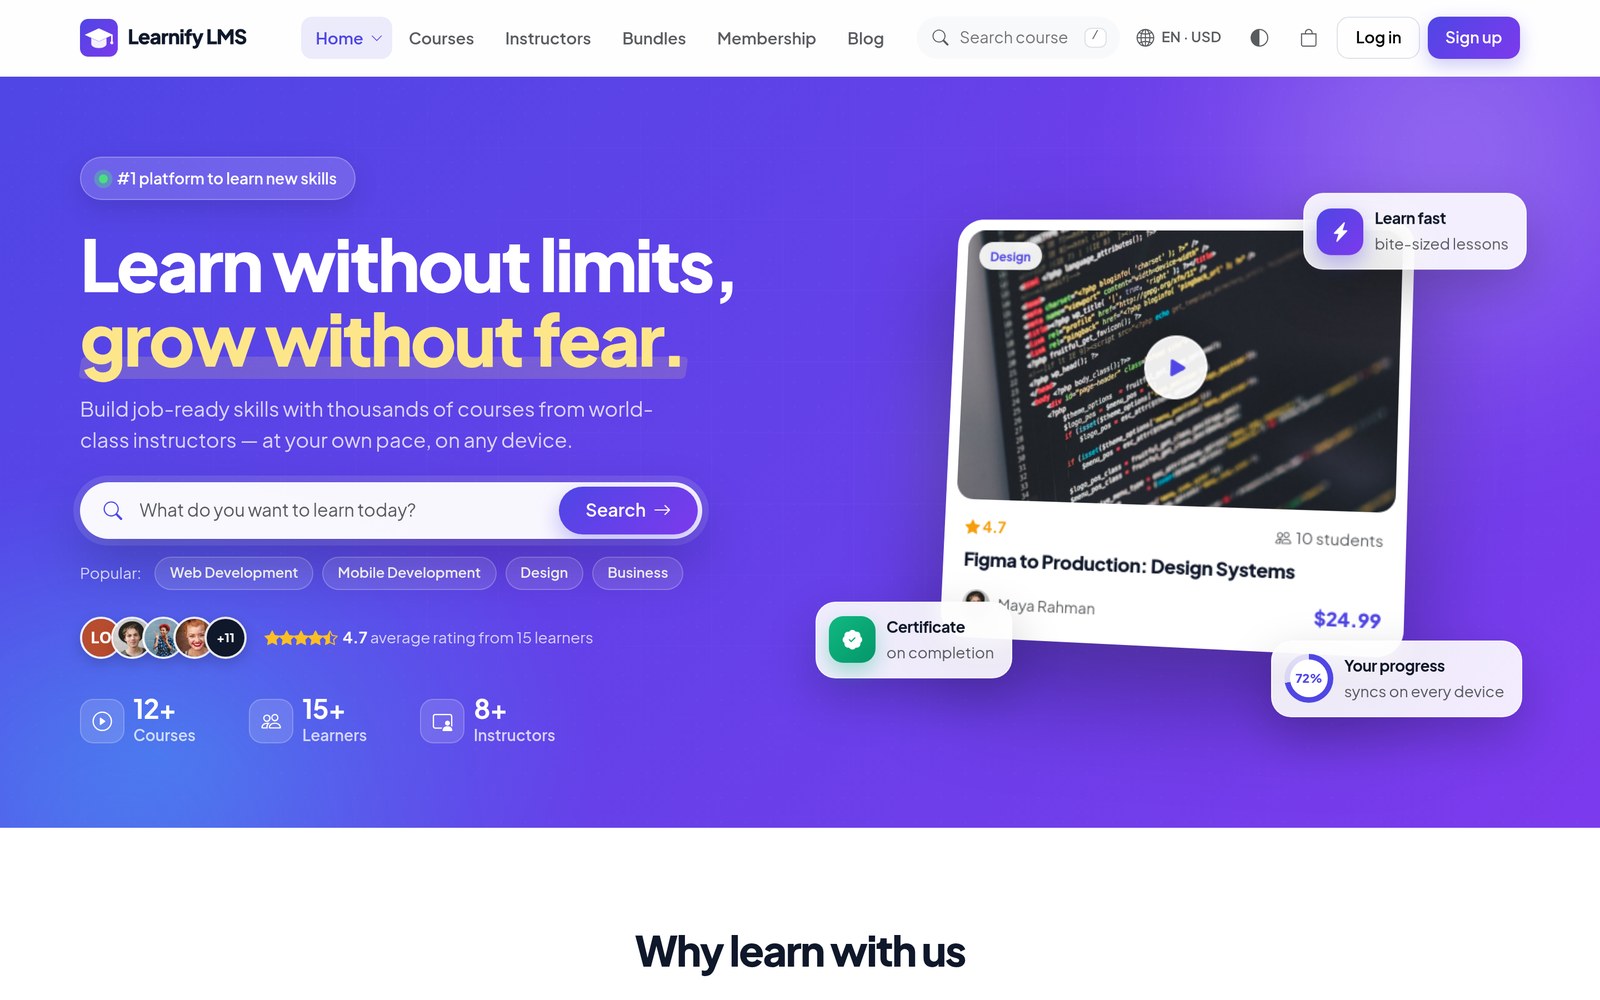
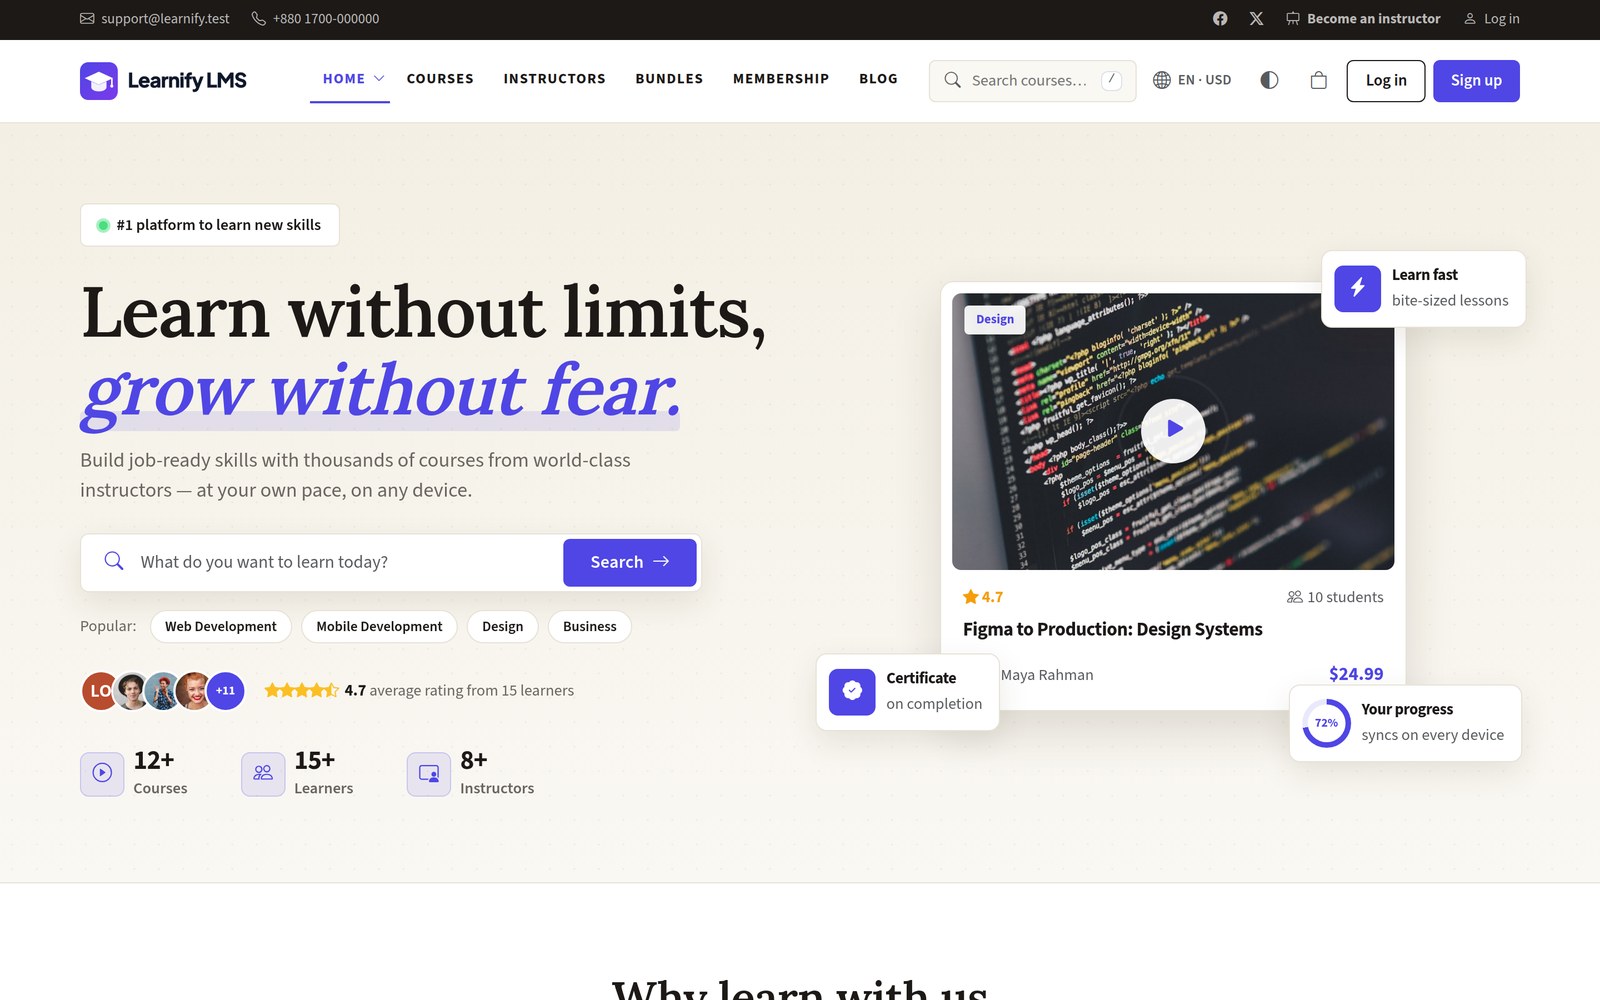
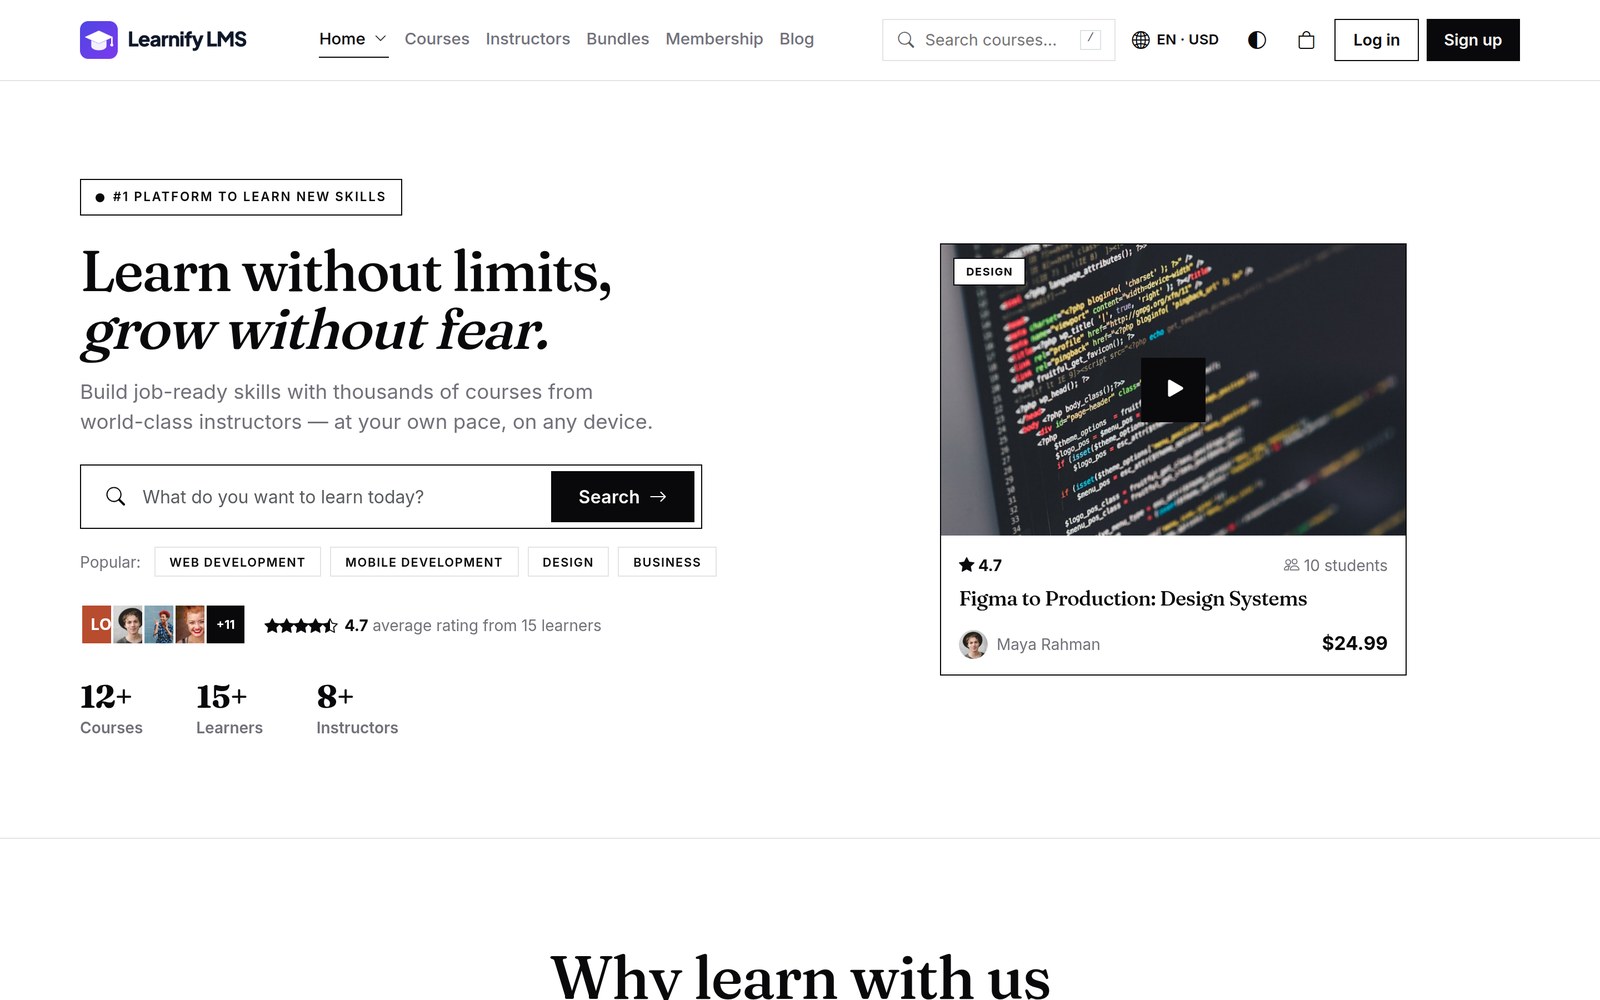
A website template is a complete look for the public site — header, hero, cards, section rhythm, footer and fonts. Pick one under Settings → Appearance → Website template. Your homepage sections, their order and copy, and the brand colours from Appearance all stay as they are; only the way they are drawn changes. Four ship with the item:
| Template | Style | Best for |
|---|---|---|
| Aurora (default) | Modern — gradient hero with glowing orbs, glass search bar, floating course cards | Online academies, marketplaces, modern course platforms |
| Academy | Classic institute — utility top bar with your contact details and social links, solid white header, serif headlines on a warm paper background, bordered cards | Schools, universities, coaching centres, corporate training |
| Editorial | Minimal & typographic — black on white, hairline borders, oversized serif headlines, square corners, no gradients or shadows | Creators, writers, design and business courses, premium brands |
| Nova | Dark & techy — always-dark surfaces, neon accent glow, grid backdrop, monospace labels | Coding bootcamps and tech academies |
Preview before you switch. Each card has a Preview button that opens the live site in that
template for you only (the address carries ?template=<name>; it sticks for your session). A floating
bar at the bottom of the page lets you Apply to site or Exit preview. Applying also resets the
homepage hero to the layout that template recommends, unless you untick Use the template's recommended hero
layout on the settings card.
Templates are plain stylesheets in public/css/templates/<name>.css, scoped to the
body class lf-tpl-<name>. A developer can copy one to make a fifth: duplicate the file,
rename the body class inside it, and add the new key to App\Support\SiteTemplate.
On a demo site (APP_DEMO=true) every visitor may preview the templates from the
storefront's Home menu, which lists them as homepage styles — but nobody can apply one there.
Pages, Blog & SEO
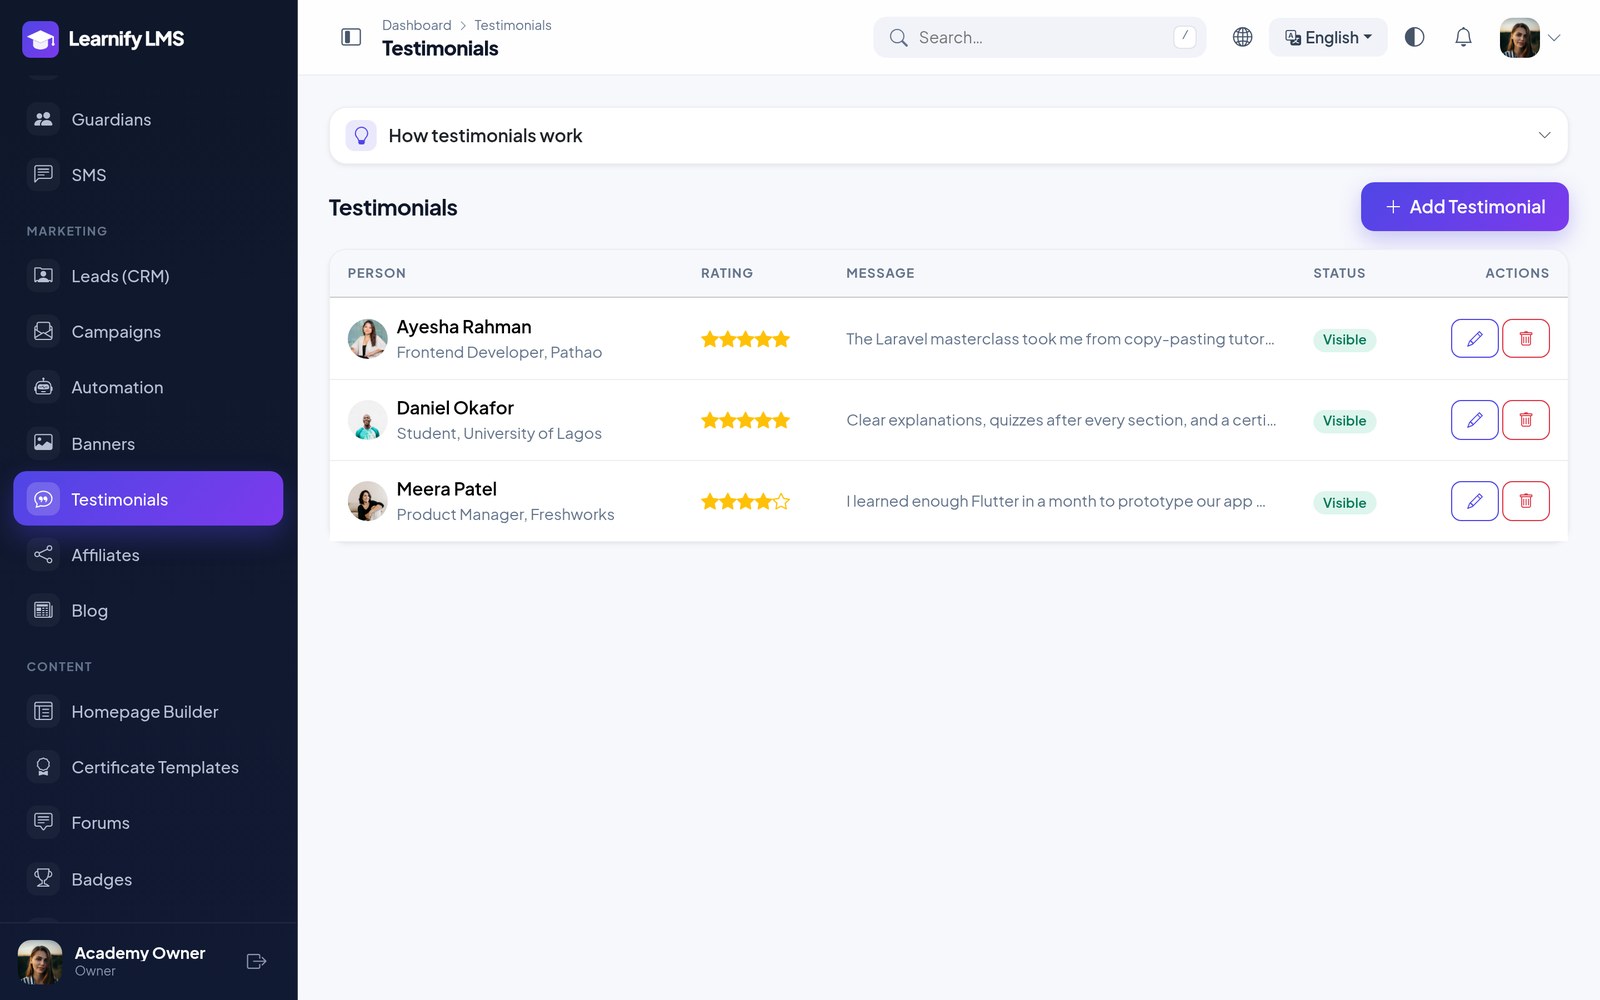
Static pages (about, terms, privacy, contact), a blog with categories, FAQs and testimonials are all editable from the panel. Every course, page and post has its own meta title and description, and a sitemap
SEO & AI search (Settings → SEO): a default meta description, a default share image for Facebook / WhatsApp / LinkedIn / X (1200×630), a “hide this site from search engines” switch for staging and demo sites, and extra lines for robots.txt and the llms.txt introduction. /robots.txt, /llms.txt and /sitemap.xml are generated with your own domain and catalogue (cached for an hour; saving settings refreshes them). The sitemap includes learning paths, bundles and events; instructor profiles and the FAQ page carry structured data; dashboard and login pages are kept out of search results.
On nginx, remove any location = /robots.txt { ... } block left from an older setup, or /robots.txt returns 404 instead of the generated file.
/sitemap.xml. 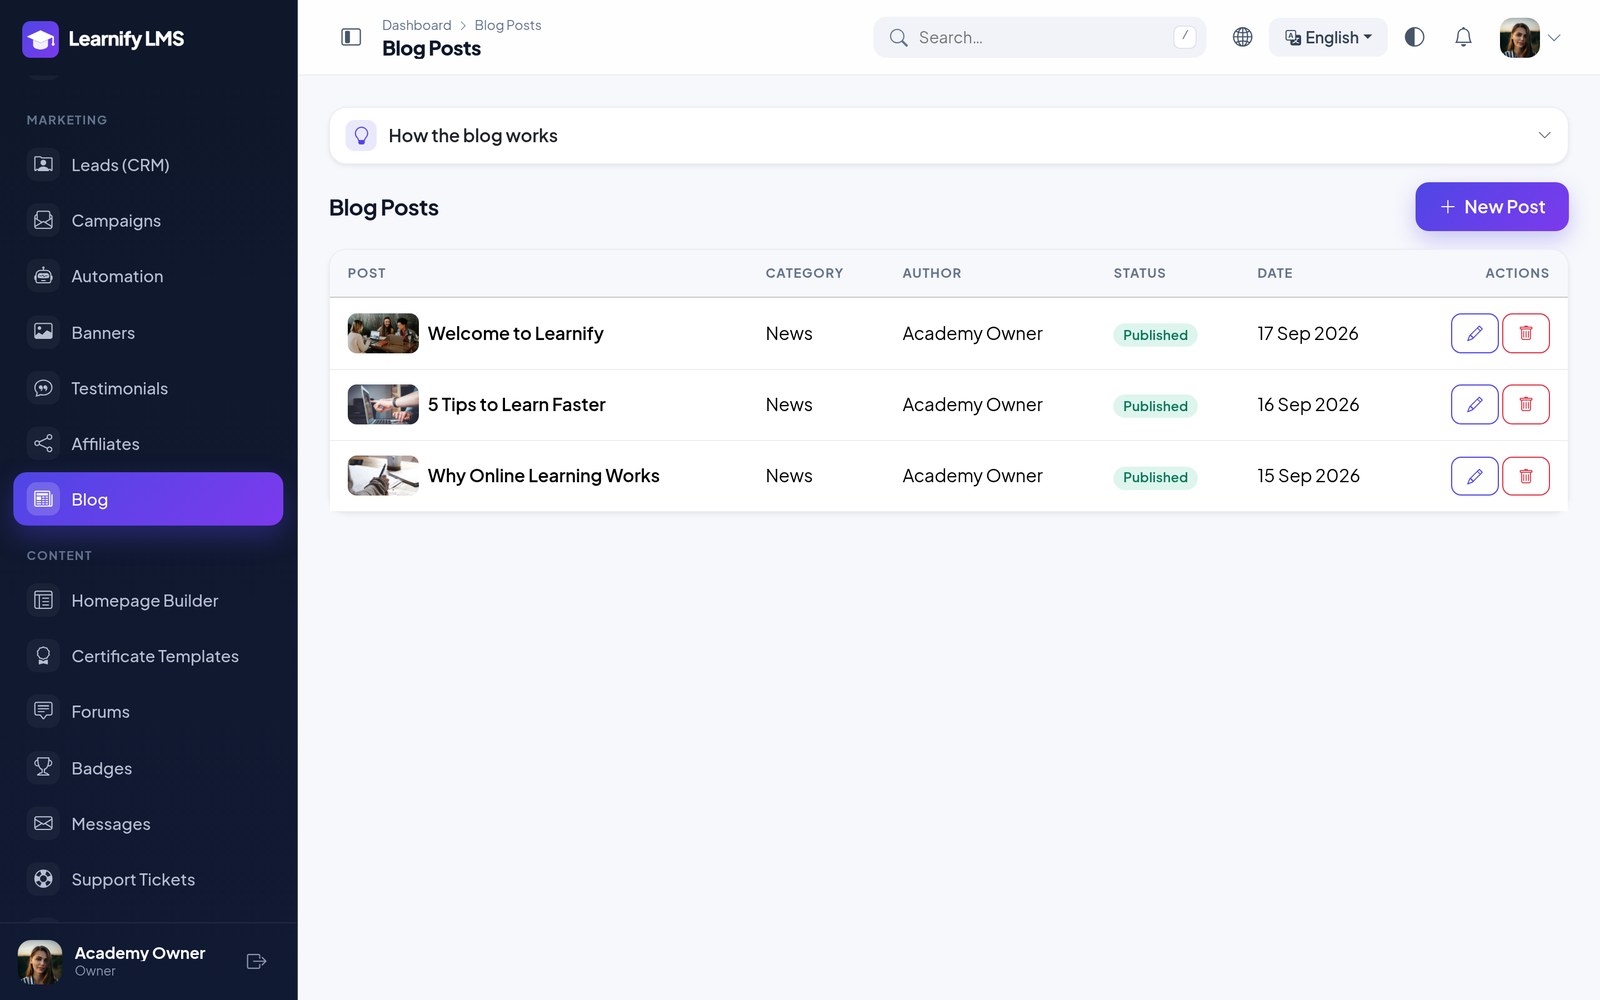
Live Chat & Chat Buttons
A floating chat button on the website gives visitors (guests or signed-in learners) a menu of ways to reach you. Configure it under Settings → Chat buttons; every option has its own switch, so you can hide one without losing its number:
- Live chat — conversations land in Admin → Support → Live chat with unread counts and open / closed tabs; staff reply, close and reopen chats there. A greeting text sits above the options.
- WhatsApp (number and a pre-filled message), Messenger (page username) and Email — plain links that open the visitor’s own app, so no third-party script is loaded.
Works on any hosting. Without anything extra the chat checks for new messages every few seconds while it is open. For instant delivery, run Laravel Reverb: add the REVERB_* keys to .env, keep php artisan reverb:start running (Supervisor), then switch on realtime under Settings → Chat buttons. If Reverb stops, the chat quietly falls back to checking.
AI auto-reply (optional, needs an AI key under AI Settings): answers visitors from your published catalogue and FAQ in the visitor’s language, hands over to staff when unsure or when asked for a person, refunds or account problems, and stops in a chat once staff reply. AI replies are labelled “AI assistant”, leave the chat unread for staff, are limited to 20 per chat and use AI credits; Pause / Resume AI work per conversation.
Courses & Approval
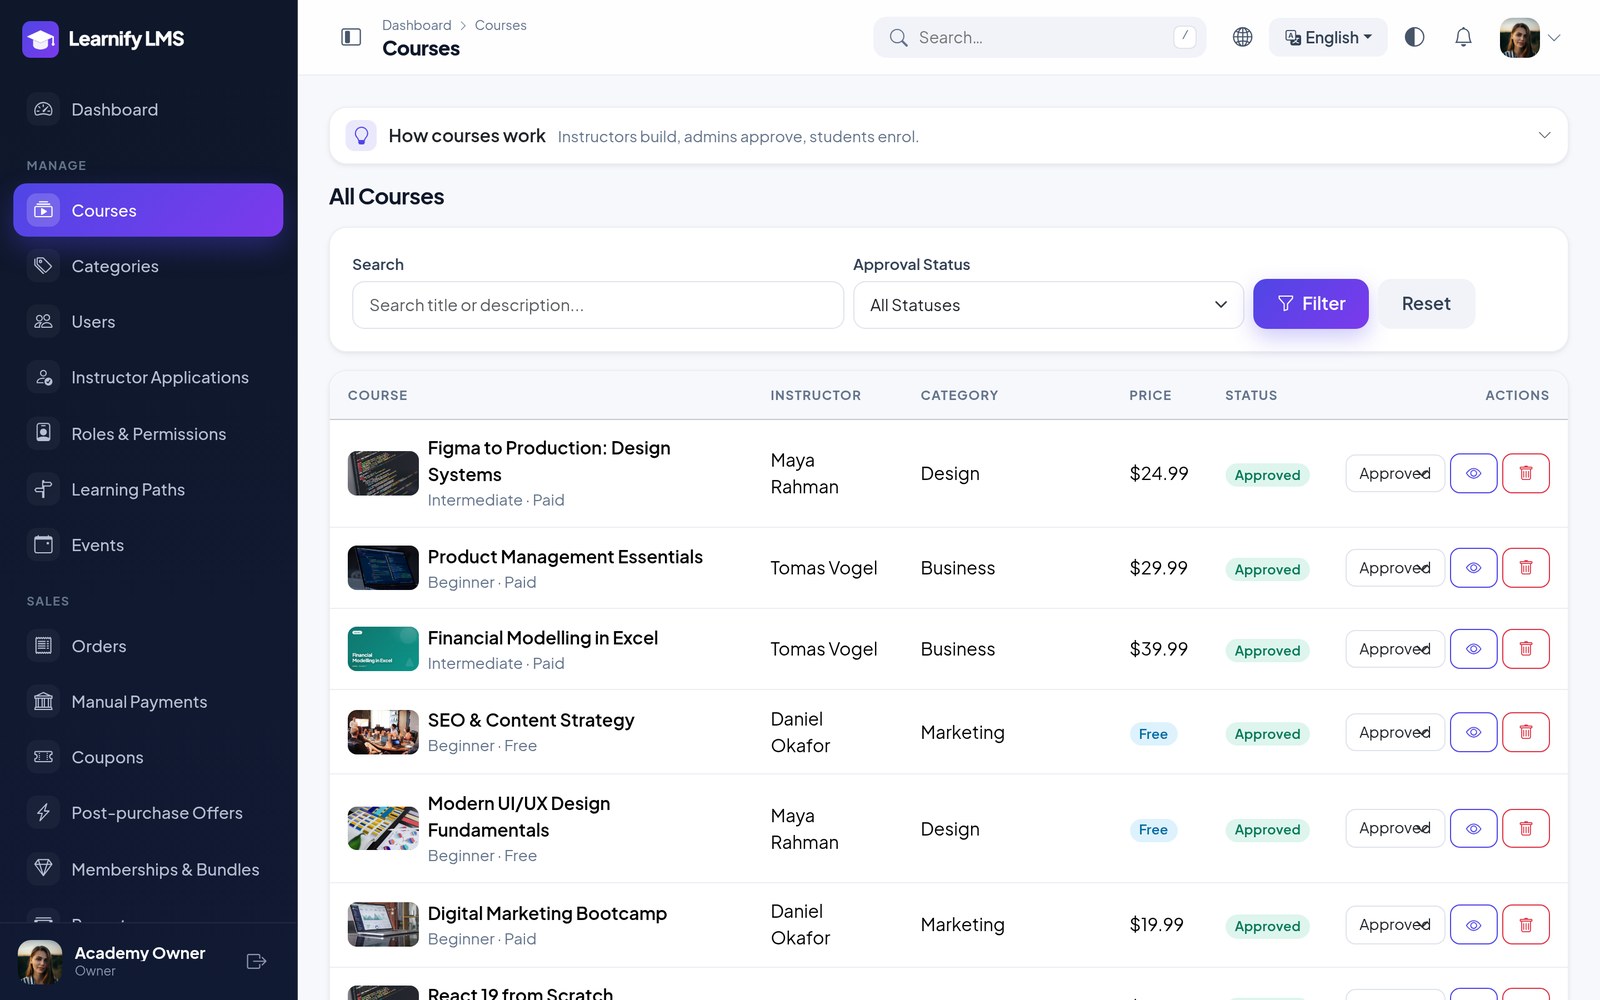
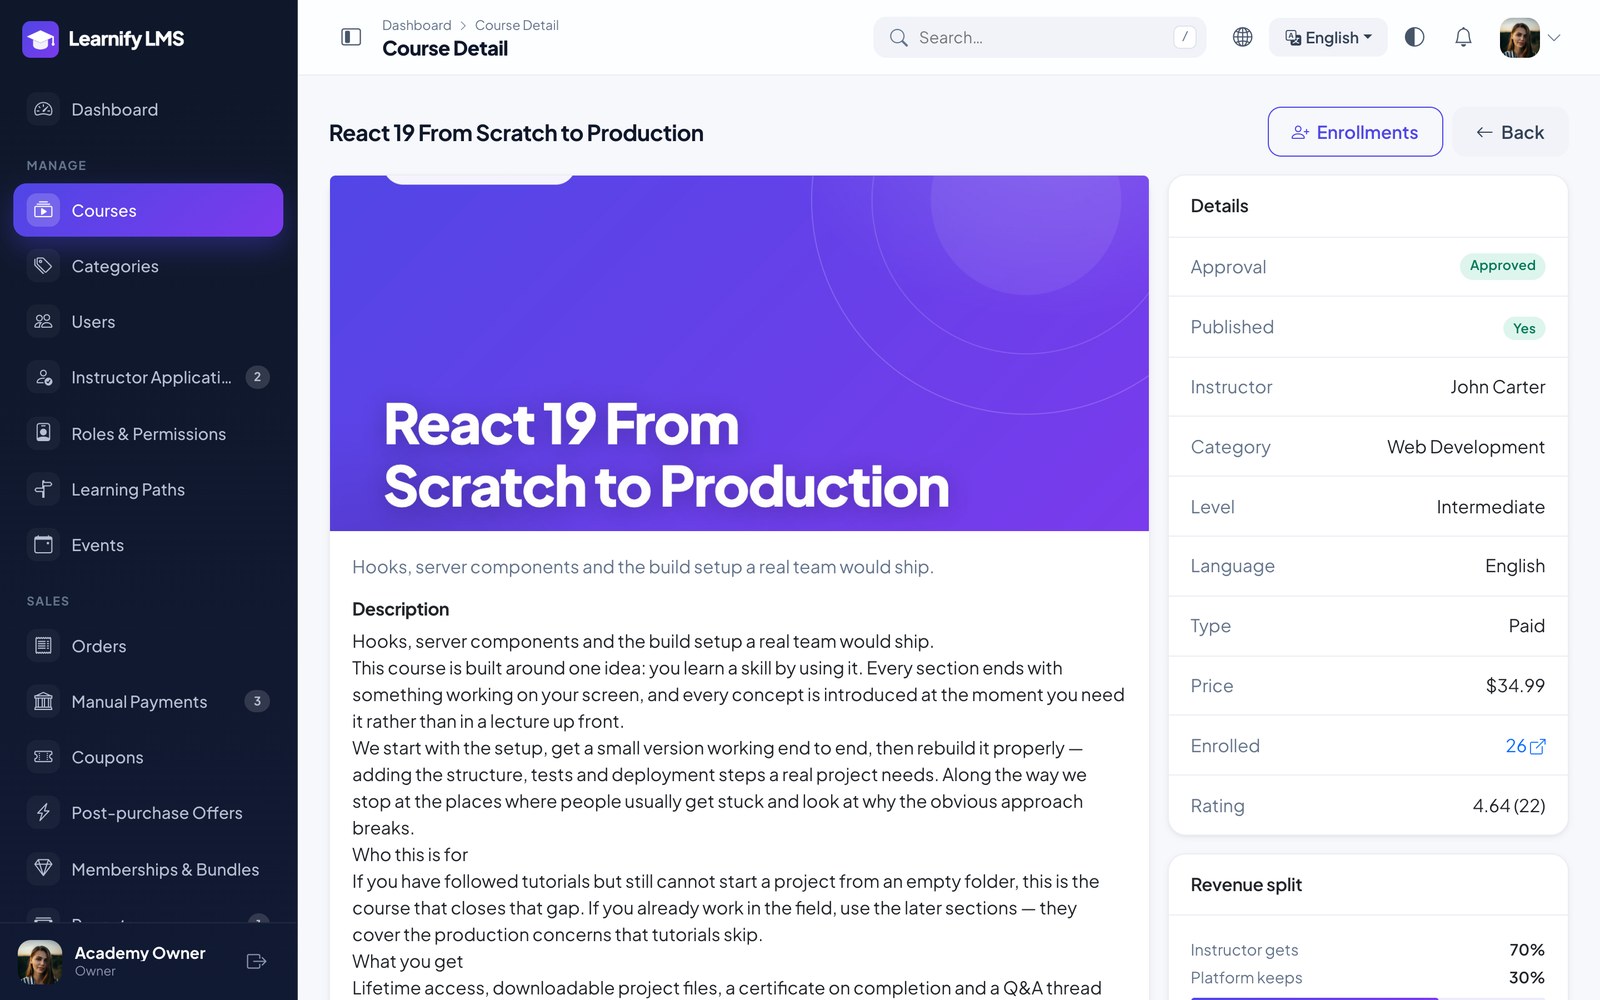
Manage → Courses lists everything on the platform with its instructor, category, price, enrolments and status. Instructors submit; you approve, reject with a reason, or feature.
Publishing as an admin. When an owner or admin creates a course from their own account (see Teaching from the admin account), the course builder shows Publish instead of Submit for review and the course goes live at once. Instructors still send a draft or rejected course with Submit for review / Resubmit for review, and it stays unpublished until approved.
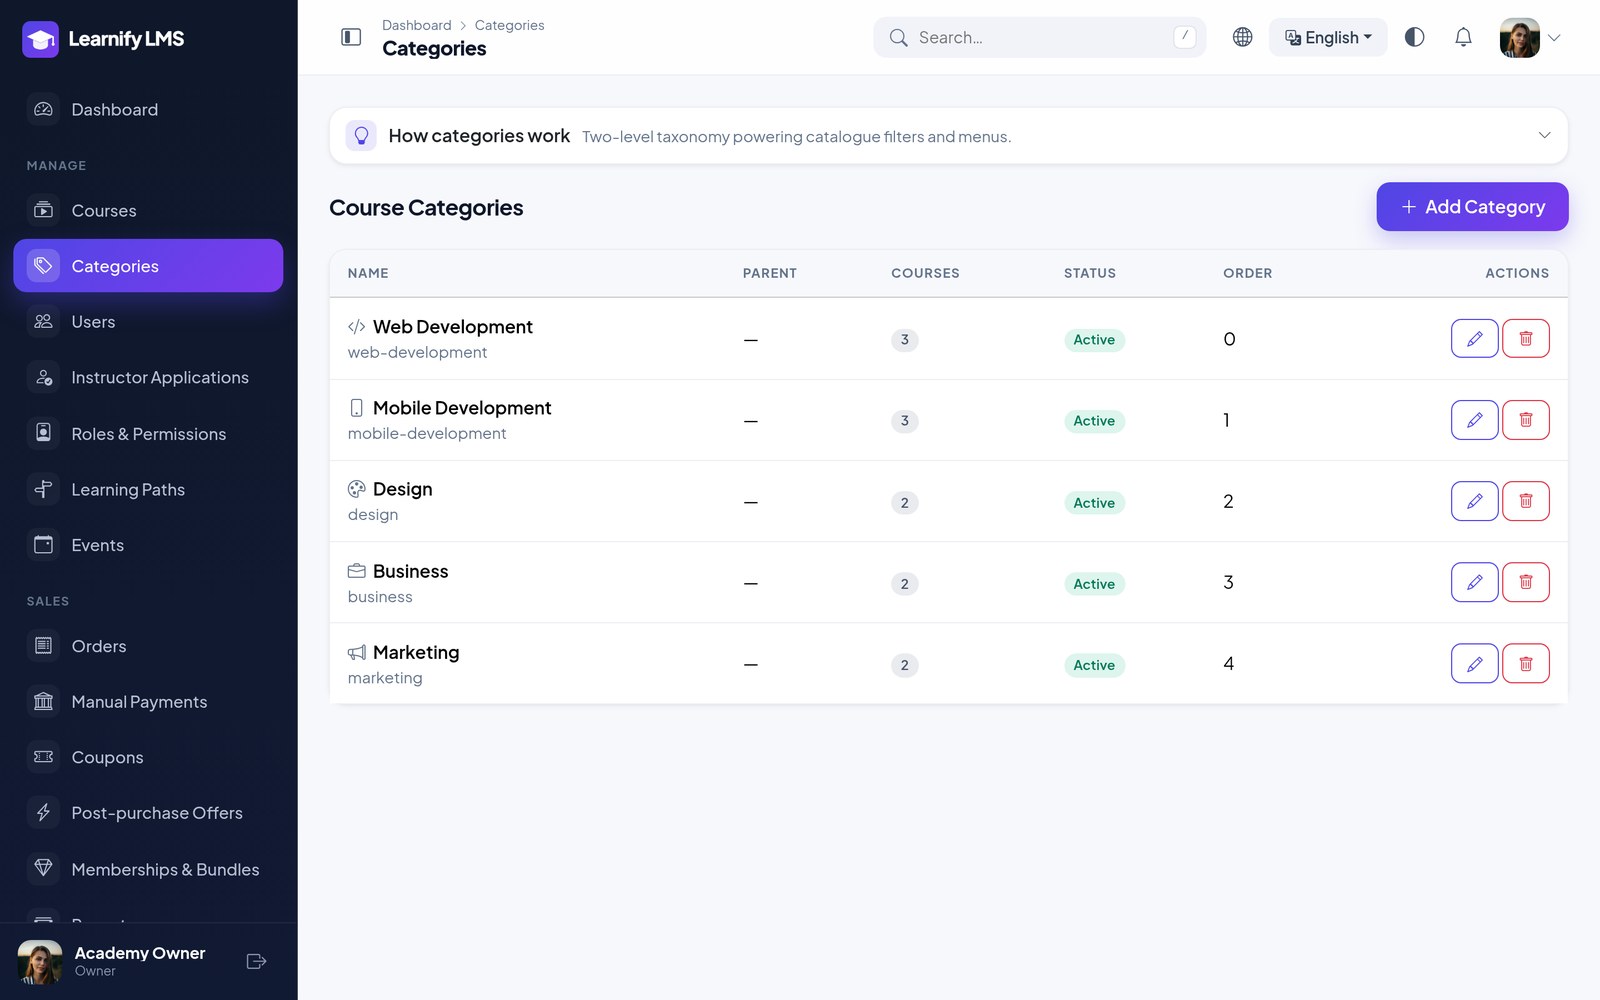
Categories and levels are managed alongside, and a featured flag pushes a course onto the homepage.
Curriculum & Lessons
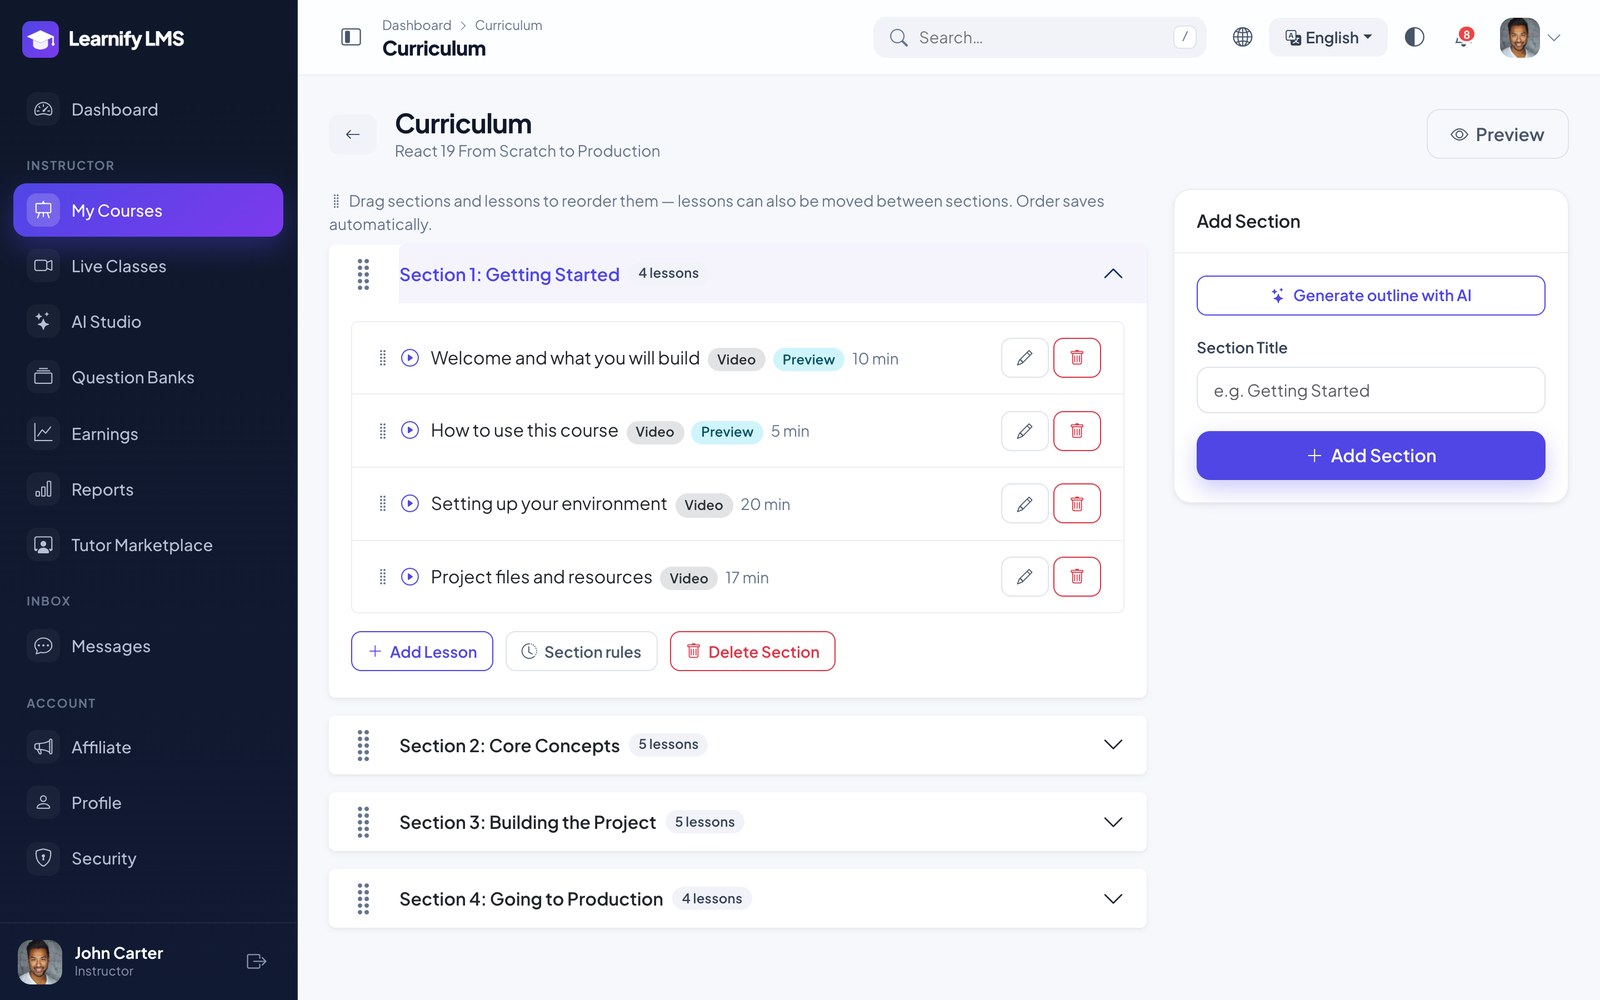
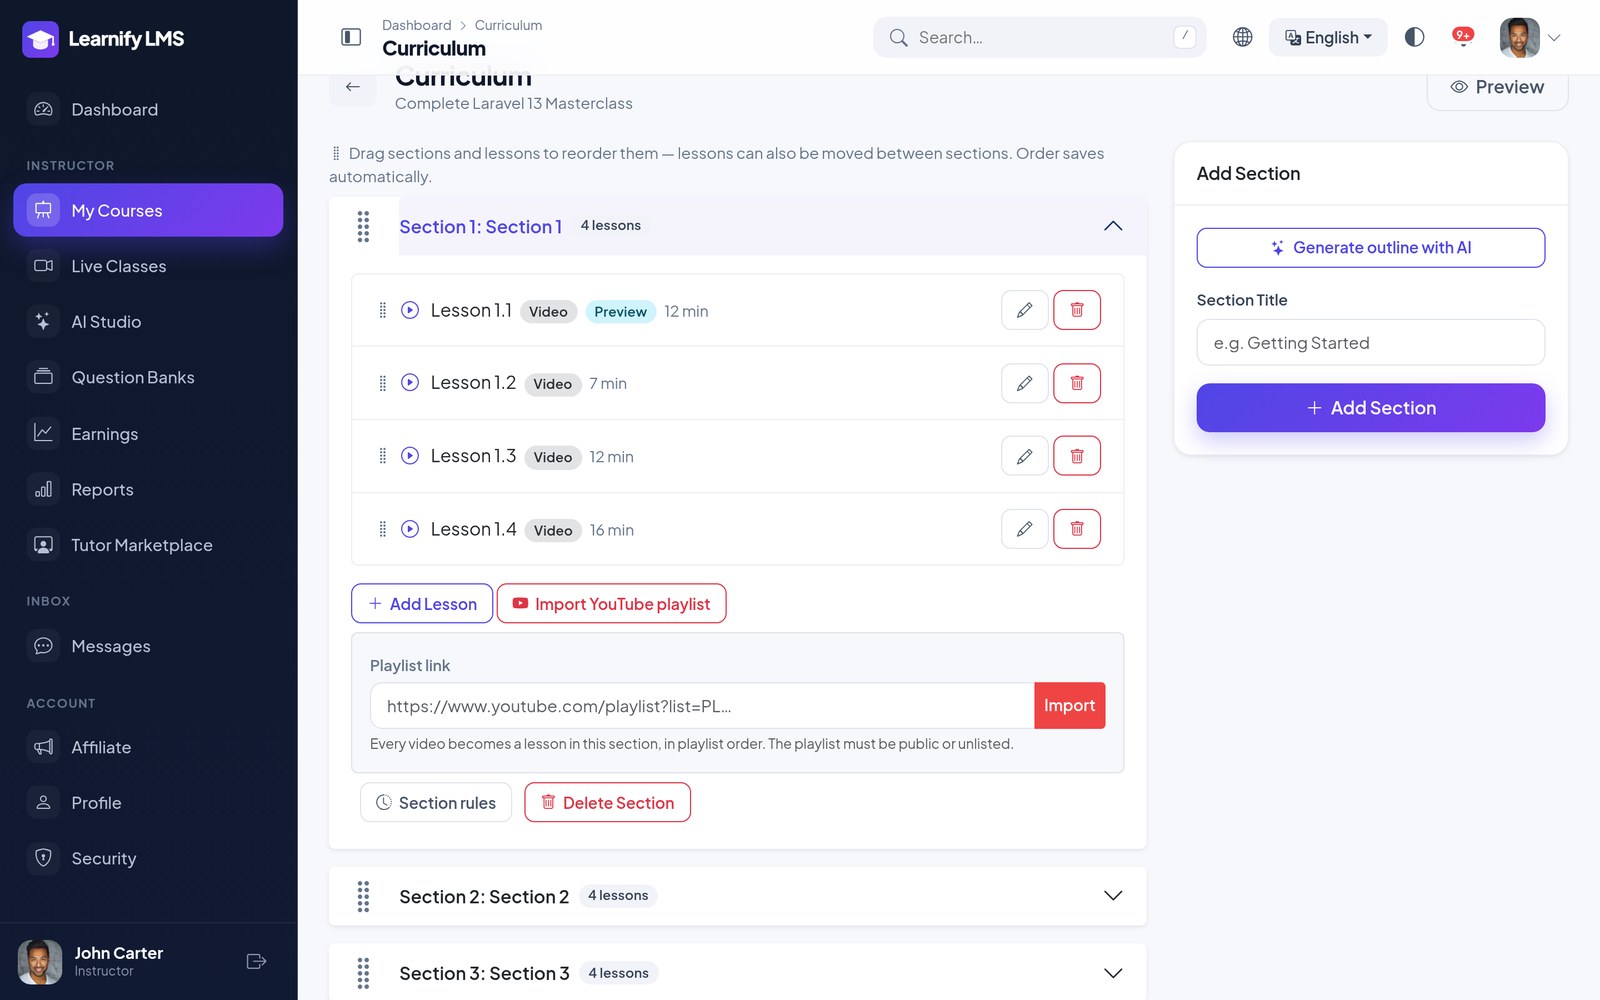
A course is sections, and a section is lessons. The builder is drag and drop — drag a section to reorder it, drag a lesson within a section or into another one, and the order saves by itself. A lesson can be video, text, PDF, audio, a downloadable file, a live session or a SCORM package.
Import a YouTube playlist. Under any section choose Import YouTube playlist, paste the playlist link and every video becomes a video lesson in playlist order. Importing the same playlist again skips videos already in the course. Add a YouTube Data API key under Settings → Media for reliable imports with each video’s length; without a key the public playlist page is read (first 100 videos, no guarantee if YouTube changes its page). The playlist must be public or unlisted.
| Setting | What it does |
|---|---|
| Preview | Lets anyone watch this lesson before buying. |
| Drip | Releases the section on a date, or a number of days after enrolment, or when the previous section is finished. |
| Downloadable | Offers the file for download, including offline use in the app. |
| Subtitles | WebVTT tracks per language. |
| Resources | Extra files attached to the lesson. |
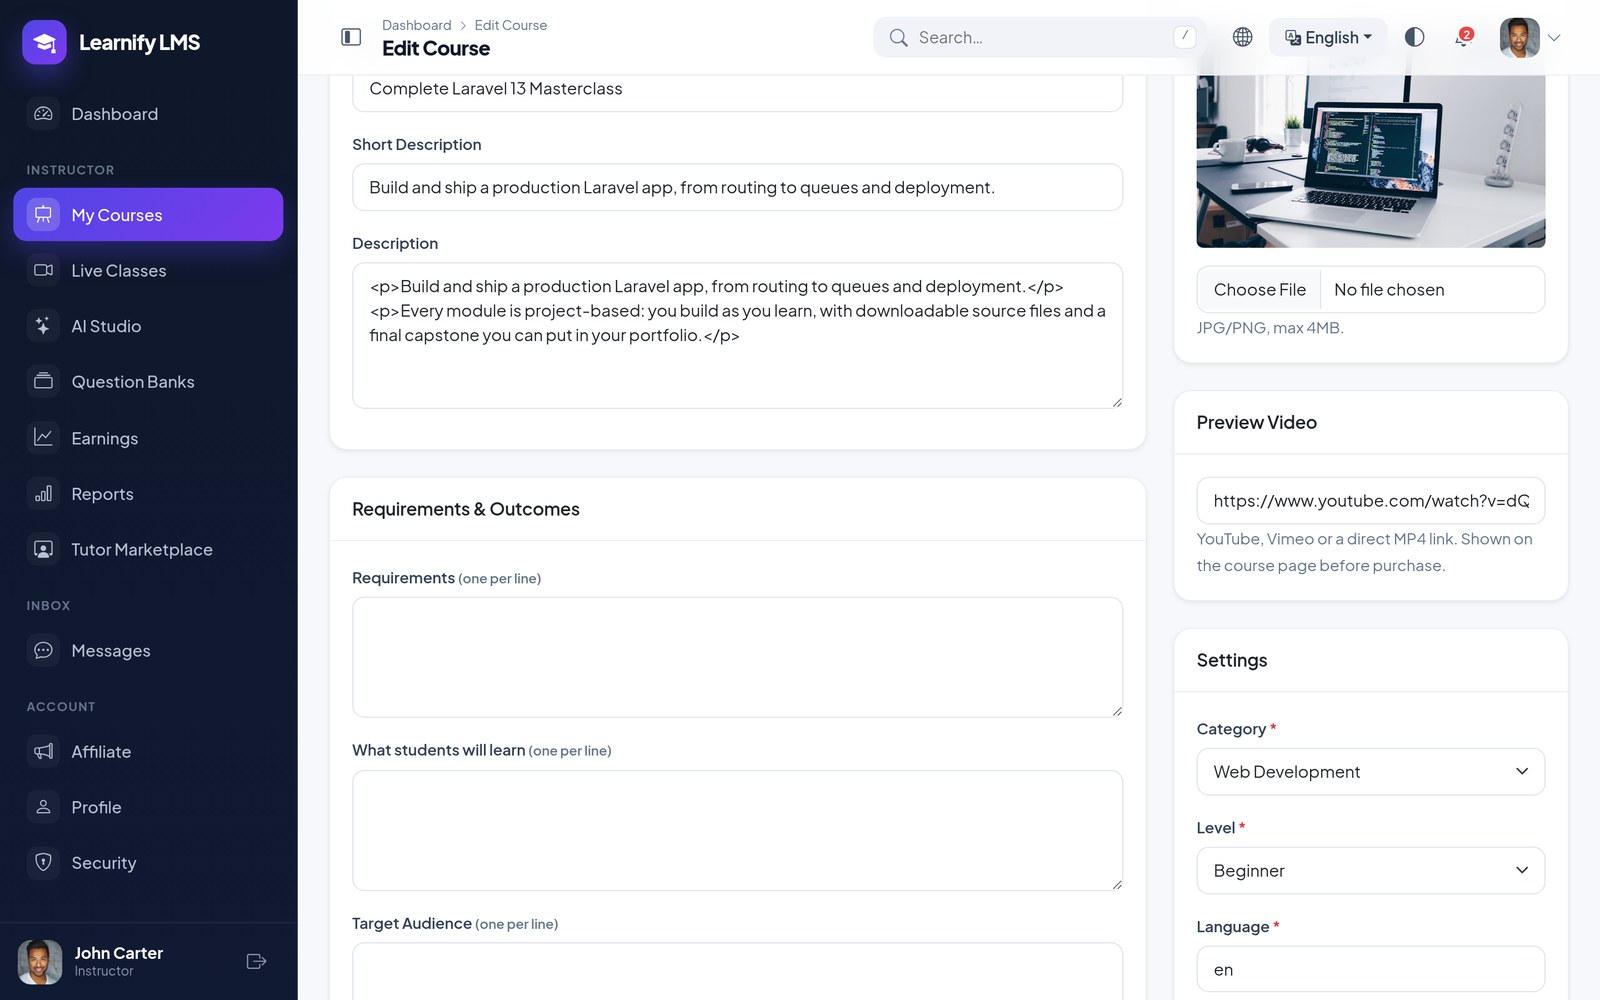
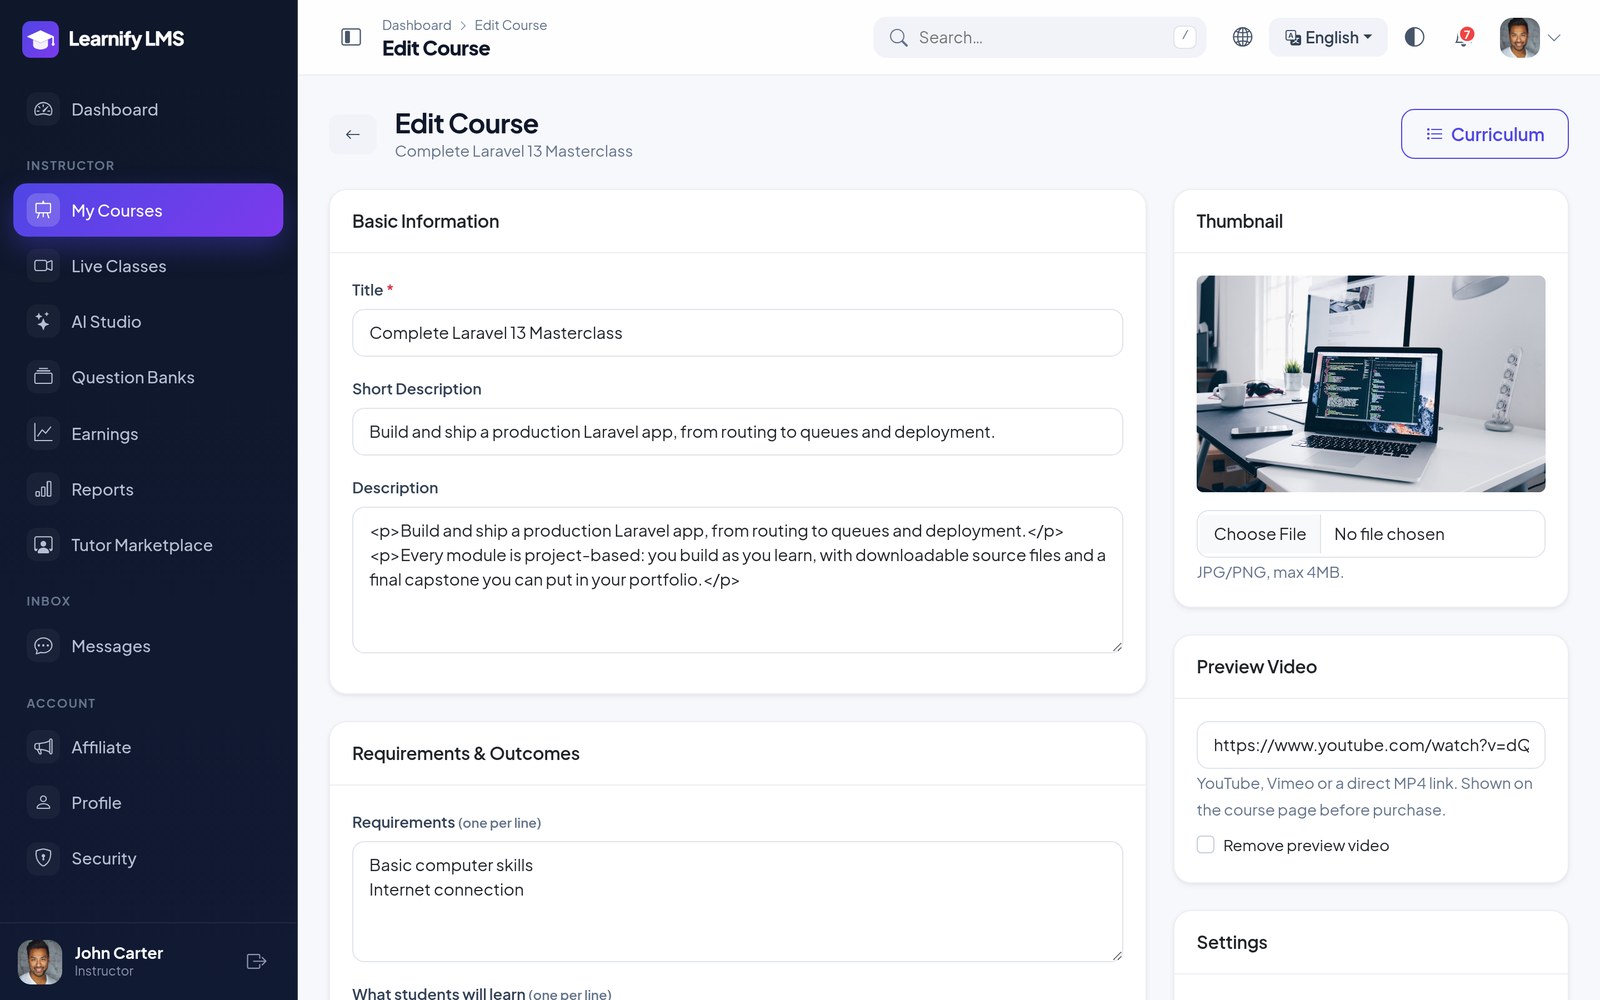
Video sources (YouTube, Vimeo, Google Drive, direct URL, HLS, upload, Bunny, Cloudflare) are covered in Common Setup. A course also takes a preview video on its edit page — a YouTube, Vimeo, Google Drive or MP4 link shown on the sales page before purchase. There is also an AI assistant that drafts a section-and-lesson outline from a course title — or builds the whole course from one prompt, see AI Studio — so a new course starts from something rather than an empty screen.
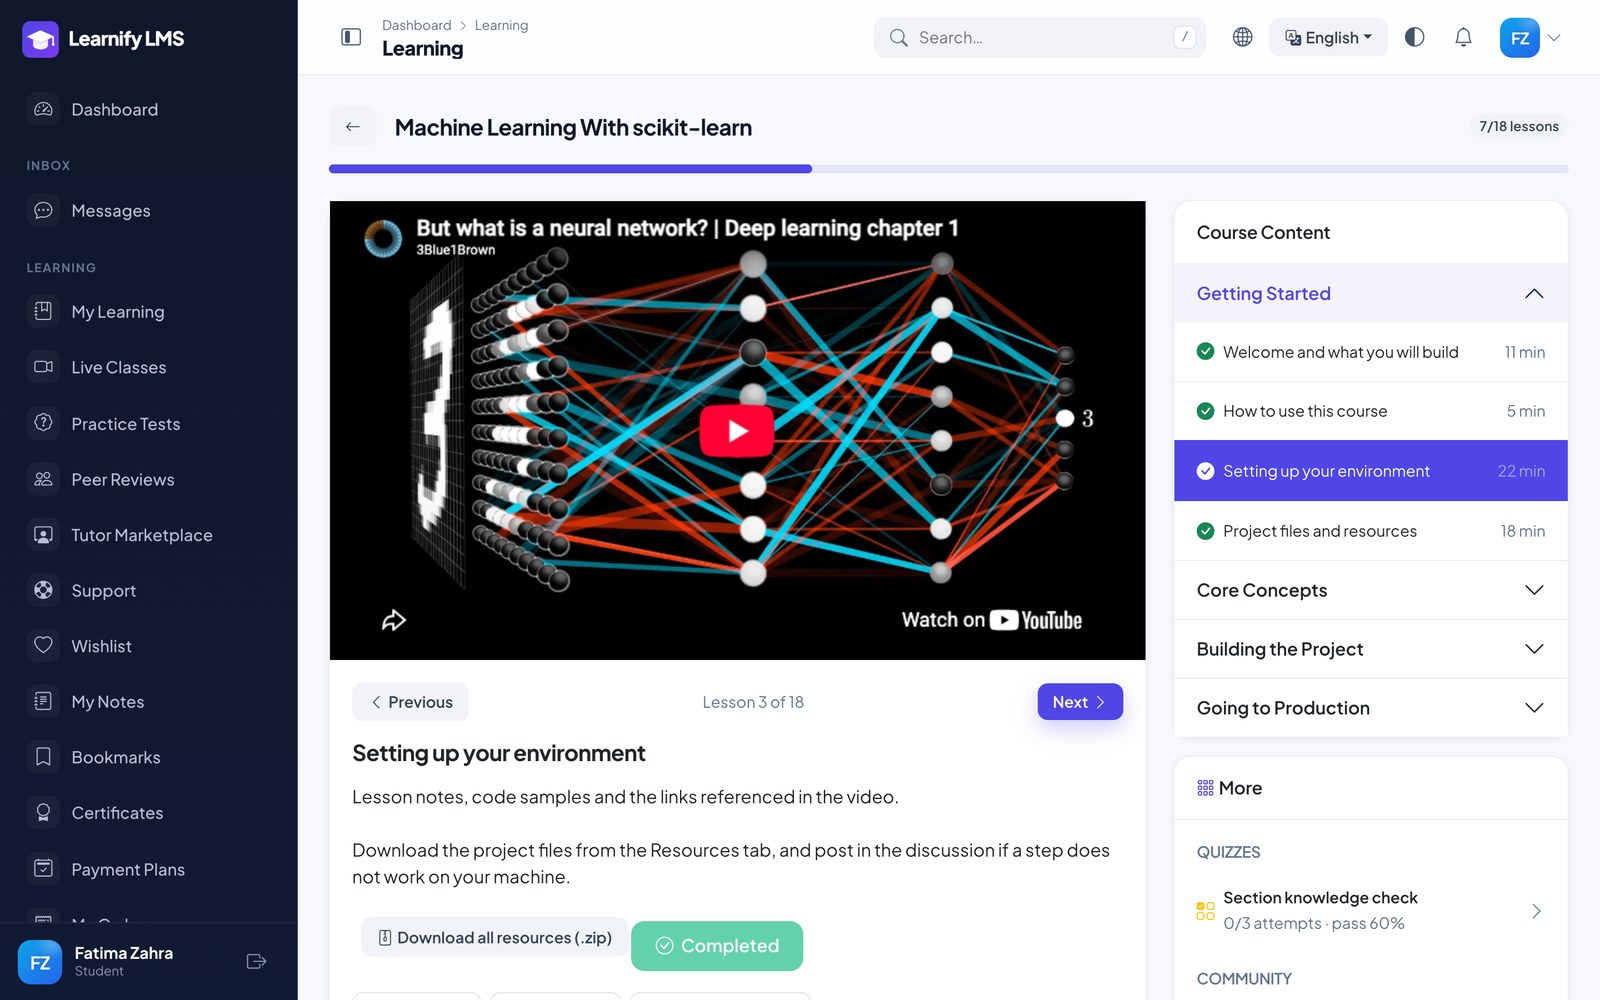
The player remembers where the student stopped, shows “Lesson 4 of 12” with Previous / Next buttons (the arrow keys work too), and moves to the next open lesson as soon as one is marked complete. Locked lessons — drip, prerequisites, sequential order — show why they are locked.
Quizzes & Assignments
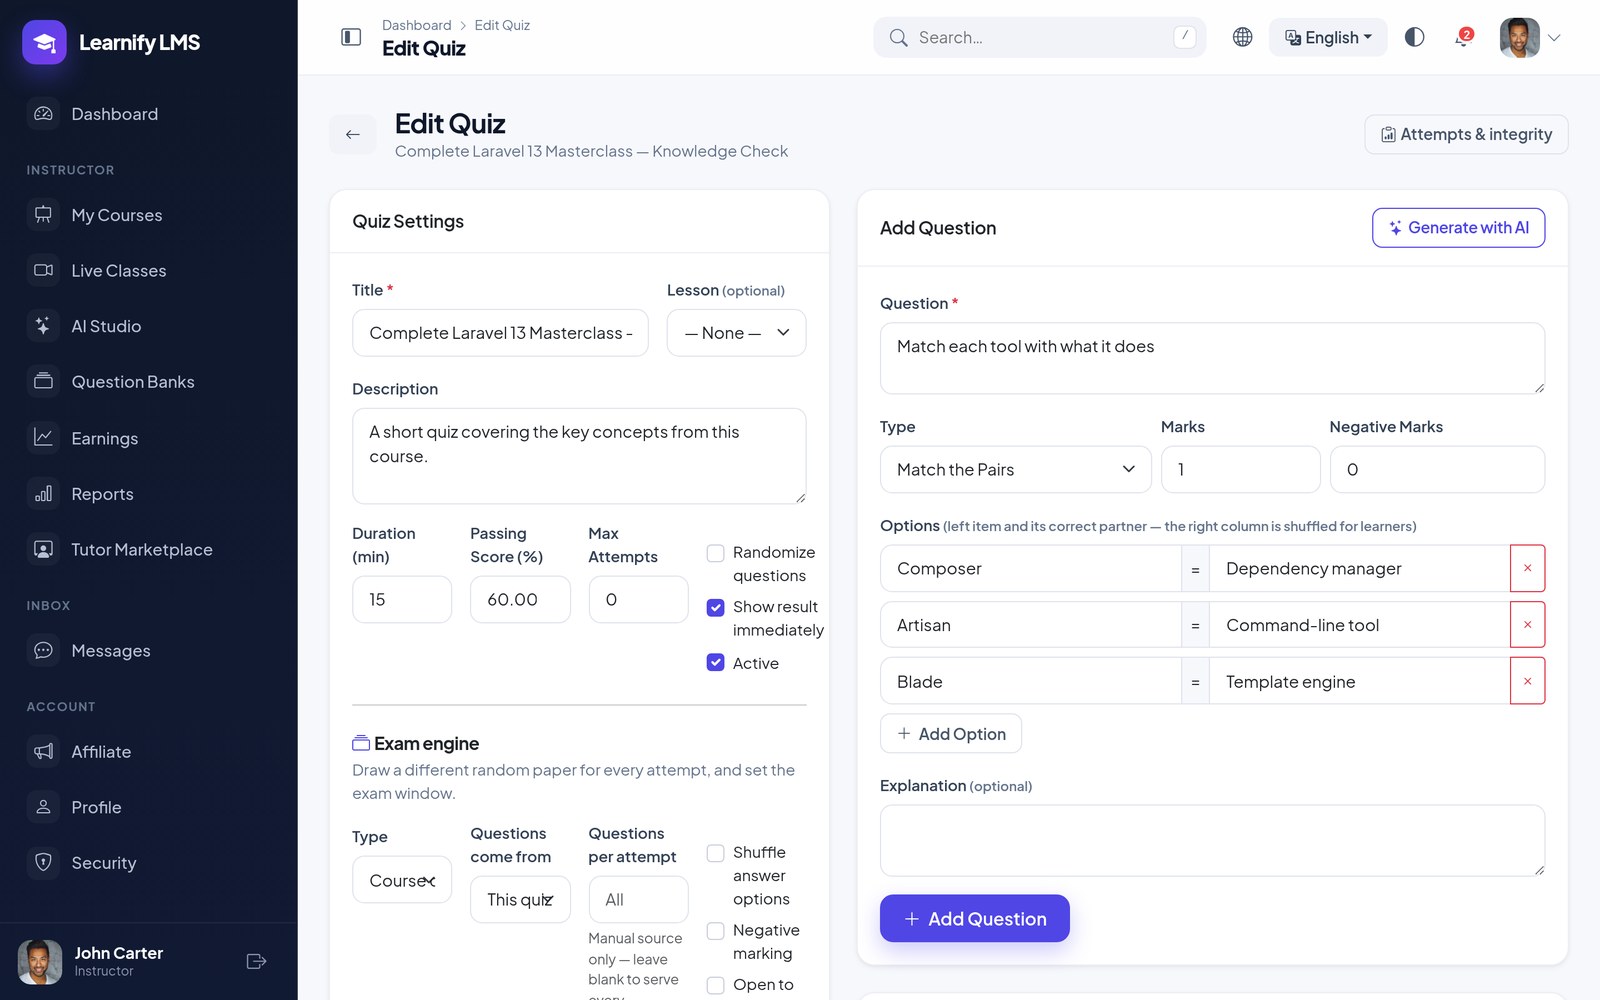
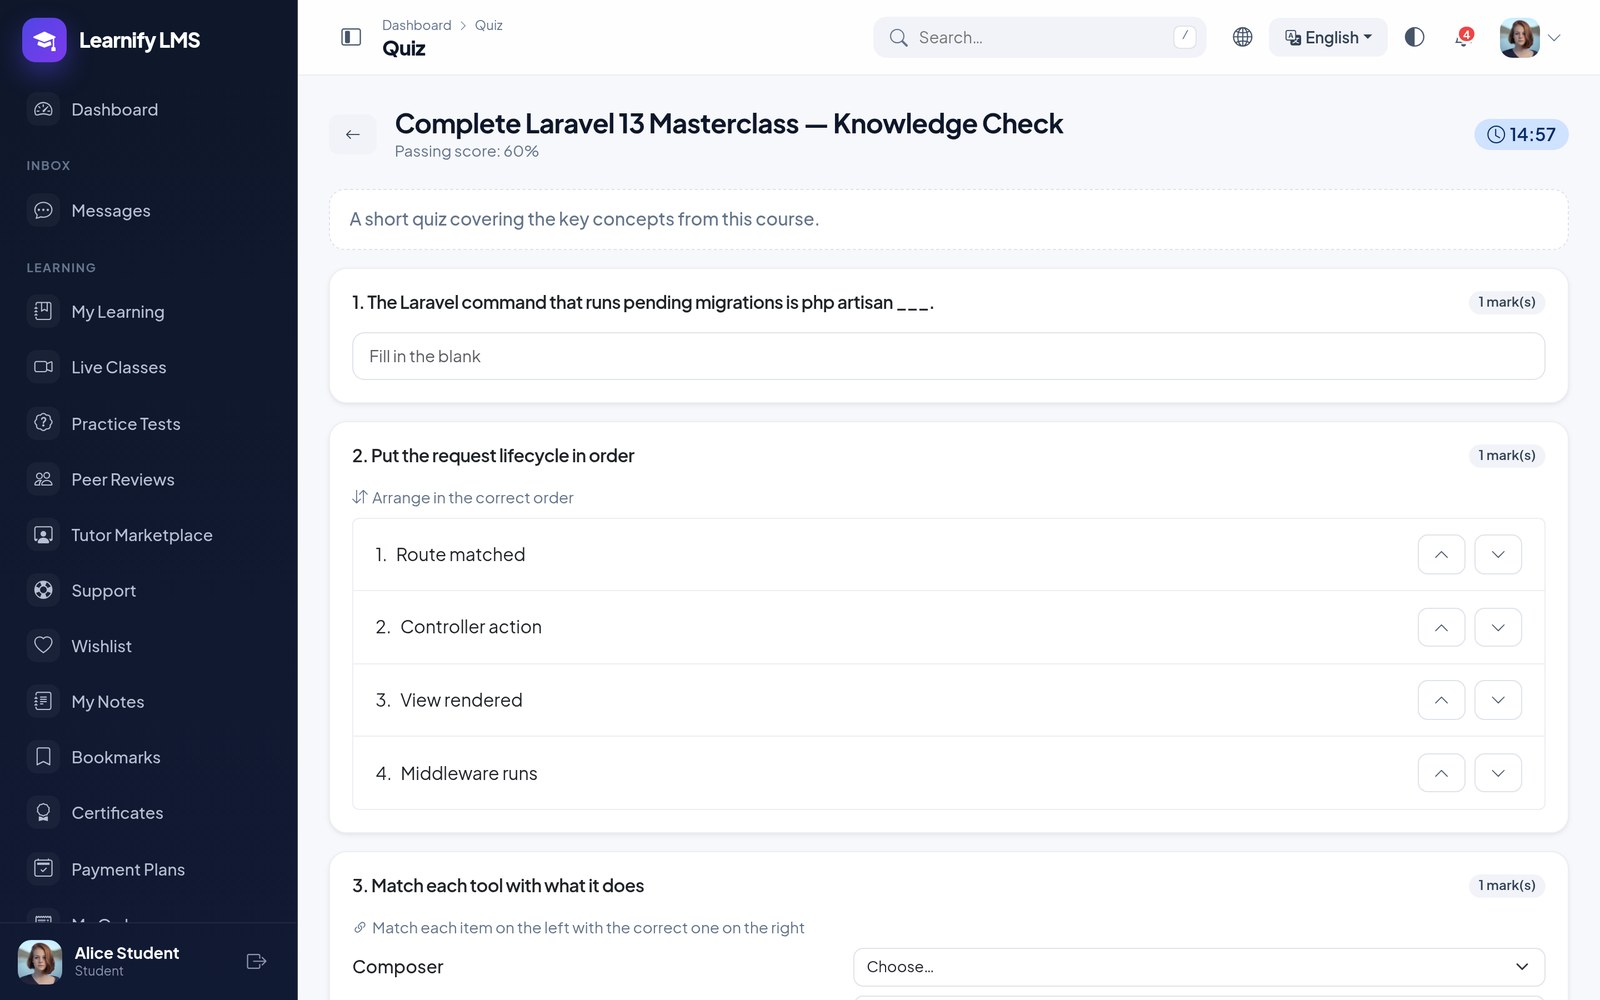
Quizzes attach to a lesson. Questions can be single-answer multiple choice, multiple answers
(“select all that apply” — only the exact set scores), true/false, fill in the
blank (write ___ in the question; list every accepted answer, matched case-insensitively),
put in order (enter the items in the correct sequence; learners see them shuffled and must
reproduce it exactly), match the pairs (left item and its partner; the right column is shuffled),
short answer or essay, and can be pulled from a reusable question bank. The first six types are graded
automatically; the result screen shows the learner’s answer beside the correct one. Set a time limit, a pass mark, how many attempts are allowed,
negative marking and whether results show immediately.
Proctoring is optional per quiz: require full screen, detect tab switching, block copy and paste, take webcam snapshots and cap the number of violations before the attempt is submitted automatically. Every violation is logged for review.
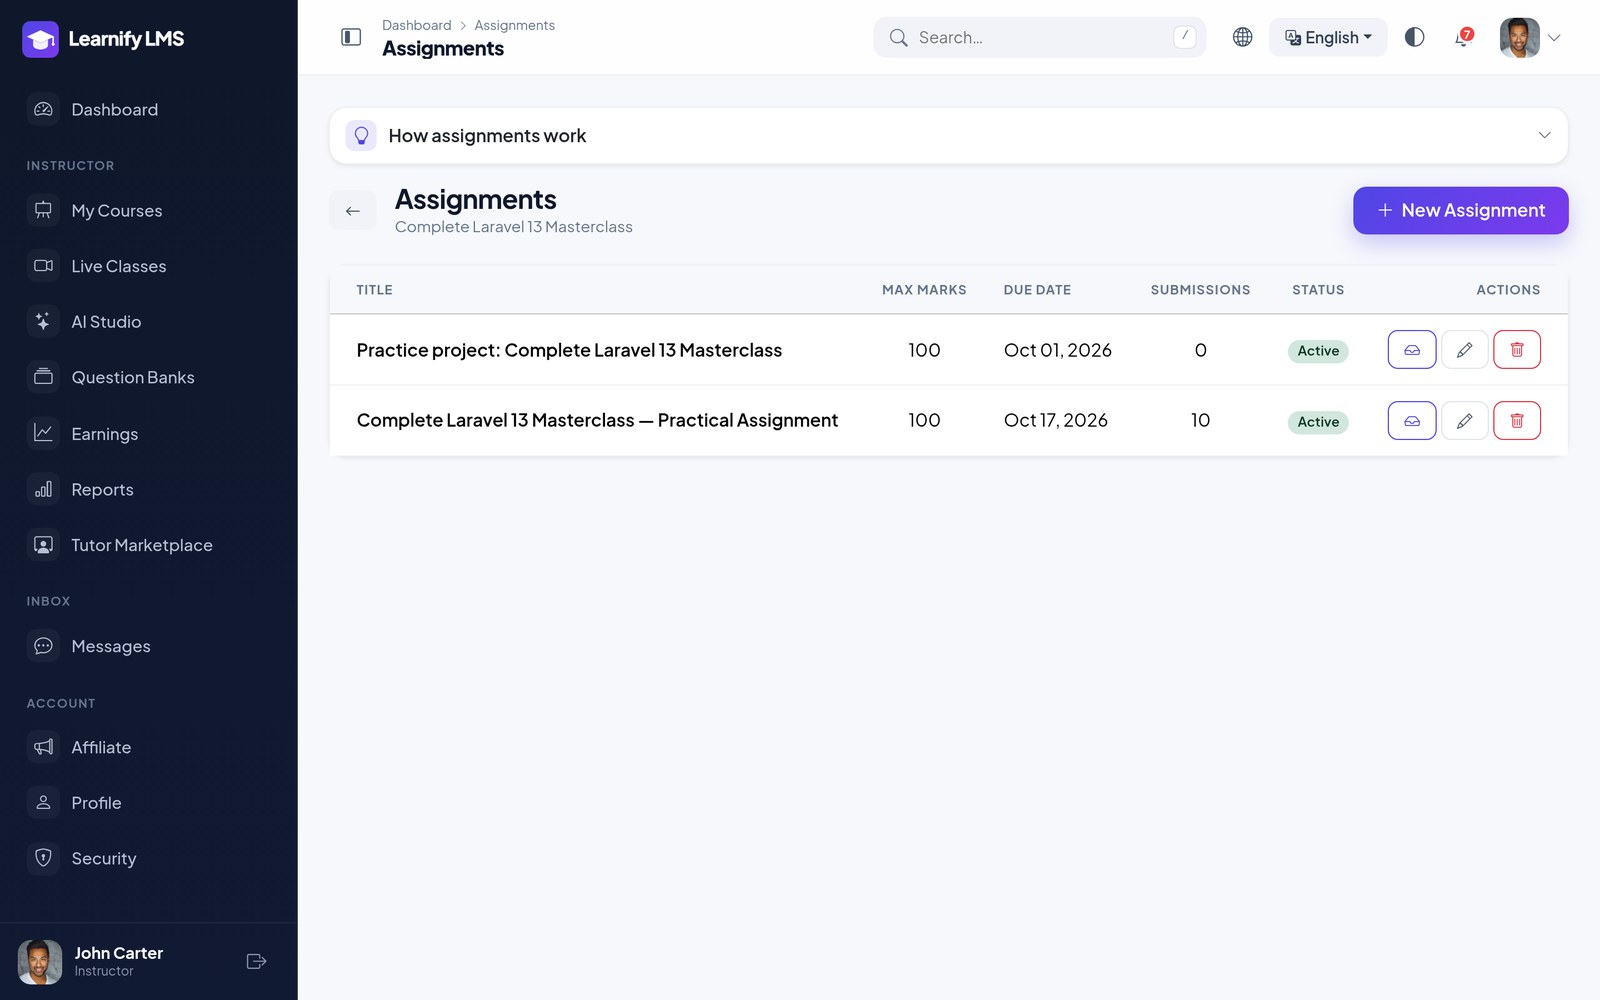
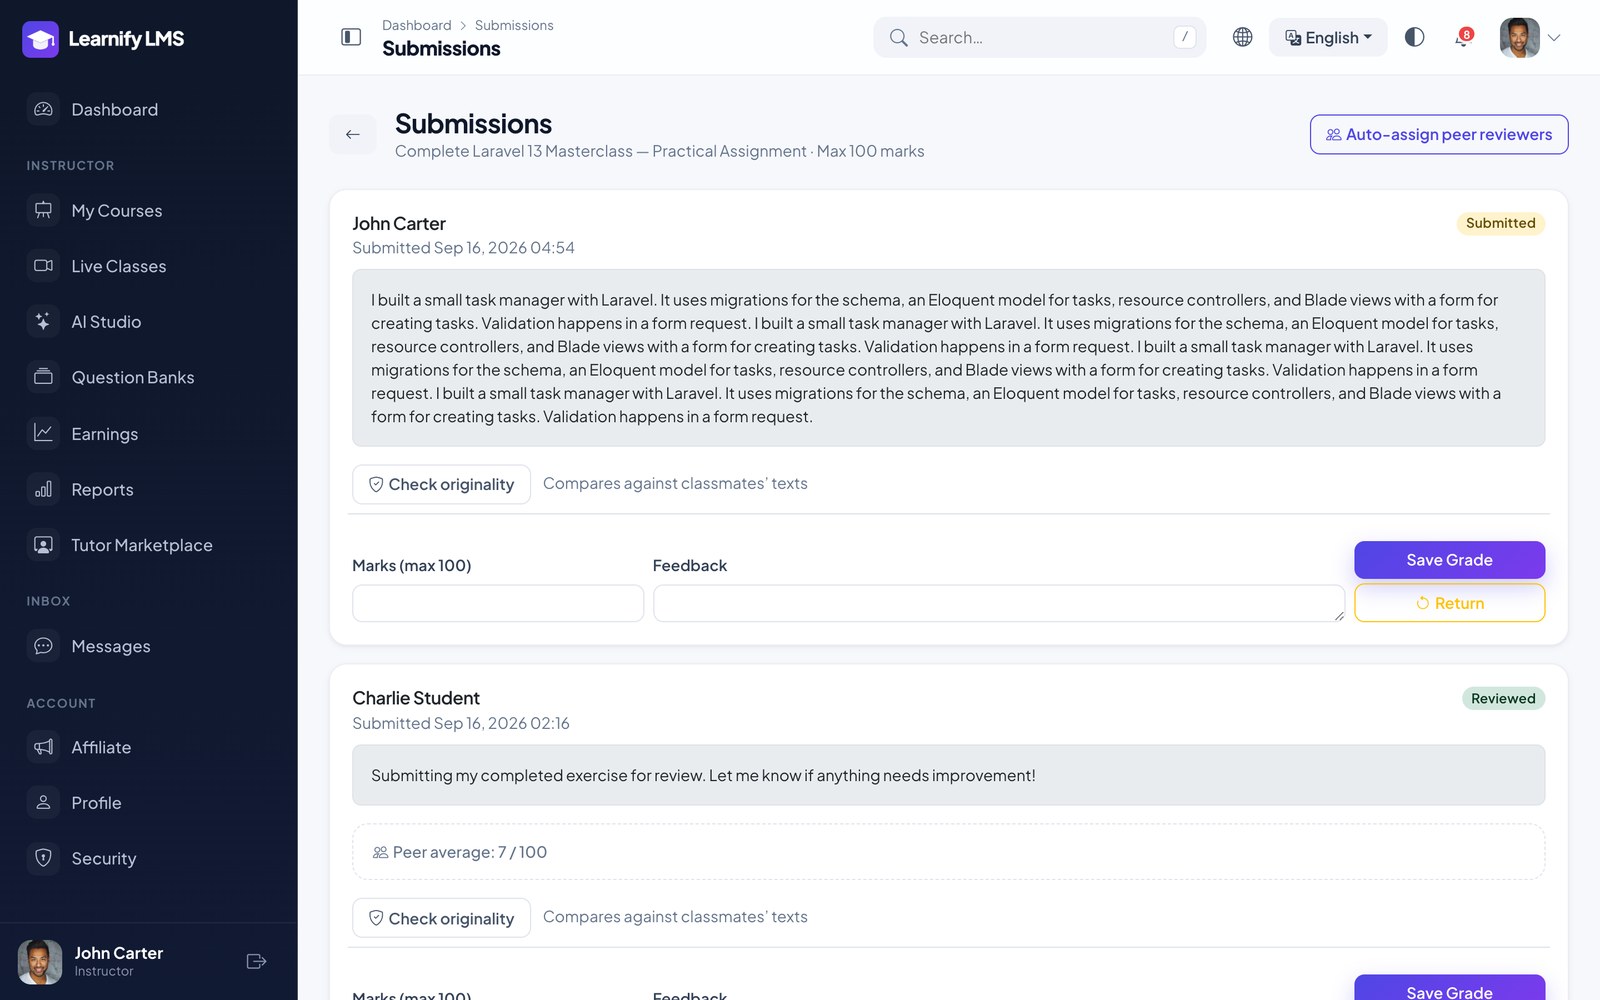
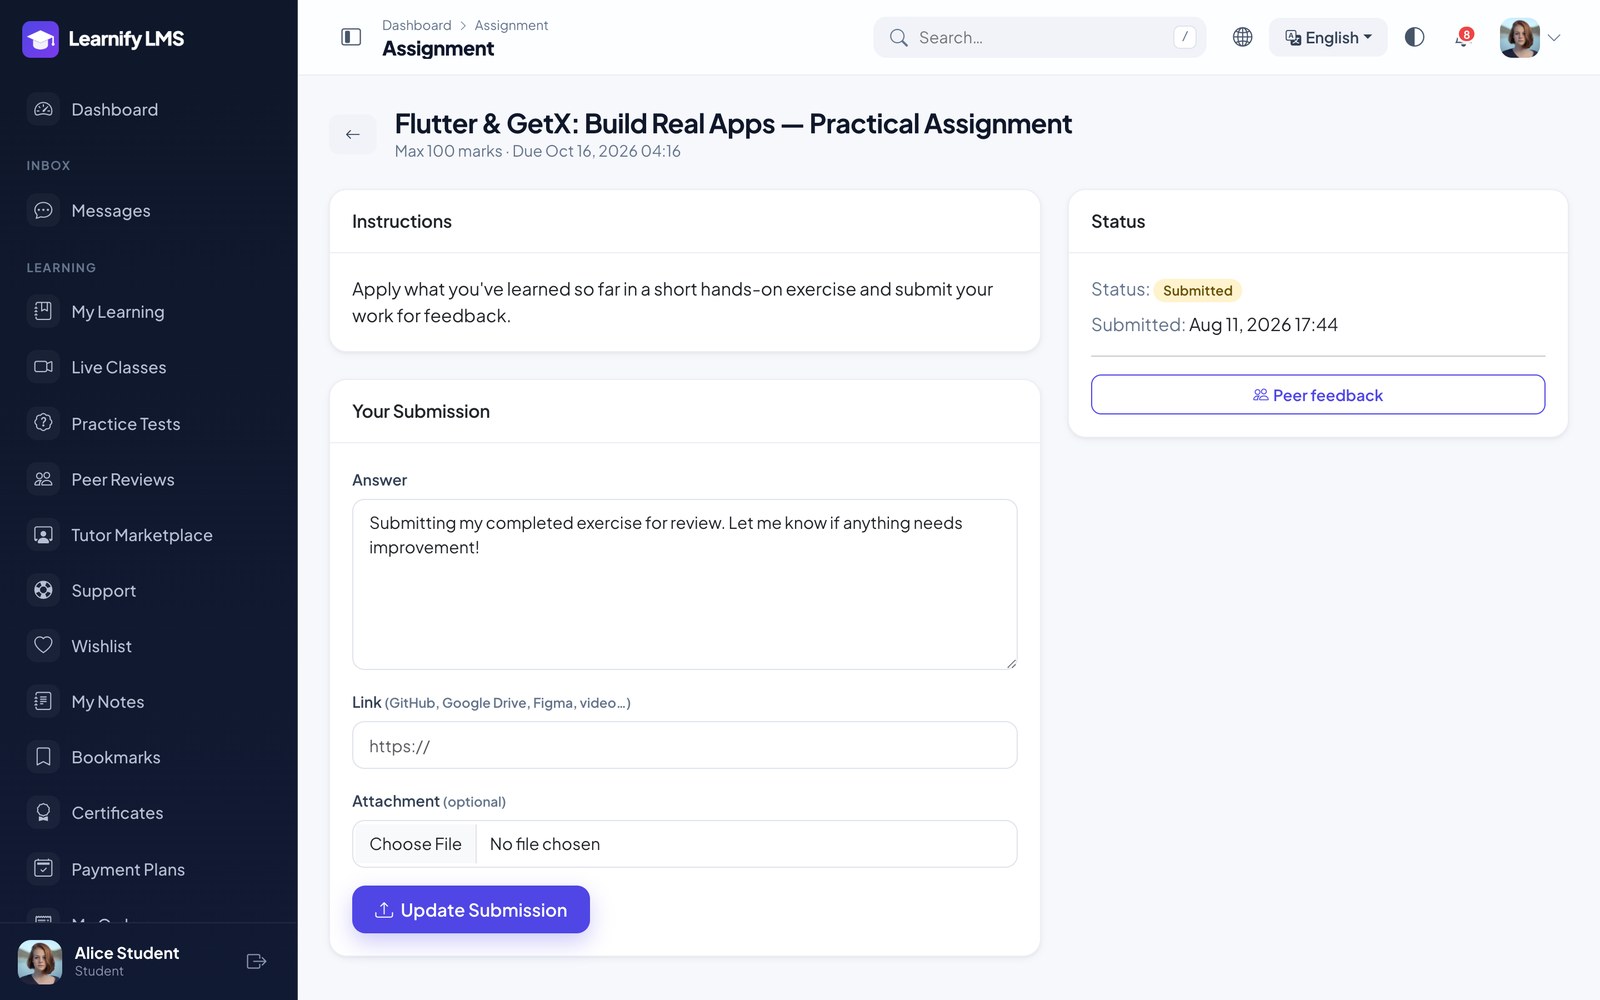
Assignments accept a text answer, a file upload, a link (GitHub, Drive, Figma…) or any mix the instructor allows. The instructor grades with feedback, or returns the work for another attempt — the student is emailed, resubmits, and the attempt counter goes up. Once graded, a submission is final unless the assignment allows resubmission. An optional AI assistant can draft the feedback, and AI
One question per page. Learners see a progress bar, a numbered navigator (answered questions are marked), Previous / Next, and a warning listing unanswered questions before they submit. The timer, auto-submit and proctoring work as before; with JavaScript off every question shows on one page.
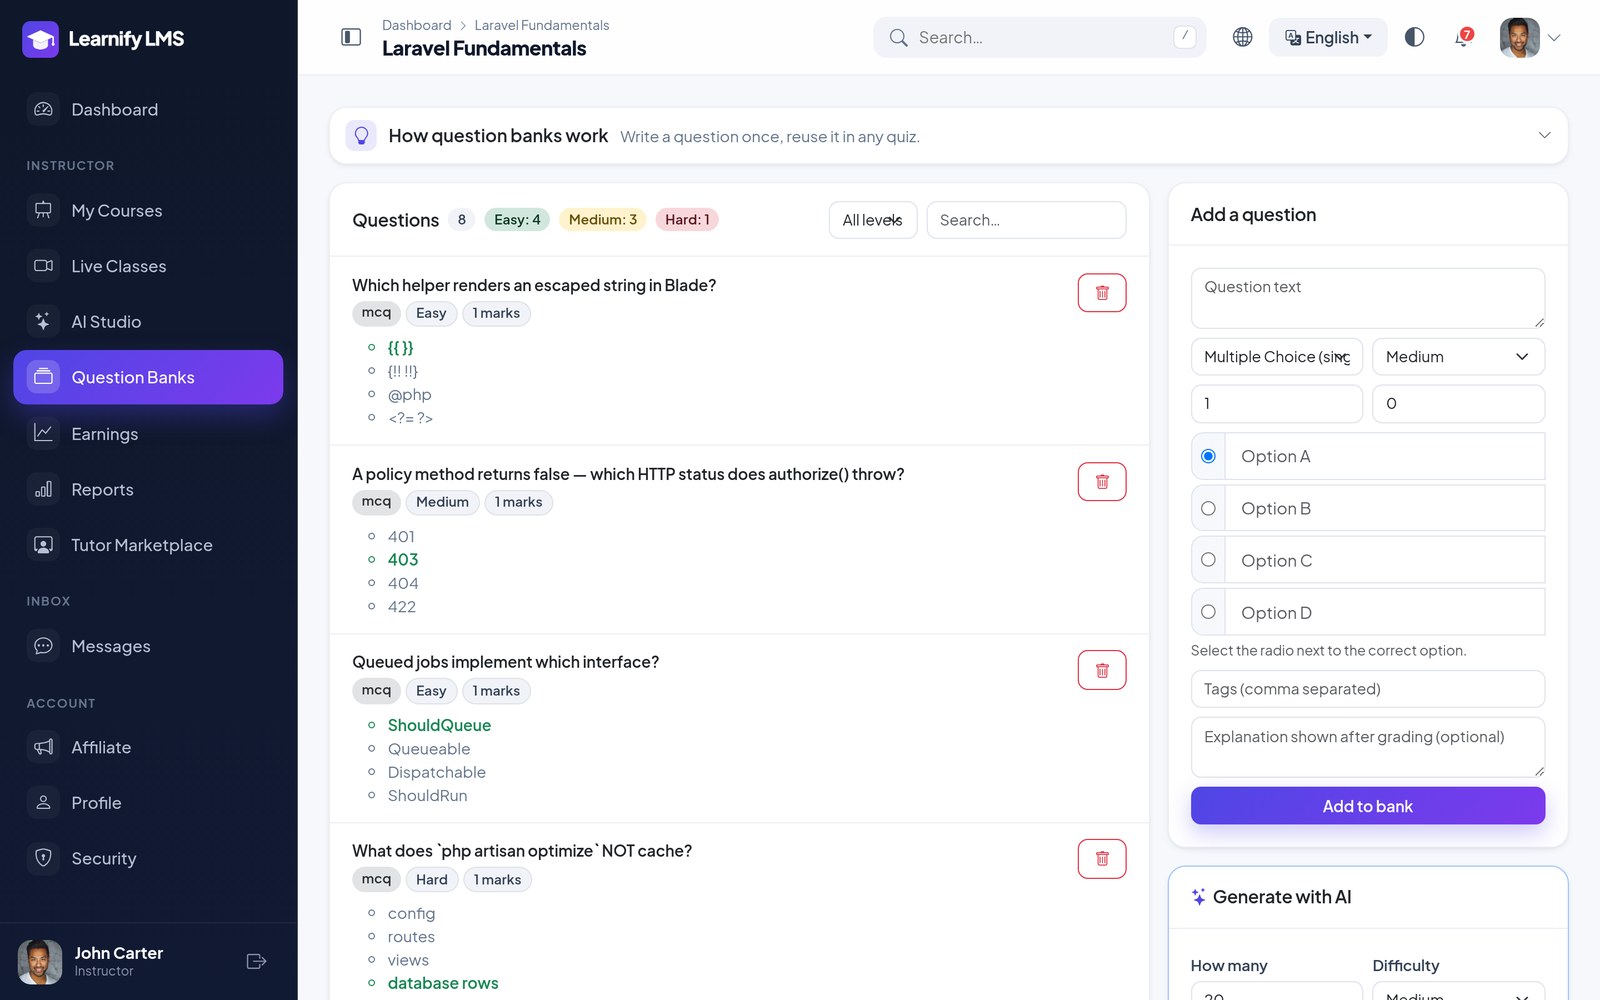
Editing questions. Question-bank and quiz questions can be edited in place; attempts already taken keep the answers they were graded on.
Studio can design the whole assignment with a rubric.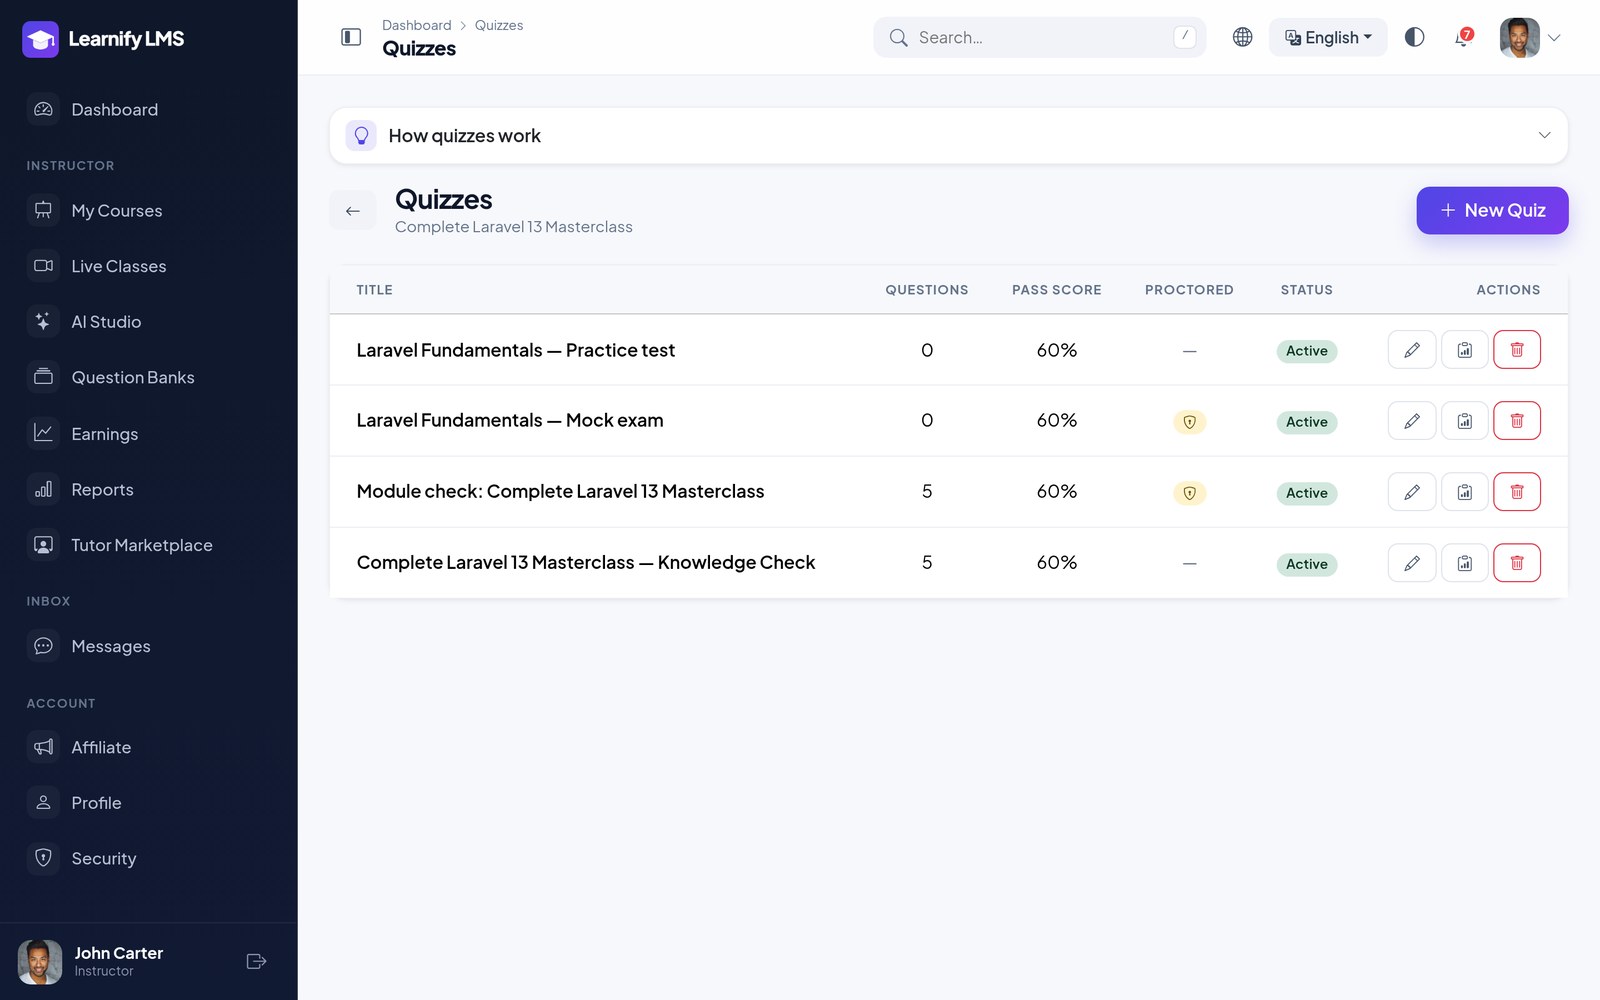
Question Banks, Practice & Mock Tests
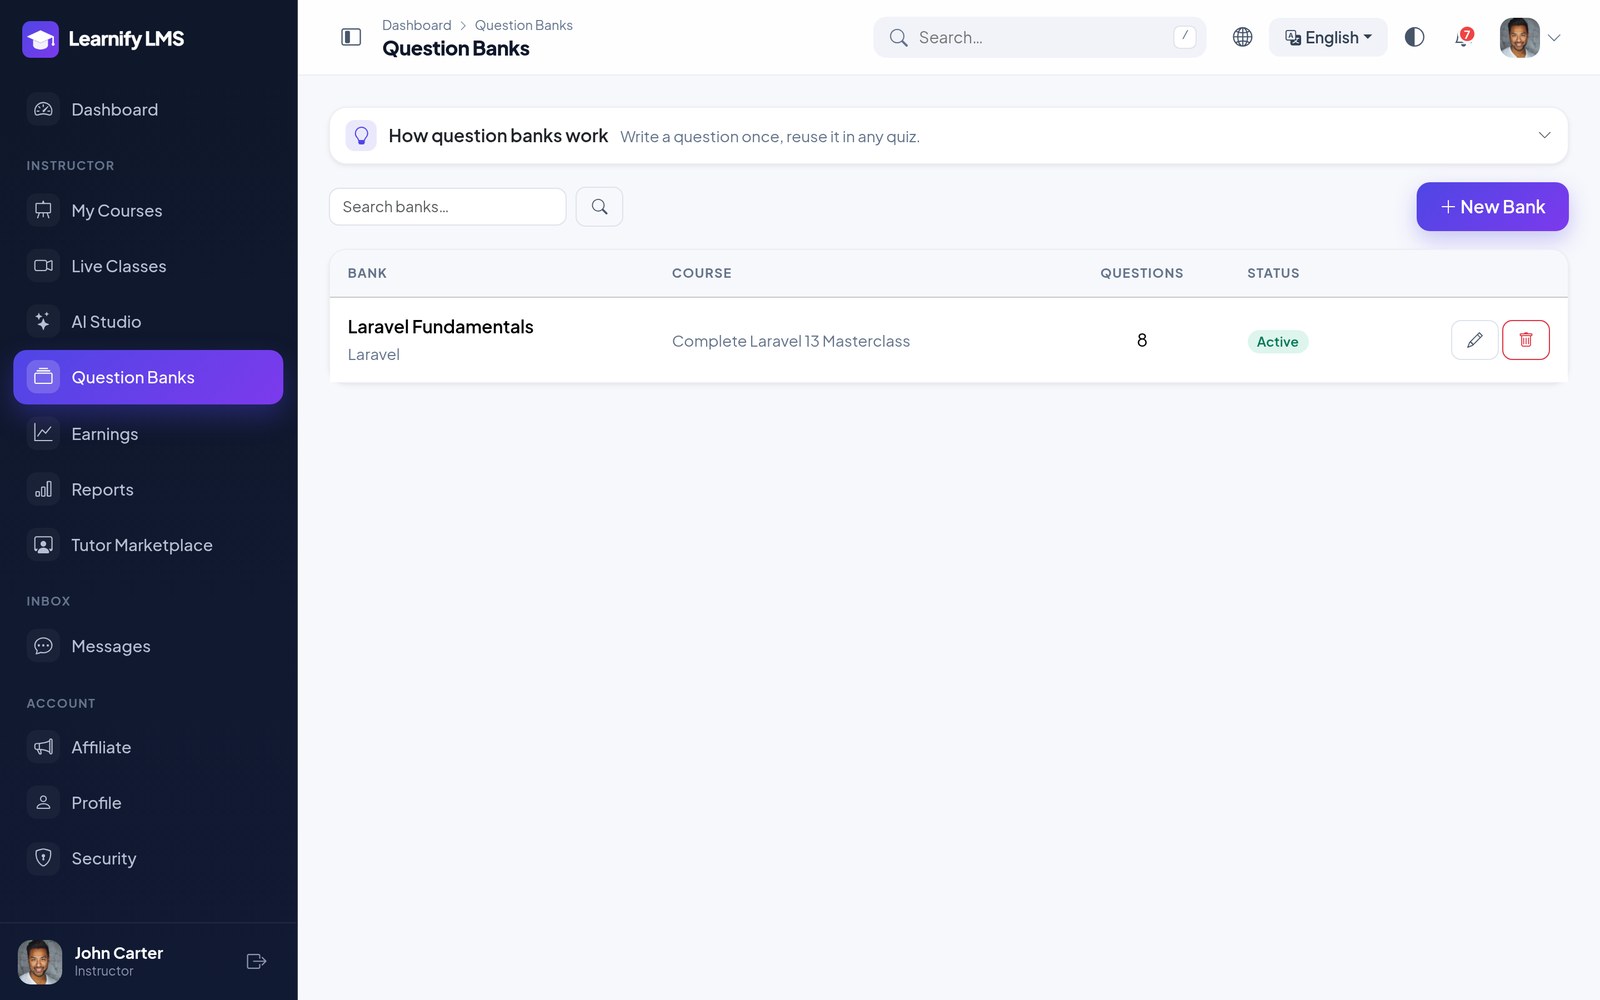
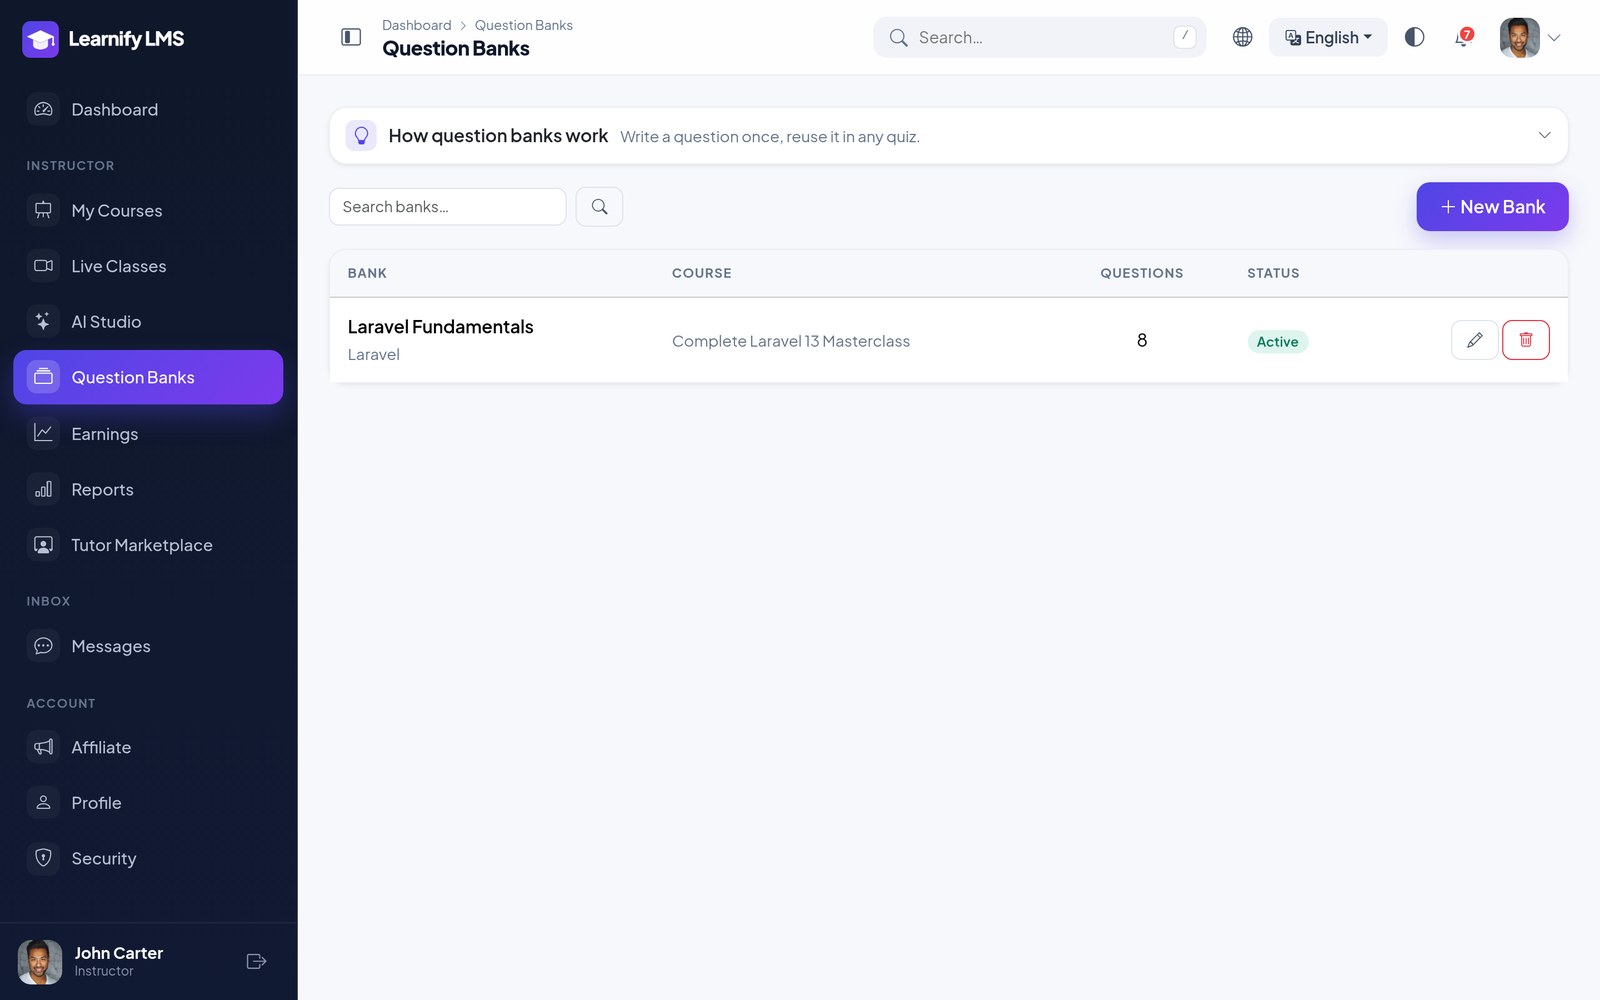
Write a question once, reuse it anywhere. Instructors group questions into banks by subject or chapter, tag each one easy, medium or hard, and import them from CSV. A quiz can then switch its source to “question bank” and say how many of each difficulty to pull — a fresh random paper is drawn per attempt and stored with it, so two students never sit the same paper.
Two extra quiz types sit on top of this. Practice tests allow unlimited attempts with answers explained immediately. Mock exams are timed, attempt-limited and run under exam conditions — negative marking, full-screen, tab-switch detection and webcam snapshots if proctoring is on. Students find both under Learning → Practice Tests, with every attempt kept for review.
Keep at least 3–4× as many questions in a bank as a paper needs, or the random draw starts repeating.
Test Series
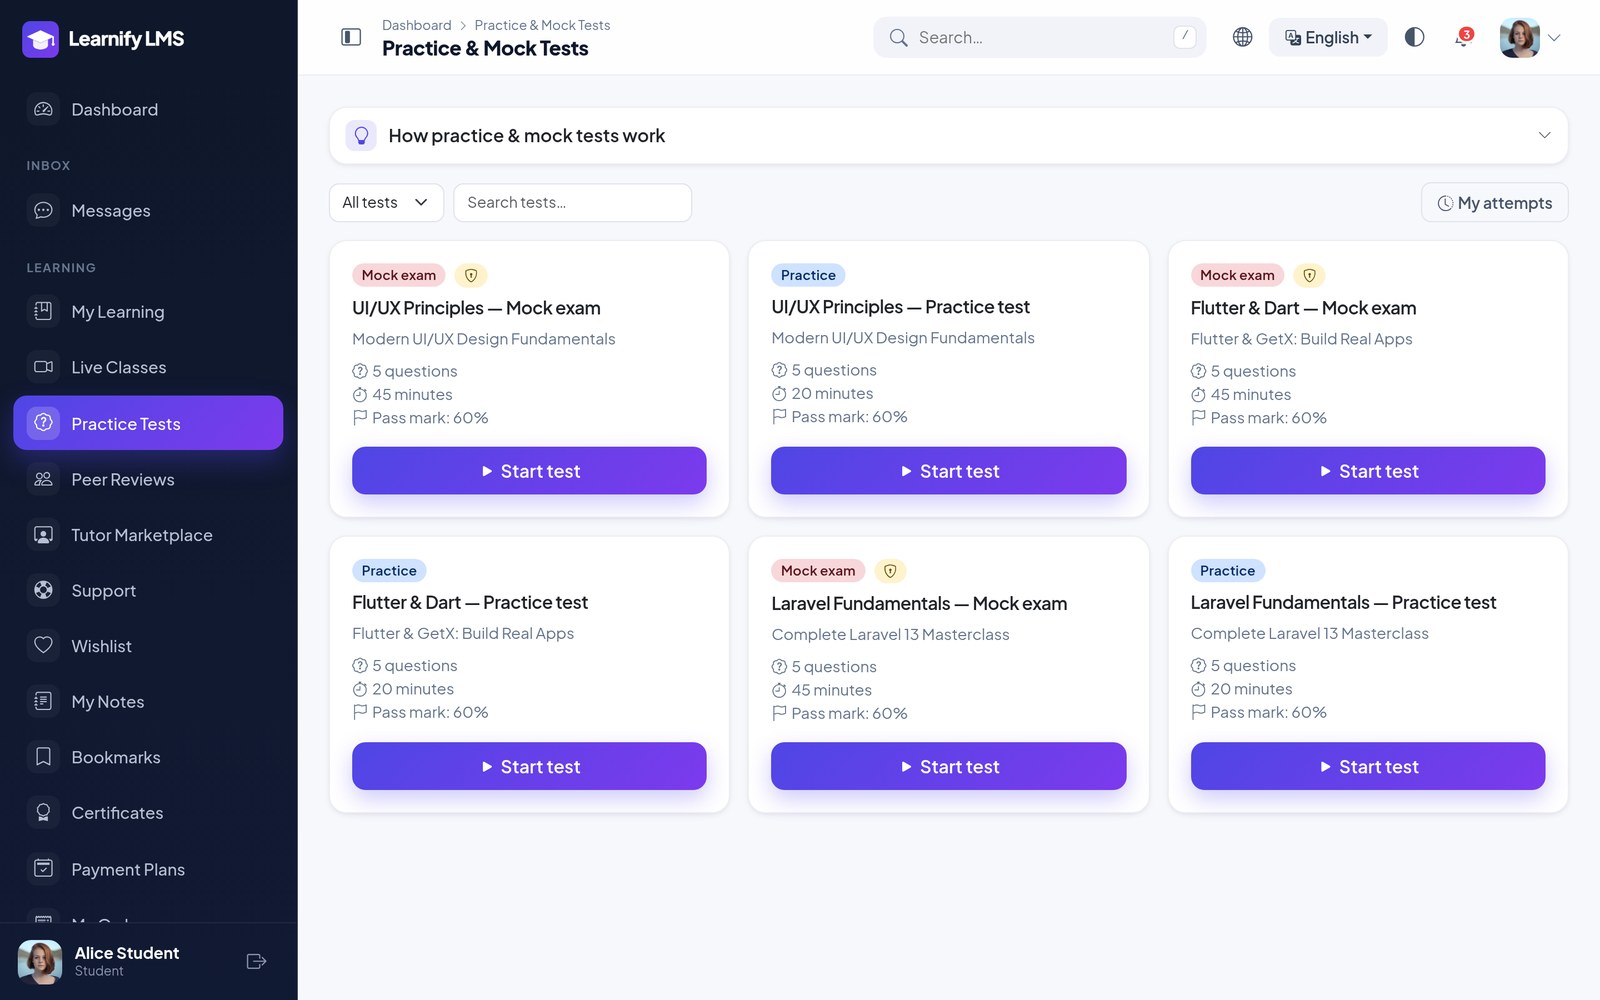
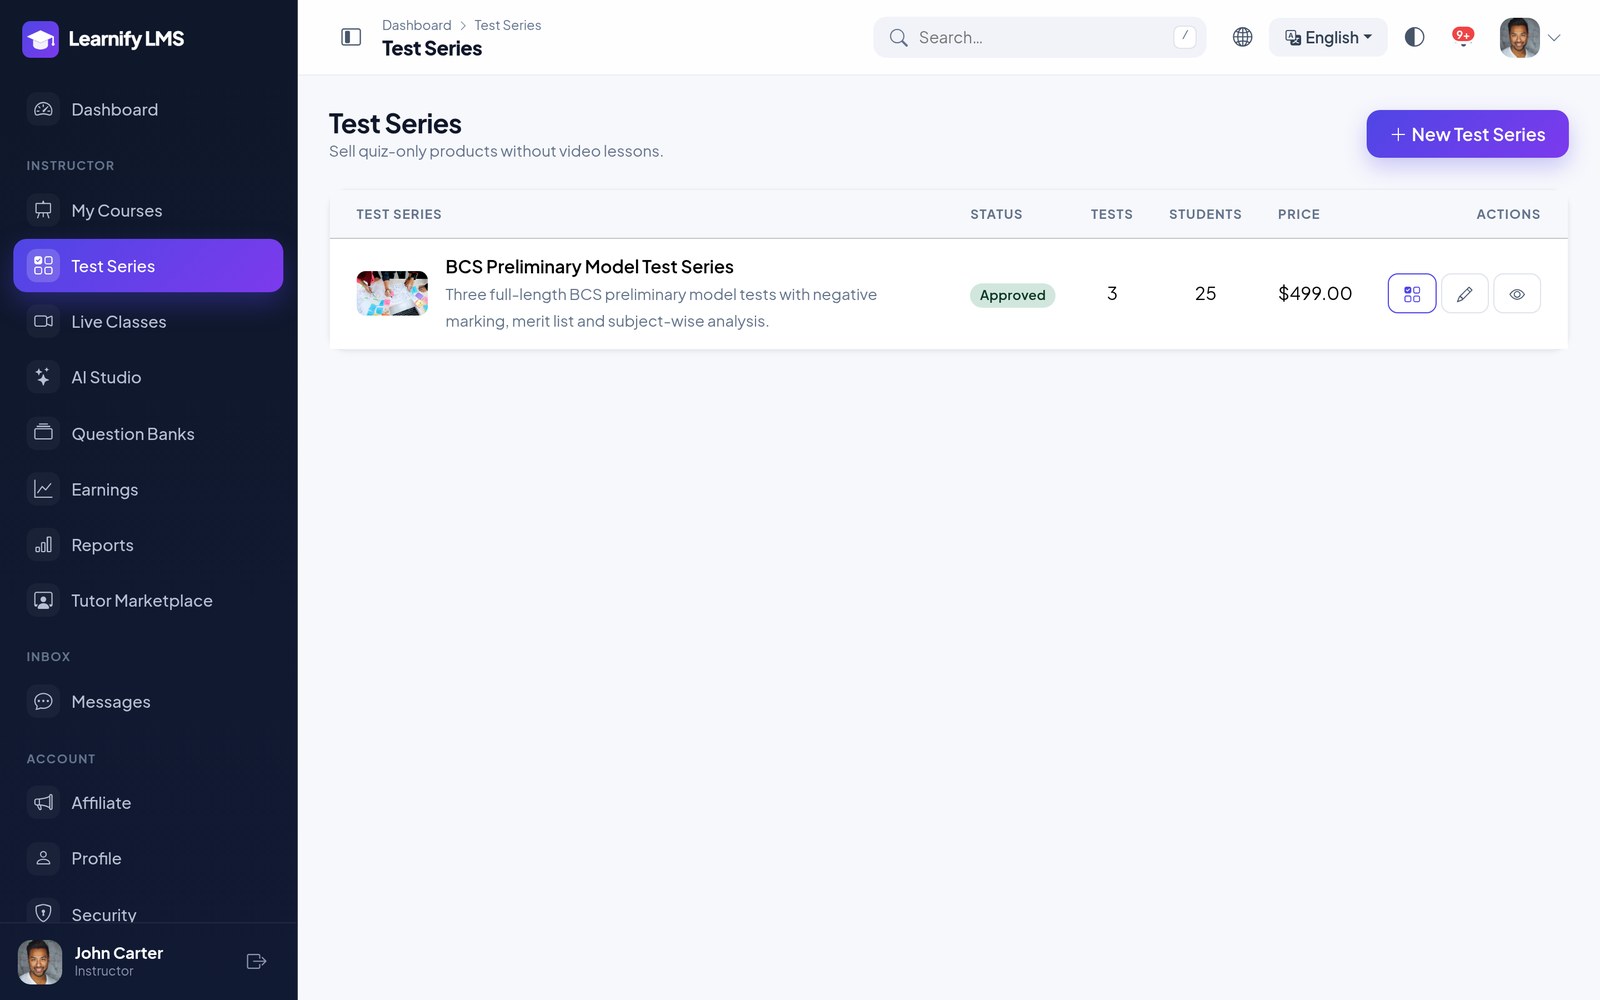
A test series is a product made only of quizzes — no video lessons — sold on its own, for exam-preparation sites that want to sell tests separately from courses. Instructors create one under Instructor → Test Series → New Test Series, then add quizzes to it exactly as they would to a course (question banks, time limits, negative marking, proctoring and everything else on this page apply).
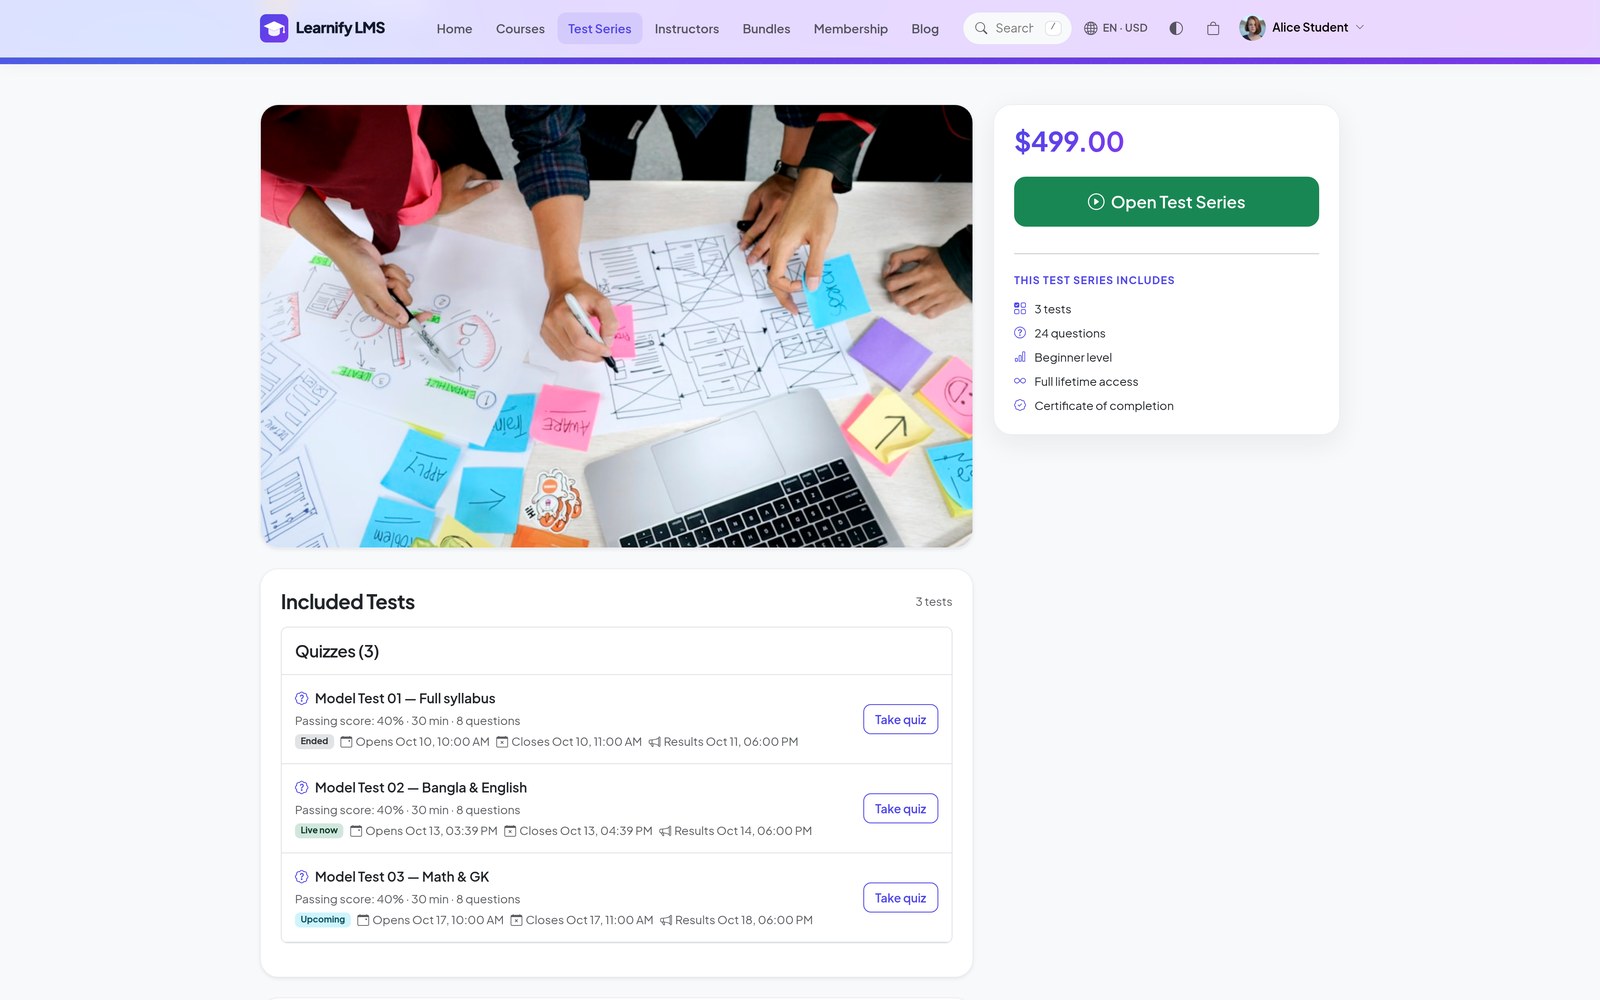
Test series have their own public catalogue at /test-series and their own details pages, and they
go through the same cart, checkout, coupons and payment gateways as courses. Buyers find them in
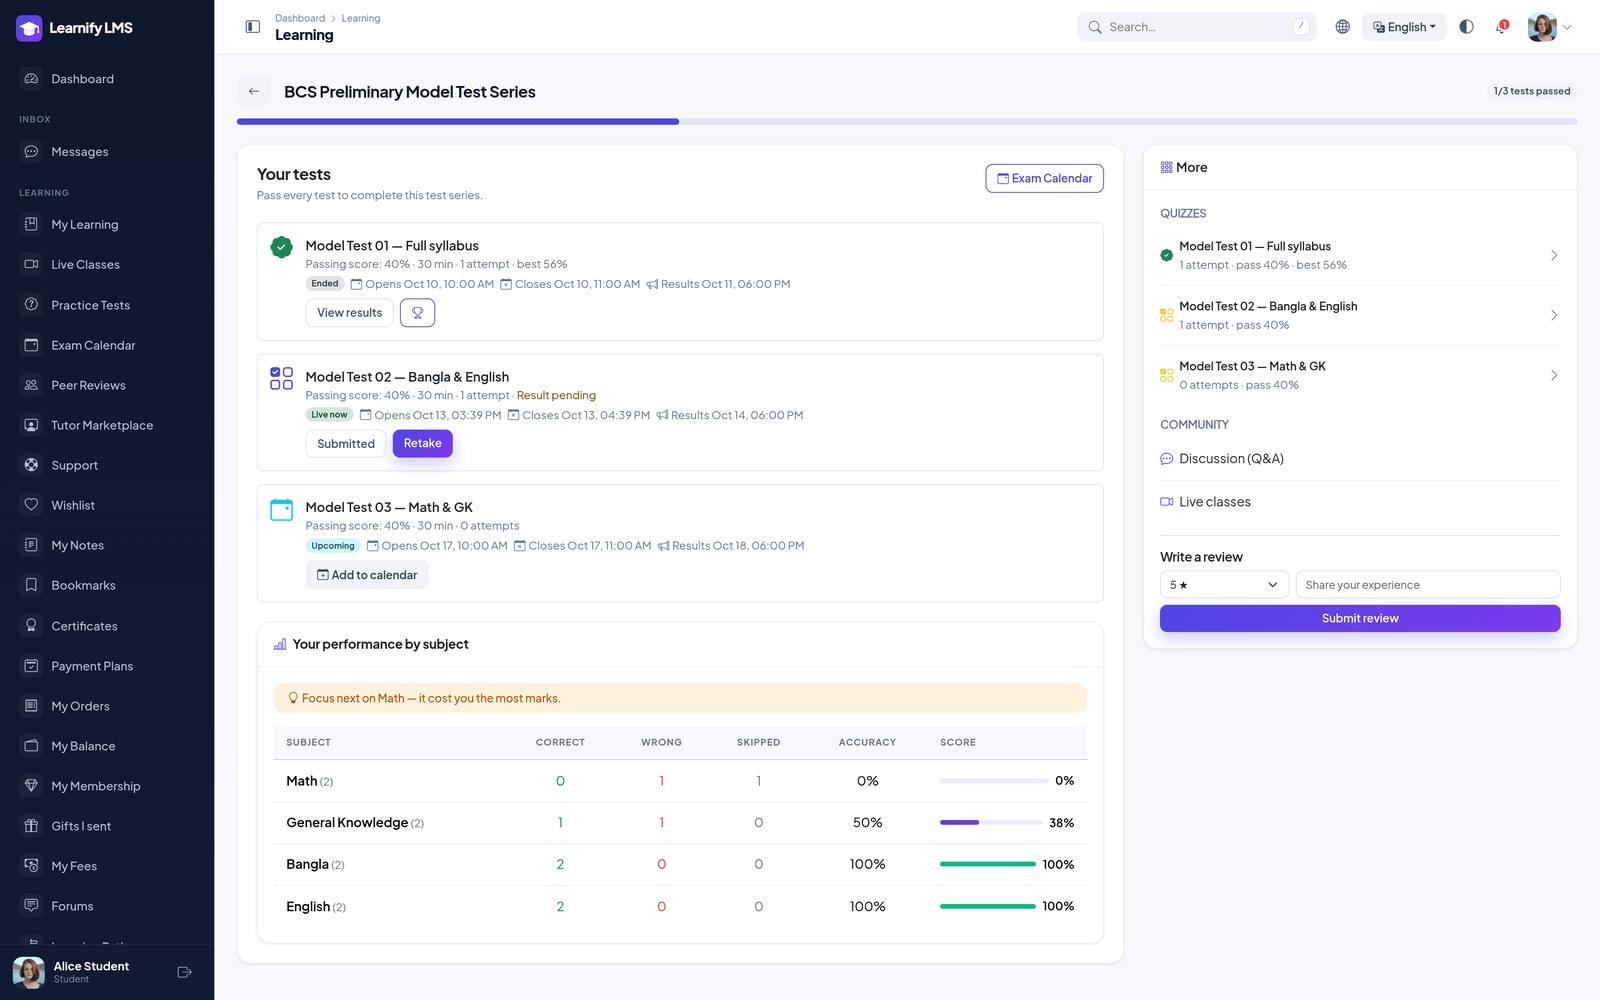
My Learning with a “Test Series” badge. Passing every active quiz moves progress, completes the
test series and issues the certificate; courses that have lessons still complete through their lessons as before.
In the admin panel, Manage → Courses has a Type filter (course or test series).
The API takes GET /api/v1/courses?type=course|test_series (leave it out for both) and returns
product_type; the app’s Explore screen has a matching Type filter.
Quizzes on course pages. Course details pages now list the course’s active quizzes, with question count and exam window, under the lessons. Buyers get “Take quiz”; everyone else sees a lock. Paid tests follow the same access rules as lessons: a refunded, expired or ended enrolment cannot open or submit them, and draft quizzes are hidden from learners.
To give away one test as a taster, tick Free sample — no purchase needed on the quiz. It asks for confirmation, and the quiz list marks it with a Free sample badge.
Live Exams & Result Publishing
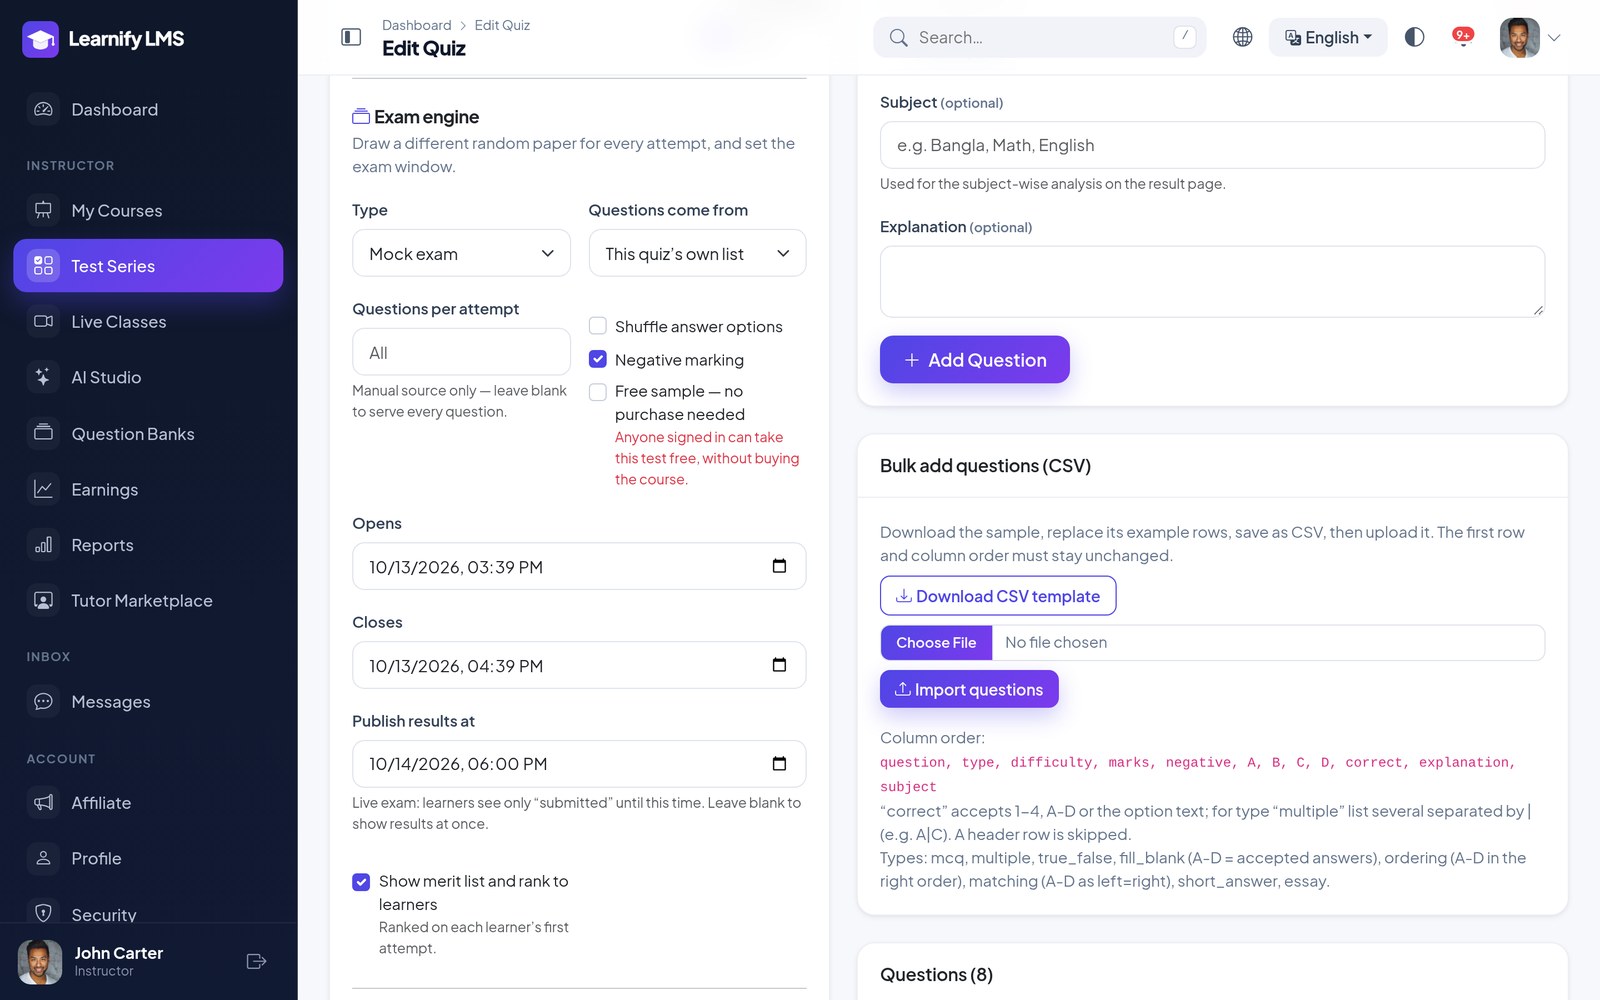
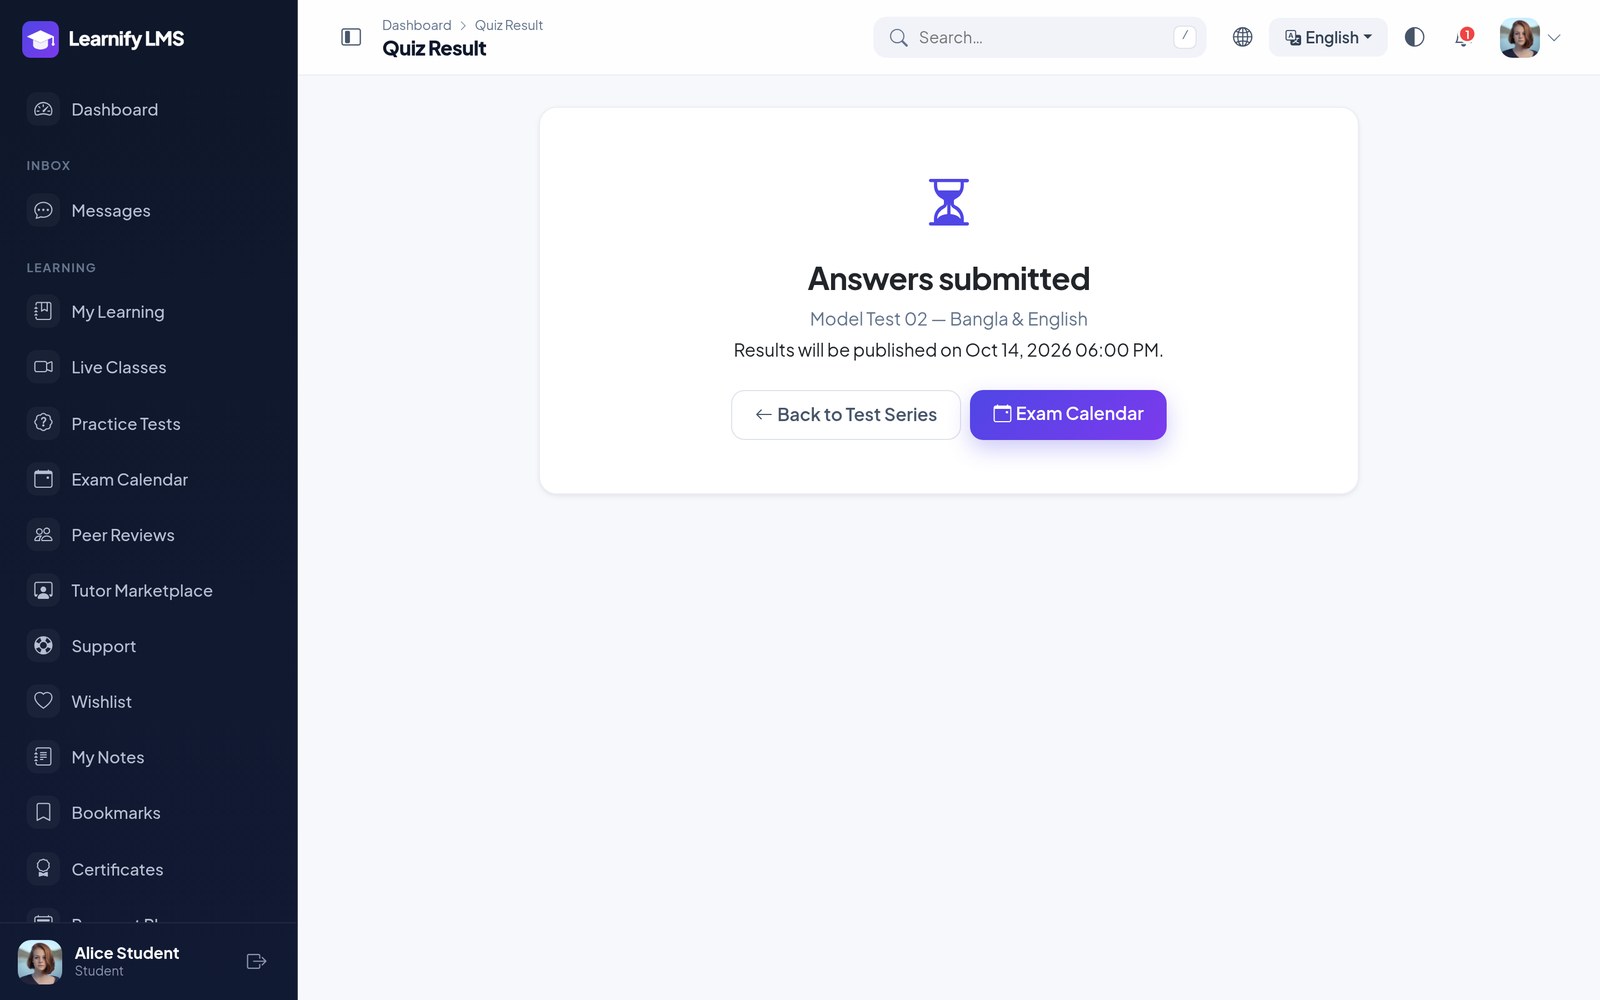
For an exam everyone sits at the same time, set the quiz’s Opens and Closes times (the exam window) and a Publish results at time. Until that time learners — and their parents — see only “Answers submitted”: no score, no pass/fail, no answer review and no test-series progress, on the web, in the API and in the app. Leave Publish results at blank to show results at once.
When the time passes, the scheduler command quizzes:publish-results releases the held-back progress
and sends every participant their score and merit rank as an in-app notification, an e-mail and a push. The wording
is the Exam result published template under System → Notification Templates.
Timing. quizzes:publish-results runs from the scheduler. Without a
cron job it runs on the first site visit after the publish time; add the cron entry if results must go out at the
exact minute — see Cron & Queue.
Merit List & Rank
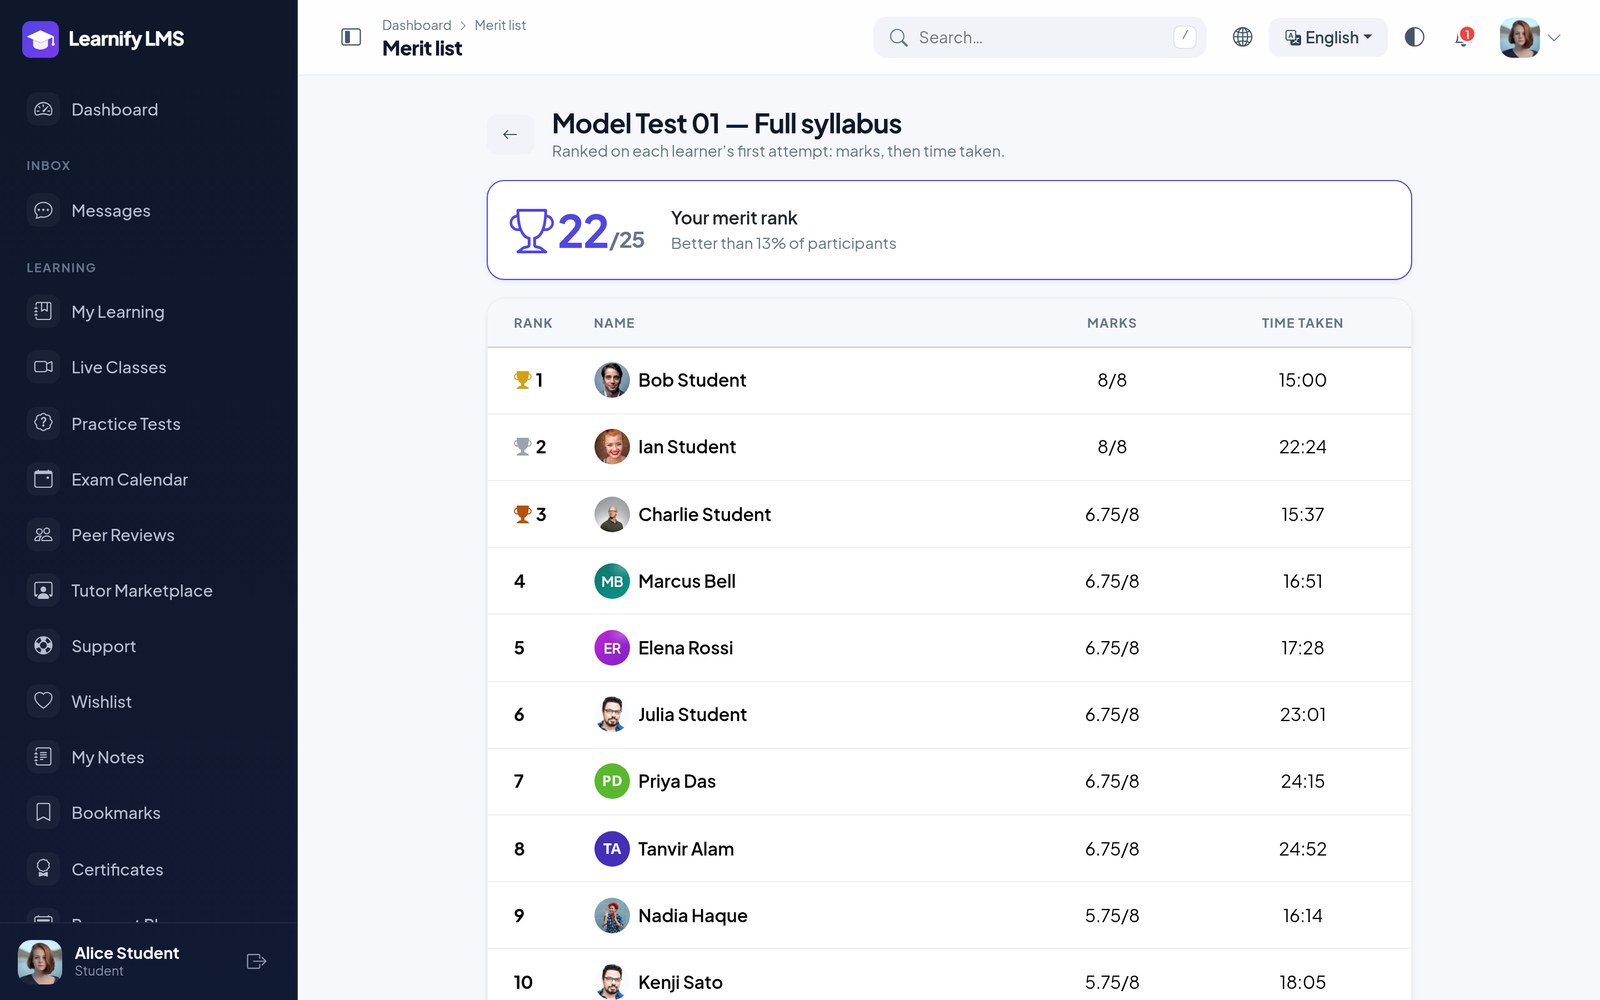
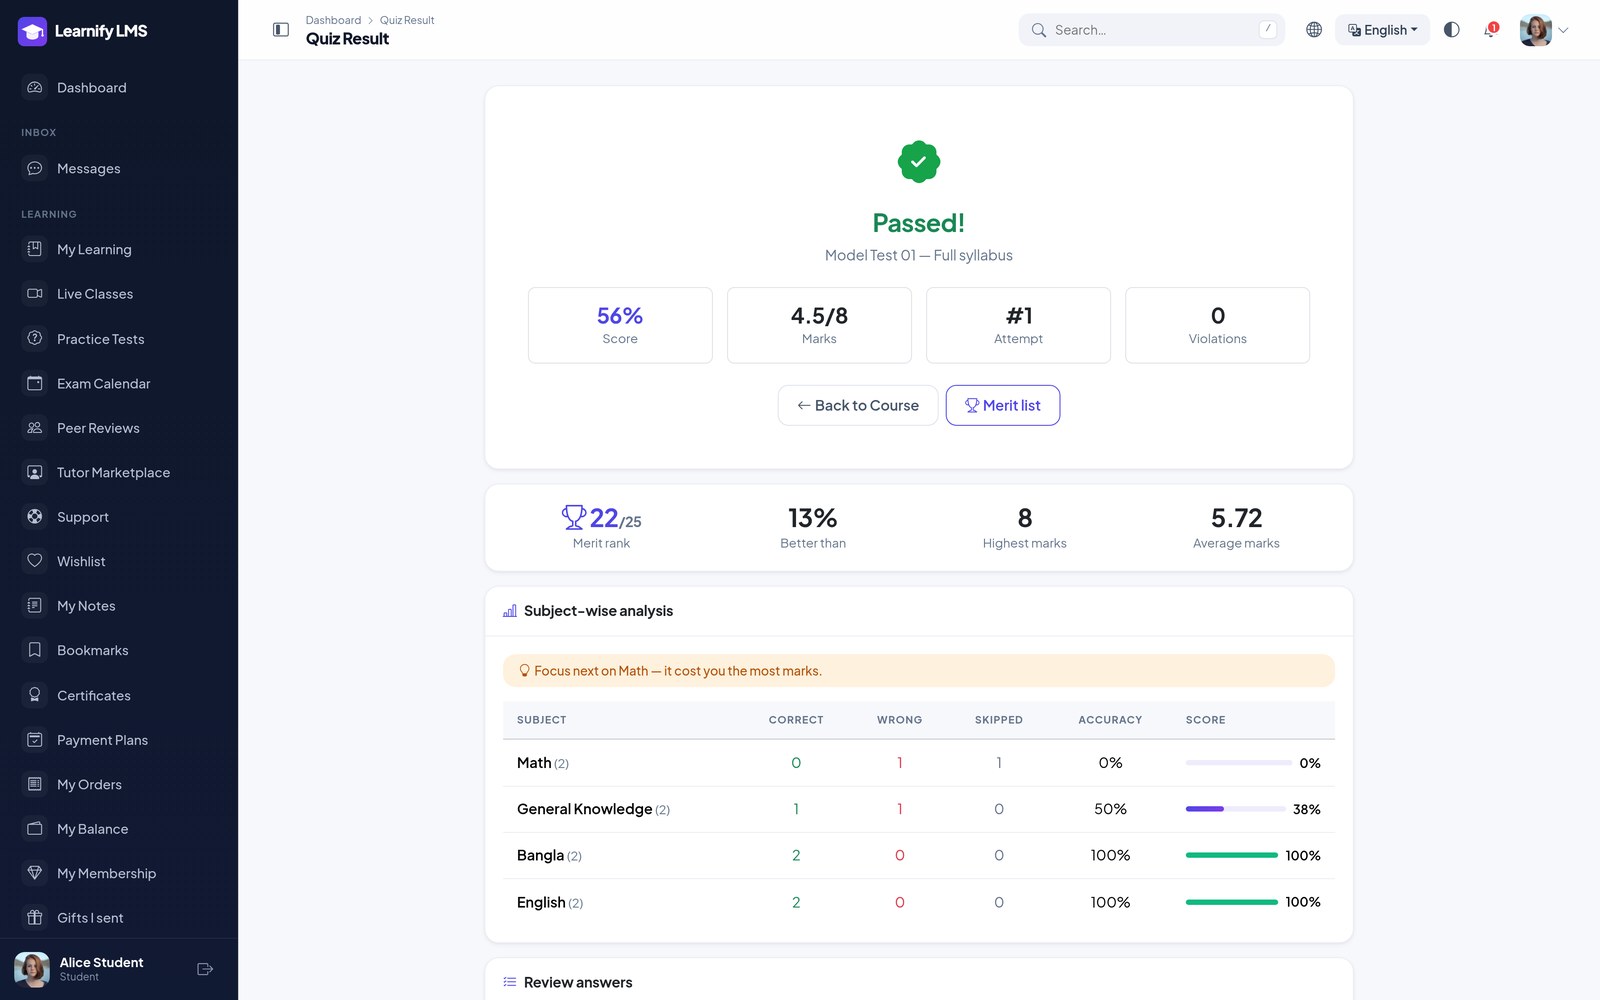
Tick Show merit list and rank to learners on a quiz. Learners are ranked on their first attempt — by marks, then by time taken; equal results share a rank — so retakes cannot climb the list.
On the result page the learner sees their rank, their percentile (“better than X%”), the highest and
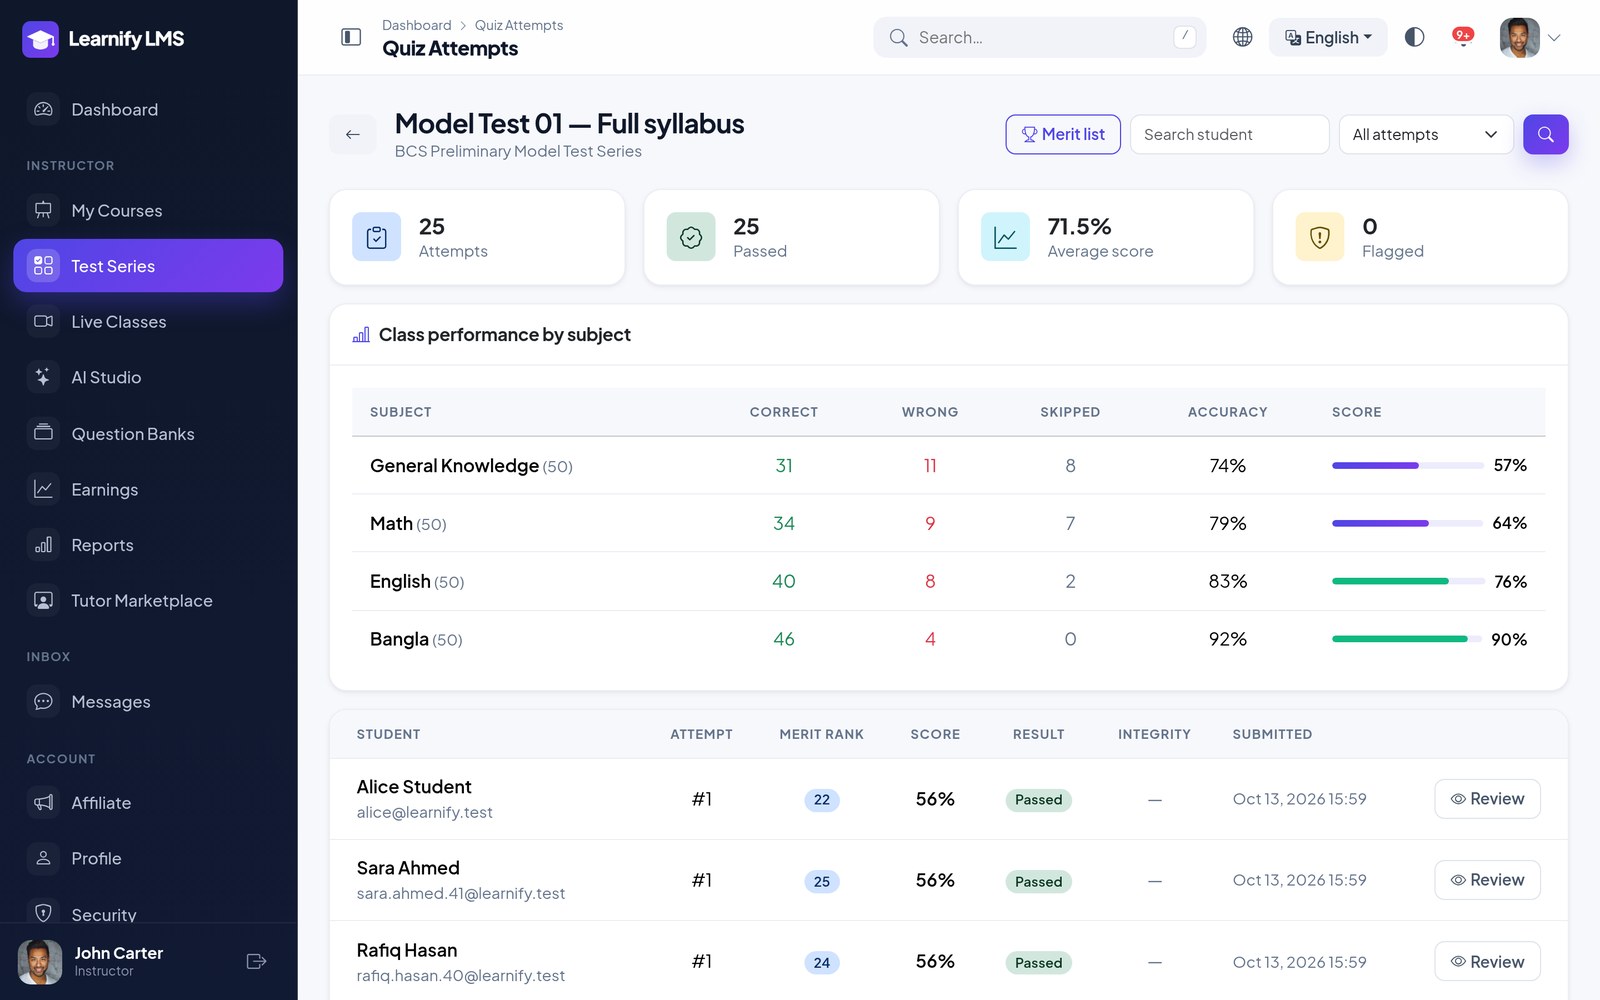
average marks and the top 100. Instructors get a Merit rank column on the attempts page and the full
merit list under Quiz → Attempts → Merit list, with a CSV export. The API serves the list at
GET /api/v1/quizzes/{id}/merit, and the app has a Merit list screen.
Subject-wise Analysis
Every question has a Subject field (for example Physics, Chemistry, Maths). Leave it blank and the
question takes the subject of its question bank. In a CSV import the subject is column 12,
subject, after explanation; the downloadable template already includes it.
question,type,difficulty,marks,negative,optionA,optionB,optionC,optionD,correct,explanation,subject
The result page then breaks the score down by subject — correct, wrong, skipped, accuracy and score for
each — and calls out the weakest subject. A test series shows the same breakdown across all its tests on the
learner’s learn page, and instructors see the class performance per subject on the quiz’s attempts page.
API results carry subjects and standing.
Exam Calendar
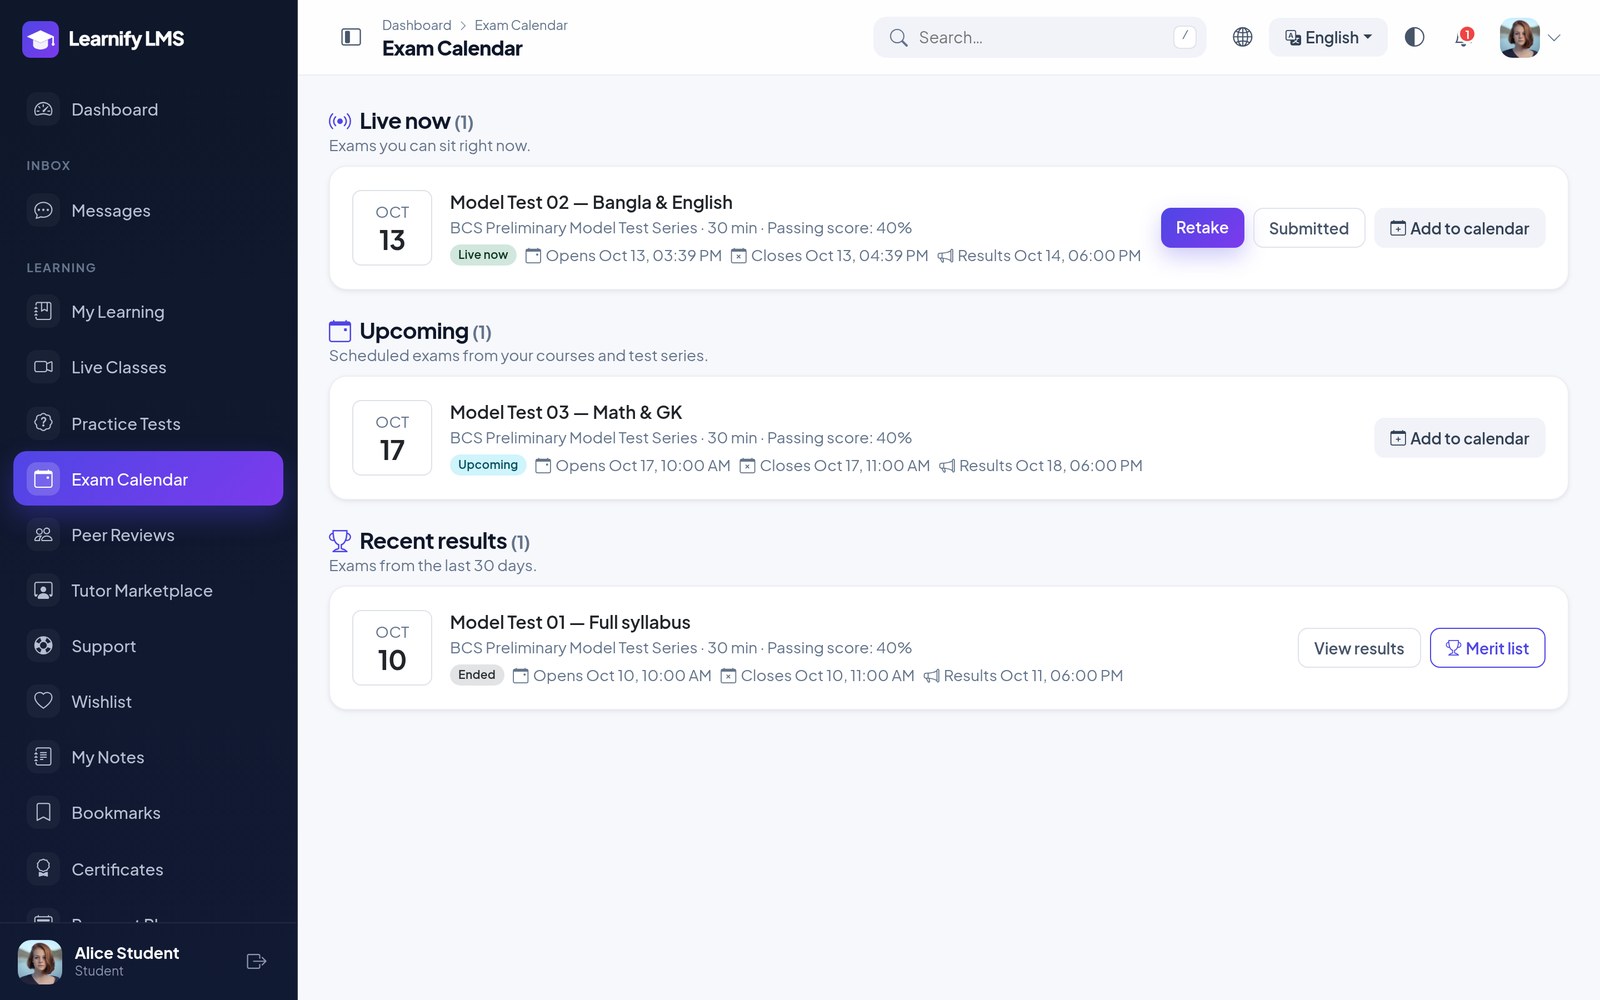
Learners find Learning → Exam Calendar in the web sidebar (and in the Profile menu of the app). It
collects the exams from their courses and test series into four groups — Live now,
Upcoming, Waiting for results and Recent results — and
each exam has an Add to calendar button that downloads an .ics file for Google
Calendar, Outlook or Apple Calendar. The API serves it at GET /api/v1/exams/calendar.
Video Checkpoints, Q&A, Notes & Bookmarks
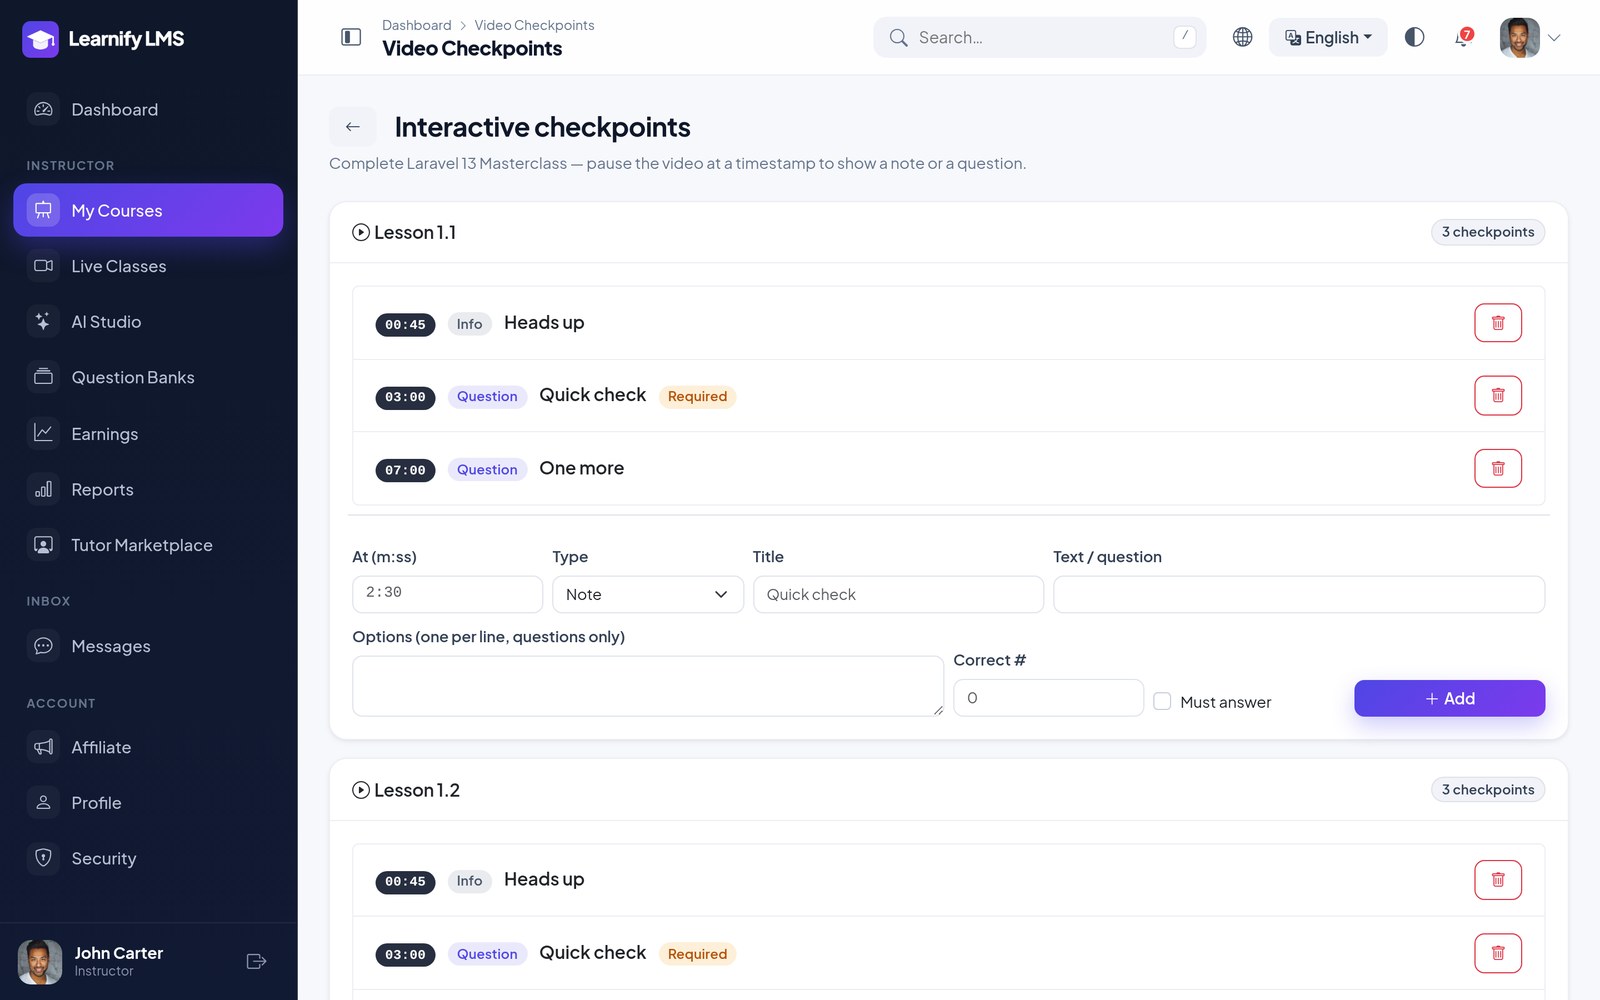
Video checkpoints pause a lesson at a timestamp the instructor chooses and show either a note or a multiple-choice question. Mark a question as required and the player will not continue until it is answered correctly. Managed per course under Instructor → My Courses → Checkpoints.
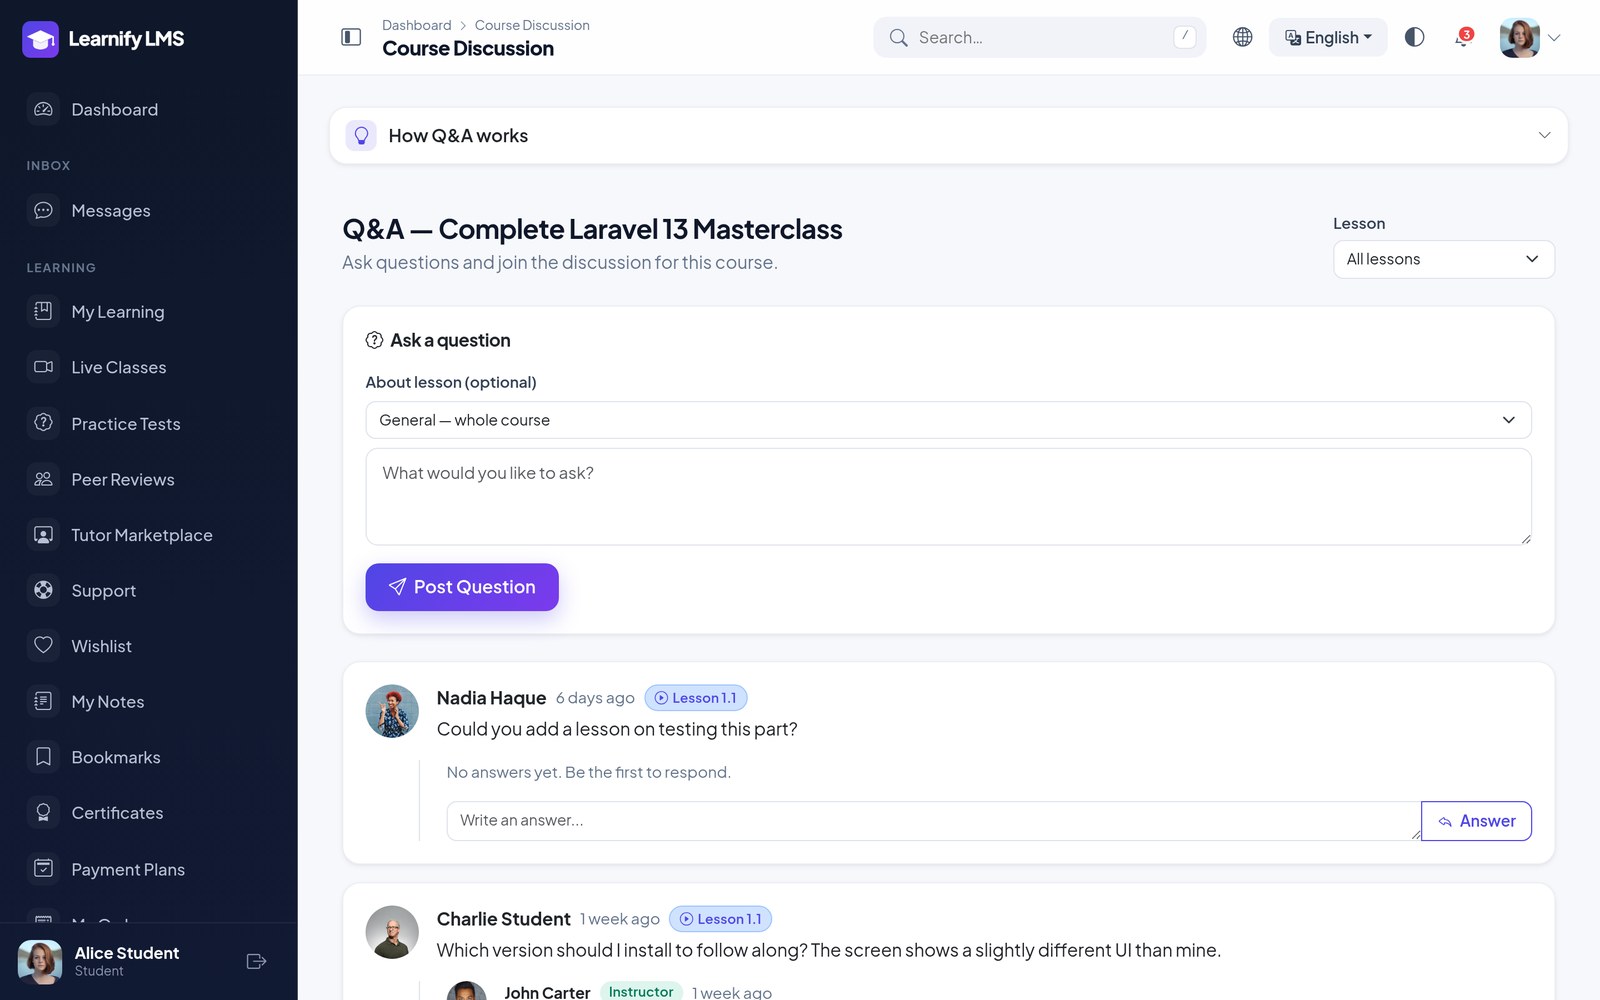
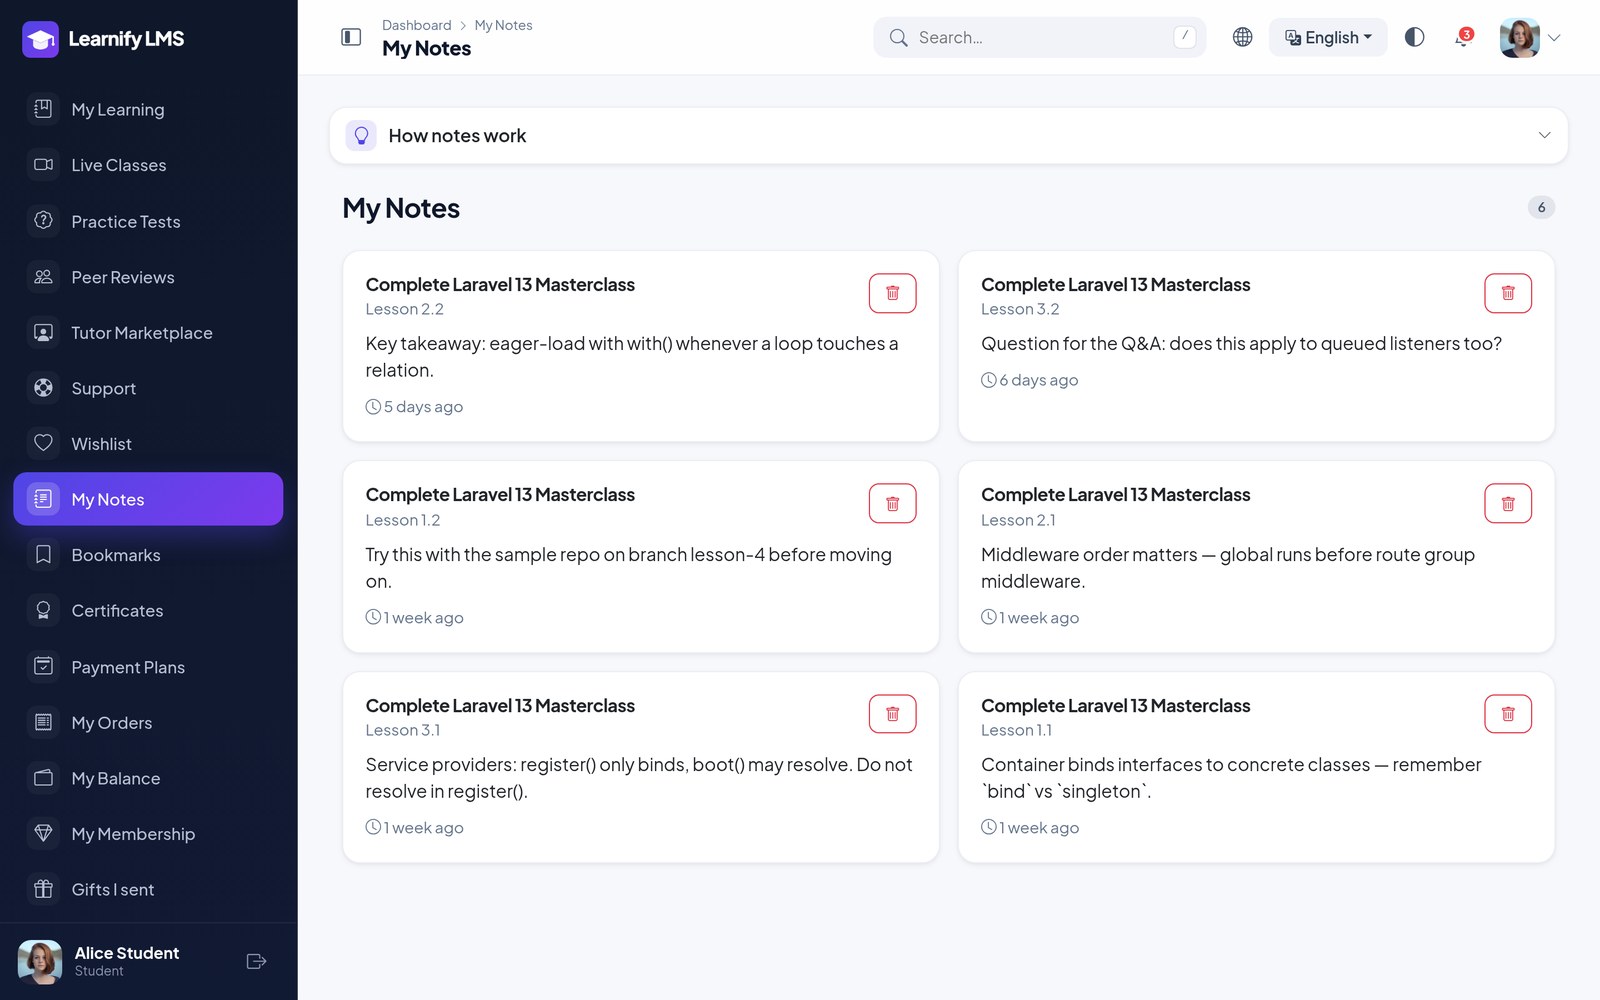
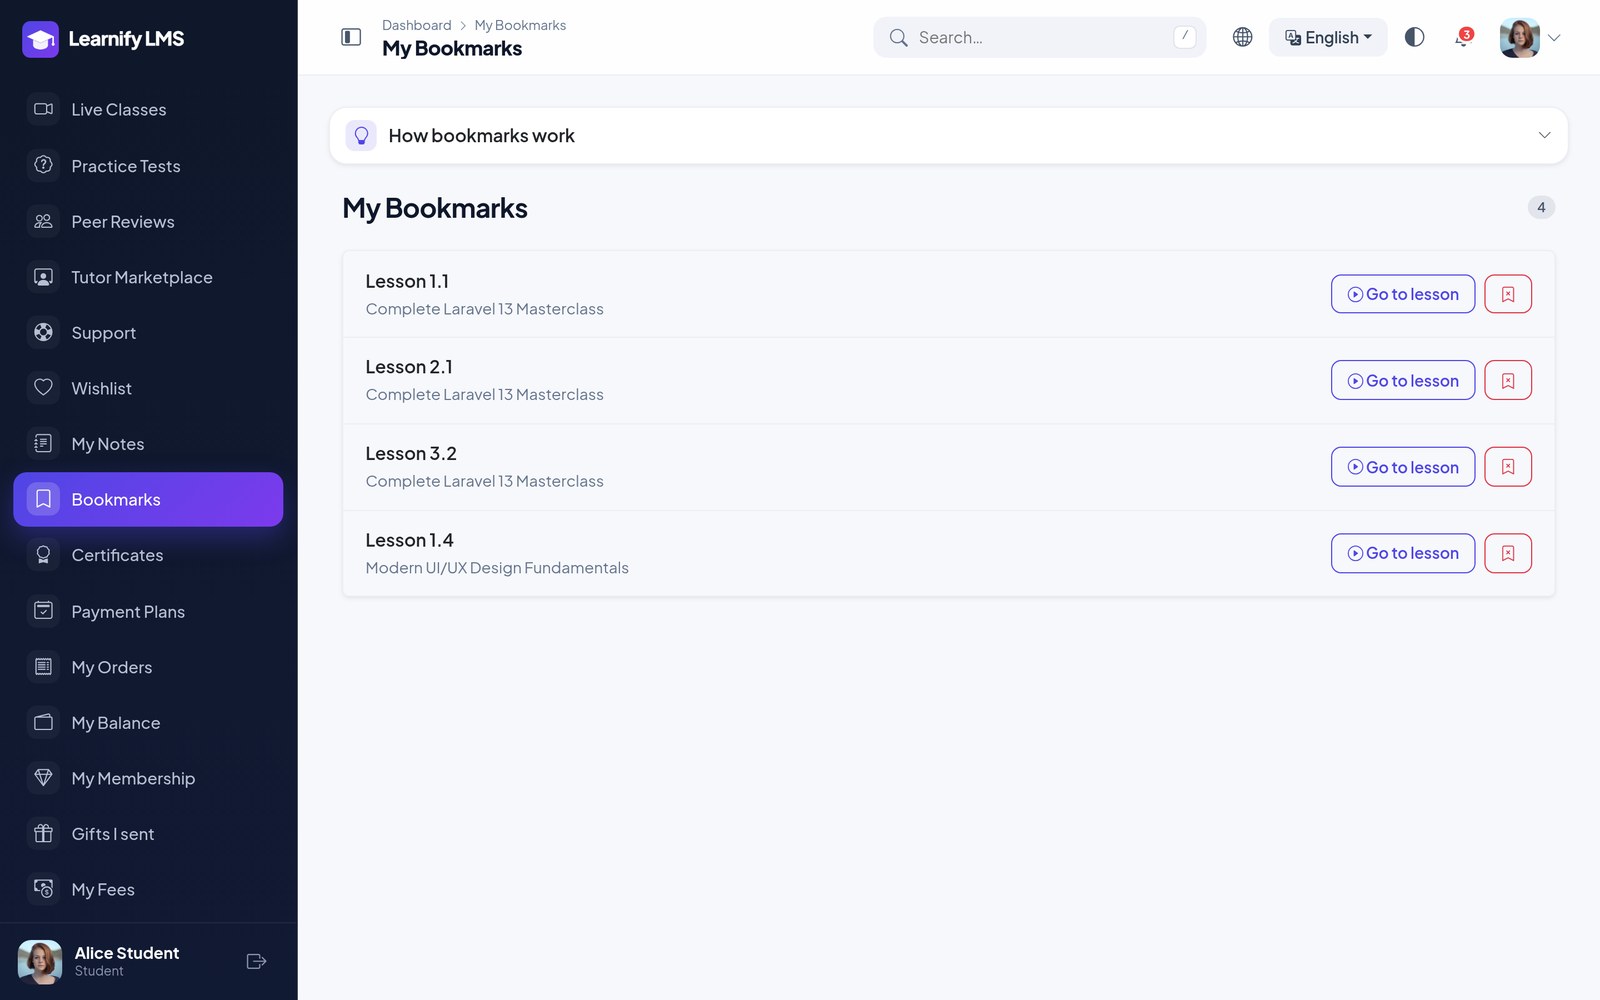
Course Q&A is a discussion thread per course, filterable by lesson. Students ask on the lesson they are stuck on, the instructor or another student replies, and the instructor can mark the best answer. Notes are taken beside the player and store the video timestamp; bookmarks reopen a lesson at the exact second it was saved. Both are listed together under the student’s Learning menu.
Edit what you wrote. Learners edit their notes, course Q&A questions and answers, and forum topics and replies (until the topic is closed); instructors edit course FAQs and video checkpoints. Each is limited to its author, or to an admin / the company manager where that applies — on the website and in the app.
Peer Review & Originality
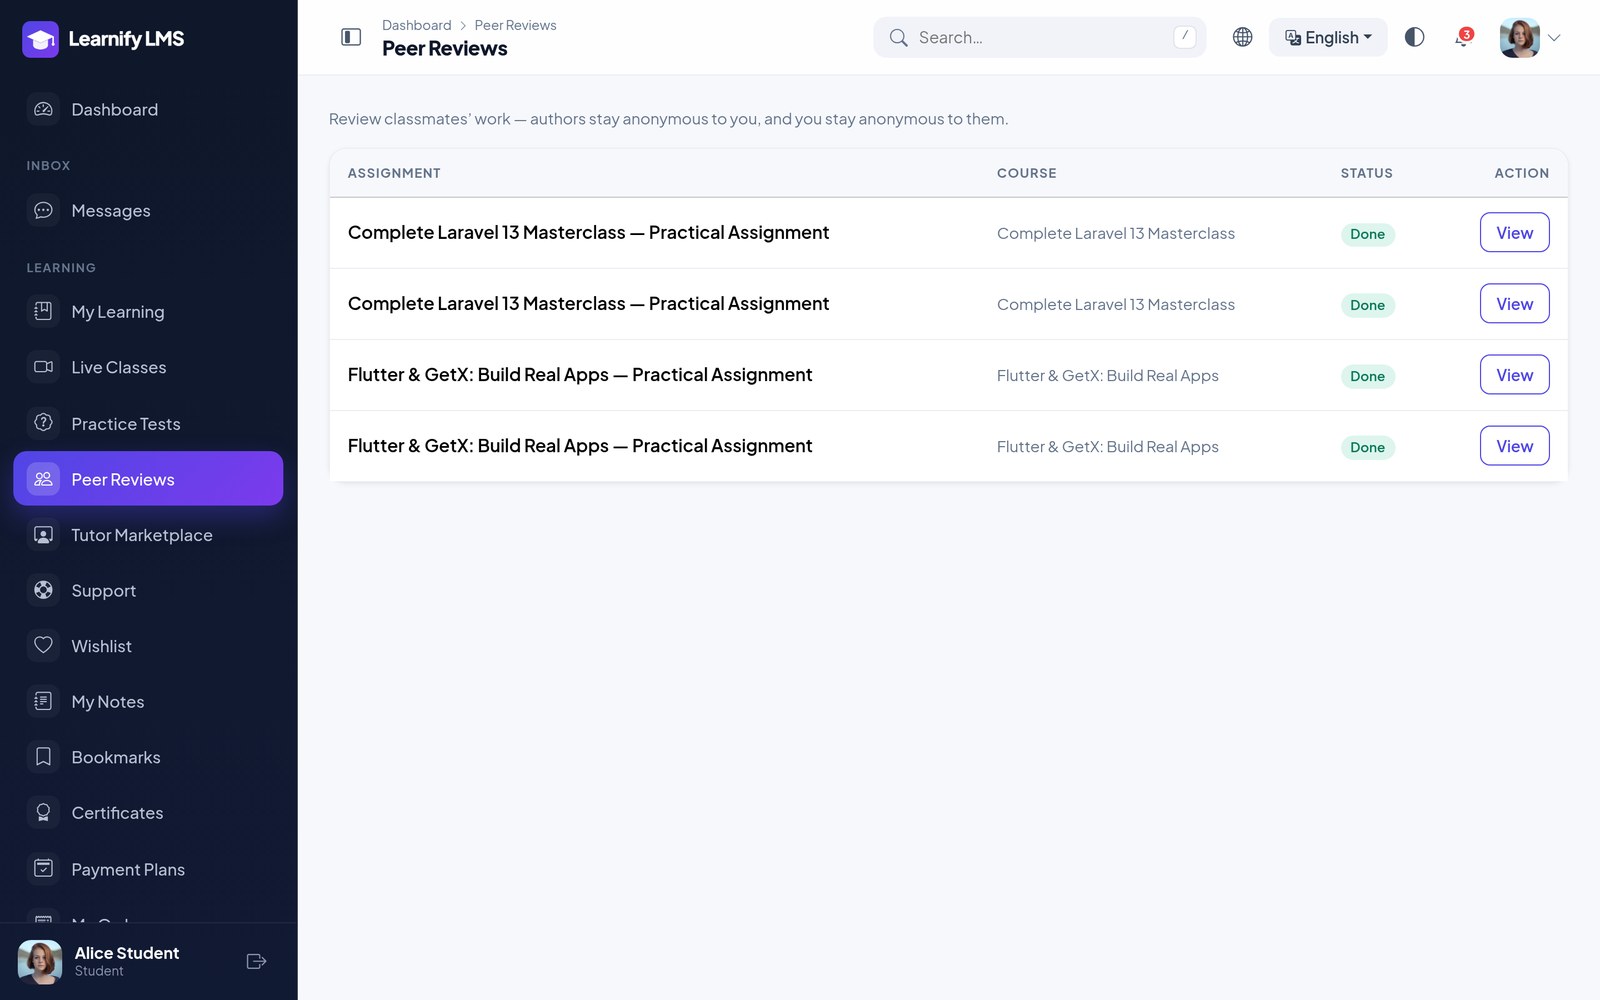
Turn on peer review for an assignment and say how many reviewers each submission gets. Once a student submits, the platform hands their work to that many classmates; reviewers score it and leave feedback, and the author sees what came back without knowing who wrote it. Students find their queue under Learning → Peer Reviews. Reviewers must be enrolled in the course.
The instructor’s grading screen also has an originality check: a submission is compared against every other submission for the same assignment, and optionally sent to an external similarity provider configured under Settings → Academic integrity.
AI Studio
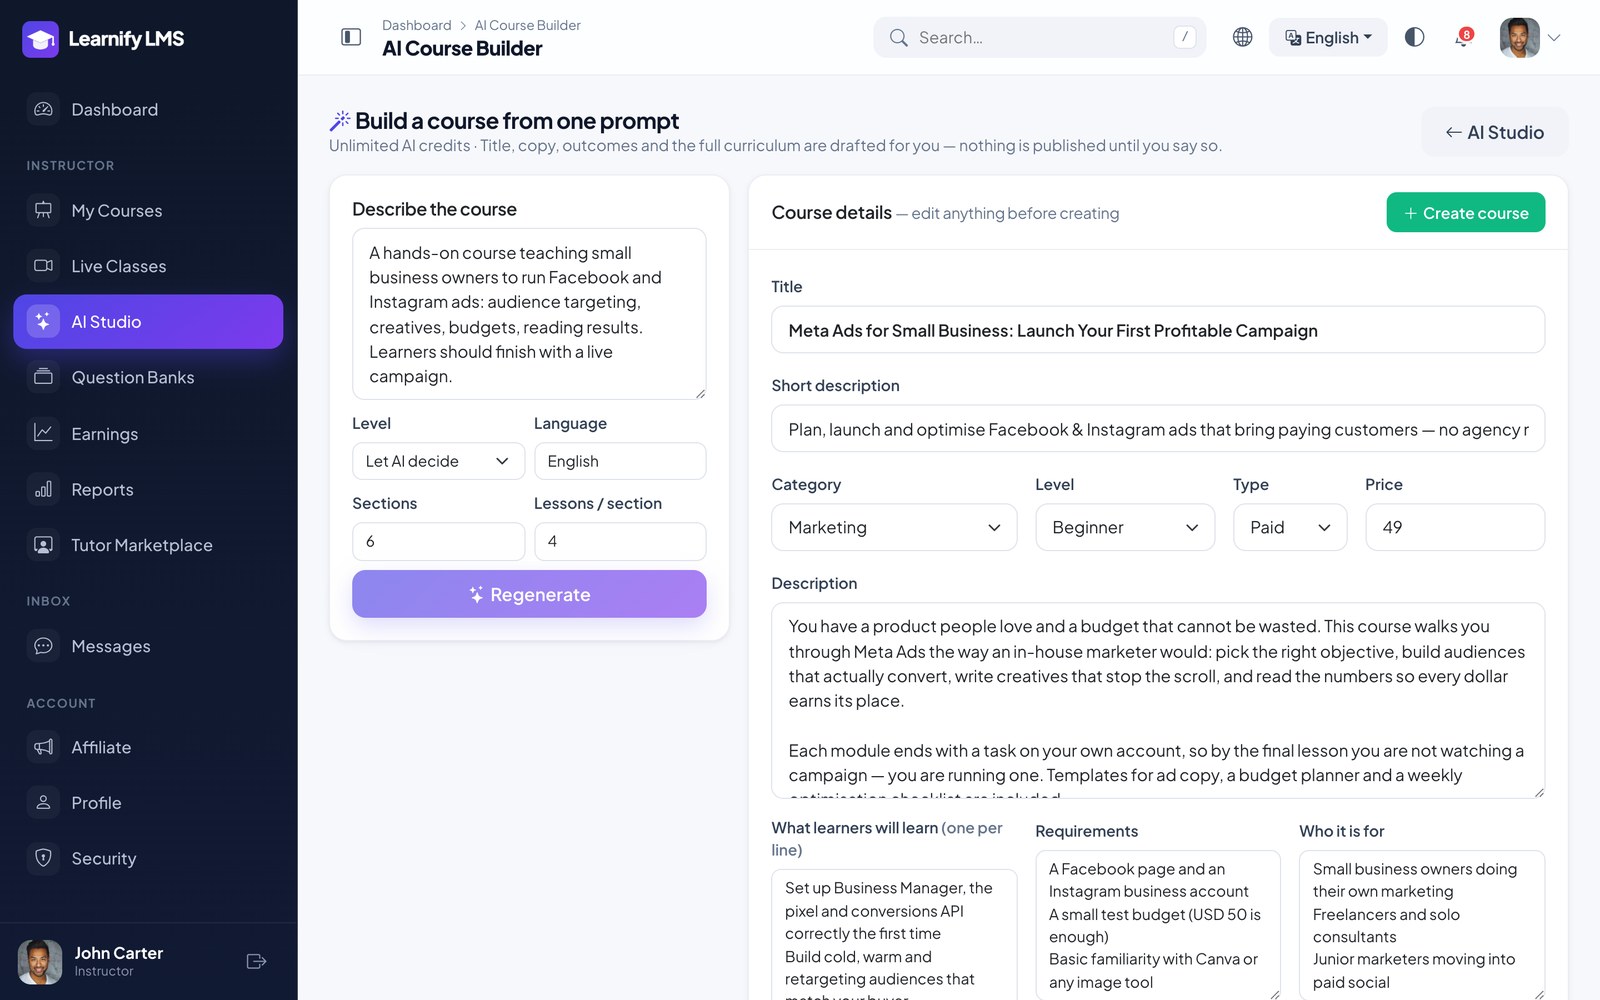
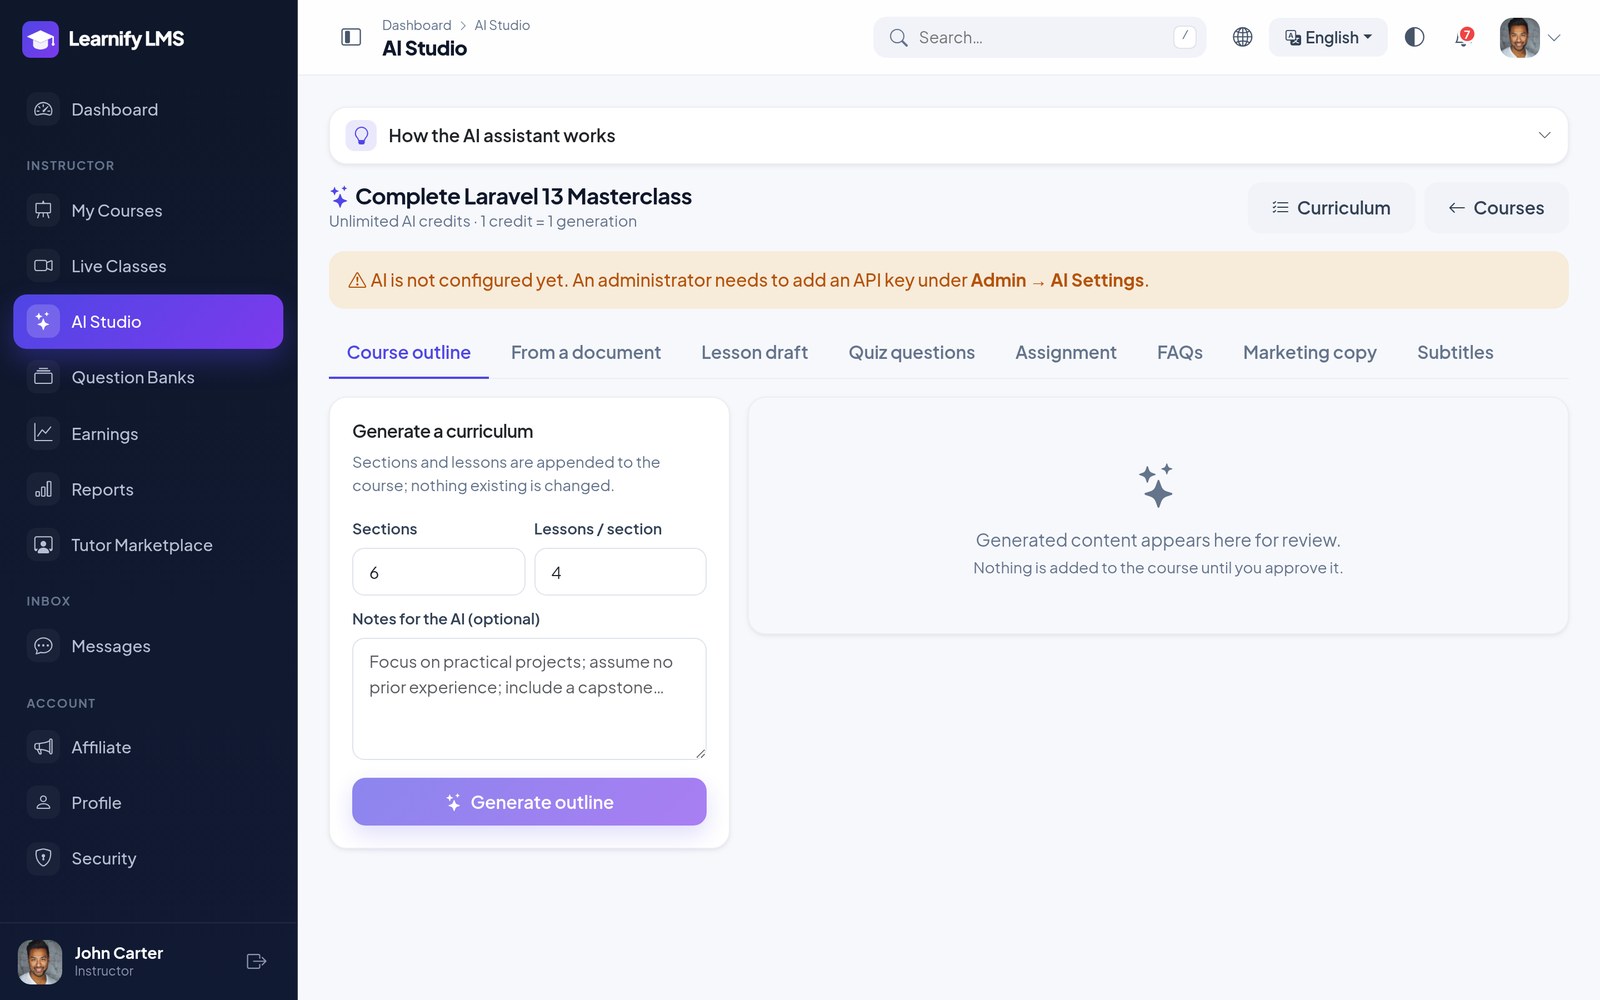
Build a course from one prompt. My Courses → Build with AI takes a short brief (“a hands-on course teaching small business owners to run Facebook ads…”) and drafts the title, sales description, learning outcomes, requirements, audience, level, category, SEO tags and a full section-and-lesson curriculum. Every field is editable, the curriculum can be unticked, and the result is created as a normal draft course.
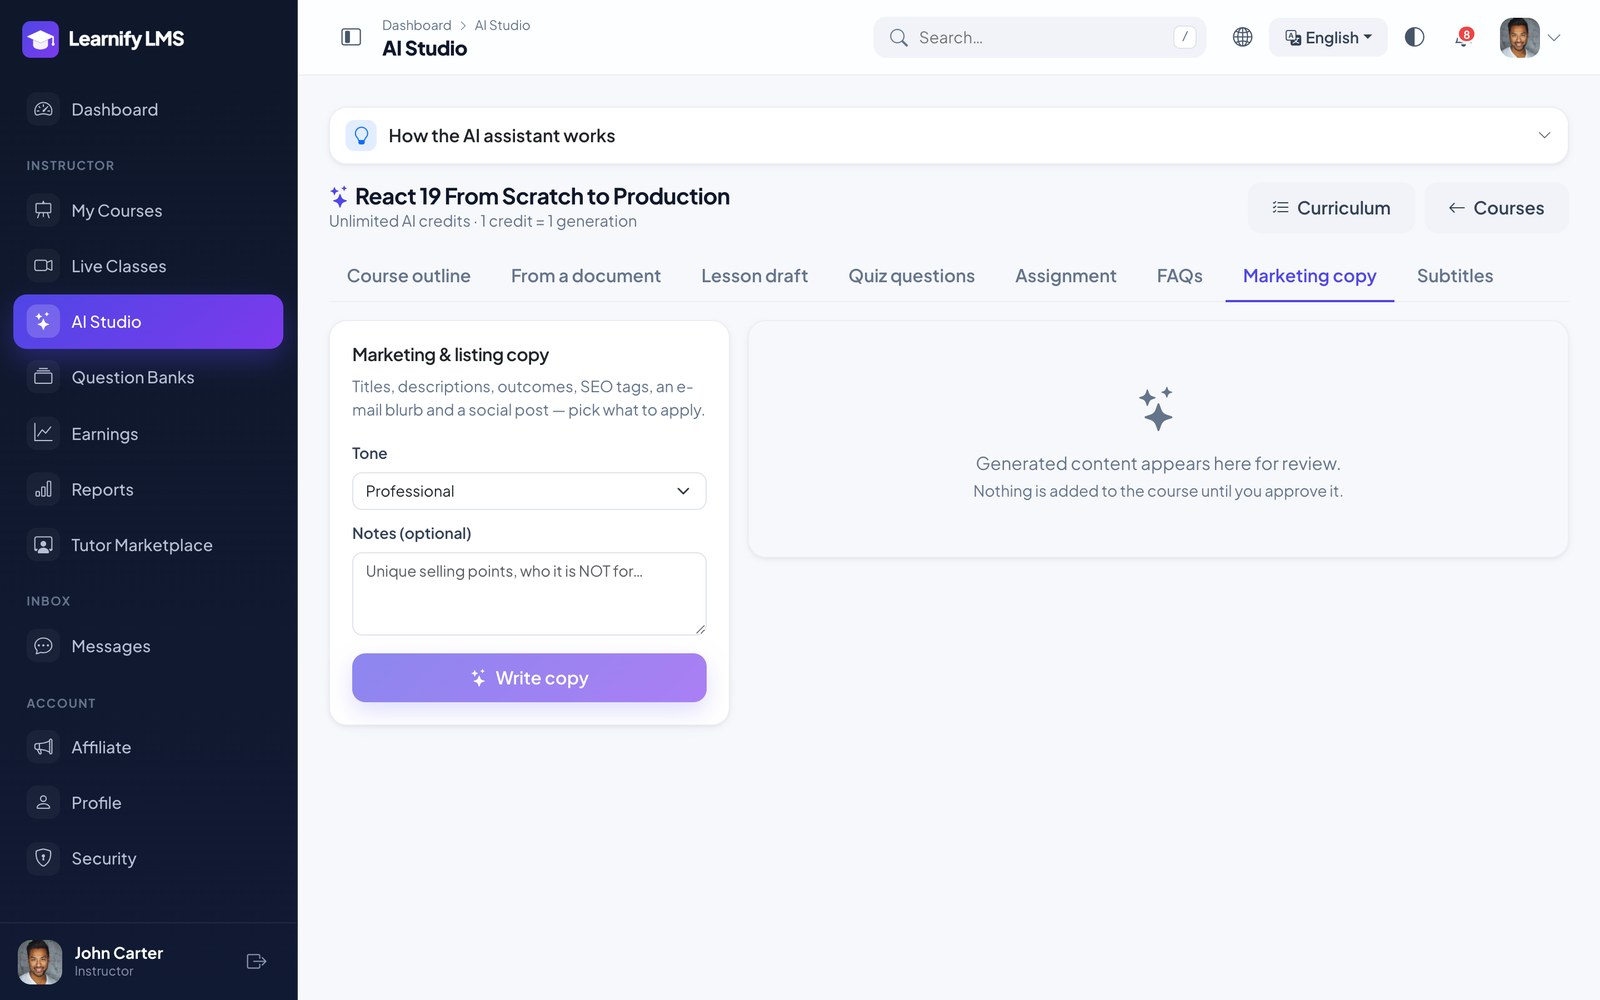
Inside a course, AI Studio has one tab per job:
| Tab | What it produces |
|---|---|
| Course outline | Sections and lessons appended to the curriculum; or from a document / transcript you upload. |
| Lesson draft | The text of one lesson, saved into a section you pick. |
| Quiz questions | Questions with explanations for a quiz or a question bank; untick any before adding. |
| Assignment | A practical brief with deliverables, accepted submission types and a marking rubric, created as an assignment. |
| FAQs | The questions buyers ask before enrolling, added to the public course page. |
| Marketing copy | Three title options, short and long descriptions, outcomes, SEO title/description, an email blurb and a social post — tick the fields to apply to the course. |
| Subtitles | Translates an existing subtitle track into another language. |
Everything lands as a draft to review and rewrite before publishing. Generations use the API key set in Admin → AI Settings and each one is recorded, so cost is visible. Students get an AI tutor inside each course that answers from the course content, when the module is enabled.
AI output is a first draft, not a finished lesson. You are responsible for what you publish.
AI picks for learners. With AI Settings → Students can ask AI to suggest their next courses on (default), the student dashboard shows an “AI picks for you” card: an optional goal, then three or four catalogue courses with a personal reason, based on enrolments, progress, quiz averages and wishlist. Results are cached for seven days per learner and goal, and a credit is spent only when the learner presses the button.
Certificates
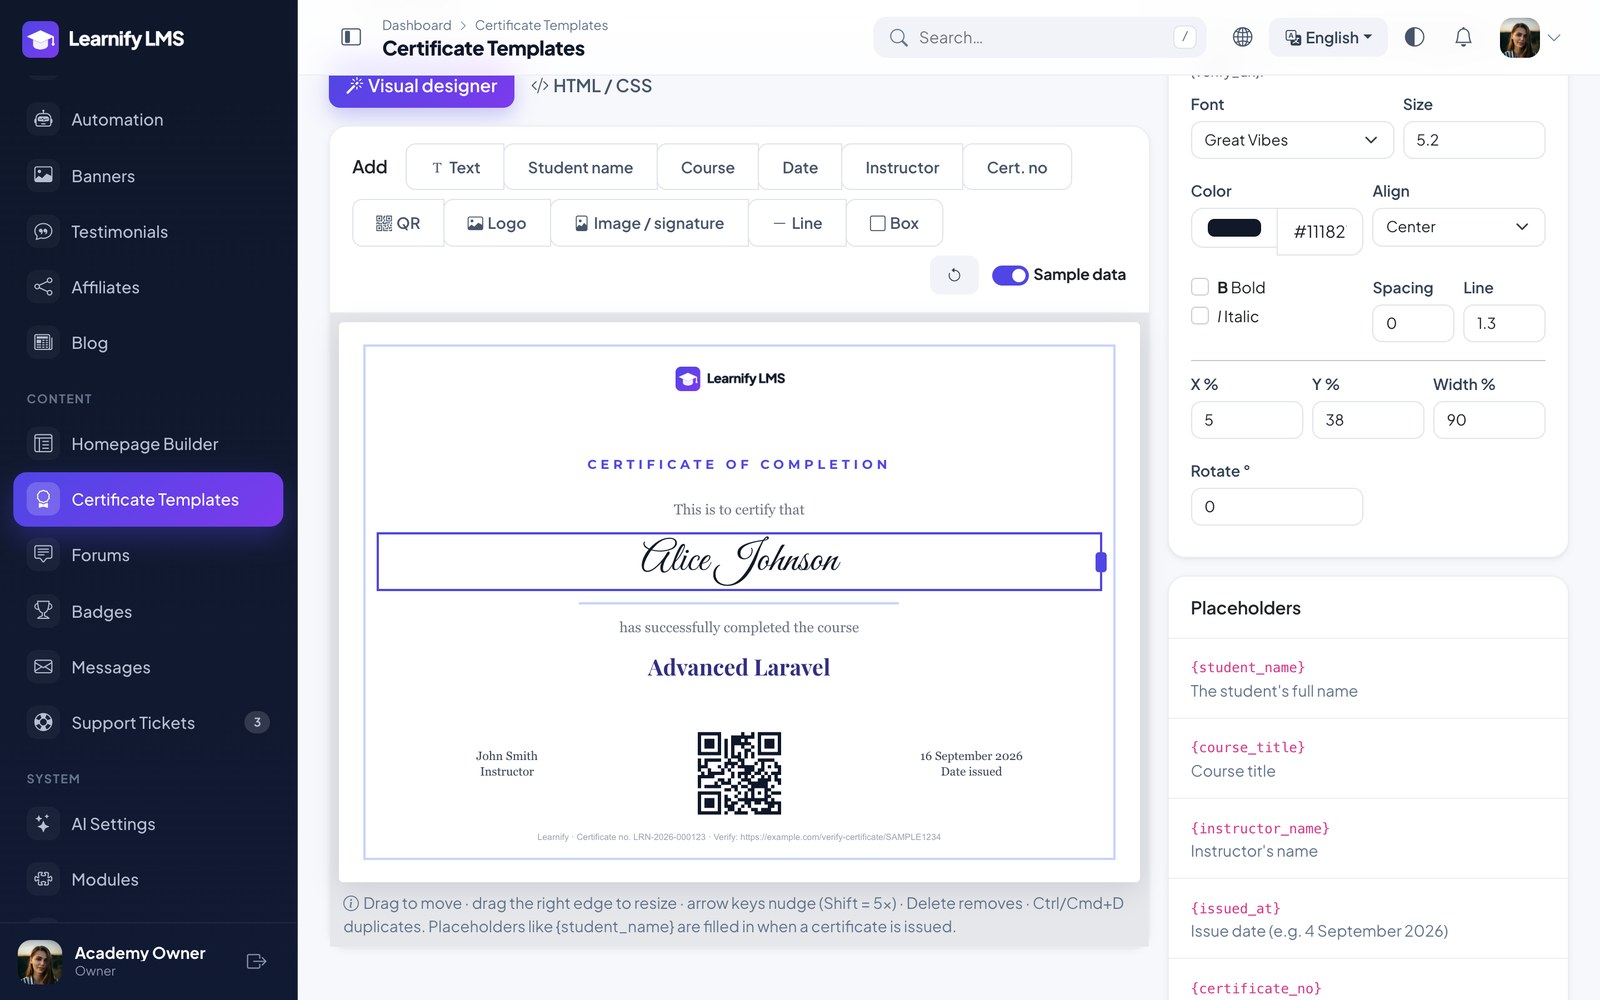
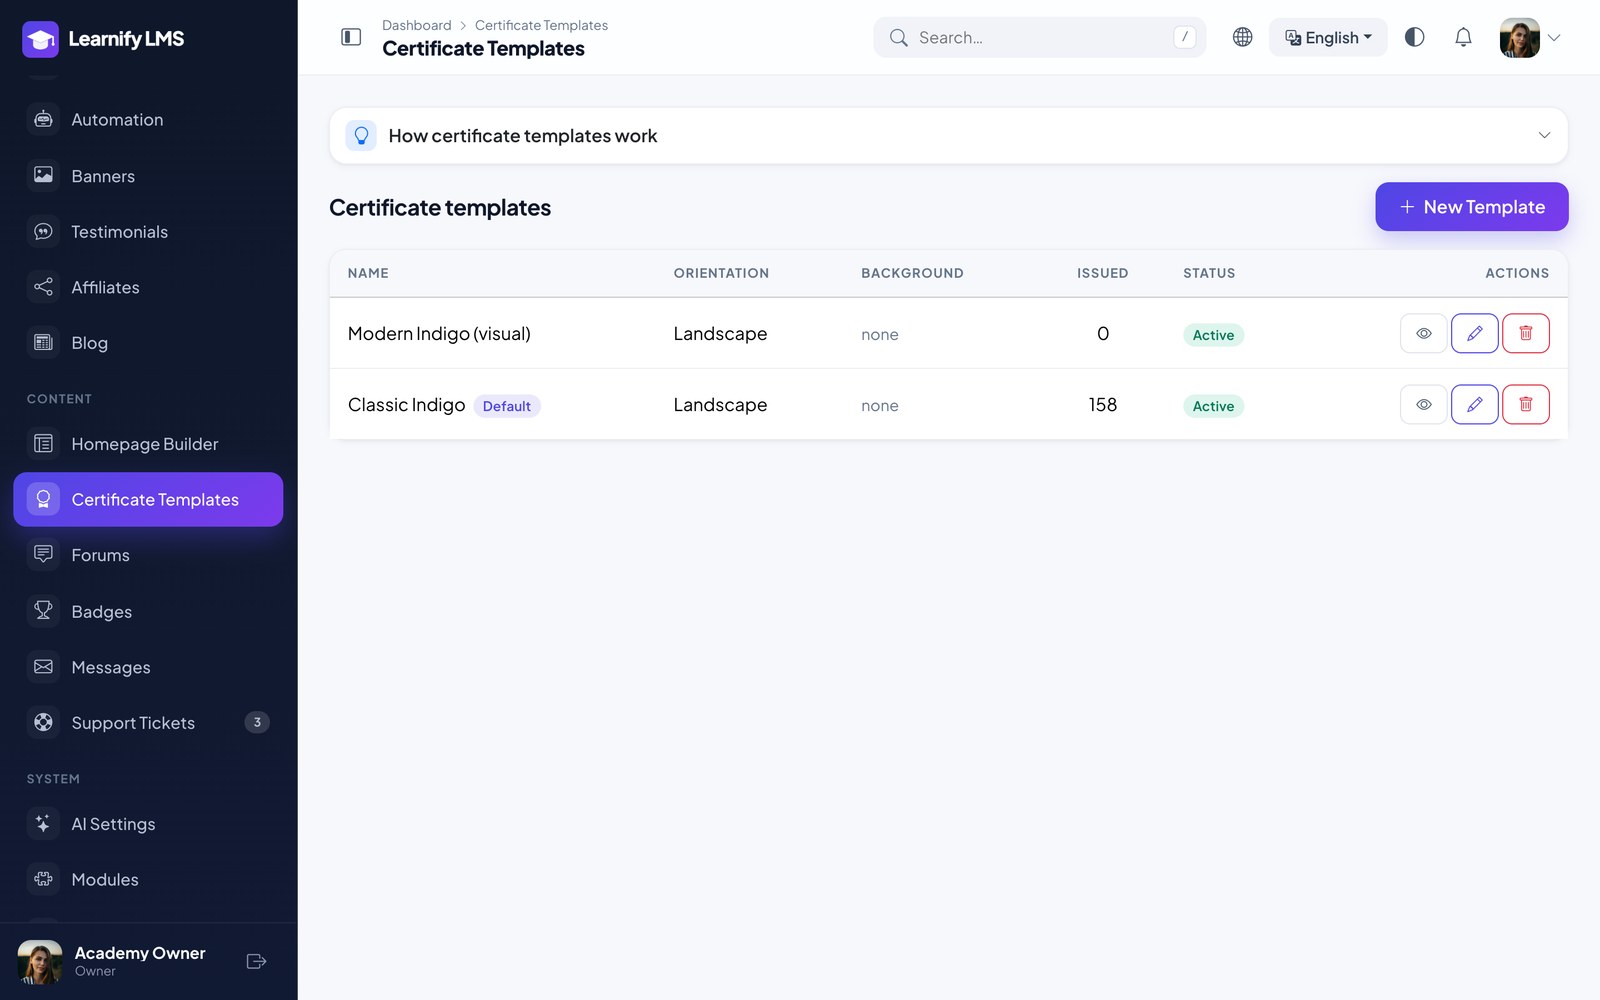
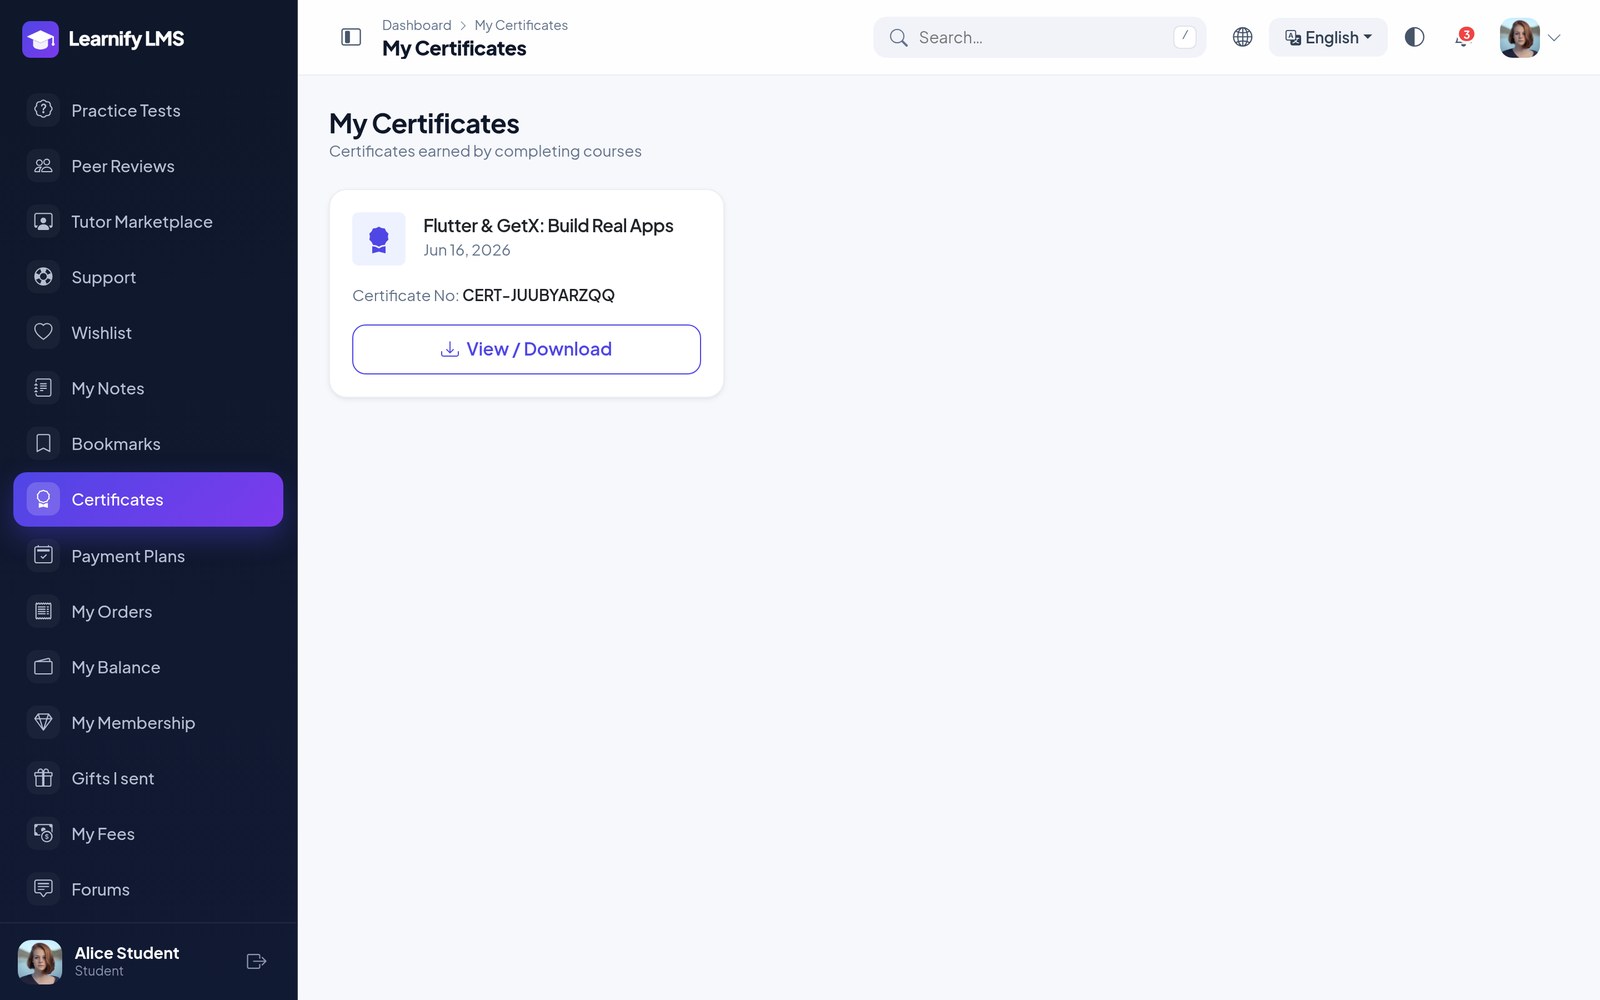
Manage → Certificate Templates is a drag-and-drop designer. Upload a background, then place text, the student name, course, date, instructor, certificate number, the academy logo, the verification QR code, a signature or seal image, lines and boxes anywhere on the sheet. Drag to move, pull the edge to resize, pick fonts (including script fonts), colours, alignment and rotation; a sample-data switch shows exactly what a student will get. Prefer code? The HTML / CSS tab shows the generated markup and can be edited directly. Set one template as the default and it is issued automatically when a student completes a course; the student is emailed with the download and verification links.
Every certificate gets a verification code, and /verify-certificate is a public page where
an employer can check one.
Paths, Bundles & Memberships
Four ways to package courses beyond selling them one at a time:
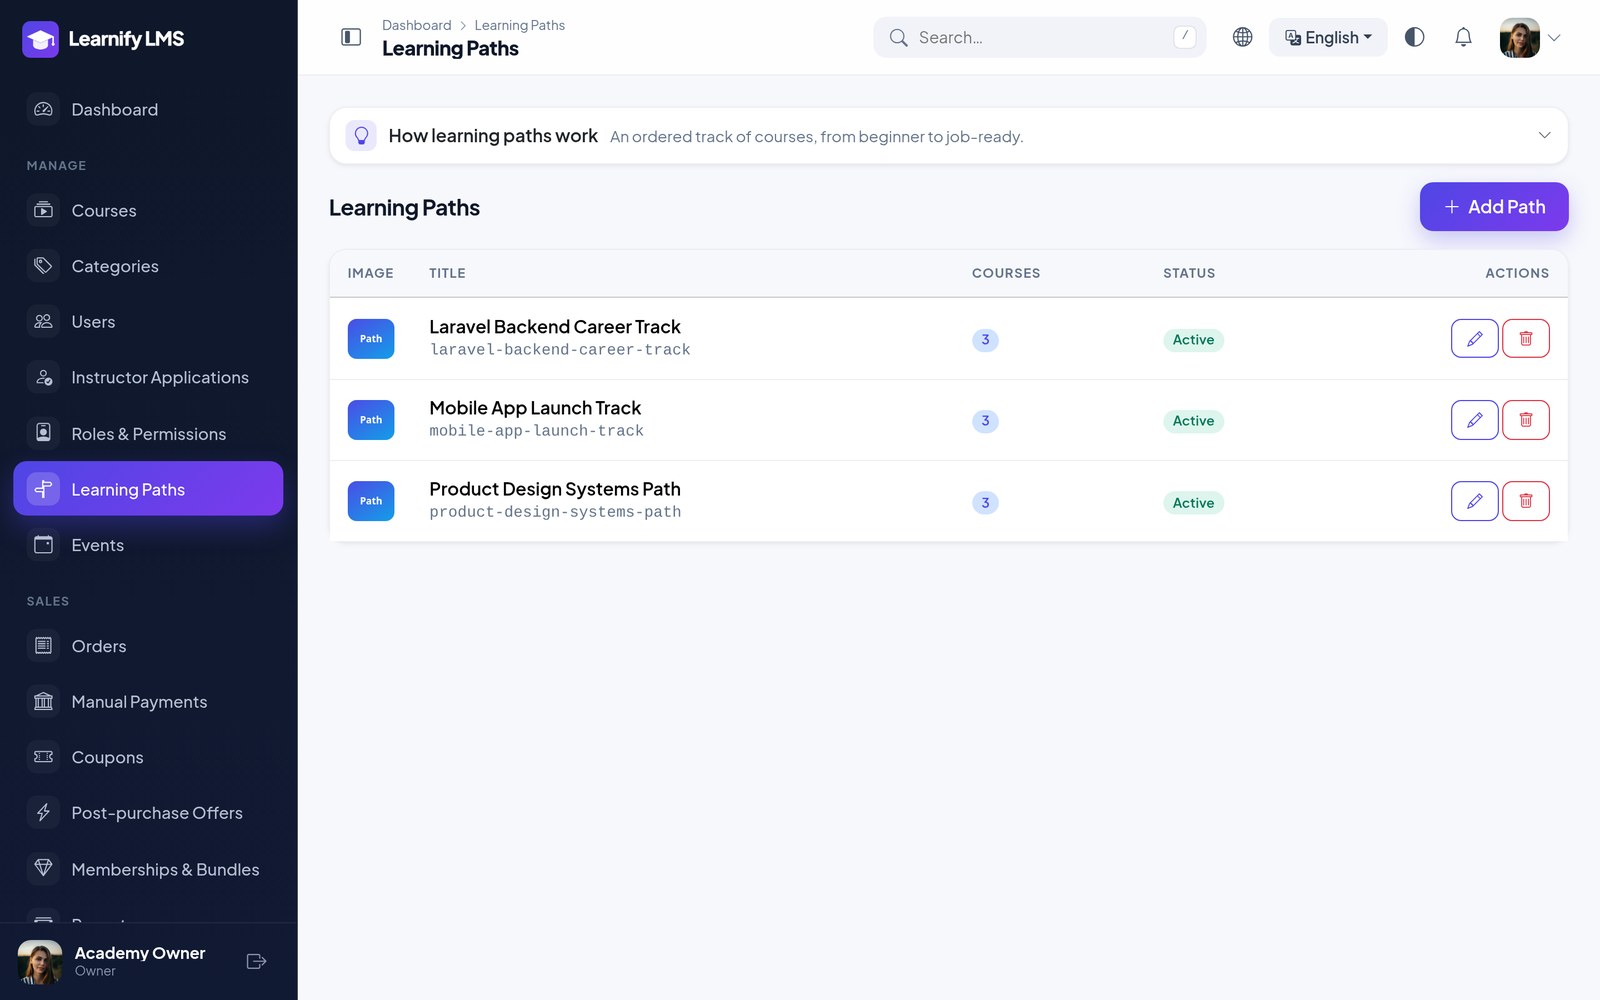
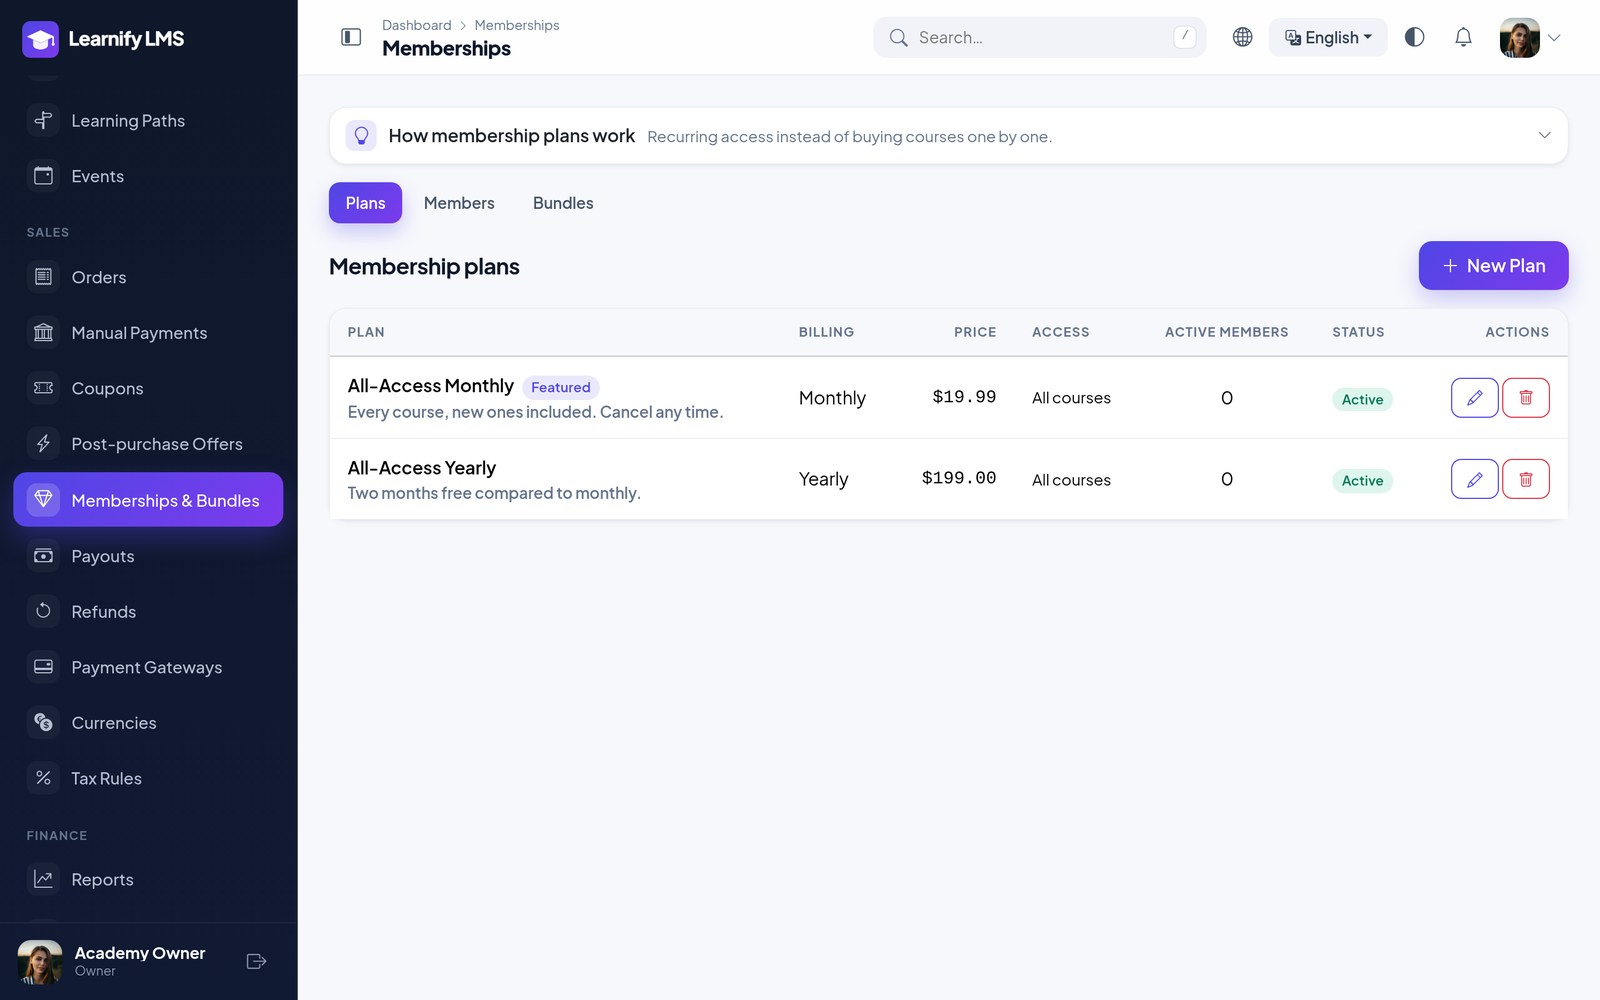
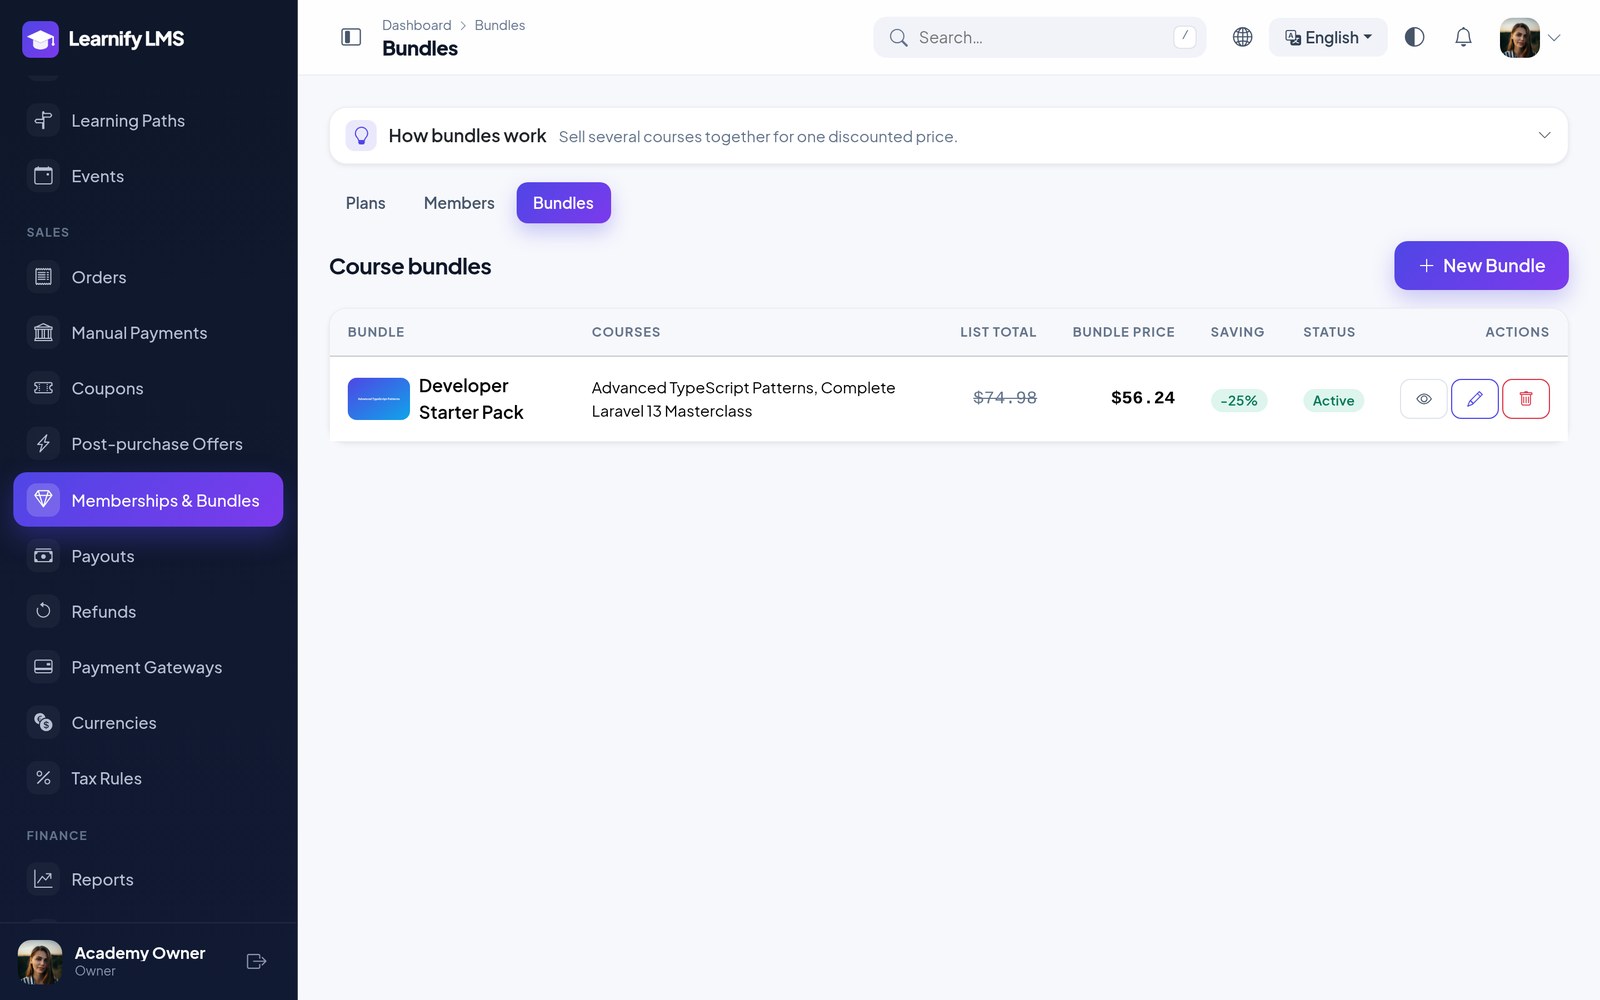
| Type | What it is |
|---|---|
| Learning path | An ordered sequence of courses with its own landing page — “become a full-stack developer”. |
| Bundle | Several courses sold together at one price. |
| Membership plan | Recurring access, monthly or yearly, to everything or to selected courses. |
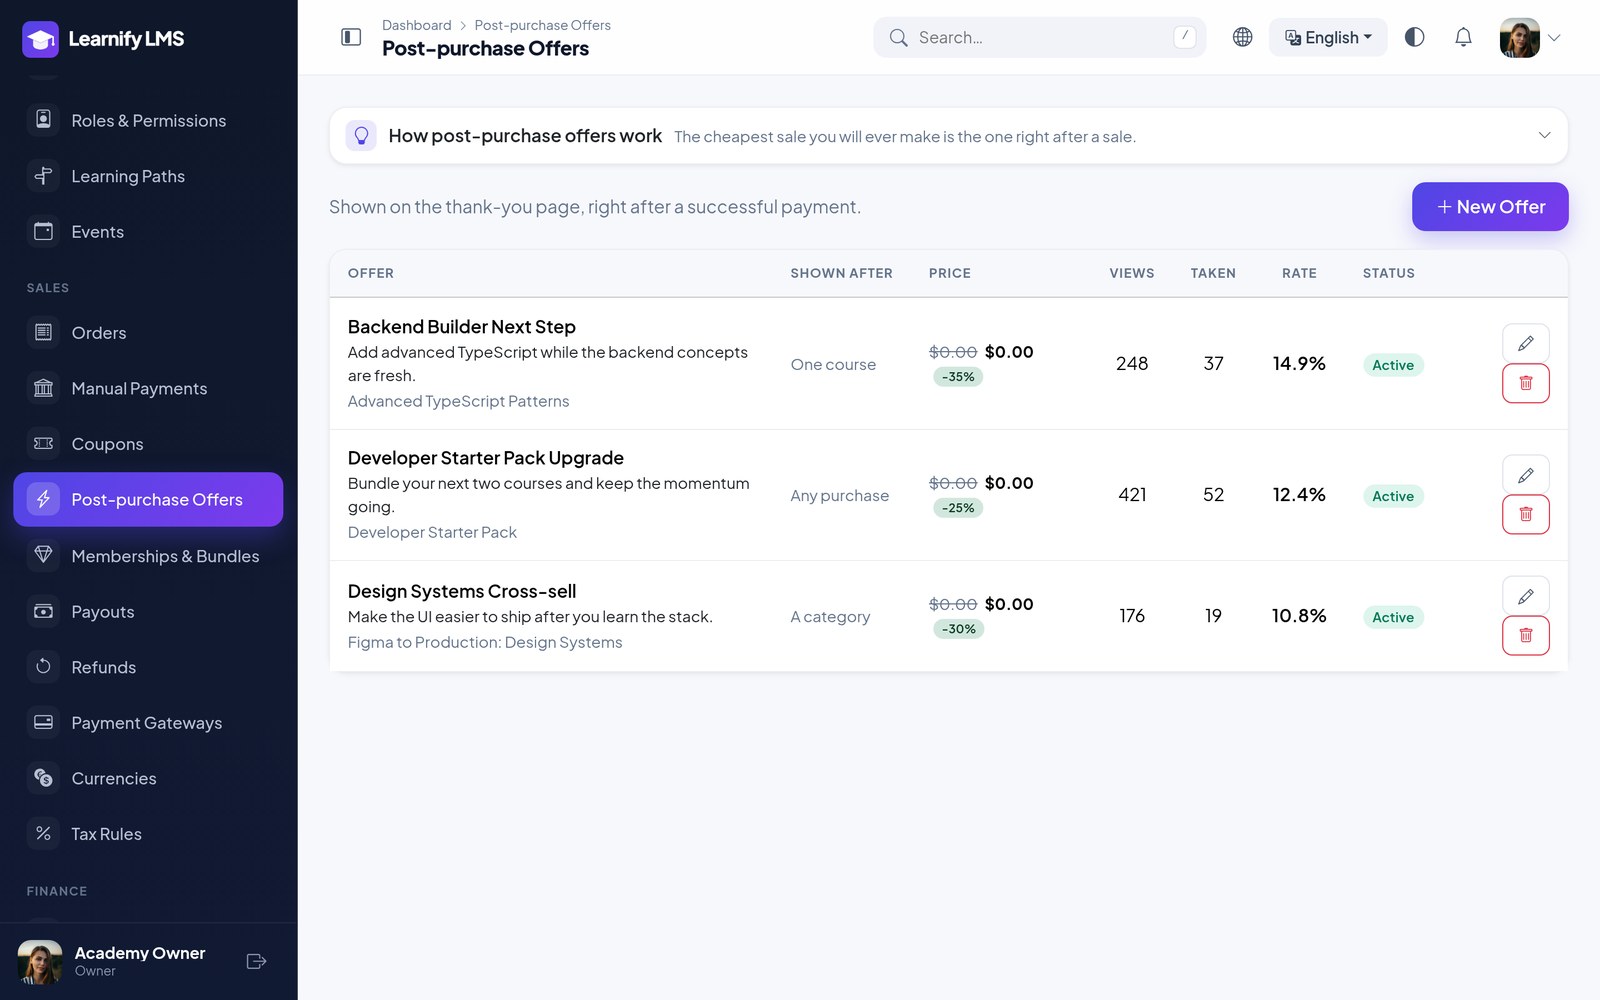
| Upsell offer | A one-time offer shown right after checkout. |
Users, Roles & Permissions
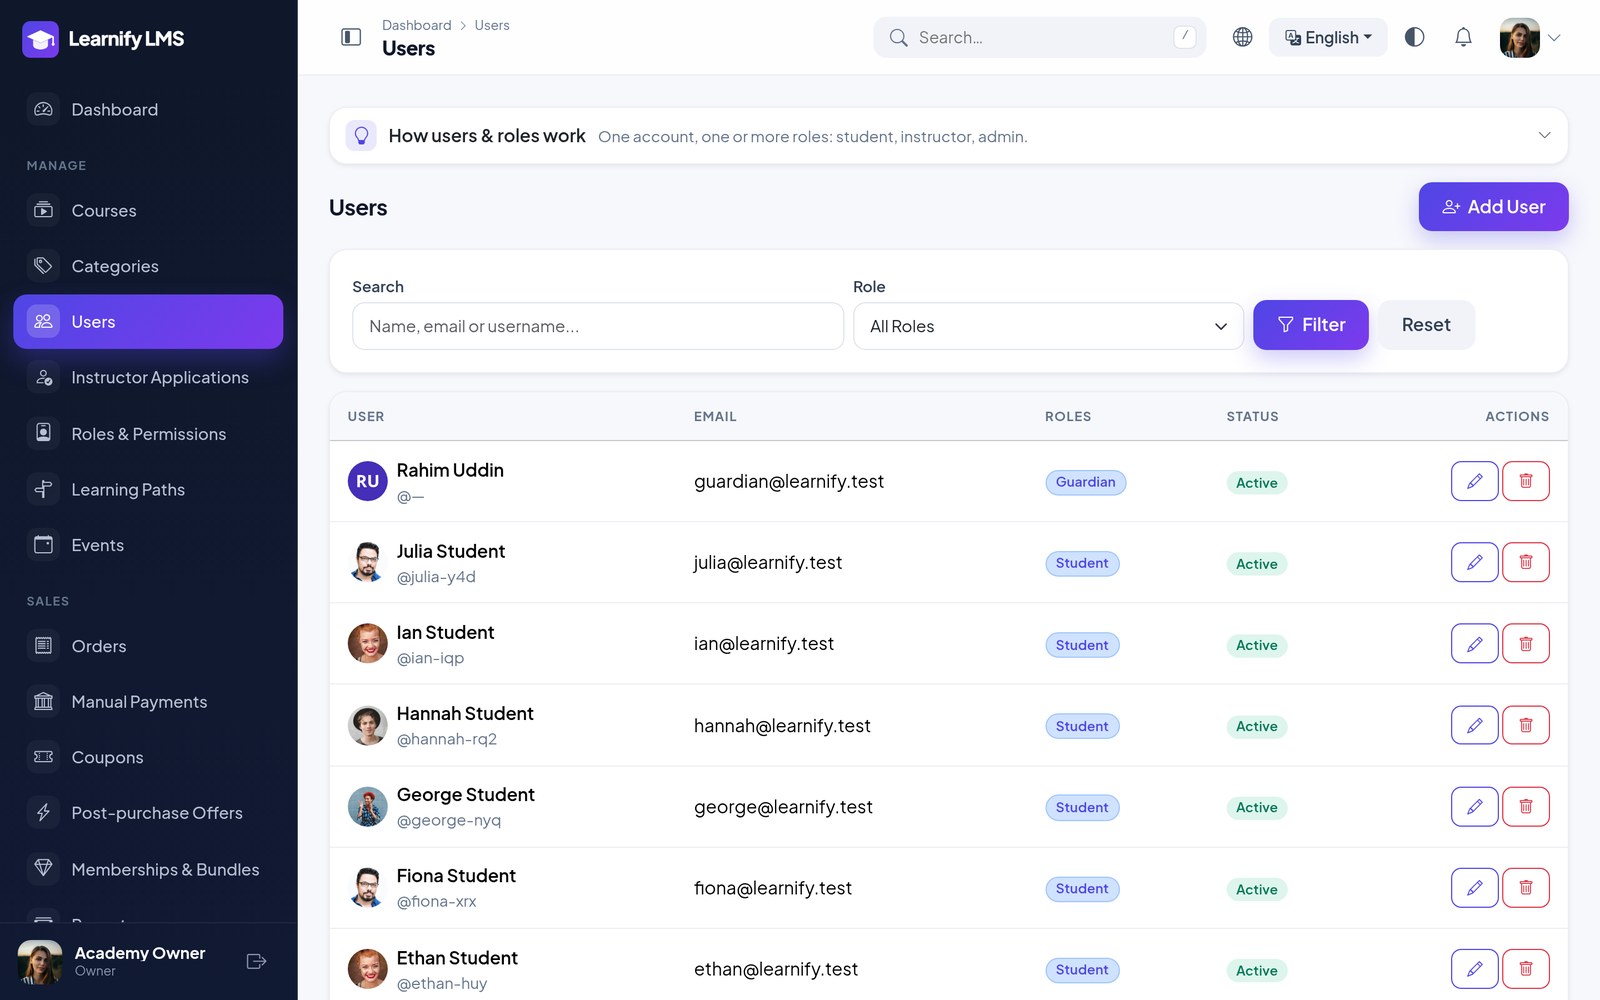
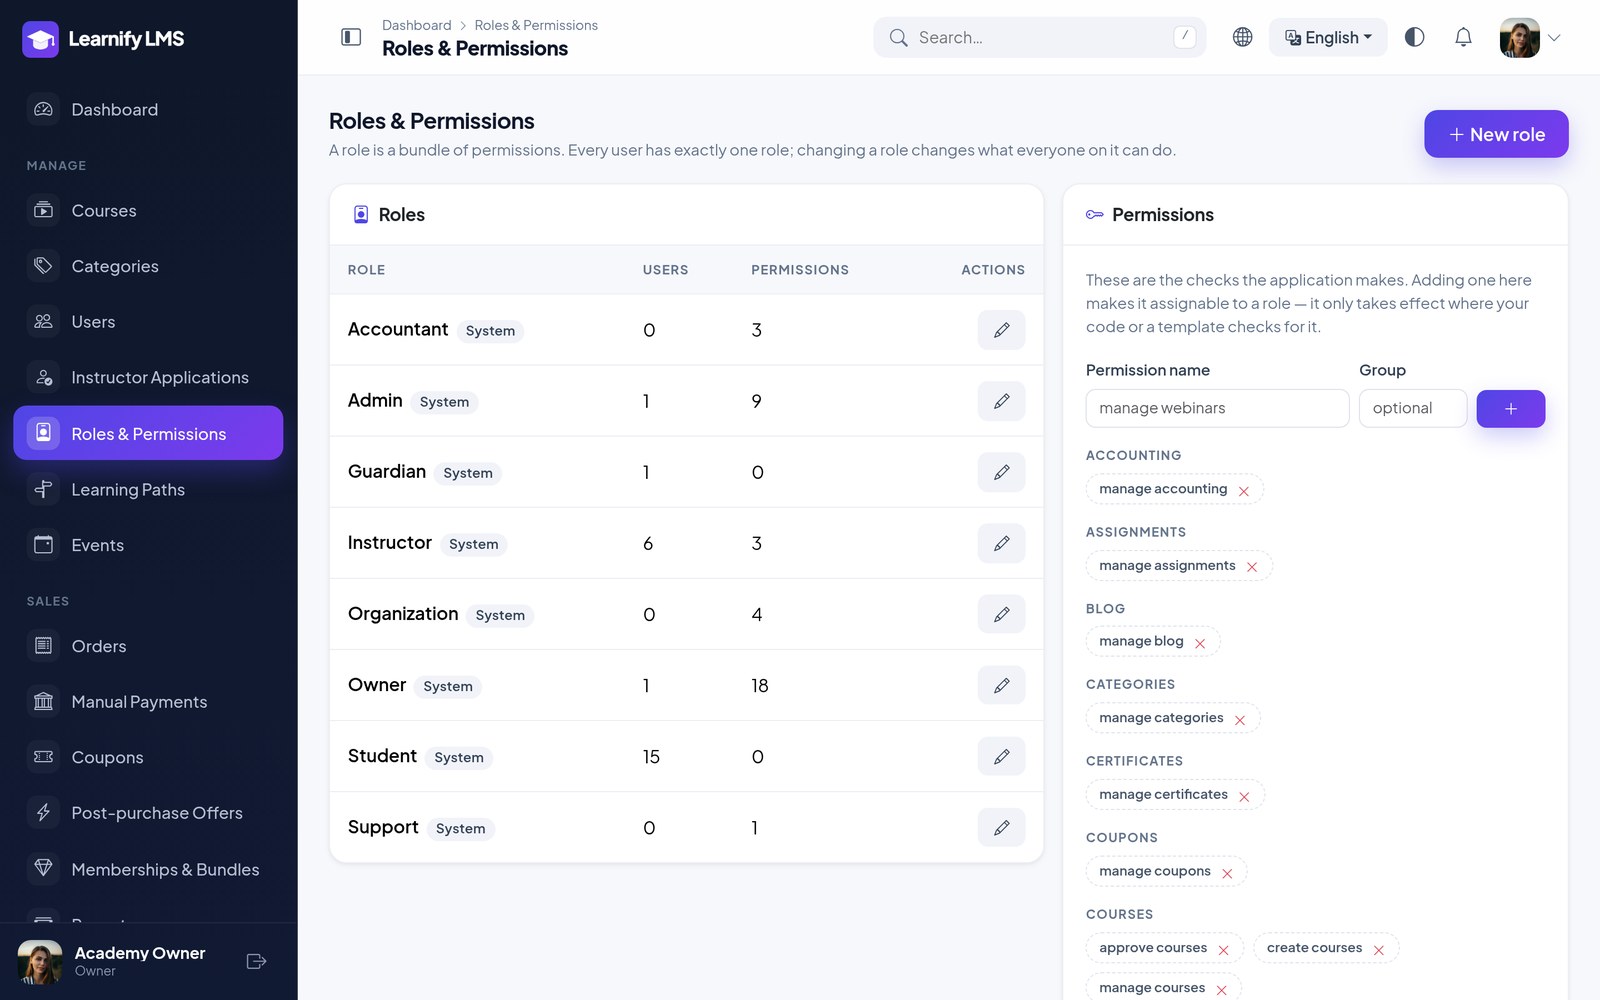
One user list for everyone, filtered by role. Roles are editable and permissions are granular, so you can create a support or accountant role that sees exactly what you want it to.
Instructors & Commission
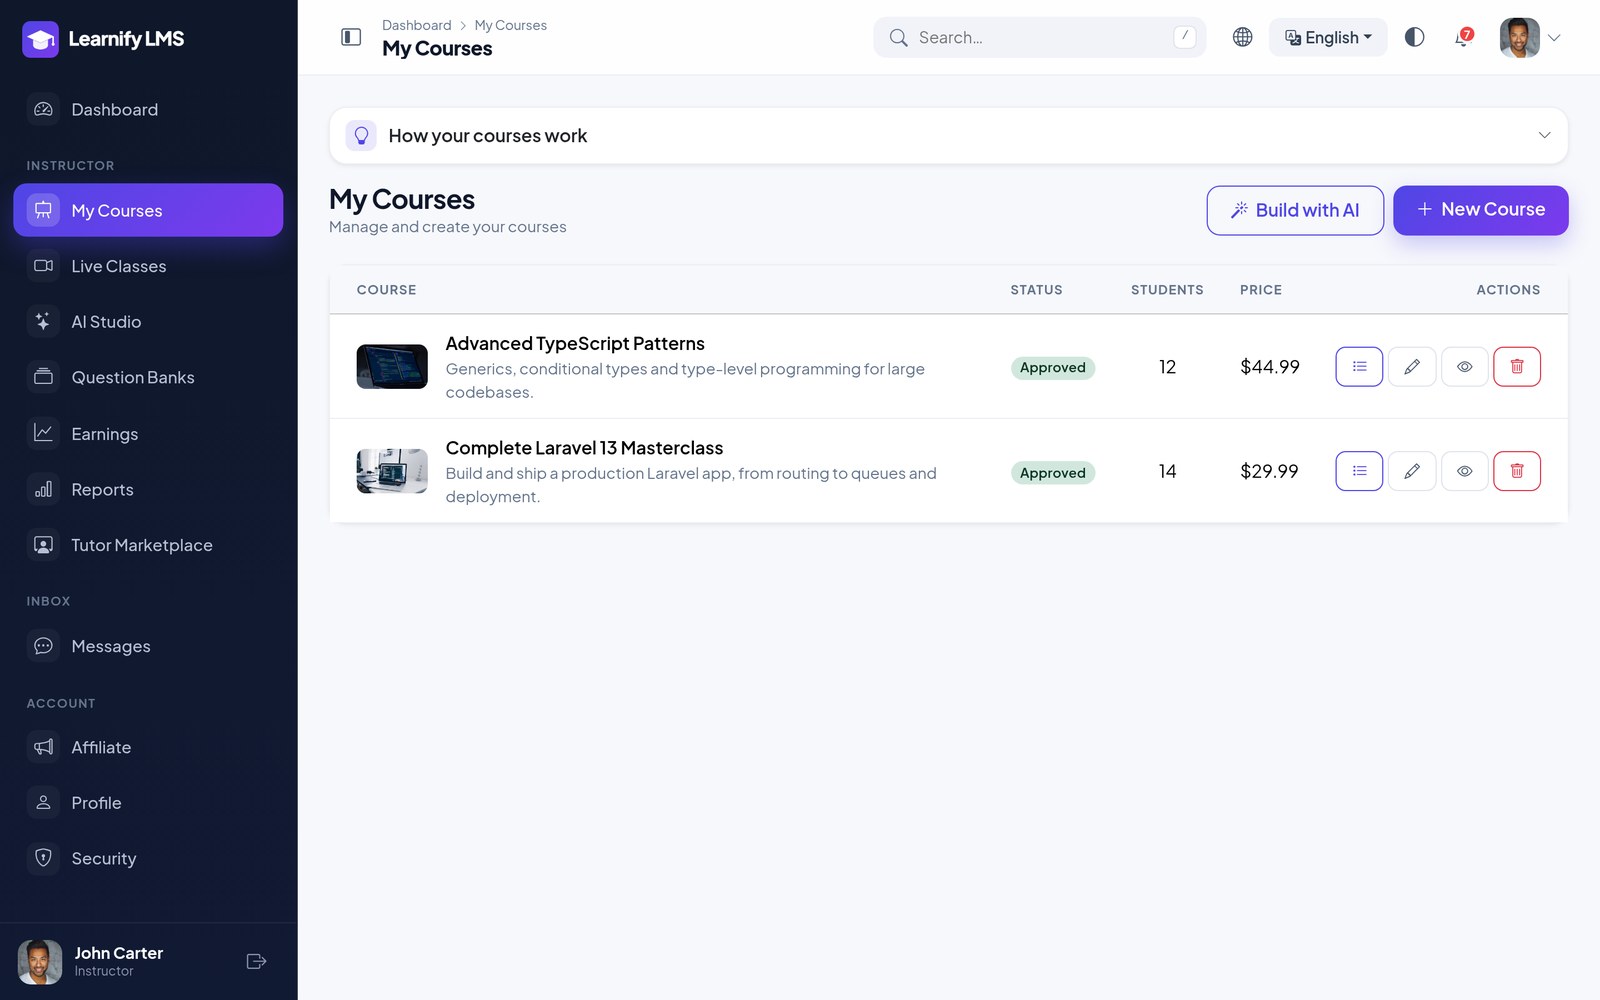
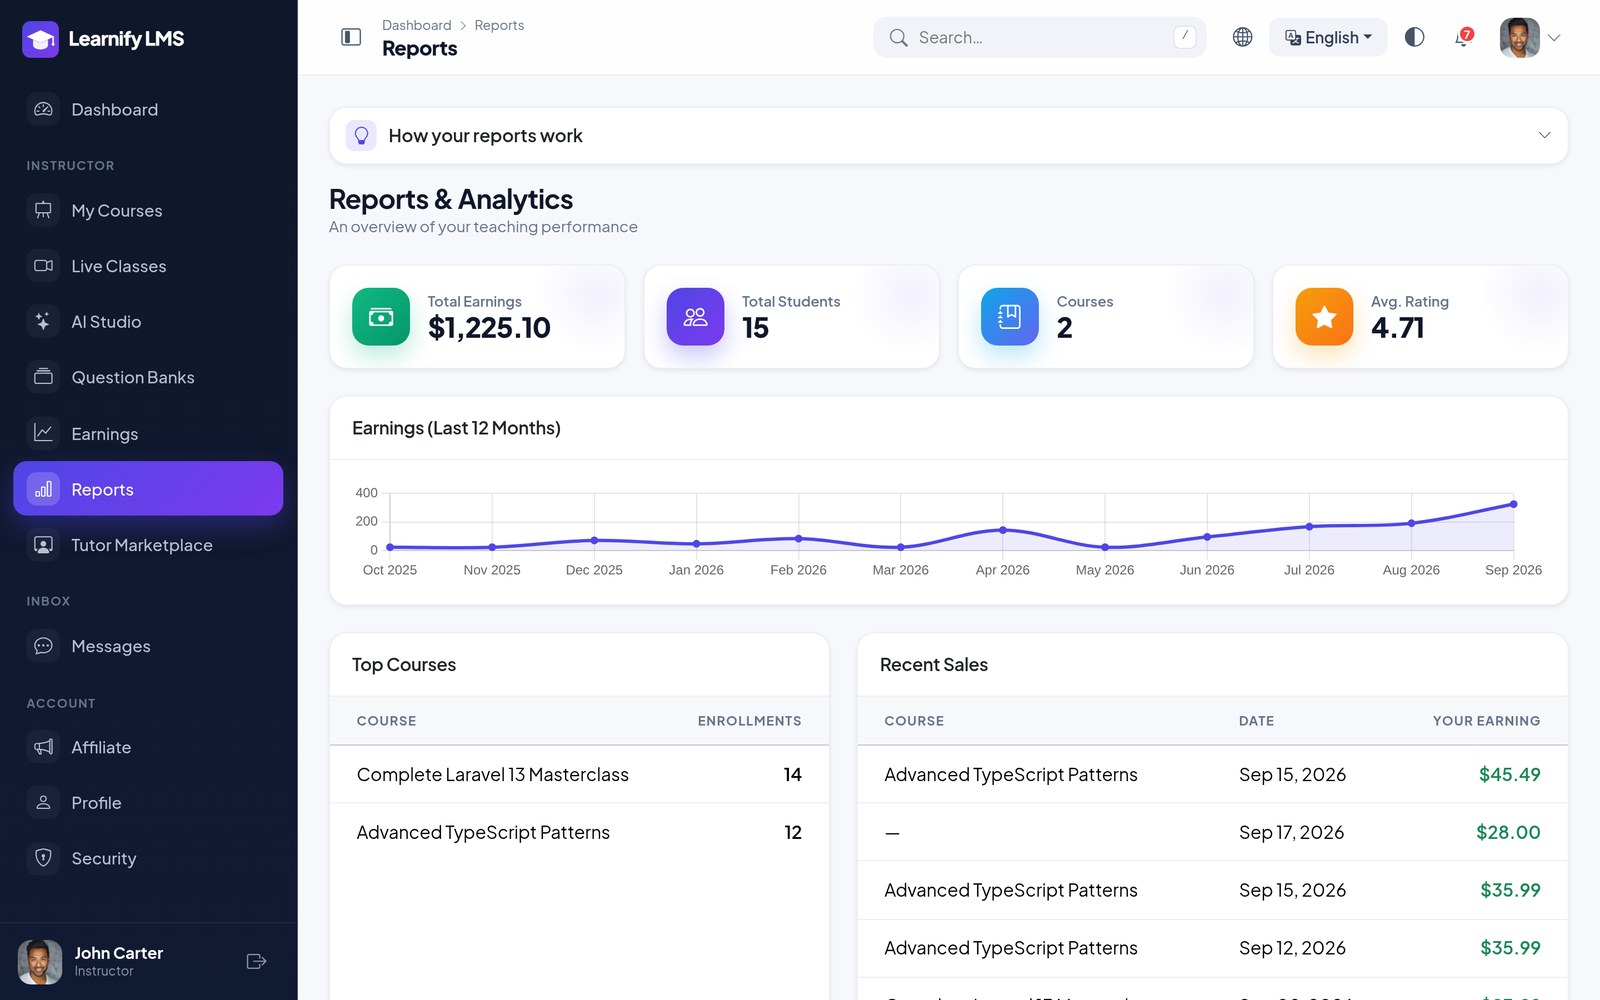
An instructor gets a workspace of their own: their courses, the curriculum builder, quizzes, assignments, students, live classes, earnings and reports.
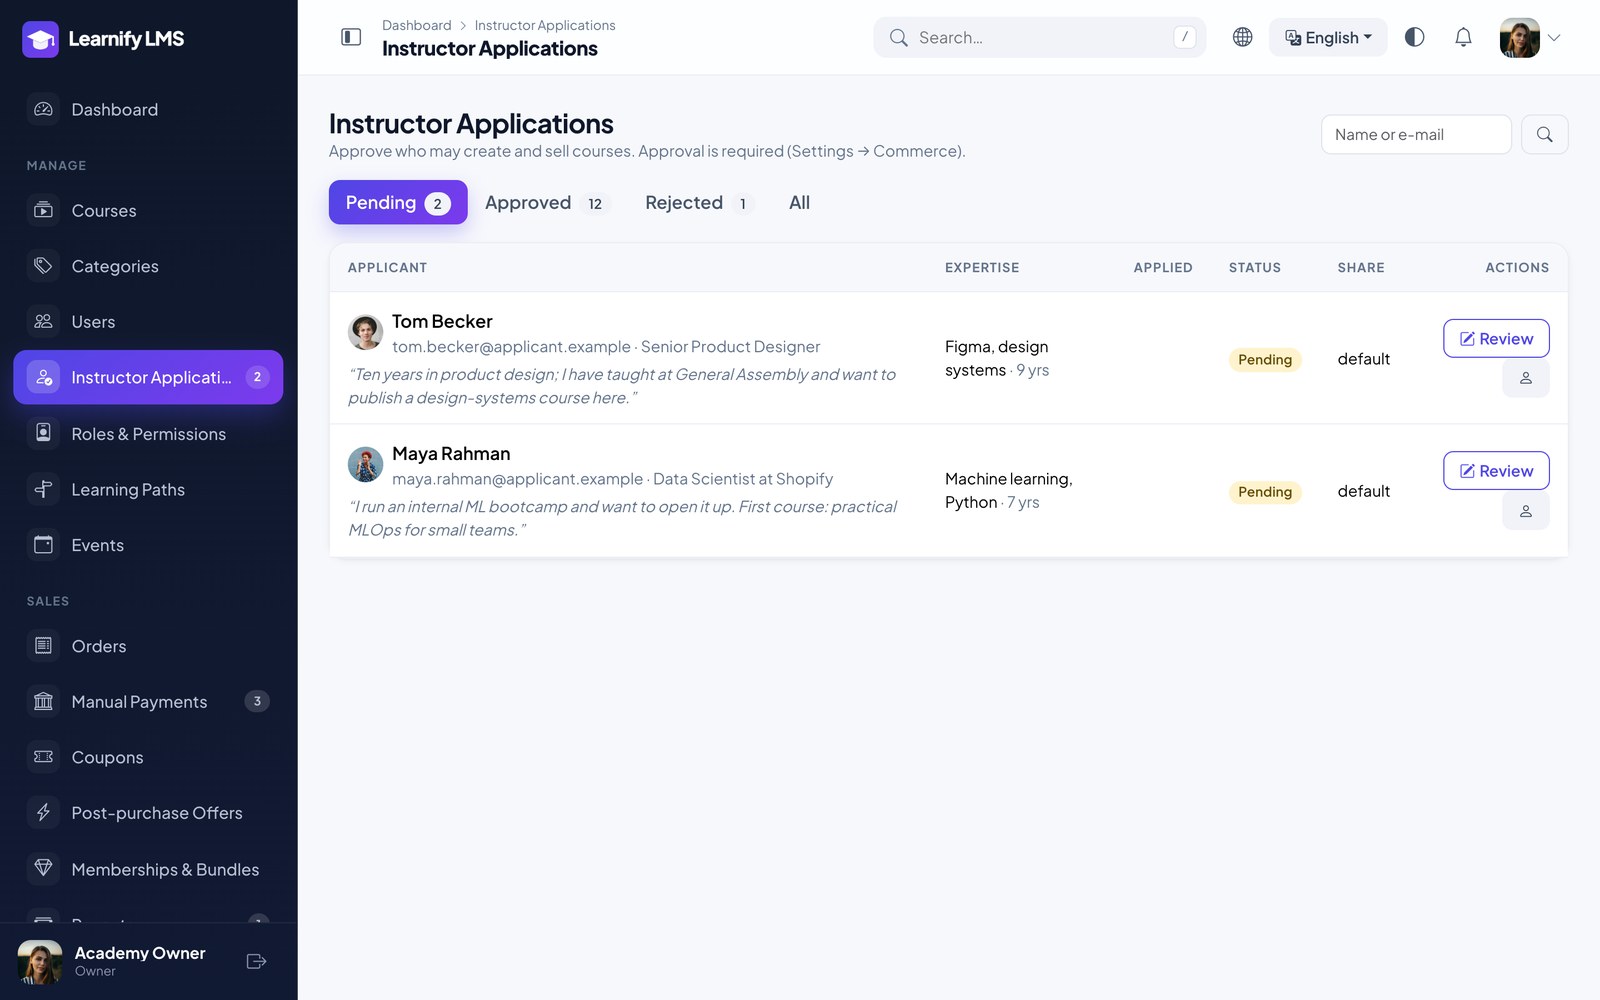
Applications. Anyone who registers as an instructor, or applies from their student account (Account → Become an Instructor), lands in Manage → Instructor Applications. Until you approve them they can set up their profile but not create courses; approving grants the role and emails them, rejecting sends your note. Switch this off under Settings → Commerce to approve everyone automatically.
Single academy or marketplace? Settings → Commerce → Marketplace mode decides whether visitors can sign up or apply as instructors at all. Off, the registration forms (web and app) only offer the student role and “Become an Instructor” disappears; you add teachers yourself under Users. Everything else — revenue share, payouts, the instructor workspace — keeps working.
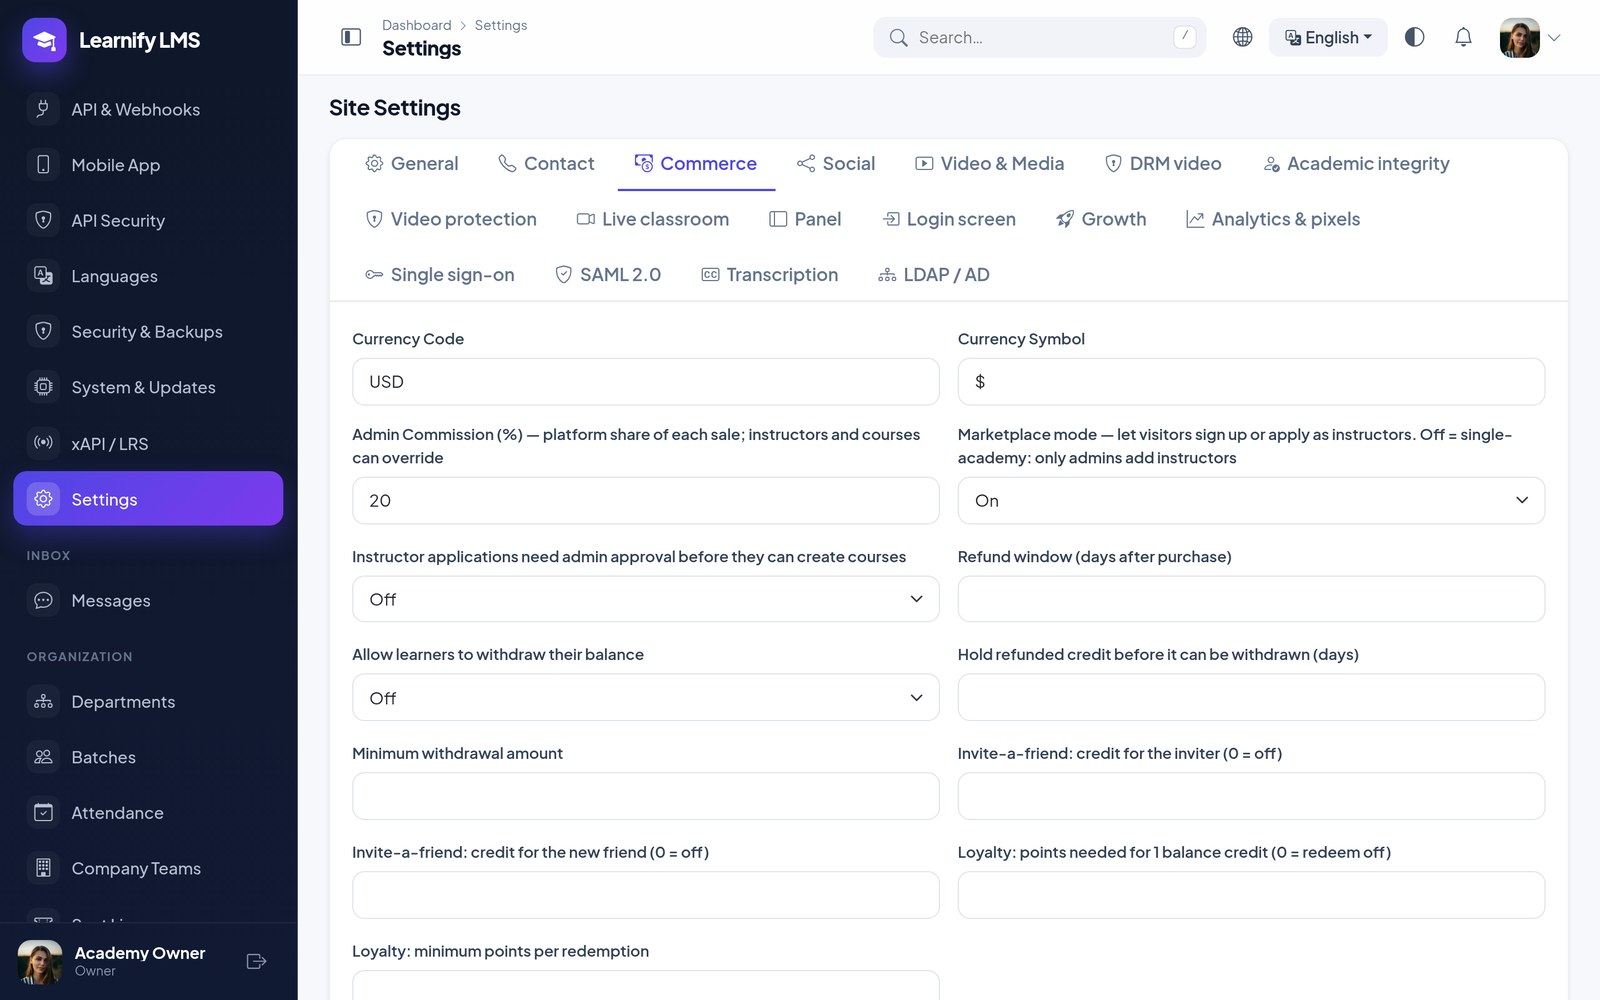
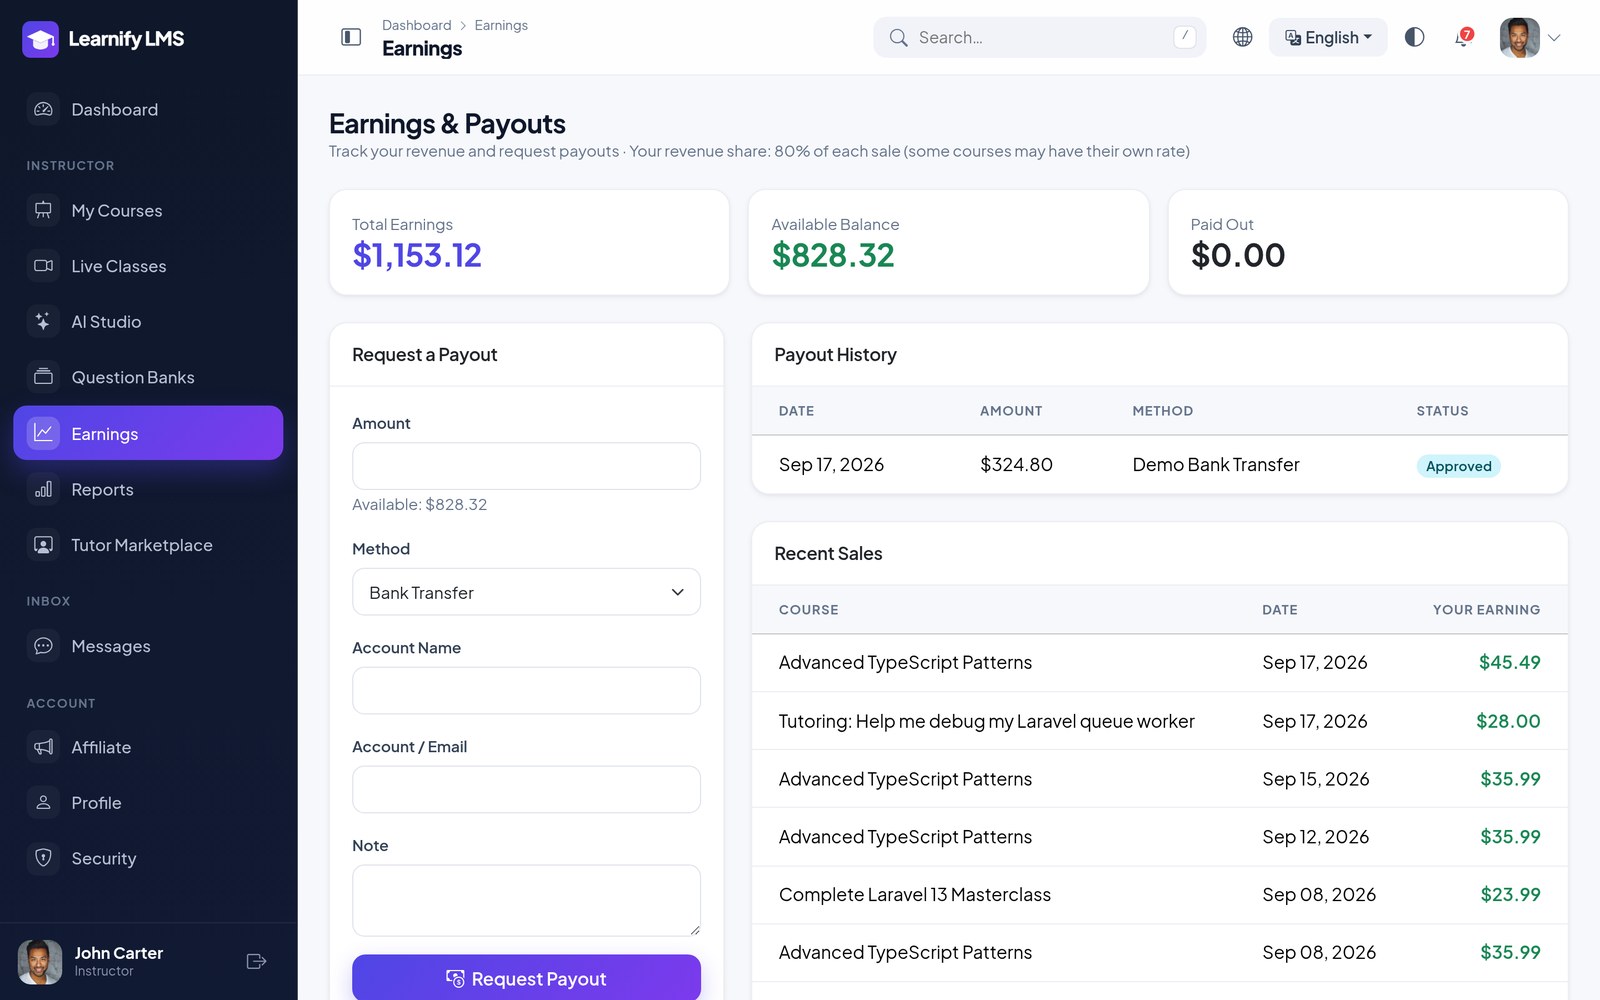
Revenue share resolves from the most specific rule: a rate set on the course itself, else the instructor’s own rate (on the user or the application), else the global admin commission. The course page in the admin panel shows the split in force and where it comes from; instructors see their share on the Earnings page. Every sale splits automatically into an instructor share and a platform share. Under Settings → Commerce you can also set an own-referral share: when a student signs up through an instructor’s own affiliate link and buys that instructor’s course, the instructor gets this (usually higher) share instead and no separate affiliate commission is paid for the sale. Leave it blank to split every sale the same way. The split is taken on what the buyer actually paid for the course: a coupon is spread across the order’s lines and shared by both sides, tax is never part of the instructor’s share, and a 100% coupon earns the instructor nothing.
Students & Progress
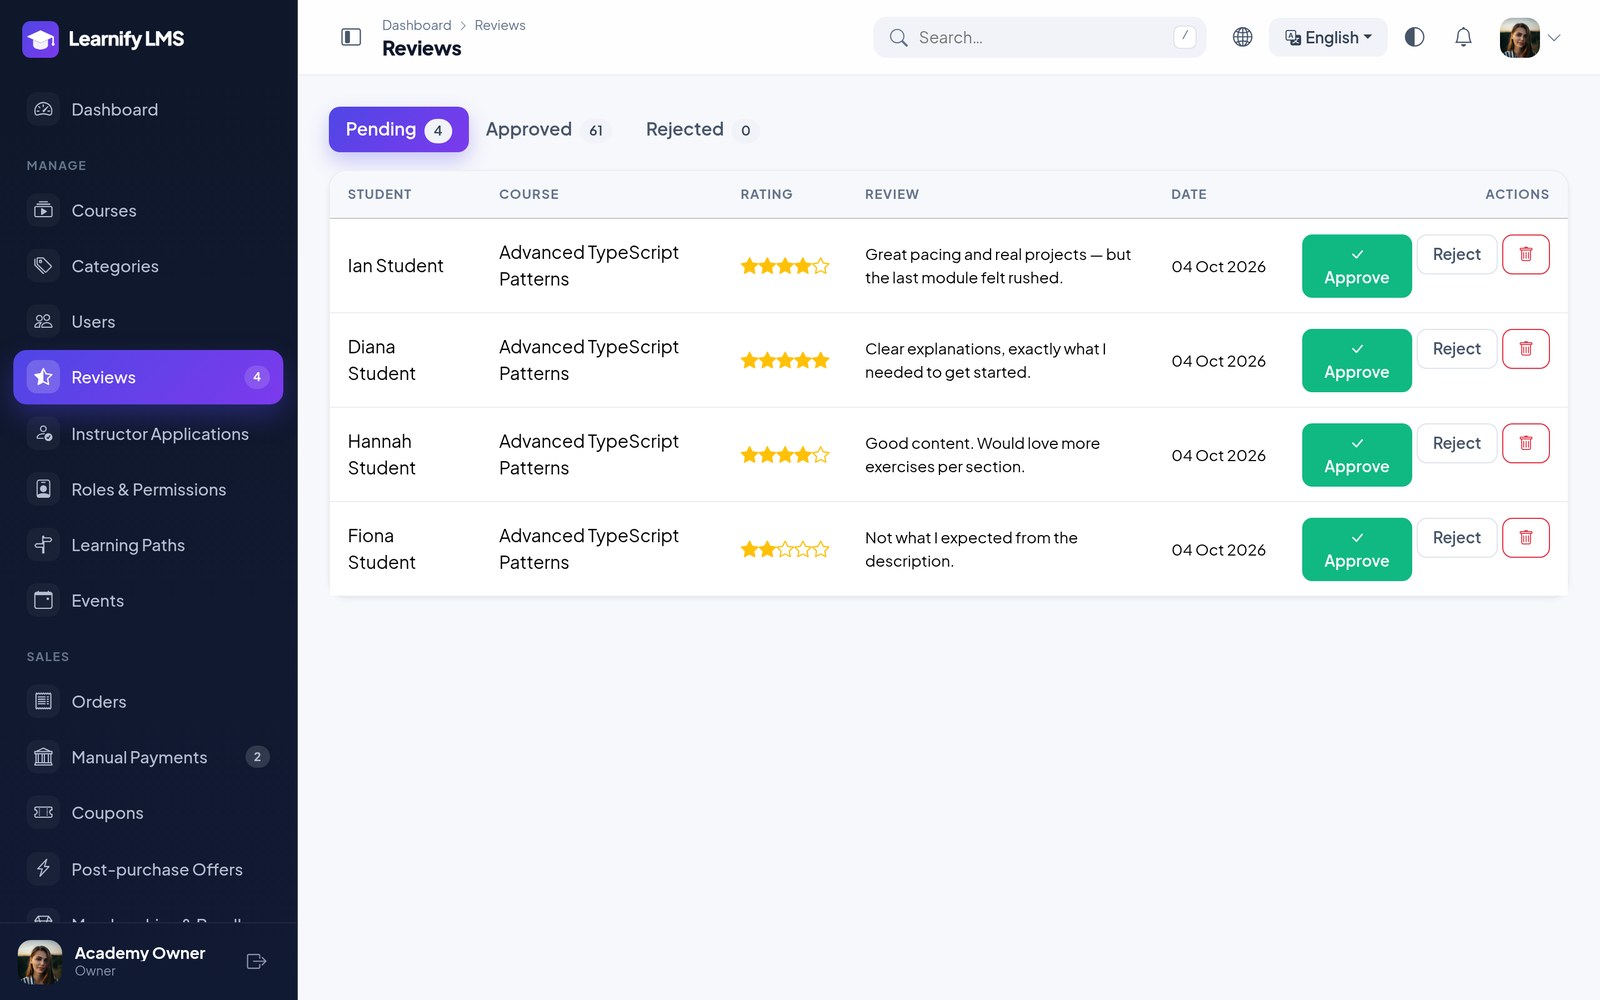
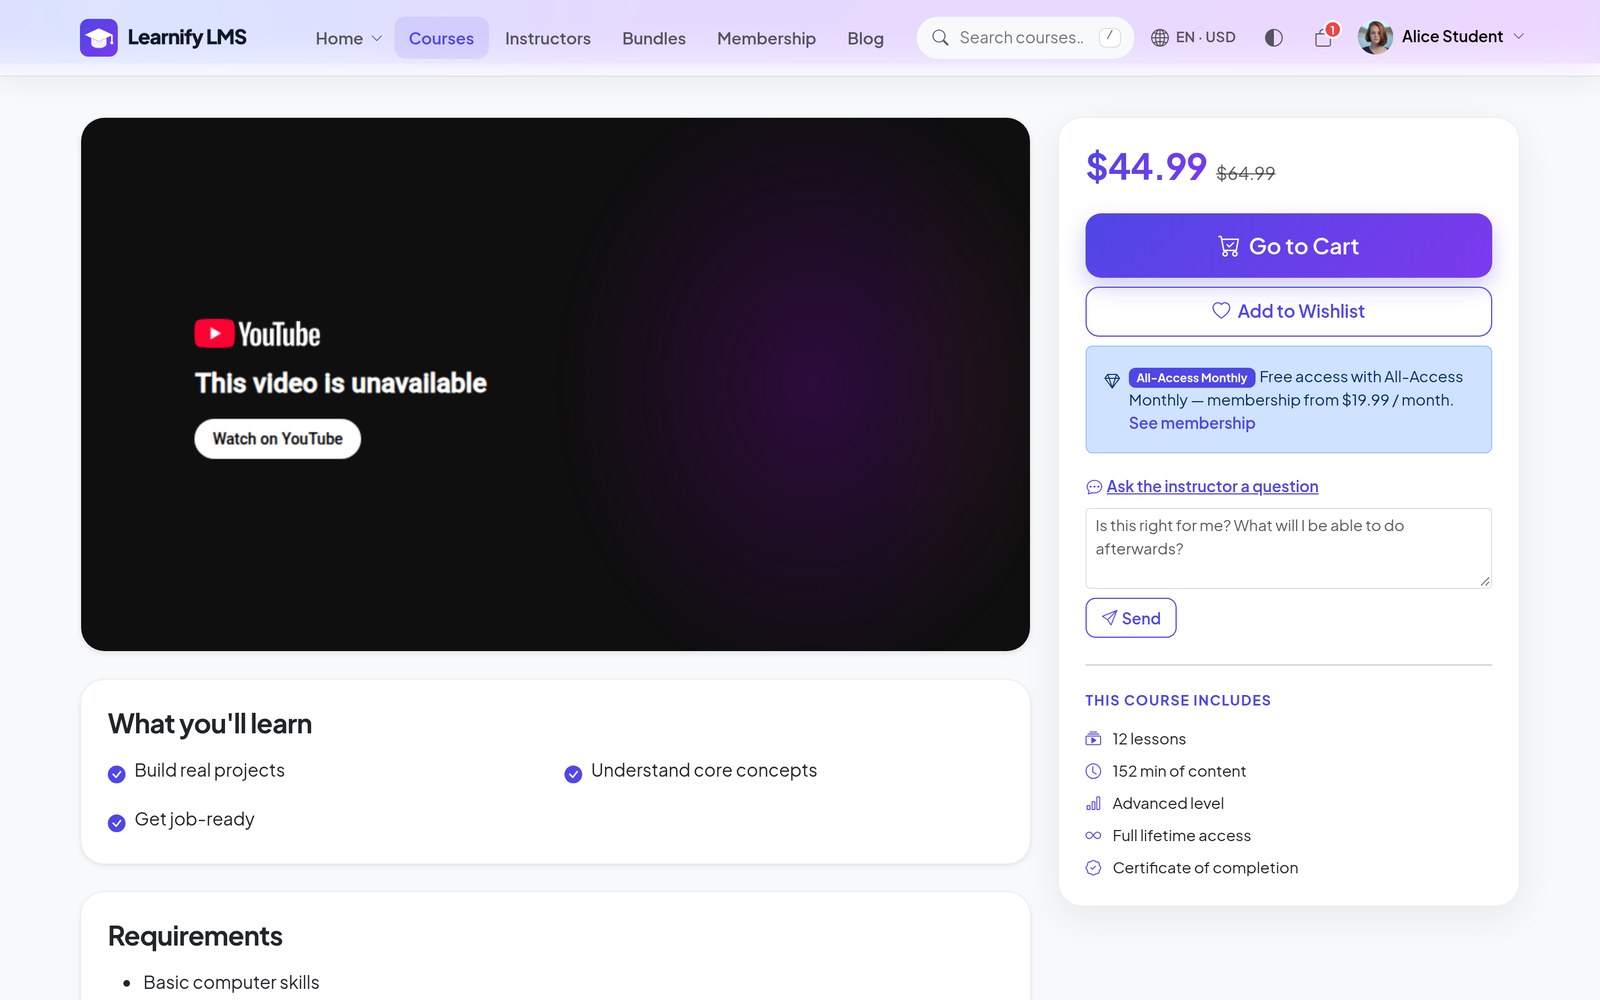
Reviews. Turn on Settings → Commerce → Hold new course reviews and every new review waits under Manage → Reviews until you approve or reject it; only approved reviews show on the course page and count towards its rating (web and app). With it off, reviews publish immediately. Ask the instructor. A signed-in visitor can send the instructor a question from a course page before buying; it arrives in the instructor’s normal messages. Switch it off under Settings → Commerce. The app has the same button on every course.
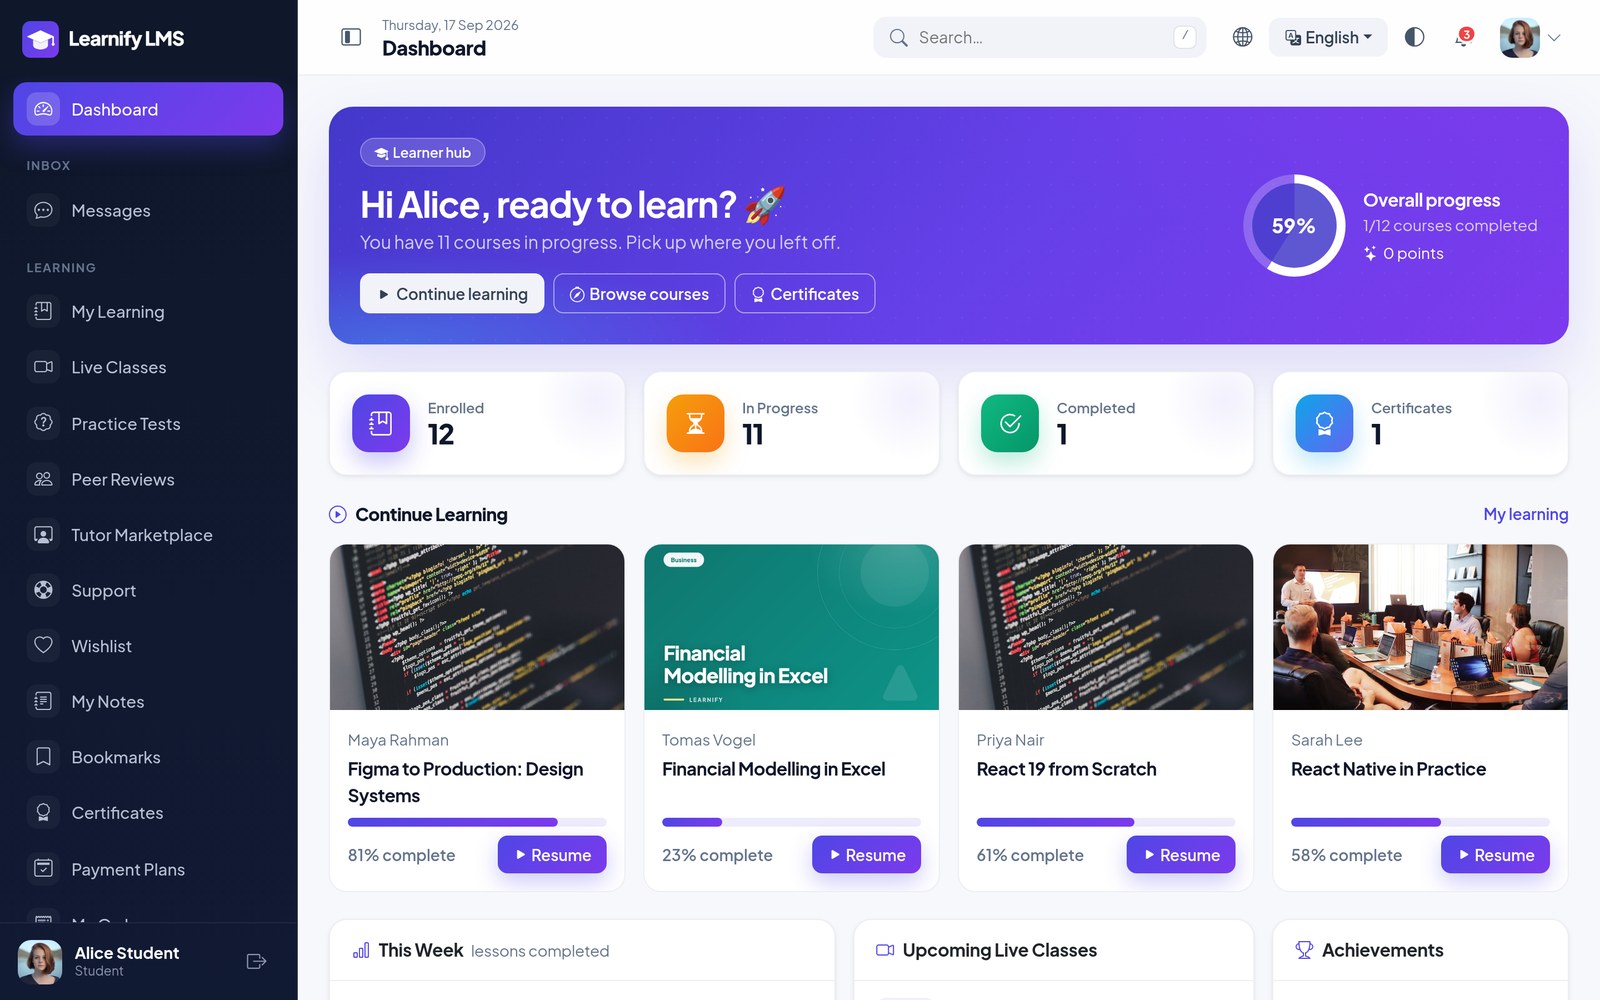
Open a student to see enrolments, progress per course, quiz attempts, assignment submissions, certificates, orders and points. Progress is written from both the website and the app, so the numbers are the same wherever the student was last.
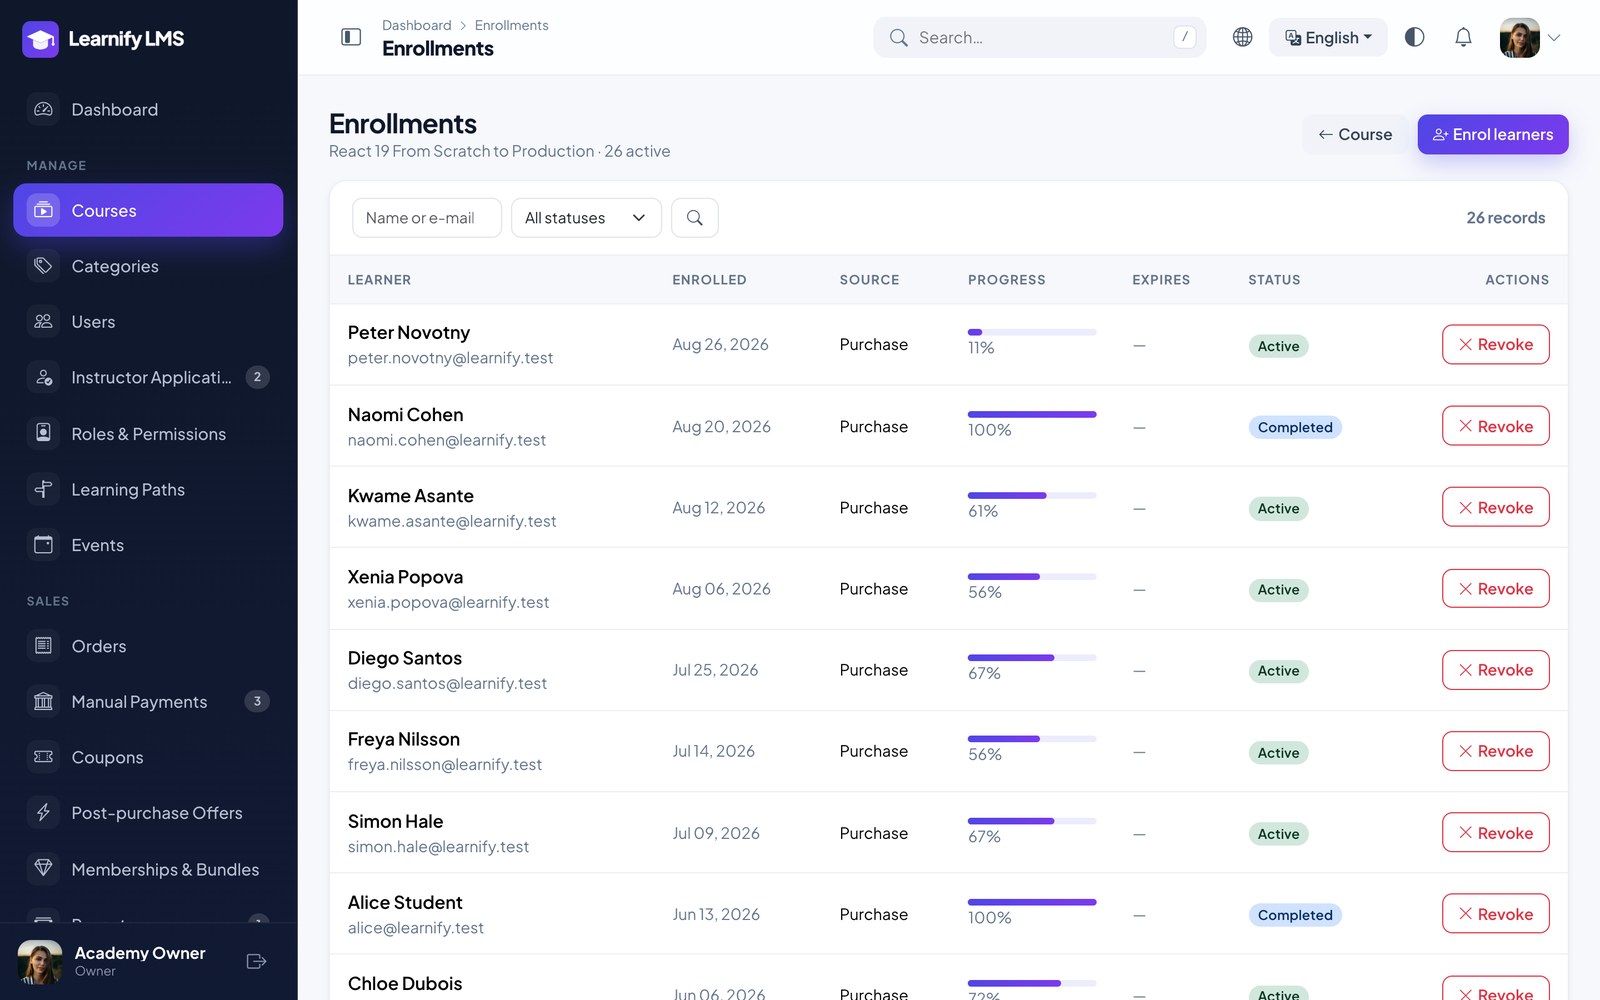
Manual enrolment. Open a course under Manage → Courses → Enrollments and paste e-mail addresses (one per line or comma separated) to grant access without a purchase — offline payments, scholarships, support fixes. Set an optional expiry, choose whether to send the welcome email, and revoke or restore access from the same list; every row keeps its history.
Orders & Refunds
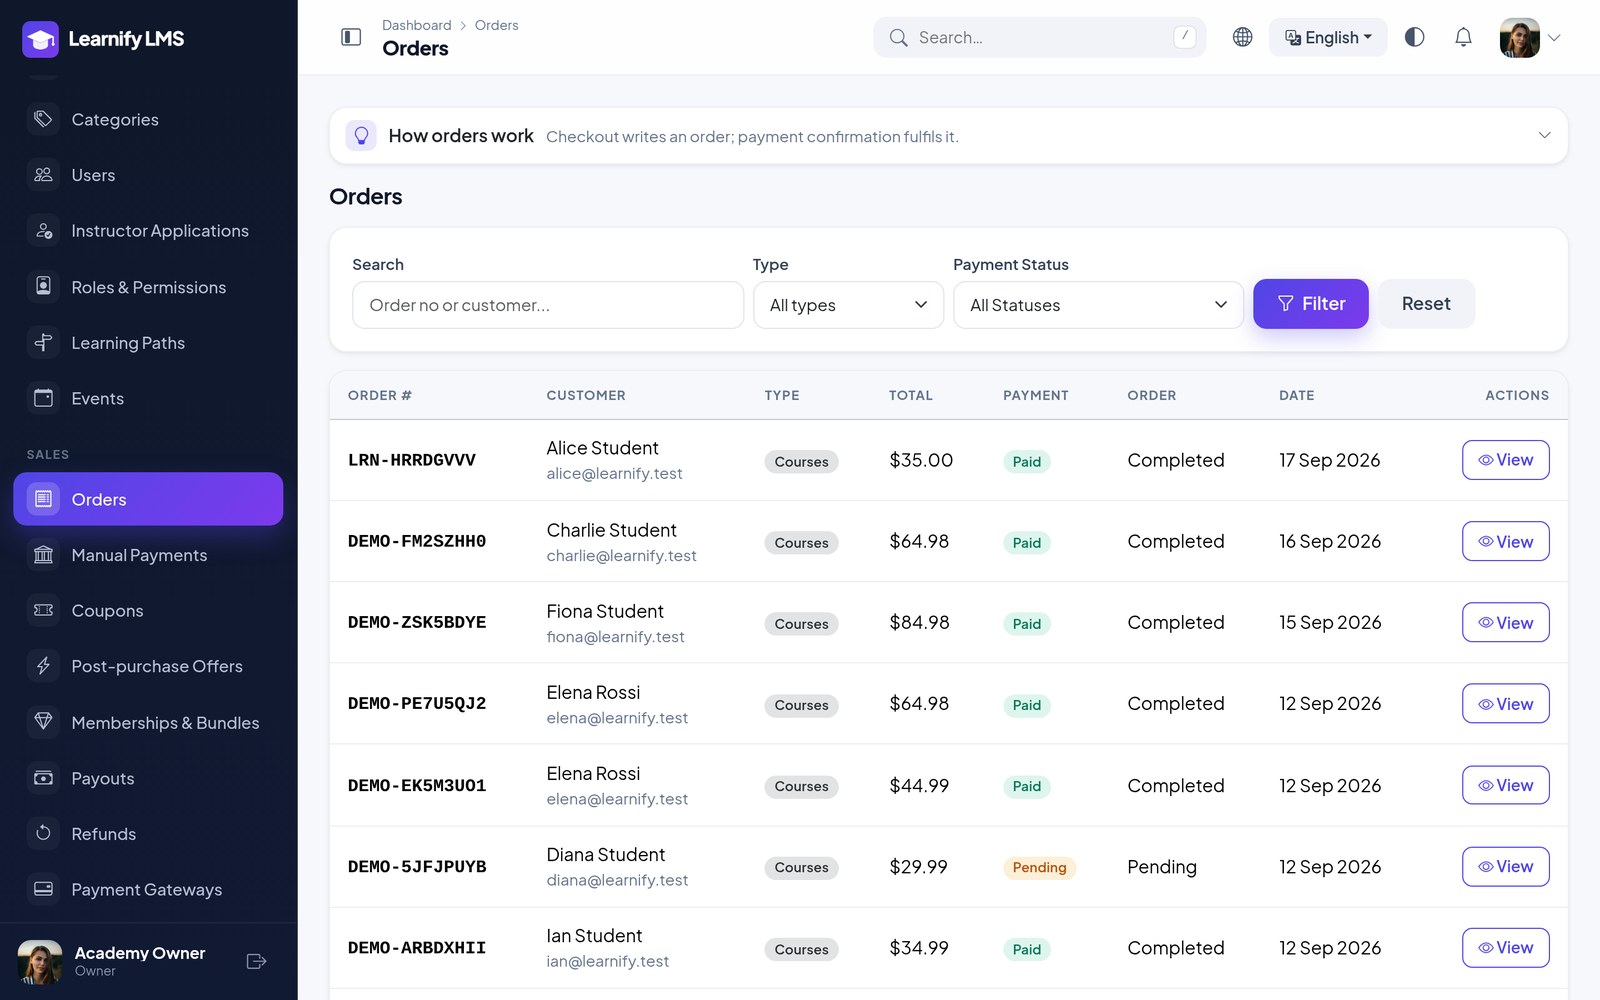
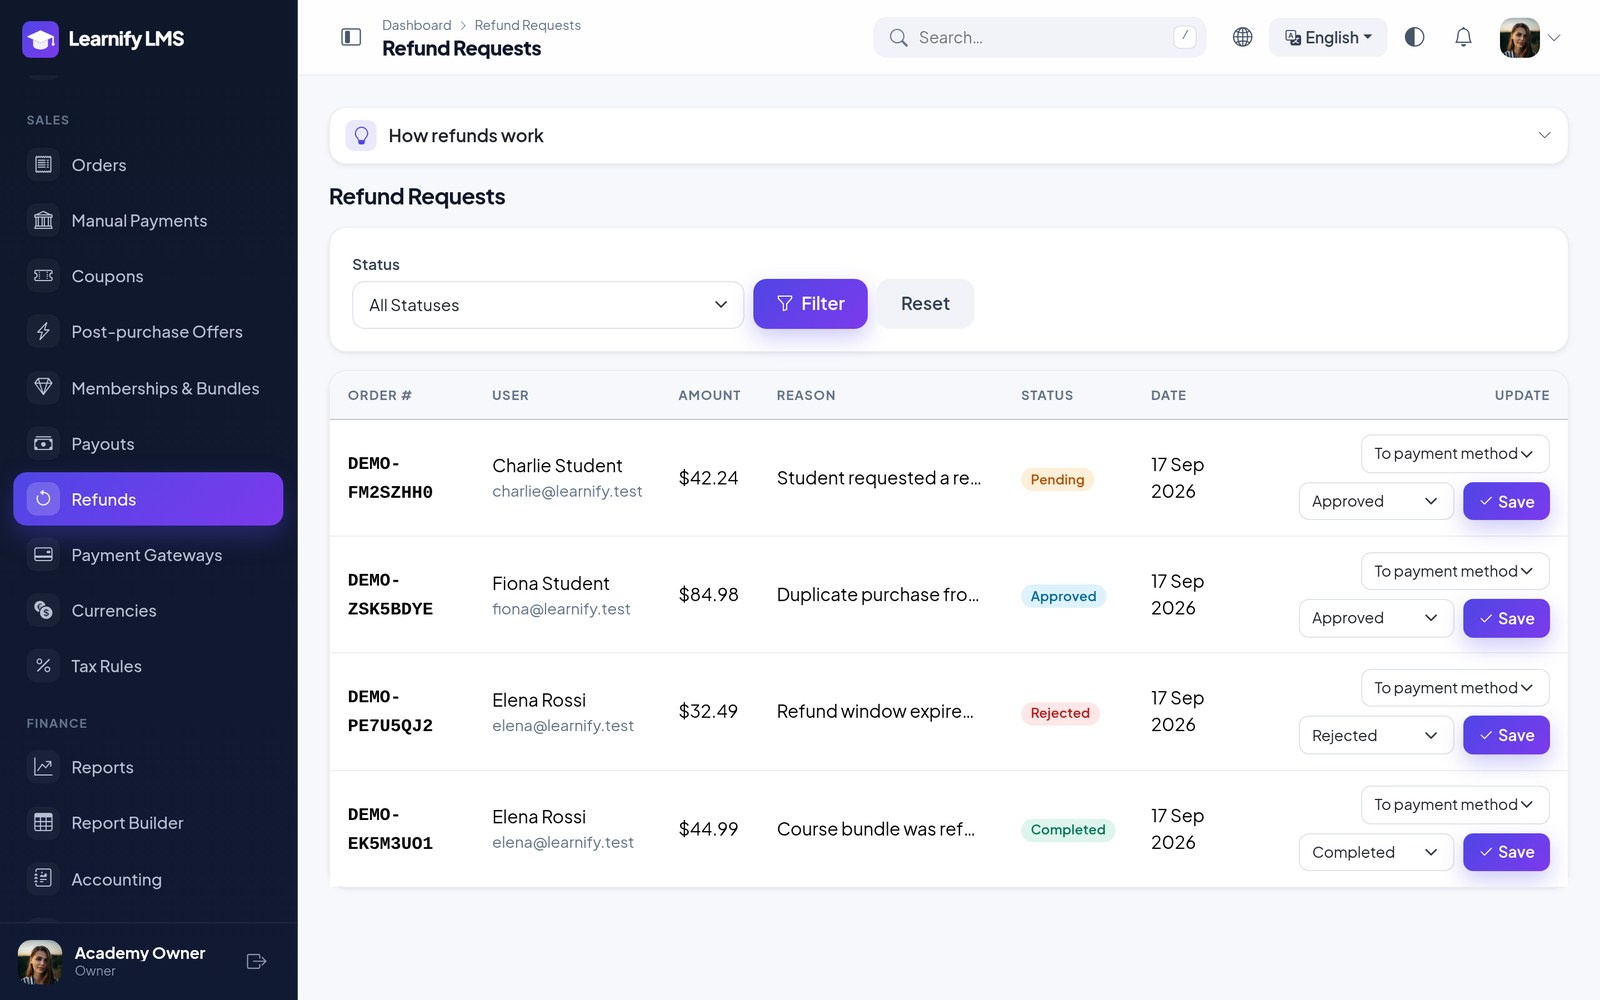
Every purchase is an order with its items, the gateway used, the transaction reference and the instructor/platform split. Refunds are requested or issued from the same screen and reverse the accounting entries with them; since 1.7.0 a refund also takes back the access, seats and instructor earnings the order gave. A pending or failed payment on the order page has a Check with gateway button — see Payment Confirmation.
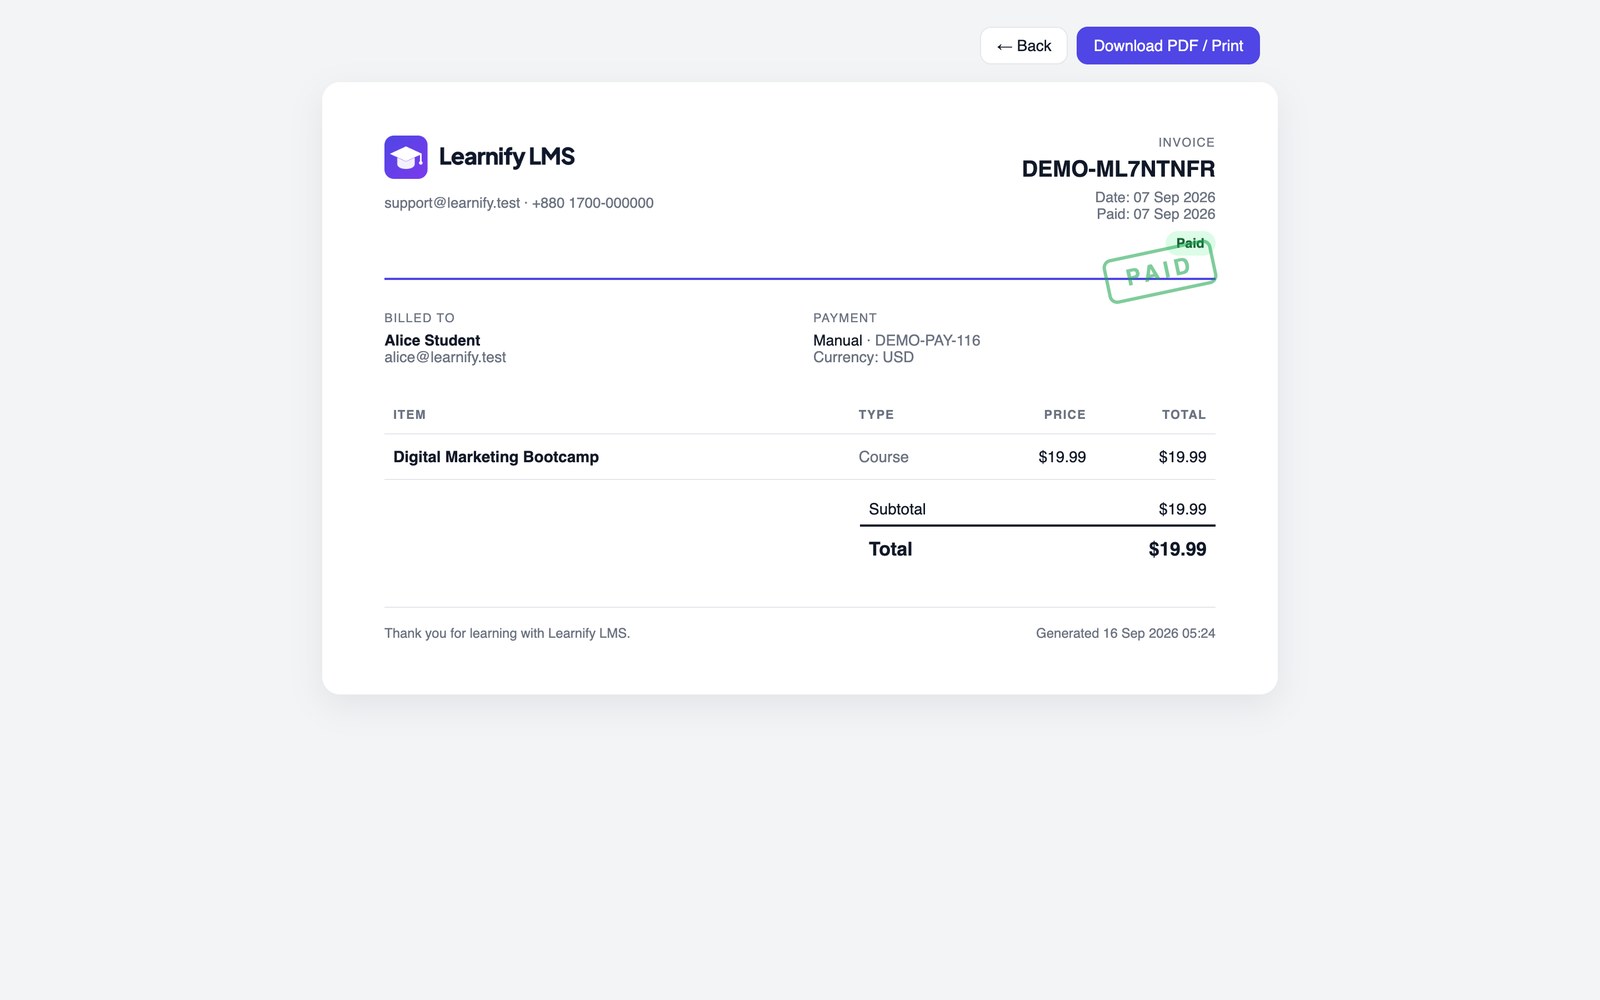
Invoices. Every order has a print-ready invoice (PAID / REFUNDED stamp, line items, coupon, tax, payment method) that the buyer opens from Order History, the thank-you page or the app, and staff from the order. Your business address, tax ID and footer note come from Settings → Contact. The buyer also receives an emailed receipt the moment an order is paid — manual payments included, once you approve them. Business buyers can add a purchase-order number and billing company at checkout; both print on the invoice and are searchable from the order list.
Payment Gateways
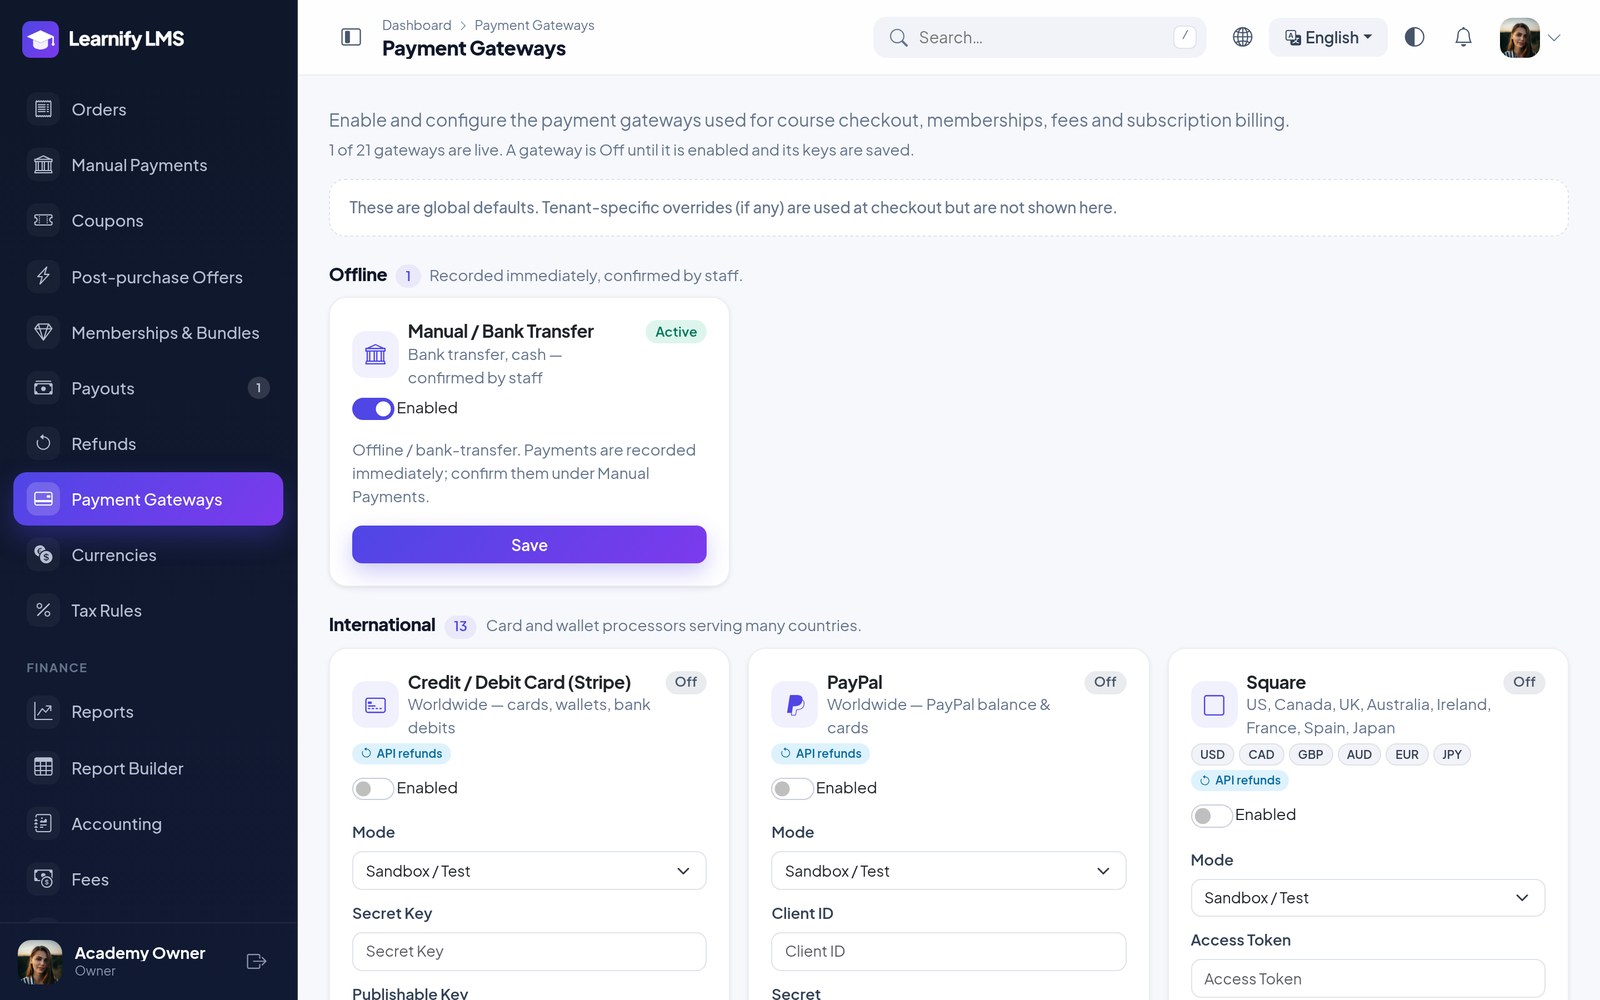
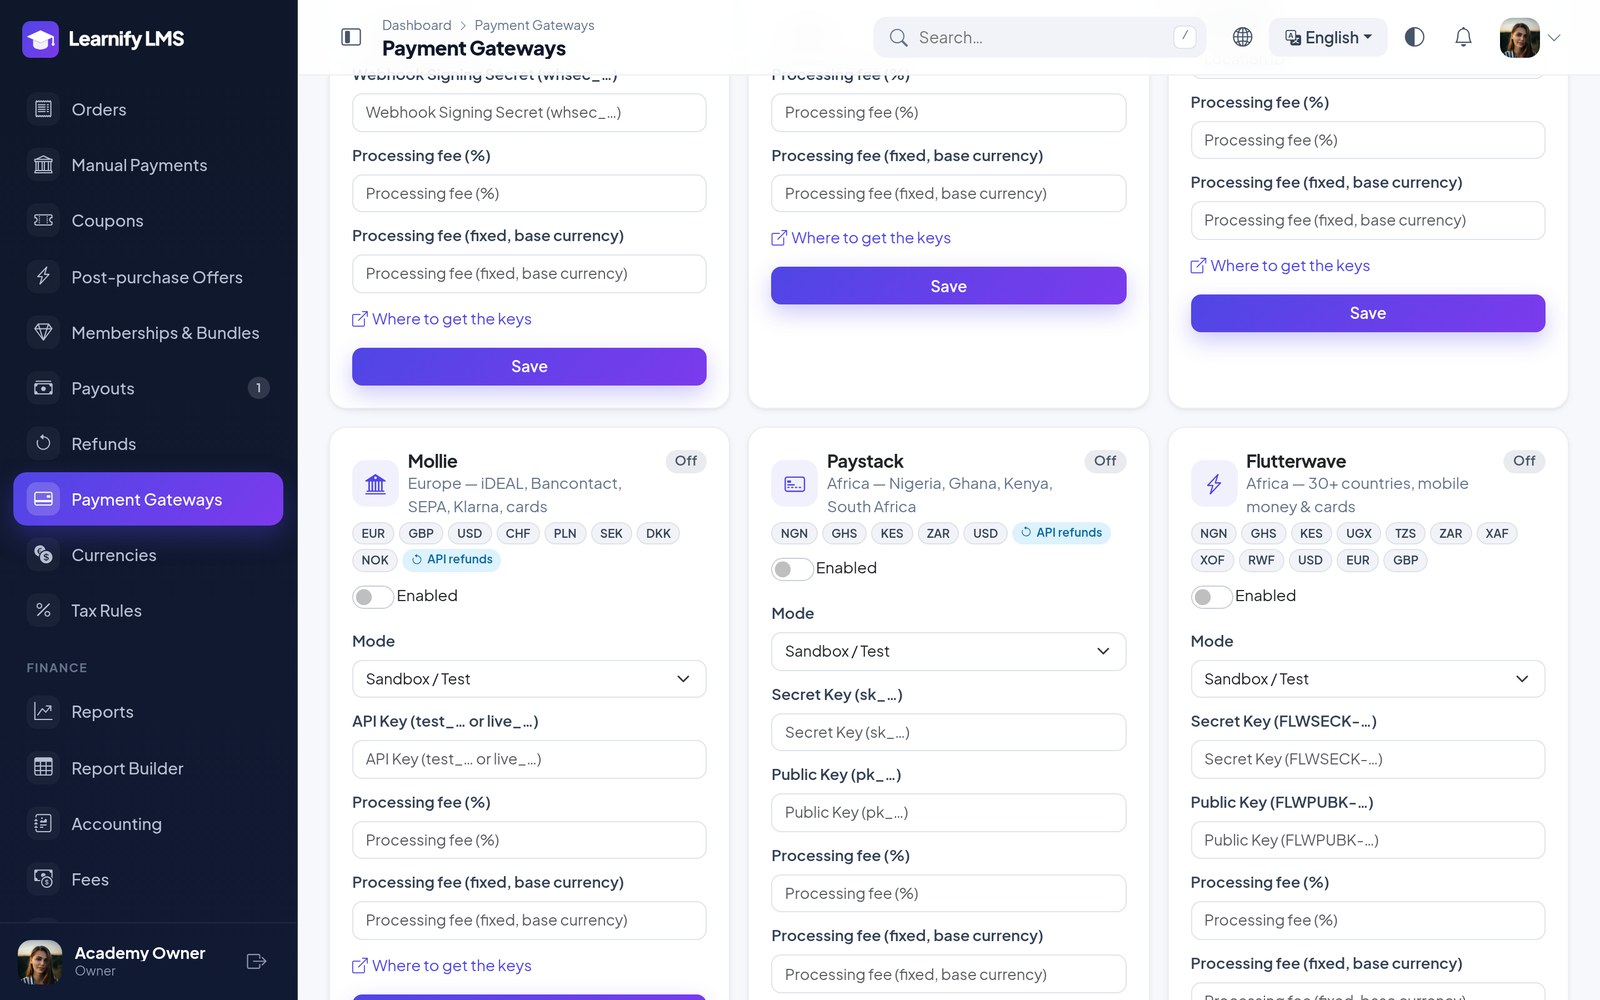
Payments → Payment Gateways lists 21 gateways, grouped by region, with the currencies each one accepts and whether it can refund through its API. Every gateway is Off until you enable it and save its keys; each has a Sandbox / Test mode you should use before going live, and a Where to get the keys link to the provider's dashboard. Enabled gateways appear at checkout on the web and in the app, and a processing fee (% and / or fixed) can be set per gateway — it is posted to 5210 Gateway Fees automatically.
| Group | Gateways | Currencies |
|---|---|---|
| Offline | Manual / Bank Transfer | Any — recorded immediately, confirmed by staff under Manual Payments |
| International | Stripe (cards, wallets, bank debits) | Worldwide; API refunds |
| PayPal | Worldwide; API refunds | |
| Square | USD, CAD, GBP, AUD, EUR, JPY; API refunds | |
| Mollie (iDEAL, Bancontact, SEPA, Klarna, cards) | EUR, GBP, USD, CHF, PLN, SEK, DKK, NOK; API refunds | |
| Paystack | NGN, GHS, KES, ZAR, USD; API refunds | |
| Flutterwave (30+ African countries, mobile money) | NGN, GHS, KES, UGX, TZS, ZAR, XAF, XOF, RWF, USD, EUR, GBP | |
| Razorpay (UPI, cards, net banking, wallets) | INR | |
| Cashfree | INR | |
| Xendit (Southeast Asia) | IDR, PHP, MYR, VND, THB, USD | |
| Mercado Pago (Latin America) | BRL, MXN, ARS, CLP, COP, PEN, UYU; API refunds | |
| PayTabs (Middle East, per-country API host) | SAR, AED, EGP, OMR, JOD, KWD, IQD, USD; API refunds | |
| Paymob (Egypt, Saudi Arabia, UAE, Oman, Pakistan — cards, wallets, Fawry, mada) | EGP, SAR, AED, PKR | |
| MyFatoorah (Kuwait, Saudi Arabia, UAE, Bahrain, Qatar — KNET, mada, Benefit, cards) | KWD, SAR, AED, BHD, QAR, OMR, JOD, EGP, USD | |
| Egypt | Kashier (cards incl. Meeza, mobile wallets, instalments) | EGP, USD, EUR, GBP |
| Bangladesh | SSLCommerz (bKash / Nagad / cards) | BDT |
| EPS (cards, bKash, Nagad, Rocket, netbanking) | BDT | |
| bKash | BDT | |
| Nagad | BDT | |
| aamarPay | BDT, USD | |
| shurjoPay | BDT, USD |
Paymob needs the secret key, public key, integration ID(s) and HMAC secret from
Developers in the Paymob dashboard (and, outside Egypt, the region URL such as
https://ksa.paymob.com). The buyer returns with a signed response that Learnify verifies before an
order is marked paid. MyFatoorah needs only the API token and your account country (kw,
sa, ae, qa, eg); Learnify asks MyFatoorah for the invoice
status itself, so nothing the browser sends can mark an order paid. Kashier needs the Merchant ID (MID-…), the Secret Key and the Payment API Key from the Kashier dashboard (test keys for sandbox mode); Learnify opens a payment session, then asks Kashier for the result itself, and Kashier also notifies a per-payment webhook, so the browser return alone can never mark an order paid. Refunds go through Kashier’s API. EPS needs the merchant username, password, hash key, merchant ID and store ID that EPS issues (sandbox keys for test mode); it charges in BDT only, and Learnify checks the transaction status and amount with EPS before an order is marked paid. Use each provider’s test mode before going live.
Manual transfer takes an offline payment with a reference and a proof upload, which you approve by hand — useful where card payments are hard. The learner is charged in the currency they picked in the storefront navbar (the order itself is booked in your base currency), so enable gateways that accept the currencies you offer.
Test keys. The Stripe, PayPal, Razorpay, Paystack, Flutterwave, Mollie, Xendit, Square, Mercado Pago and bKash cards have a Test keys button that checks the saved keys with the gateway, so a typo shows up before a buyer meets it. Use it after saving, in sandbox and again when you switch to live.
Hosted gateways return the learner to /payment/callback/<payment> and the order
is verified server-side on that return. Two gateways also need a webhook, set in their own dashboard — the
exact address is shown on the gateway card:
- Stripe:
https://your-domain.com/payment/webhook/stripe. Without it, asynchronous payments (bank debits and similar) succeed at Stripe and never mark the order paid. - Razorpay (new in 1.7.0): in the Razorpay dashboard go to Account & Settings →
Webhooks, add
https://your-domain.com/payment/webhook/razorpaywith the payment_link.paid event and a secret of your choice, then paste the same secret into Payments → Payment Gateways → Razorpay → Webhook Secret.
Every gateway is an independent third-party service. You need your own merchant account with each, and their transaction fees, payout schedules and country rules are between you and the provider — none of that is part of this item.
Payment Confirmation
Some payments are not settled the moment the buyer comes back from the gateway: the gateway may still be processing, a bank debit may take days to clear, or the gateway may be slow or briefly down. Since 1.7.0 such a payment stays pending and the buyer sees “Awaiting confirmation — no need to pay again”. A payment is marked failed only when the gateway clearly says it was declined, cancelled or expired.
- Automatic re-check. Every 10 minutes Learnify asks the gateway about open payments and completes the order once the gateway confirms it. This runs without a cron job, like the other background tasks.
- Webhooks. Stripe and Razorpay also tell your site directly when a payment succeeds — register the webhook shown on their gateway card (see Payment Gateways).
- Check with gateway (staff). Open the order under Orders → All Orders. Next to a pending or failed payment, Check with gateway asks the gateway right away and completes the order if it was paid. The order page also shows why the gateway refused the payment or has not confirmed it yet.
- Check payment status (learners). A pending order in My Orders has a Check payment status button, so the buyer can confirm a payment without contacting you.
- Payment alerts. A card on the admin dashboard counts payments awaiting confirmation and payments that failed in the last 24 hours, with links to the orders.
From the command line, php artisan payments:reconcile --payment=<id> re-checks one payment,
for example one that an older version marked failed.
Currency & Tax
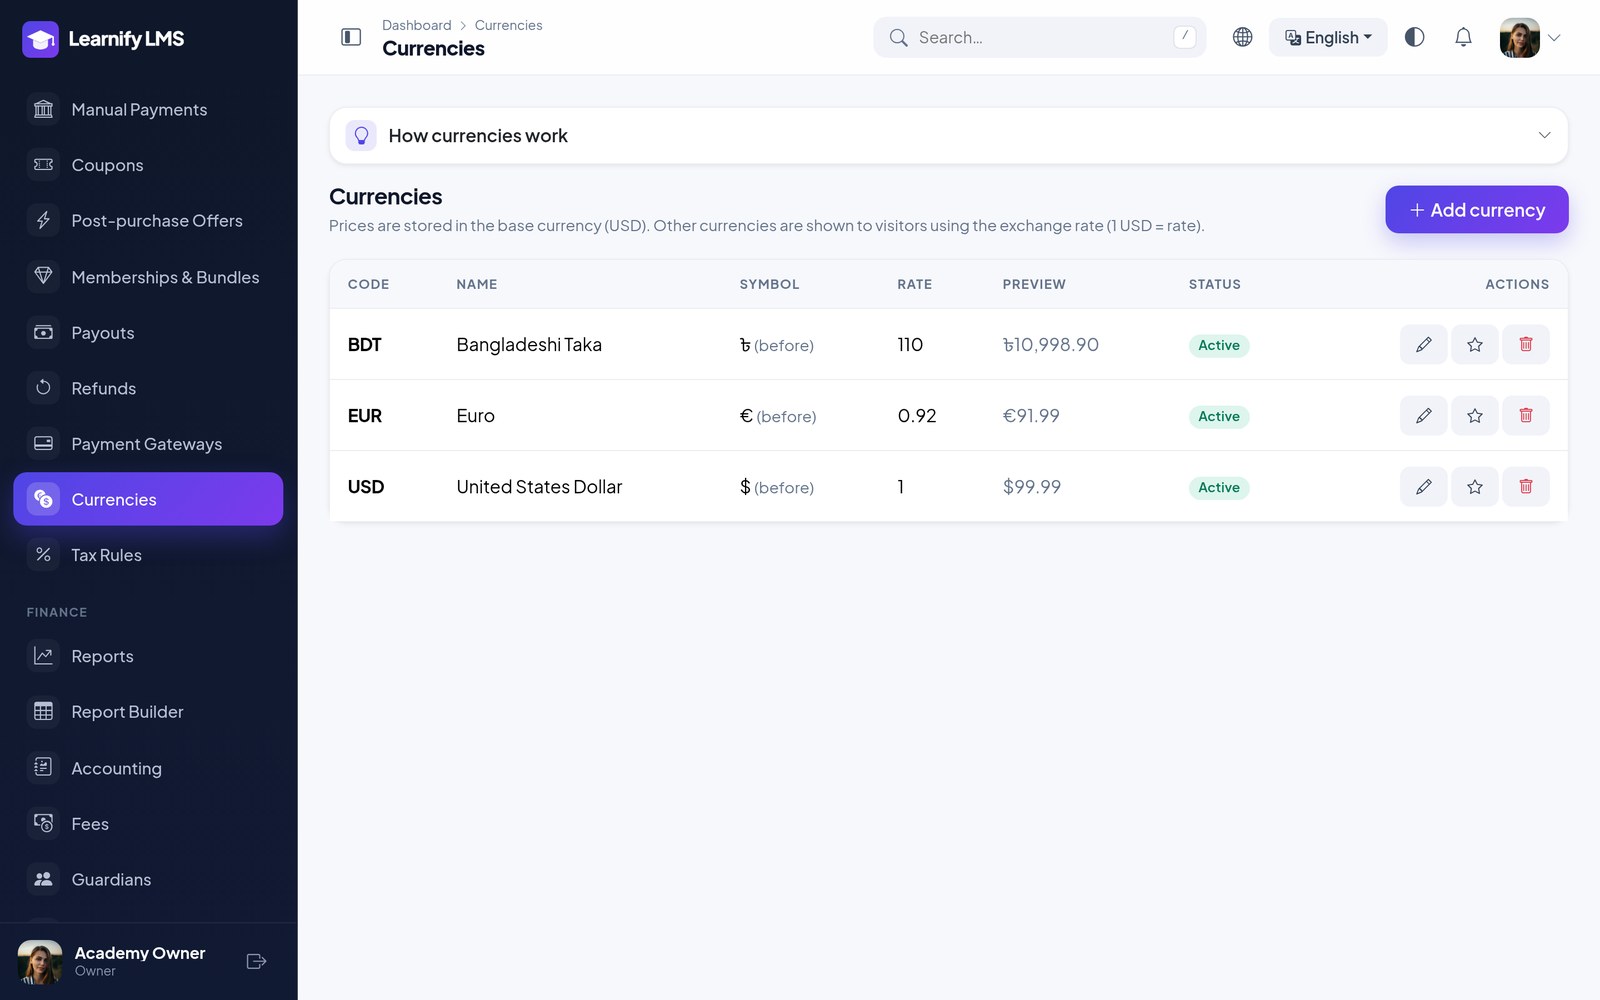
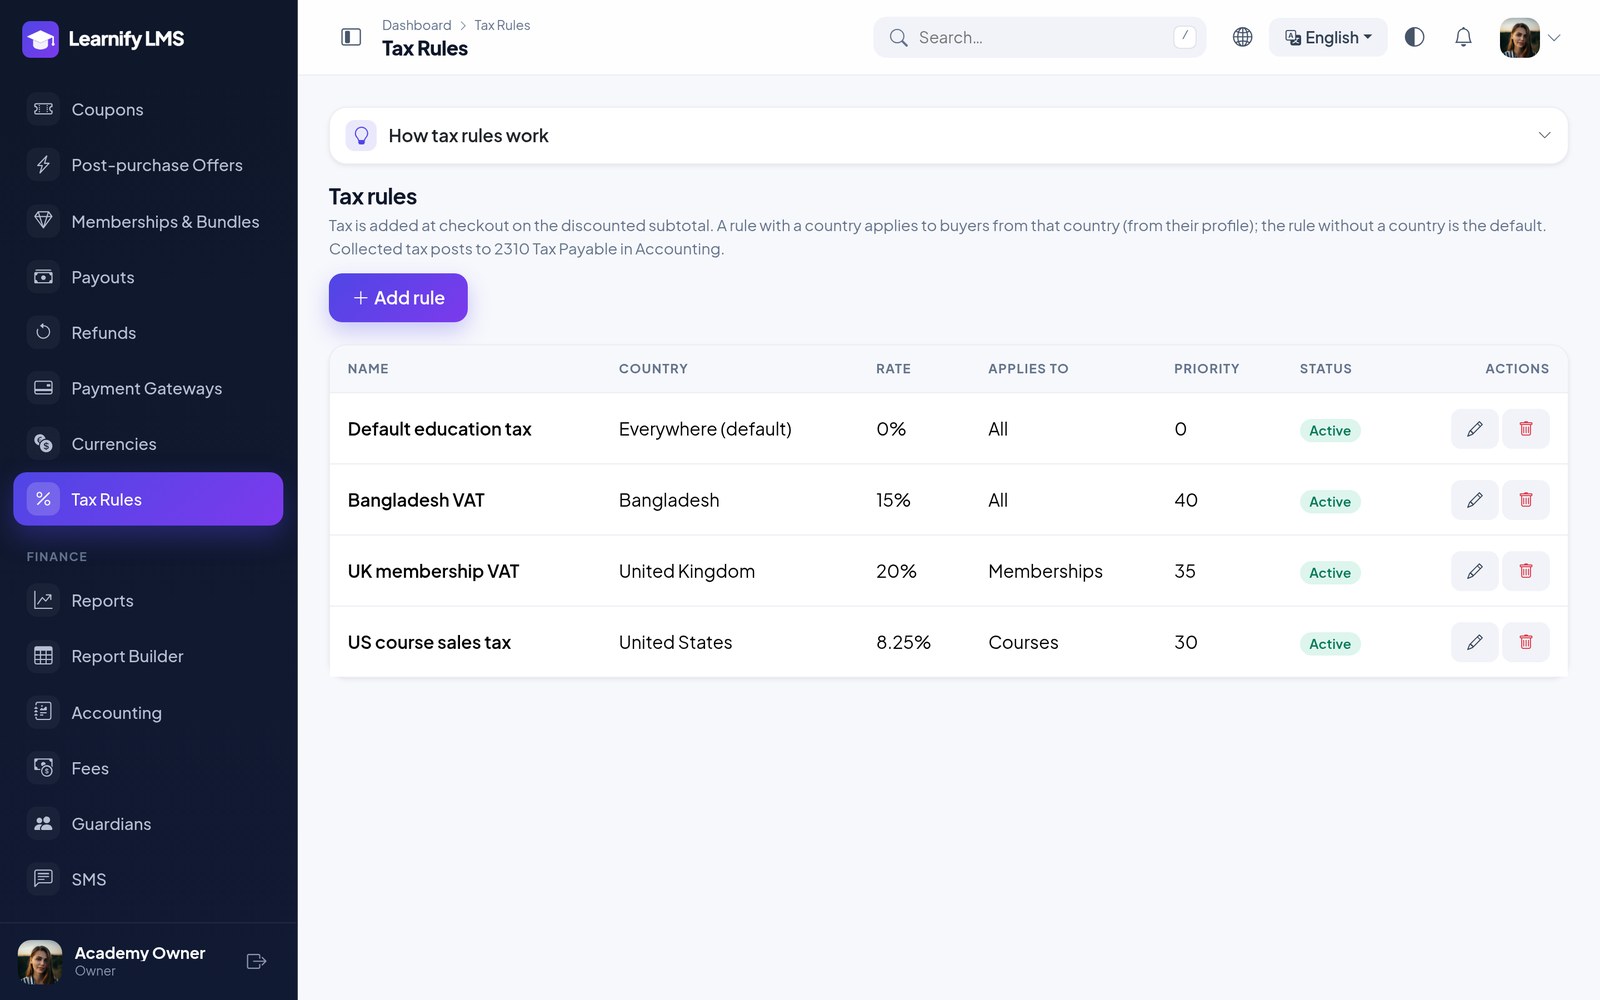
Add currencies with their exchange rate and symbol, and pick the default. Tax rules apply by country and product type, inclusive or exclusive, and appear as their own line on the order and the invoice.
Coupons & Upsells
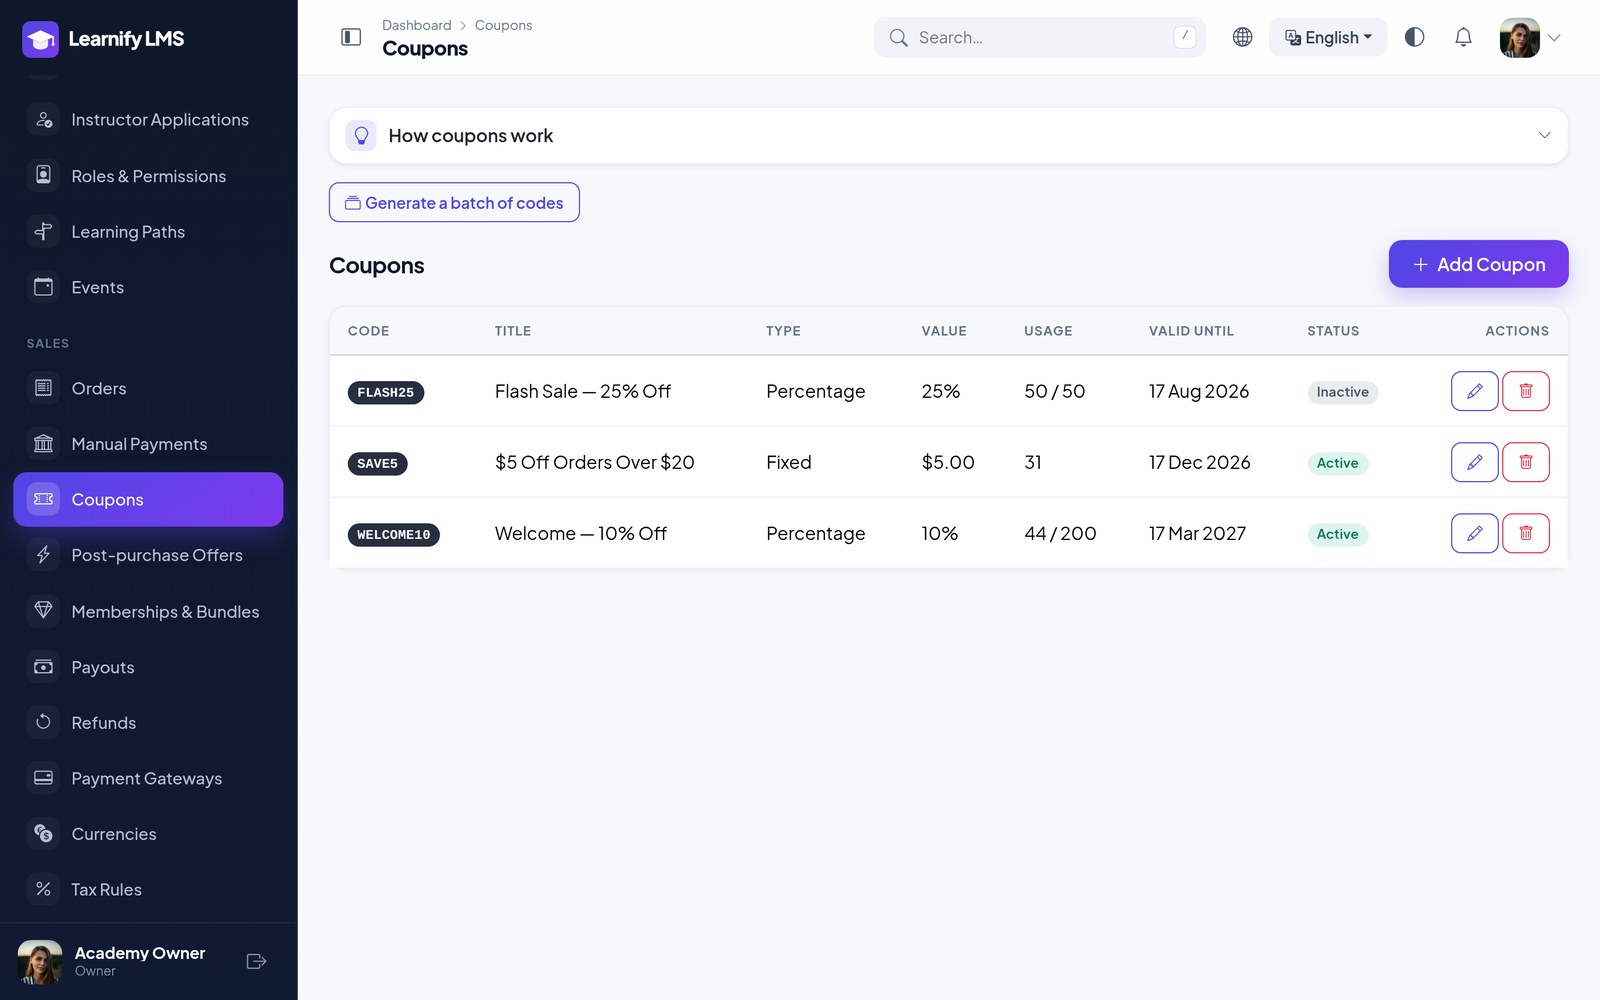
Coupons are percentage or fixed amount, with a usage limit, a validity window, a minimum order value and an optional restriction to specific courses. Upsell offers are shown once, immediately after a purchase.
Manual Payments, Payment Plans, Gifts & Wallet
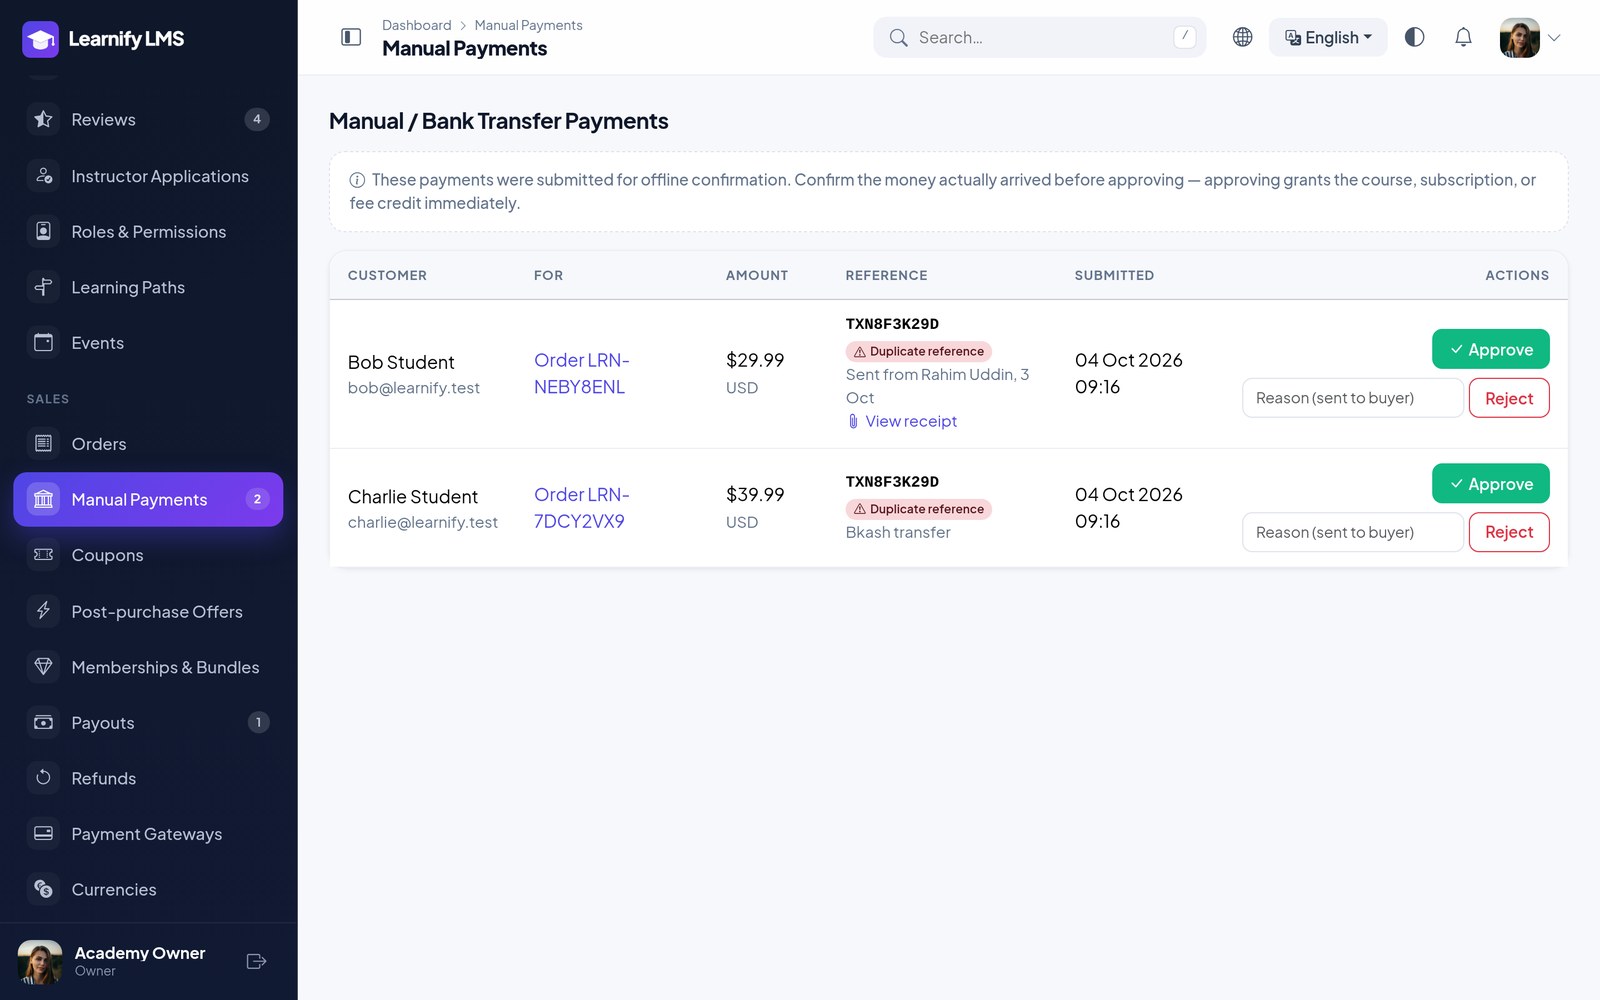
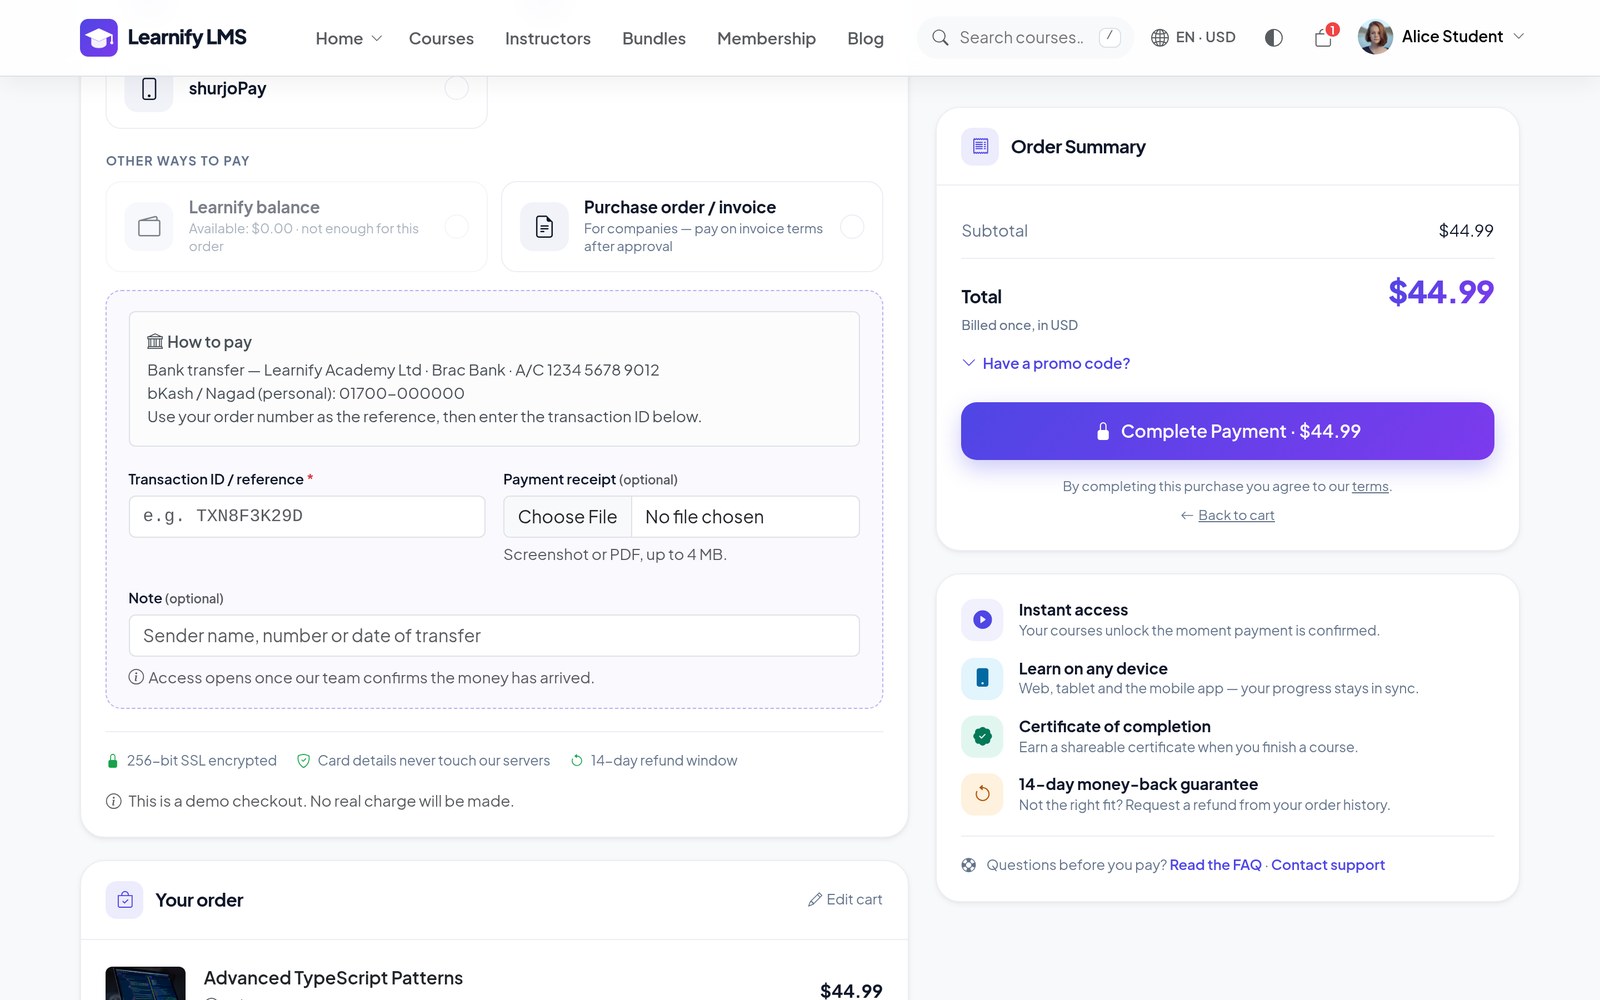
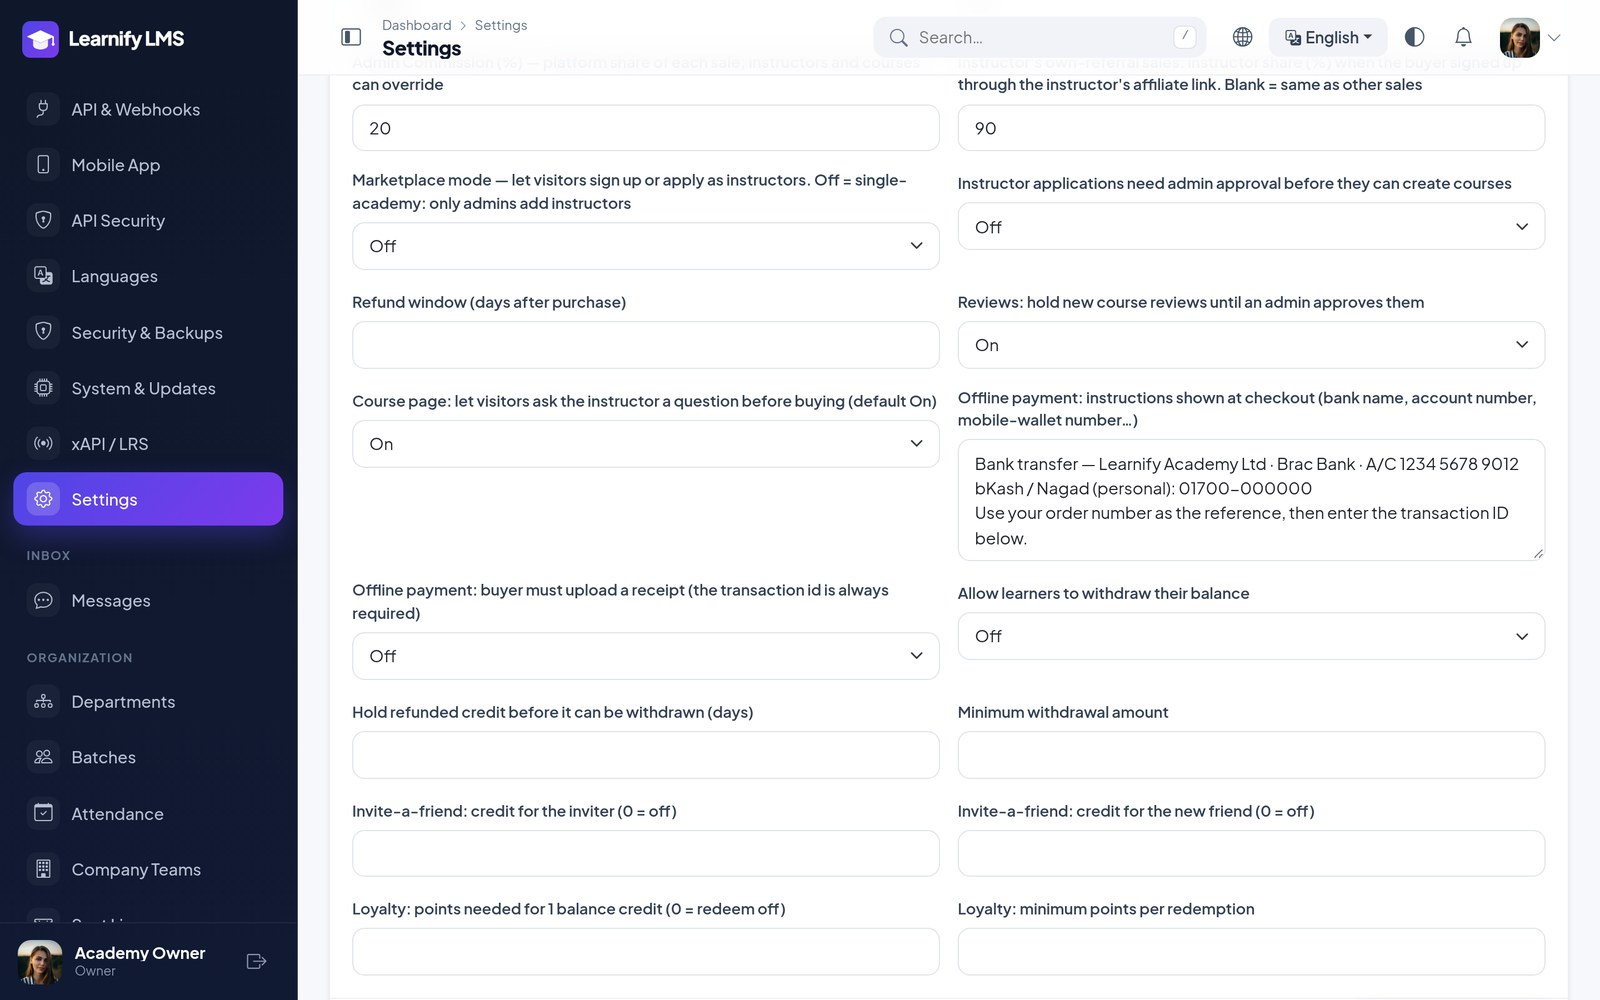
Manual payments. Bank transfer, cash deposit and mobile-wallet transfers create a pending payment. Write how to pay (bank, account or wallet number) under Settings → Commerce → Offline payment instructions; it is shown at checkout on the web and in the app. The buyer must then enter the transaction ID from their bank or wallet and can add a note and upload a receipt (JPG, PNG, WebP or PDF, up to 4 MB; switch Buyer must upload a receipt on to make it mandatory). Receipts are stored privately — only staff can open them. Staff check the money under Sales → Manual Payments, where each row shows the buyer’s ID, note and receipt and flags a Duplicate reference if the same ID was already used. Approve fulfils whatever it was for — a course order, a membership or a fee invoice. Reject takes an optional reason that is emailed to the buyer.
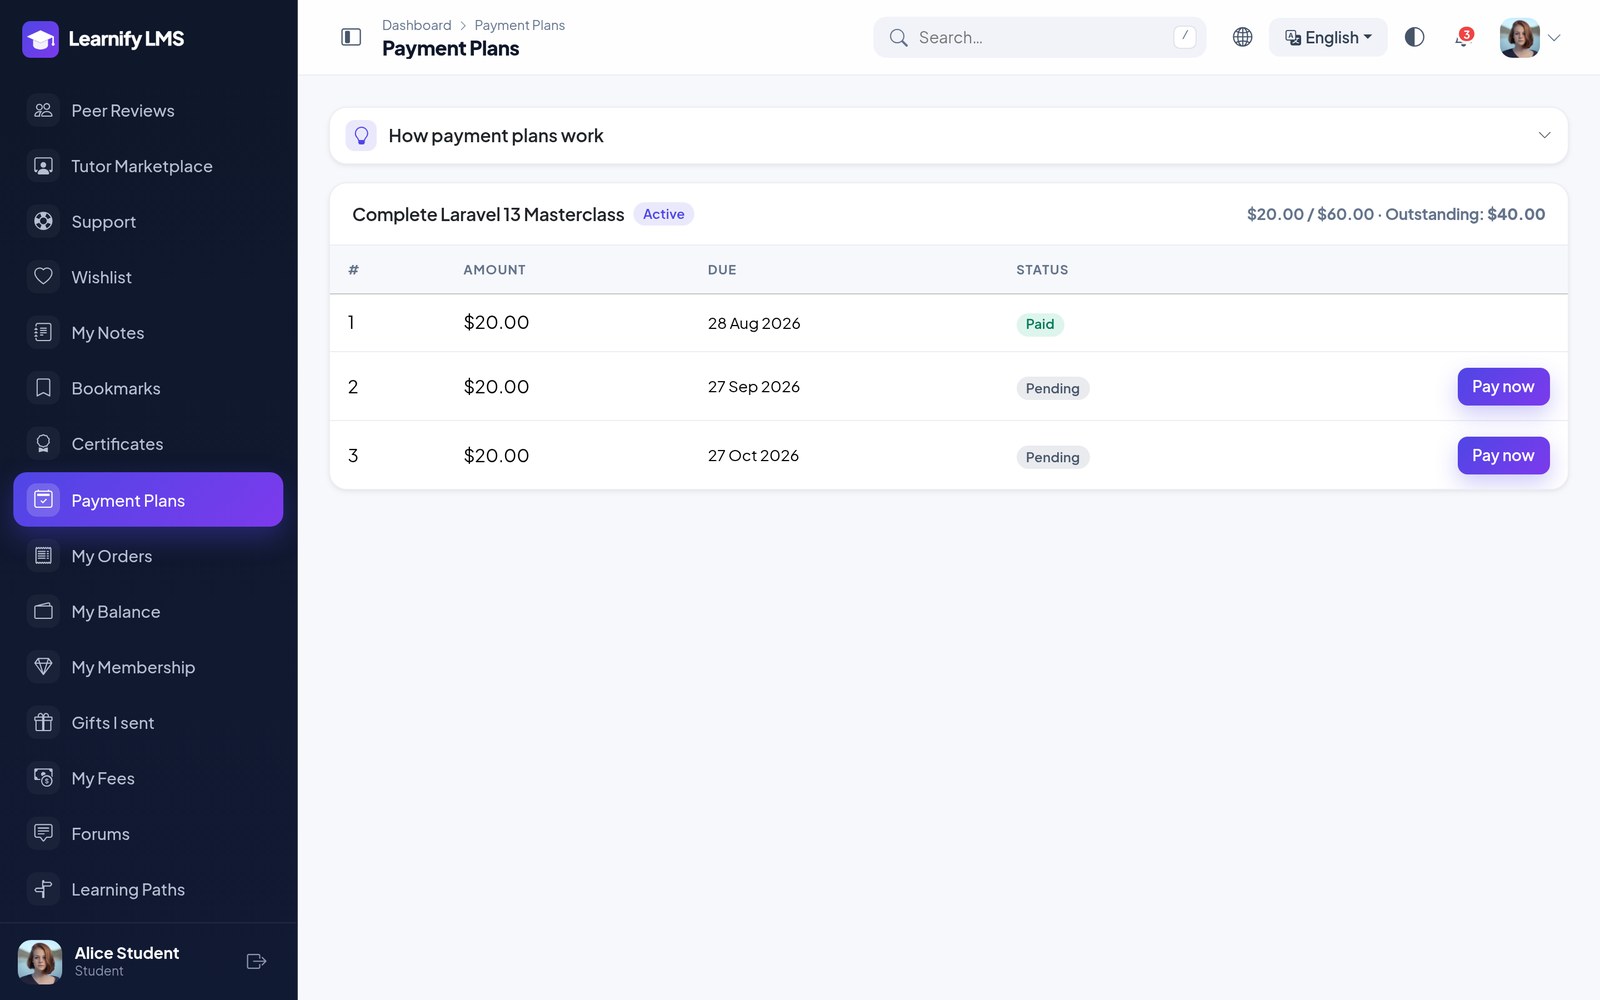
Payment plans. A course can be sold in instalments. The first payment enrols the student and the rest are scheduled with due dates; an overdue instalment suspends access (after the grace period set under Settings → Growth) until it is settled, keeping progress intact. Students pay each part from Payment Plans.
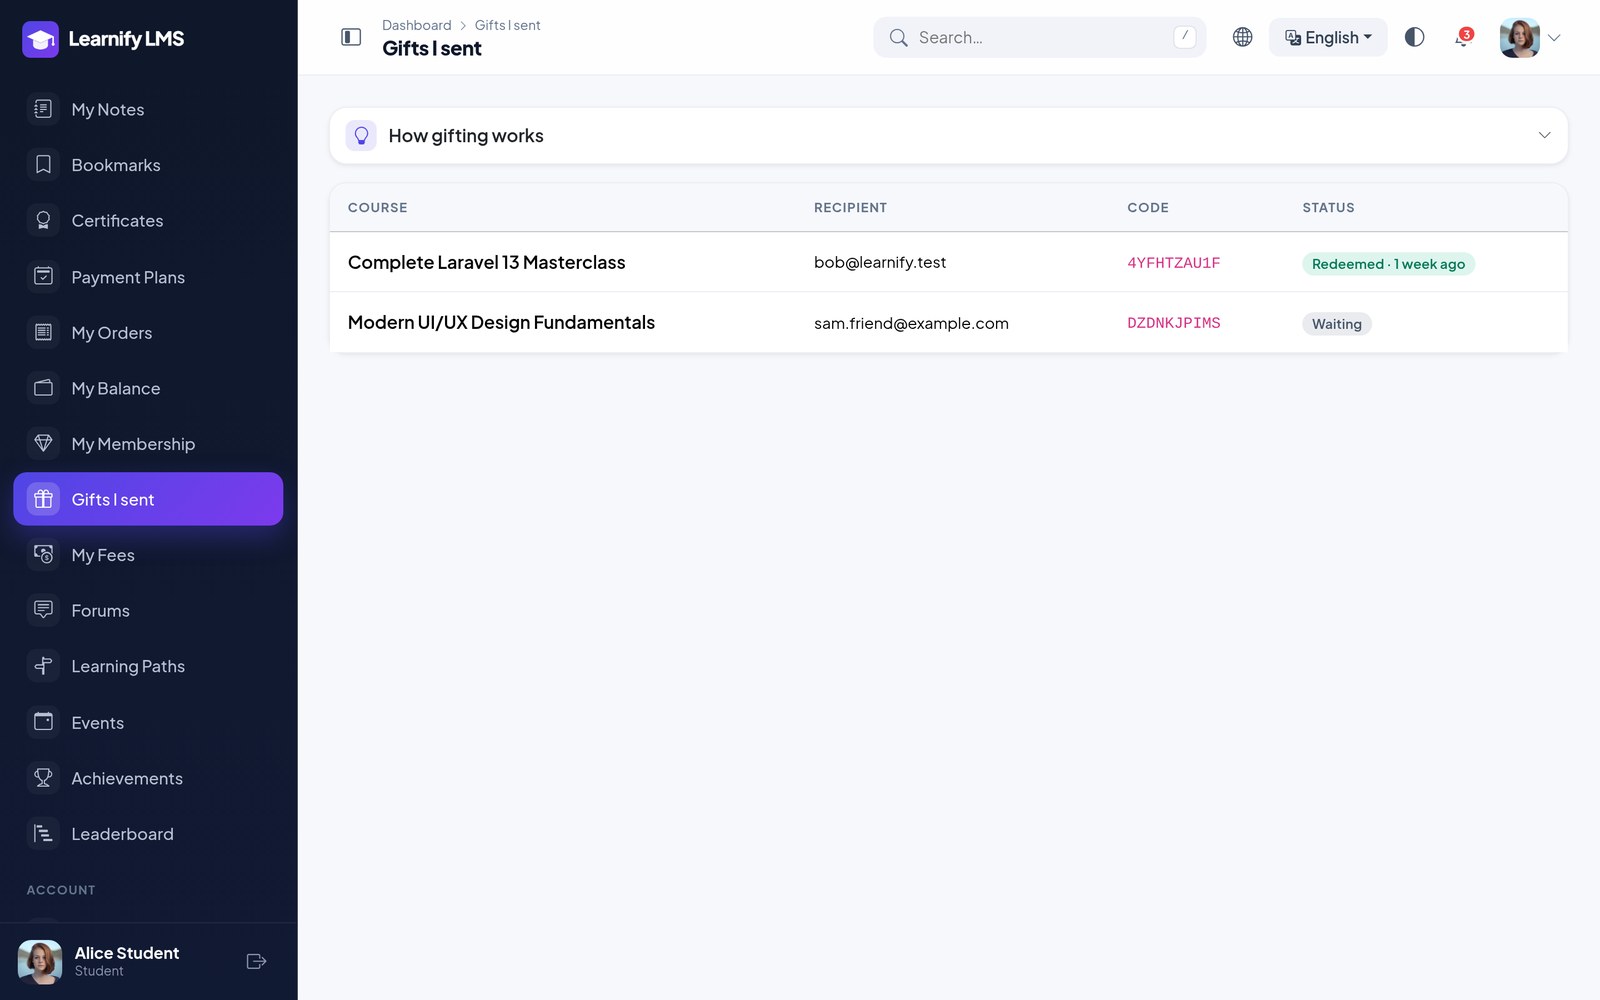
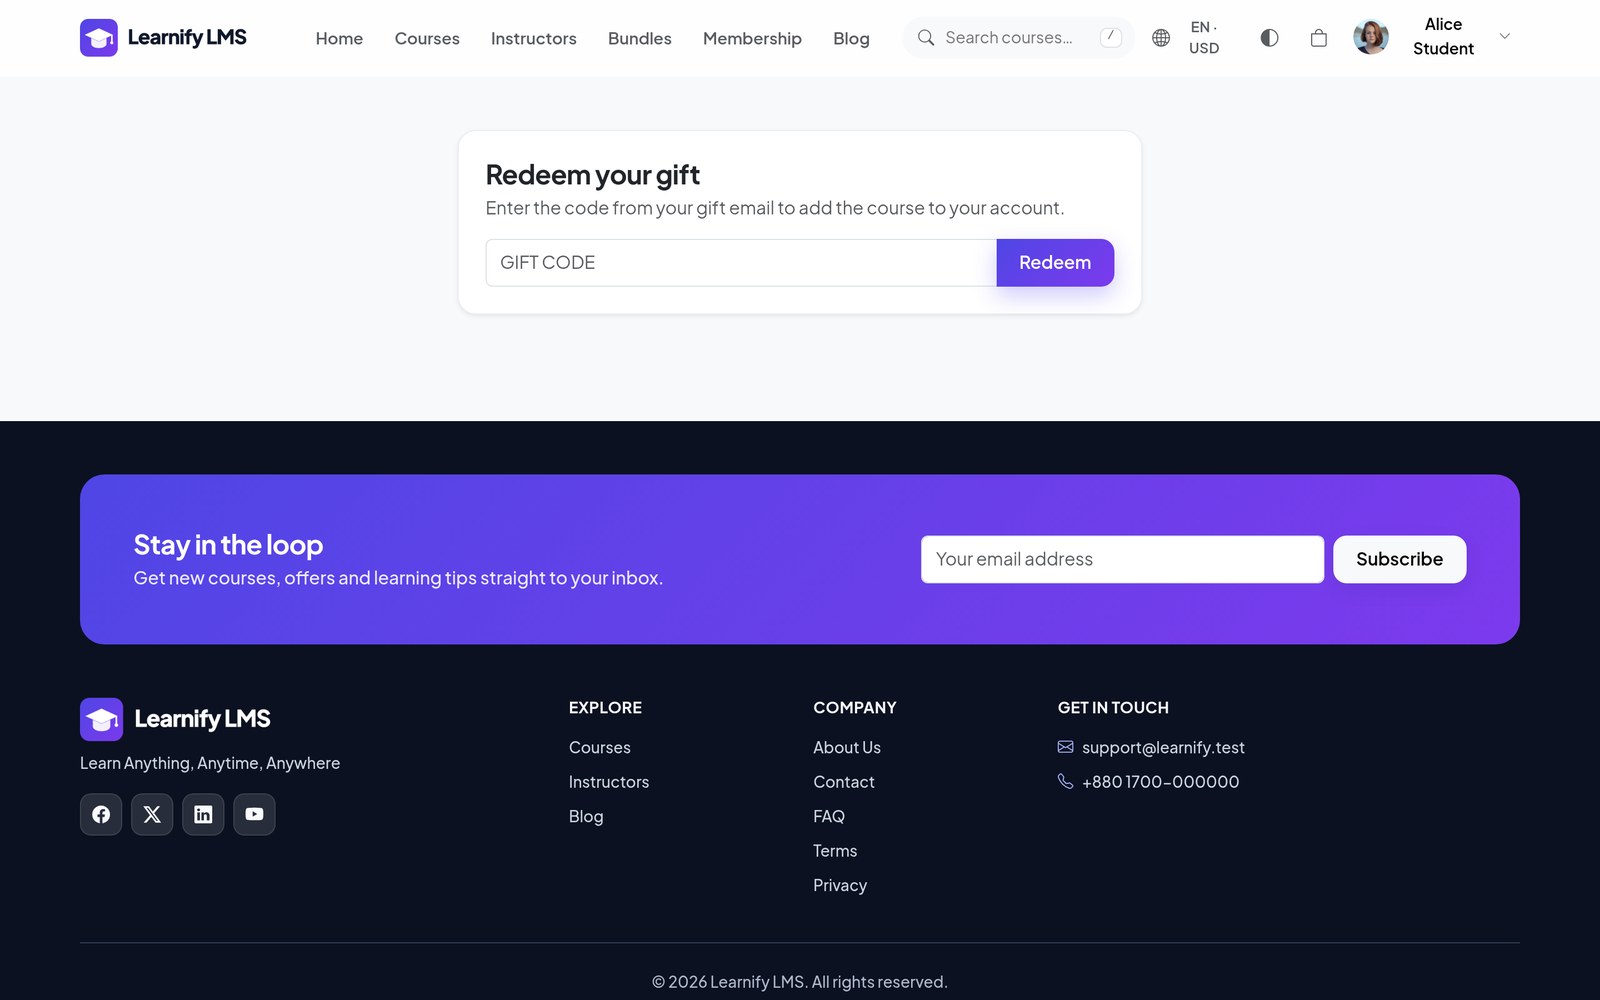
Gifts. A buyer enters someone else’s email when adding a course to the cart. After payment the
recipient gets a one-time code; signing in and redeeming it at /gift enrols them. Codes never
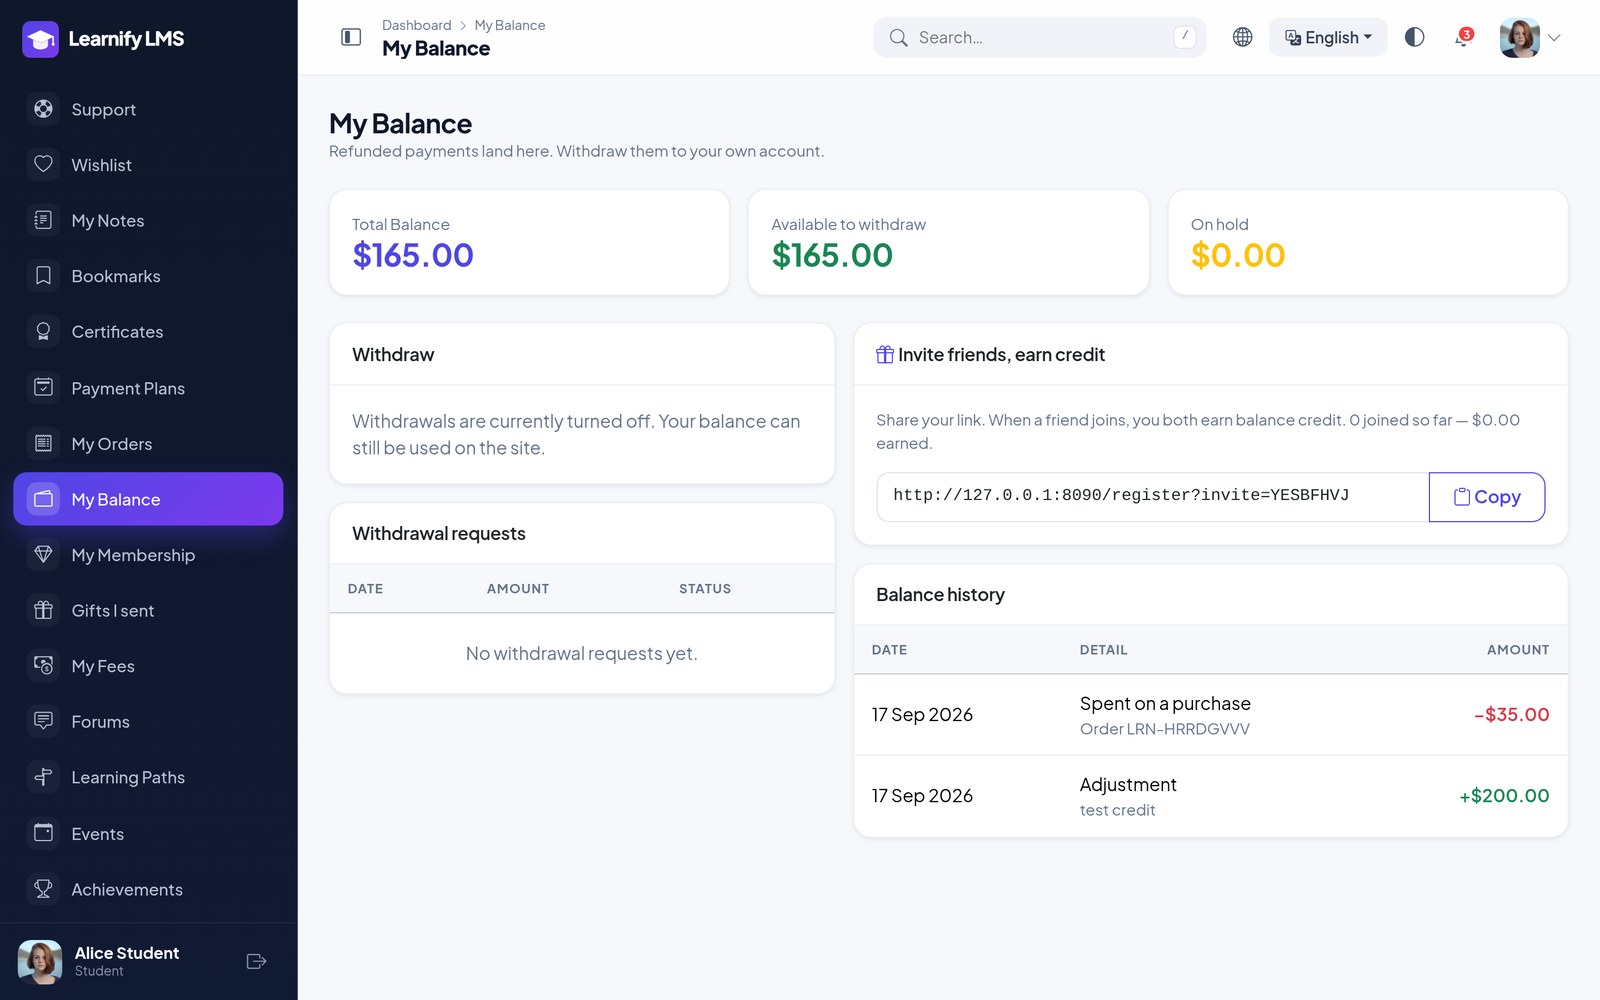
expire and work once. Wallet. Refunds, invite bonuses and redeemed loyalty points land in the
student’s balance, spendable at checkout. Cash-outs (if enabled) sit behind a hold period and a minimum
amount, both set under Settings → Commerce, and are approved by staff.
Waitlist. A course with a seat limit shows a “join the waitlist” button once full; the list is notified when a seat opens.
Instructor Payouts
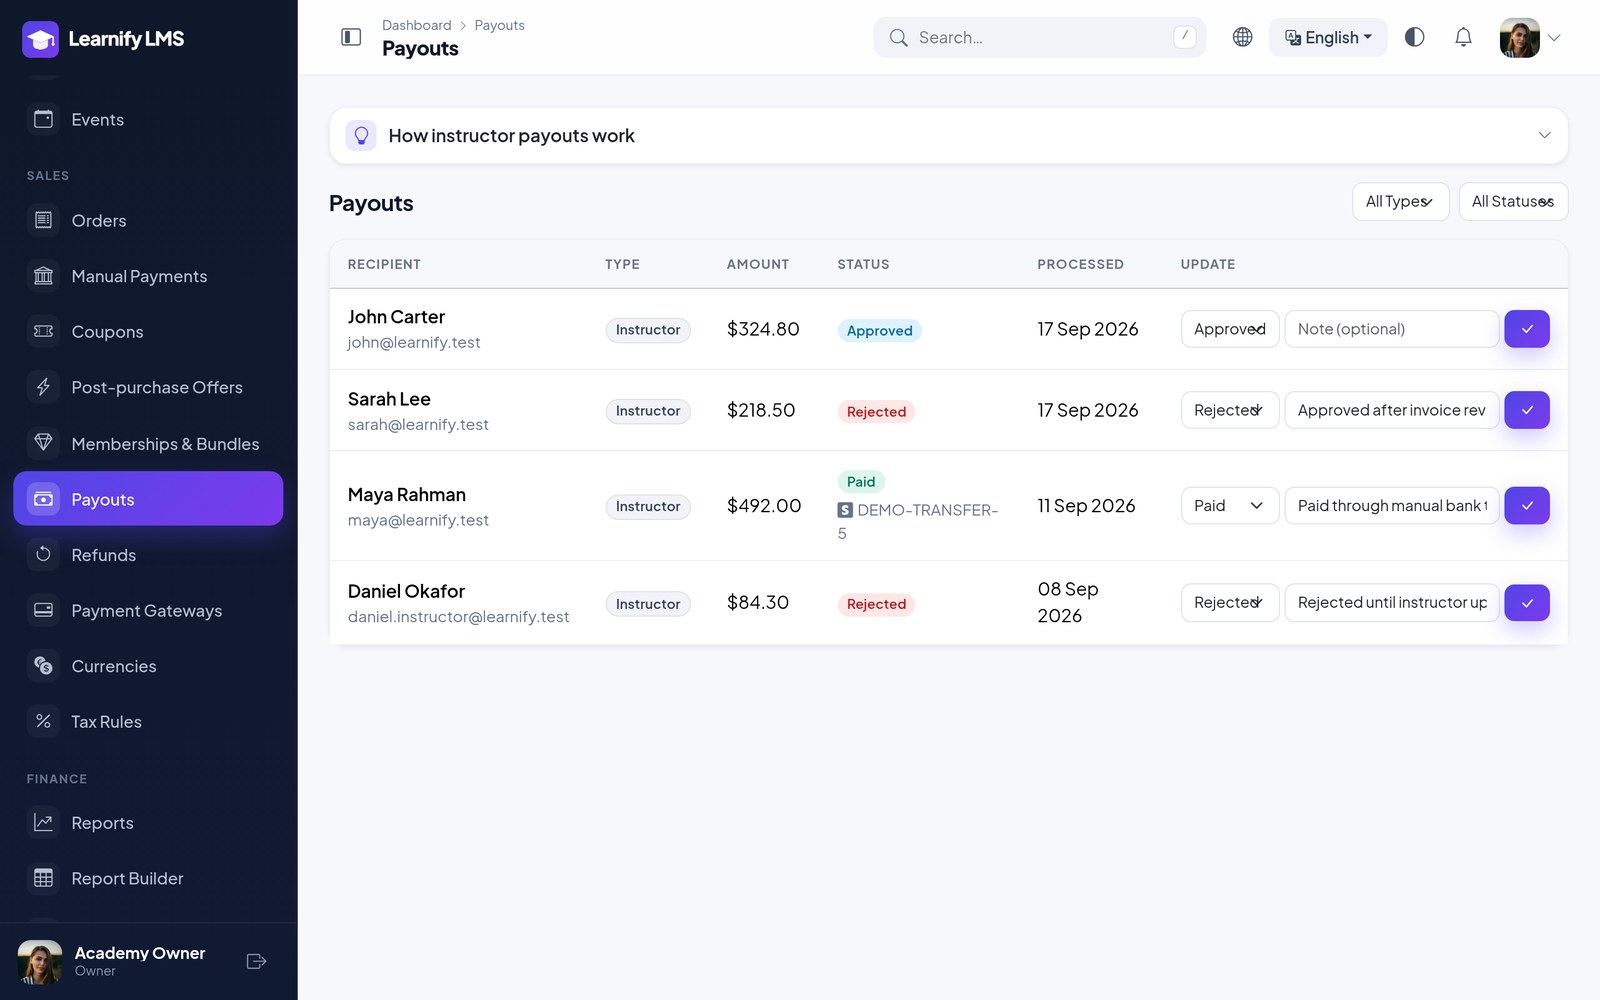
Earnings accrue to a ledger as orders are paid, and become available after a holding period. An instructor requests a payout; you approve and pay.
Stripe Connect automates it: the instructor onboards once, and approved payouts transfer straight to their account. Without Connect, mark payouts as paid manually after your own bank transfer.
Reports & Builder
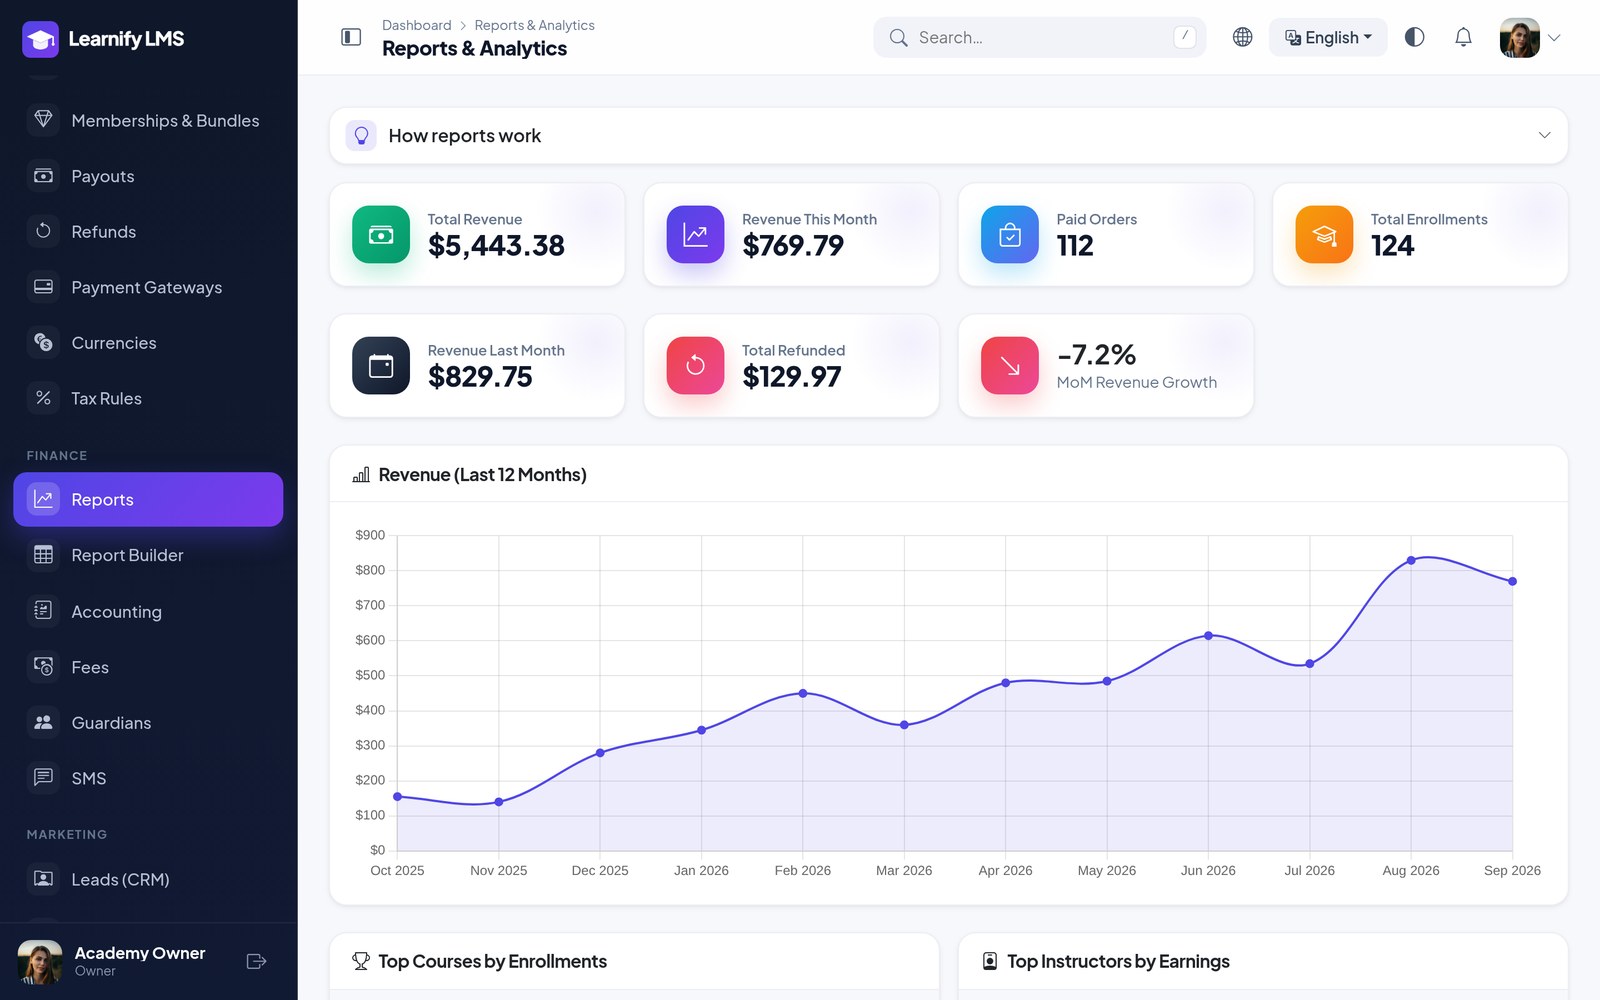
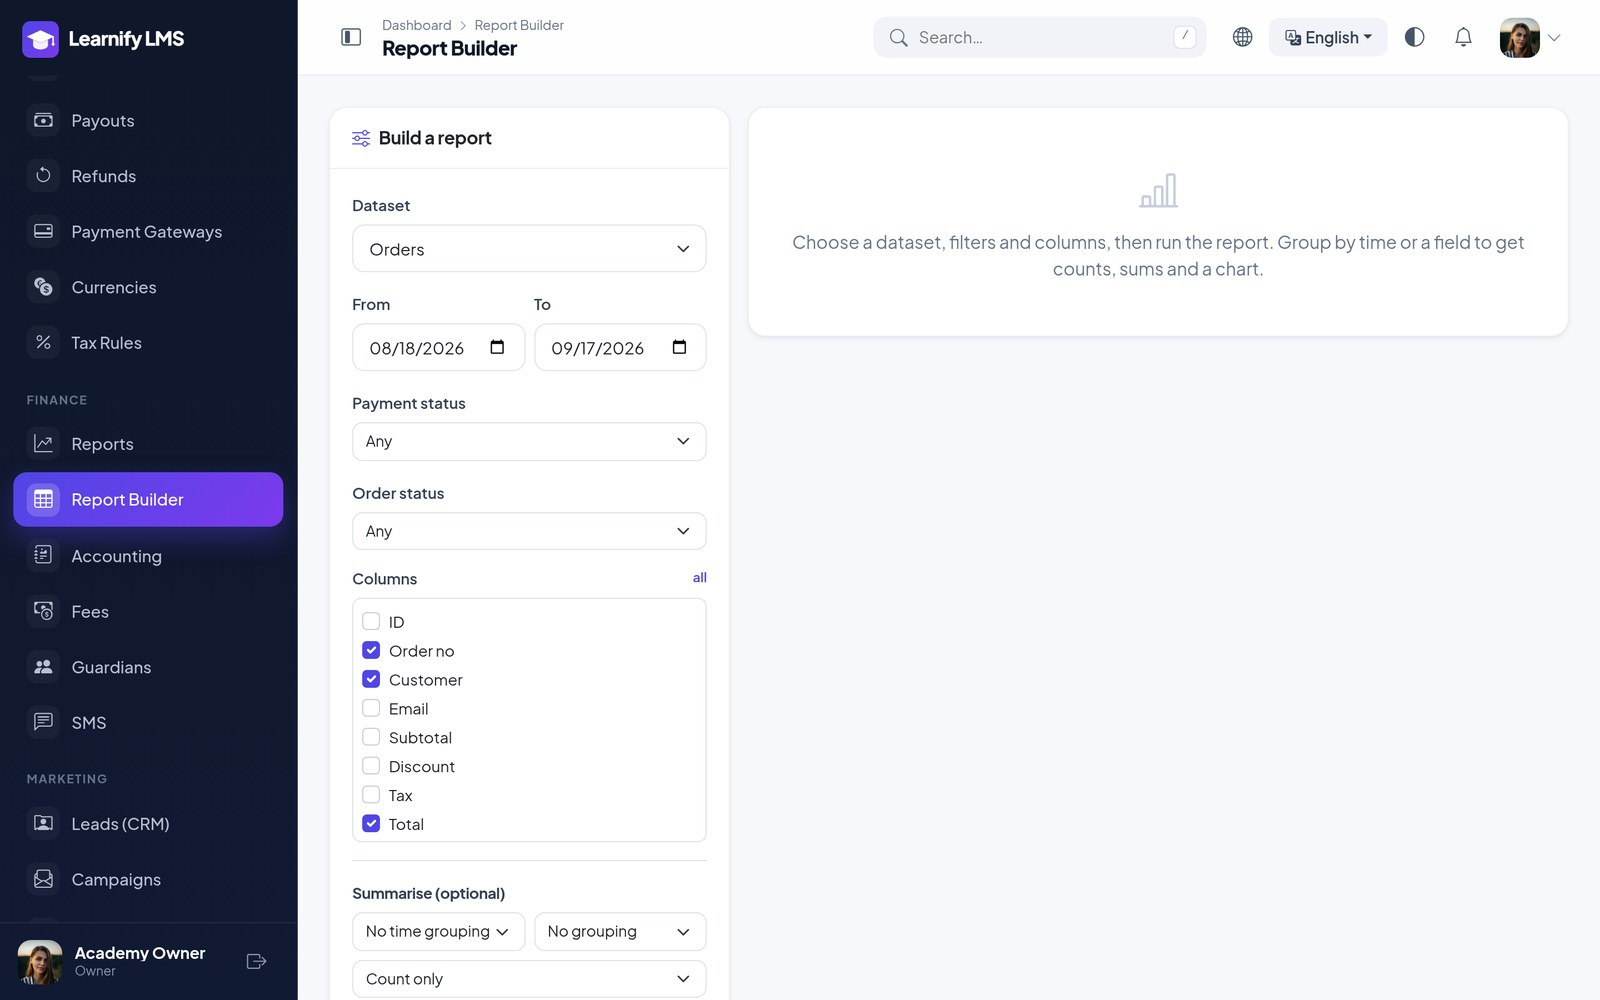
Finance → Reports covers revenue, enrolments, top courses, top instructors and month-on-month growth. When you need a number nobody thought of, the report builder lets you pick a dataset, choose columns, filter, group and export to CSV — and save the report to run again.
Accounting
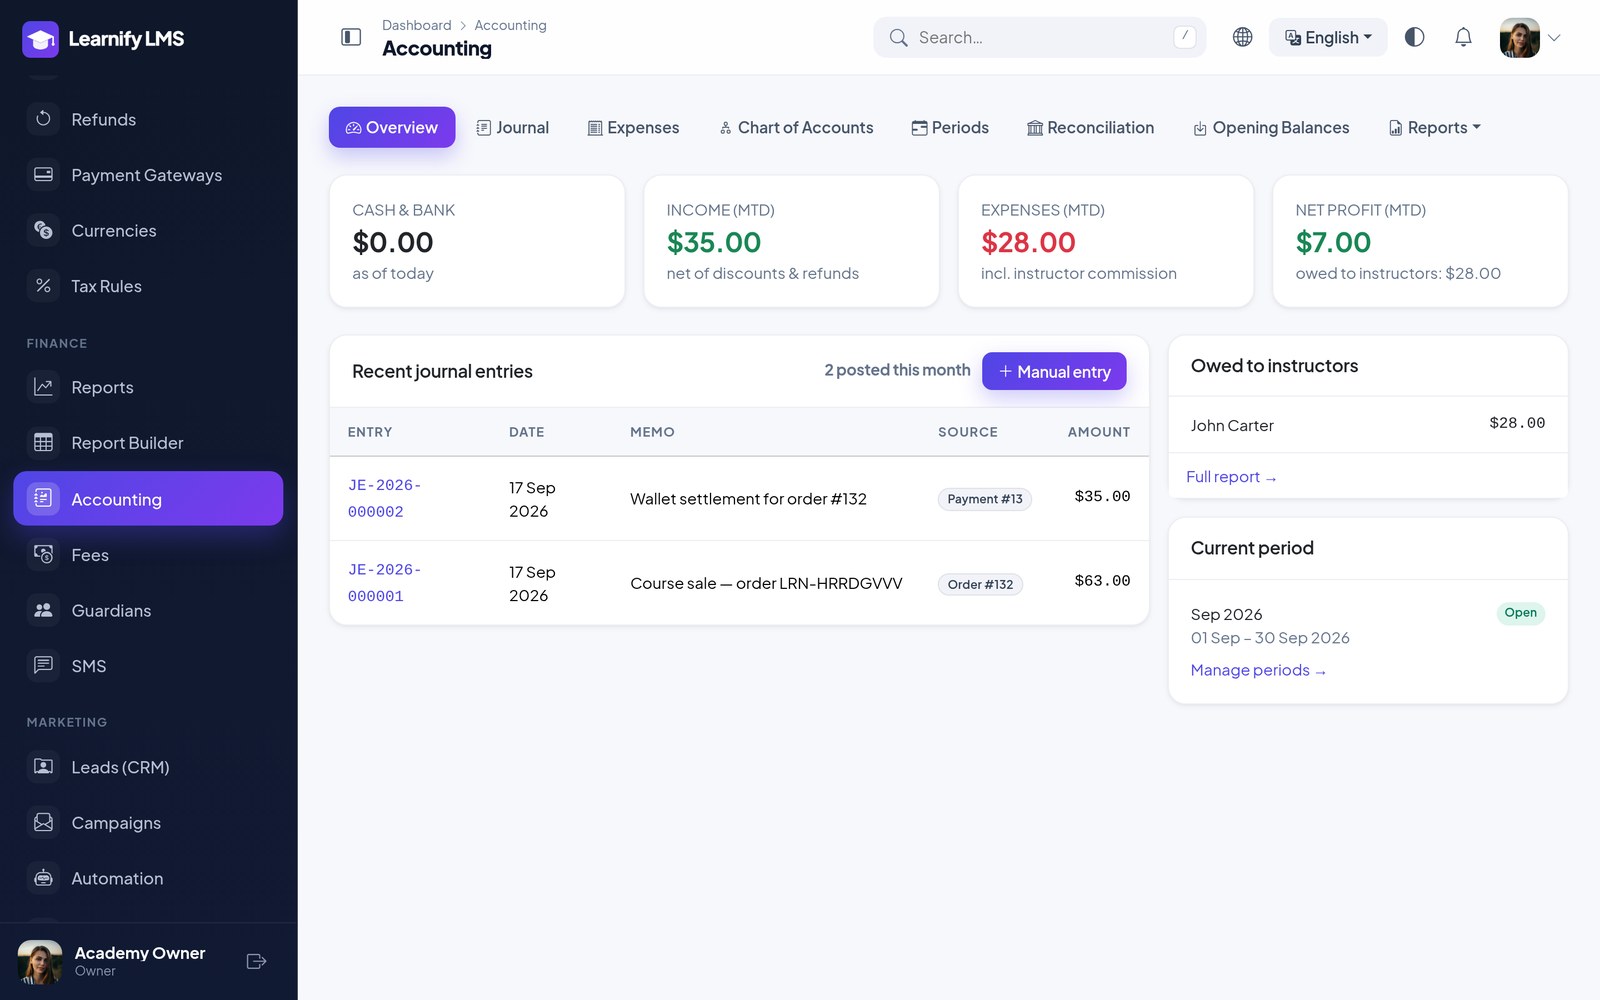
A real double-entry ledger, not a summary screen. Orders, refunds, payouts and expenses post to accounts automatically as they happen, so the books are always current.
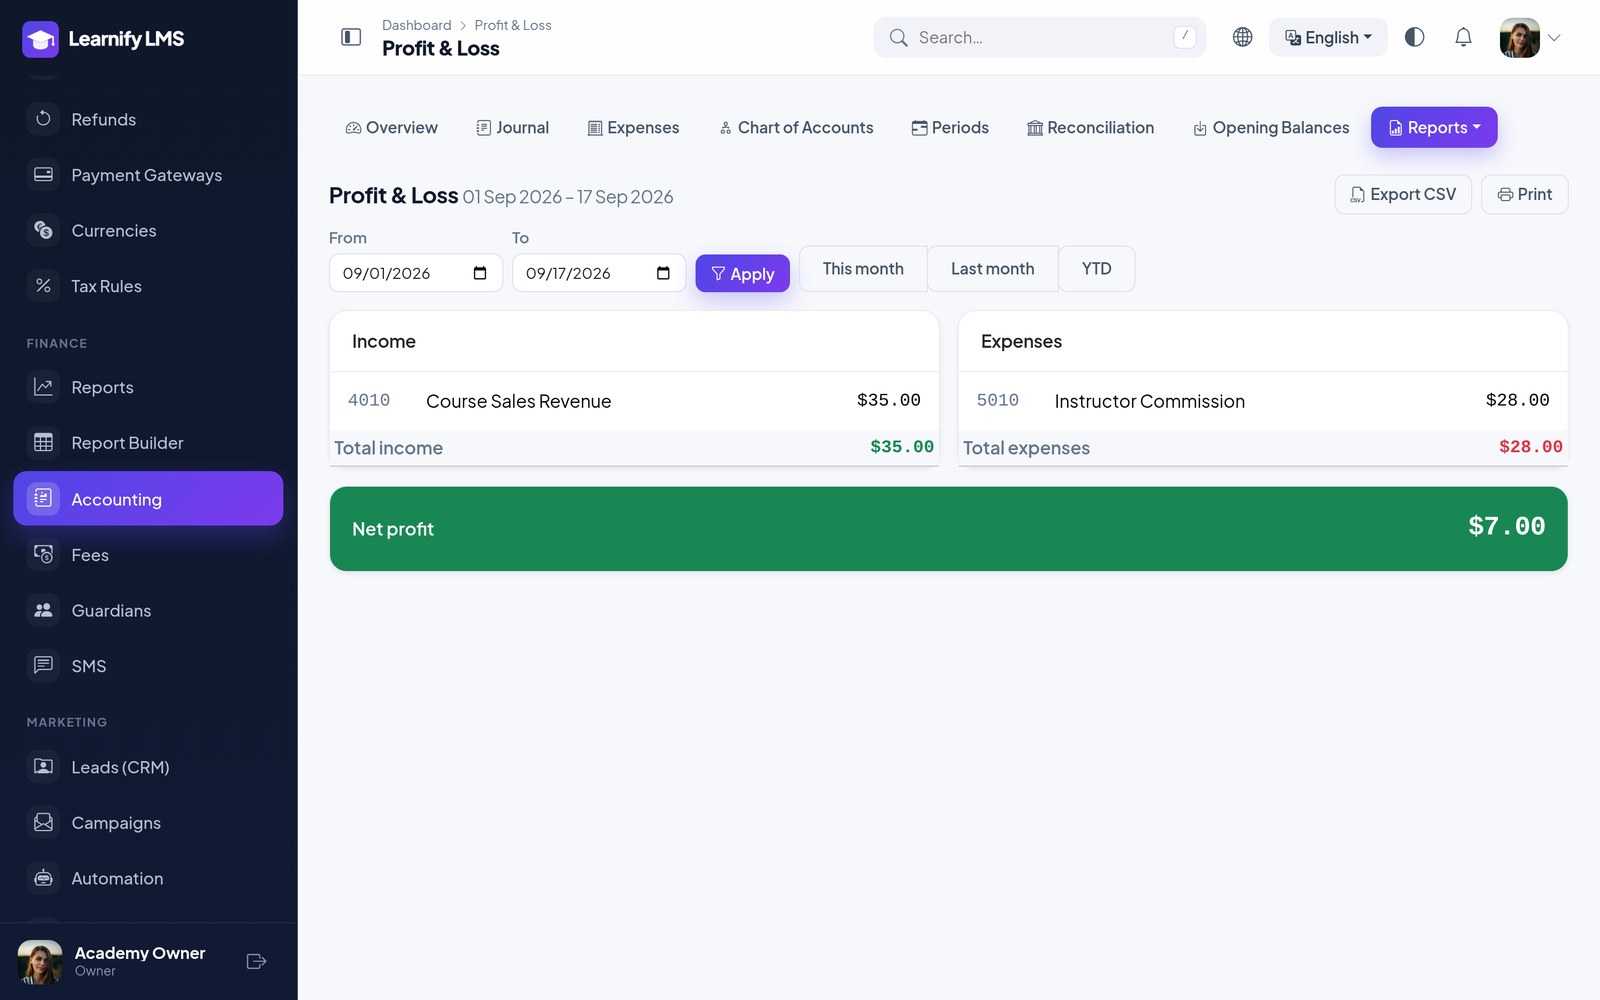
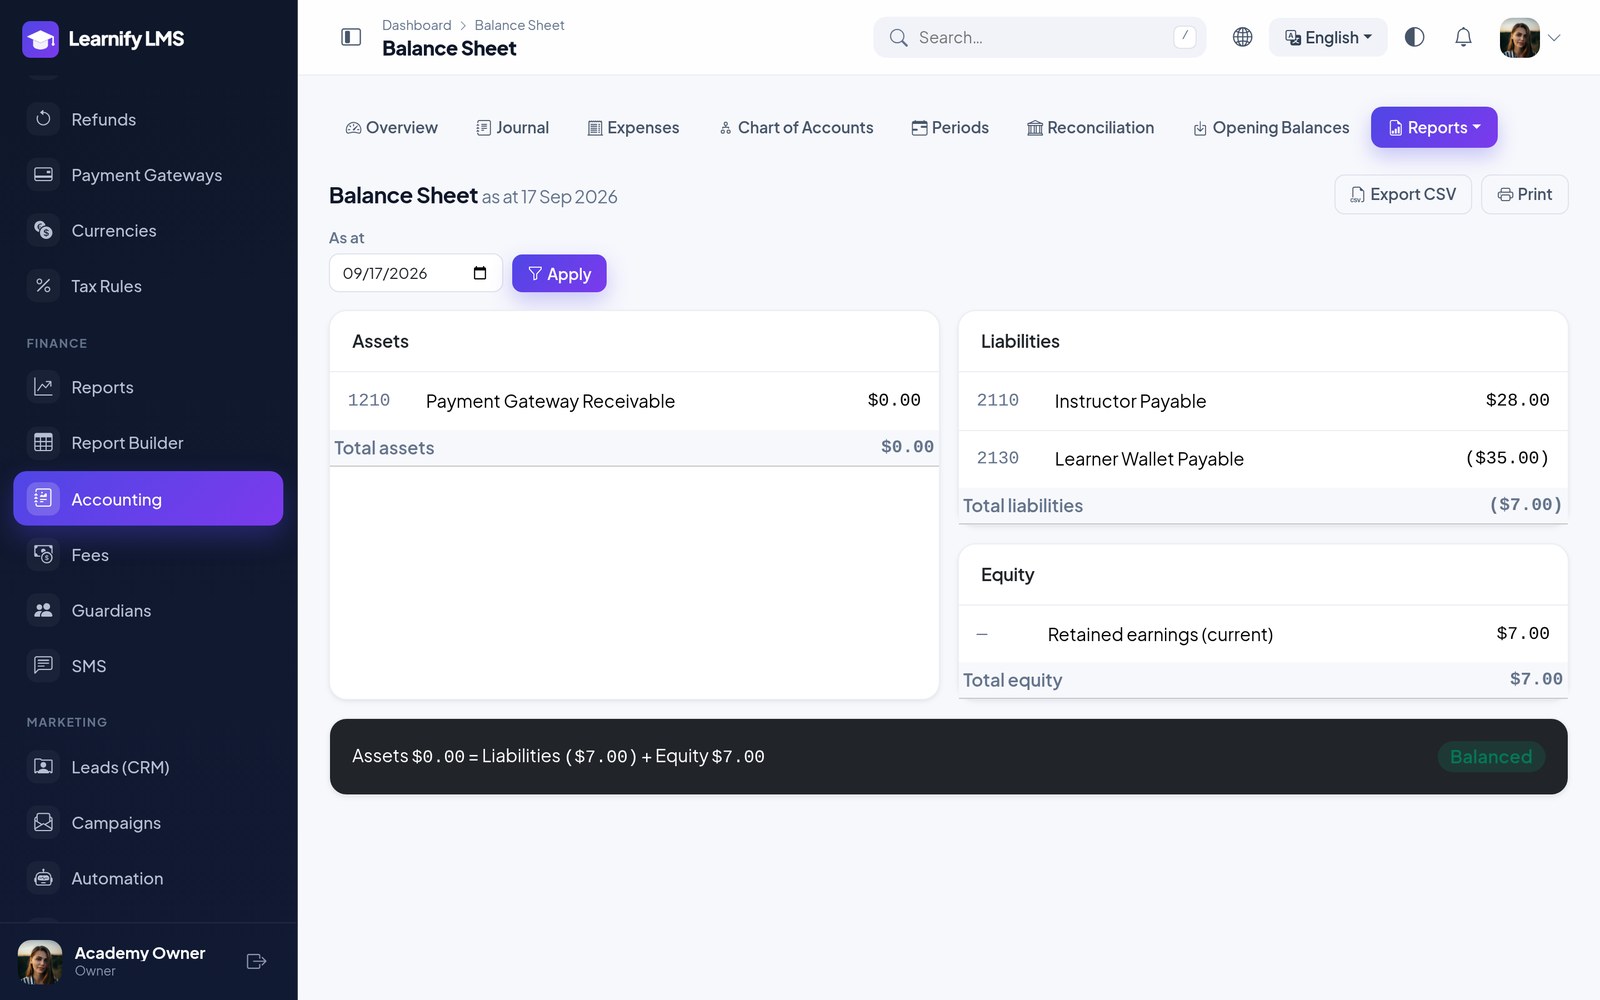
| Screen | What it gives you |
|---|---|
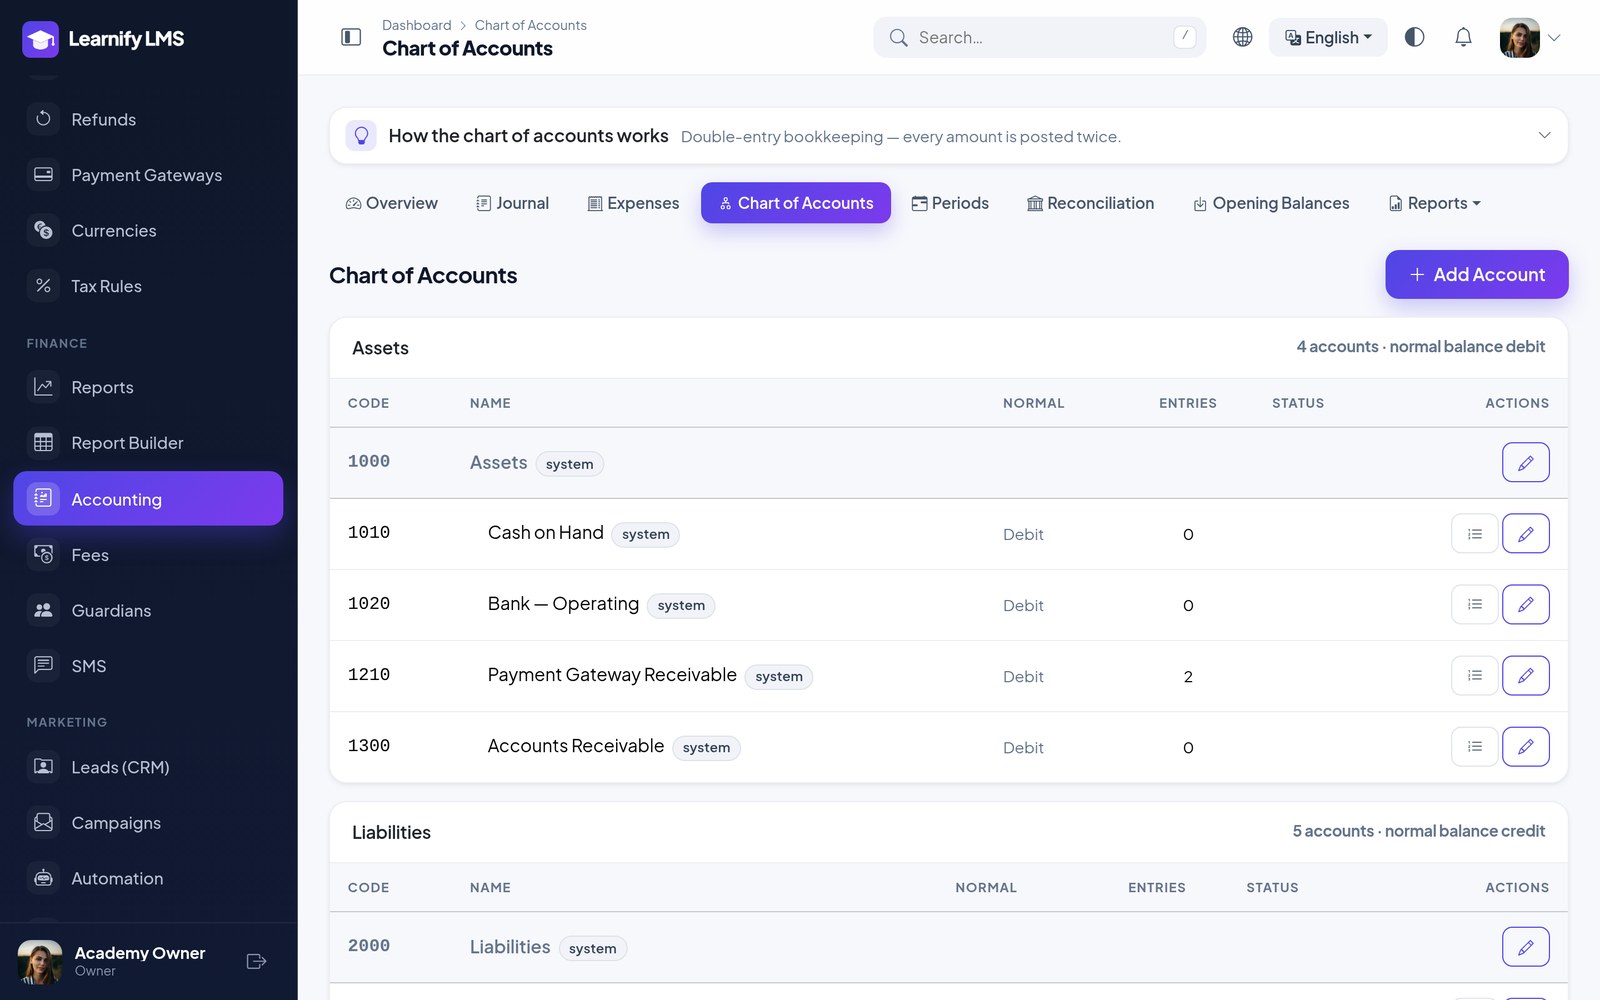
| Chart of accounts | The account tree, editable, with balances. |
| Journal | Every entry, and a form for manual ones. |
| Expenses | Recorded against categories and posted to the ledger. |
| Profit & loss | Income and expenses over a period. |
| Balance sheet | Assets, liabilities and equity at a date. |
| Cash flow, trial balance, general ledger | The standard statements. |
| Instructor payables | What you owe each instructor right now. |
Companies & Seat Licences
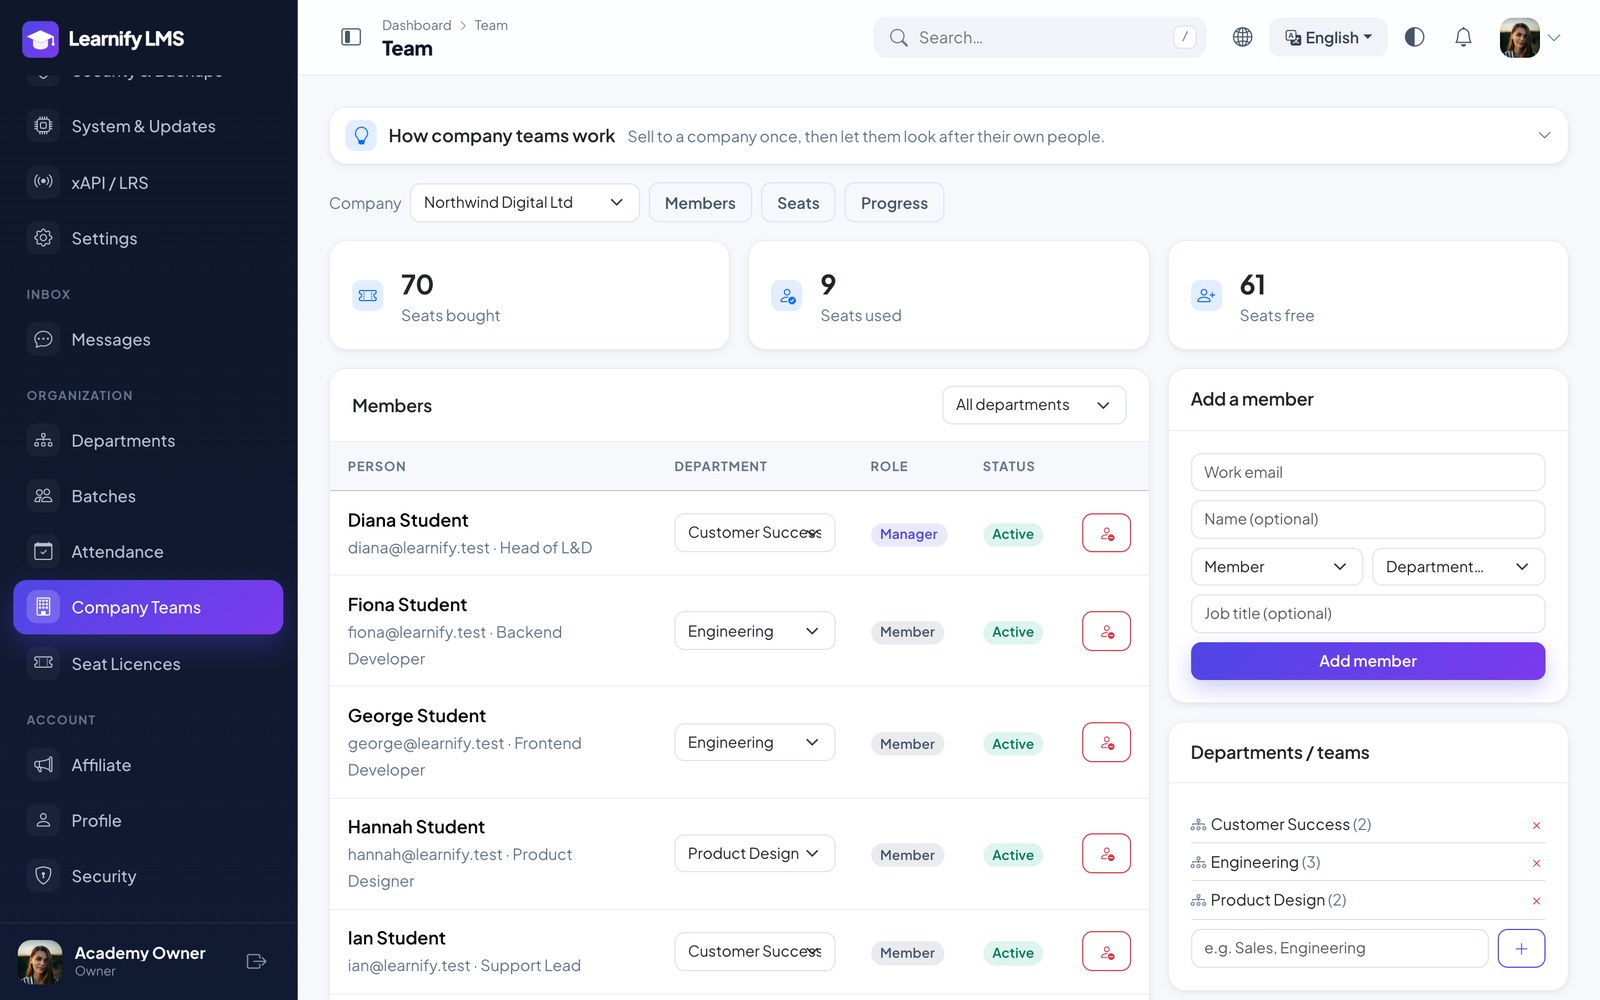
Sell to a company once, then let them look after their own people. A company has an owner,
managers and members; members are invited by email one at a time or imported from CSV, and anyone invited
before they have an account is joined automatically the moment they register. Optional
auto-join domains attach every new sign-up from, say, @acme.com to the company.
Departments. Add departments (Sales, Engineering…) on the Team page and put each person in one — from the member row, the invite form, or a CSV column. Filter the team by department.
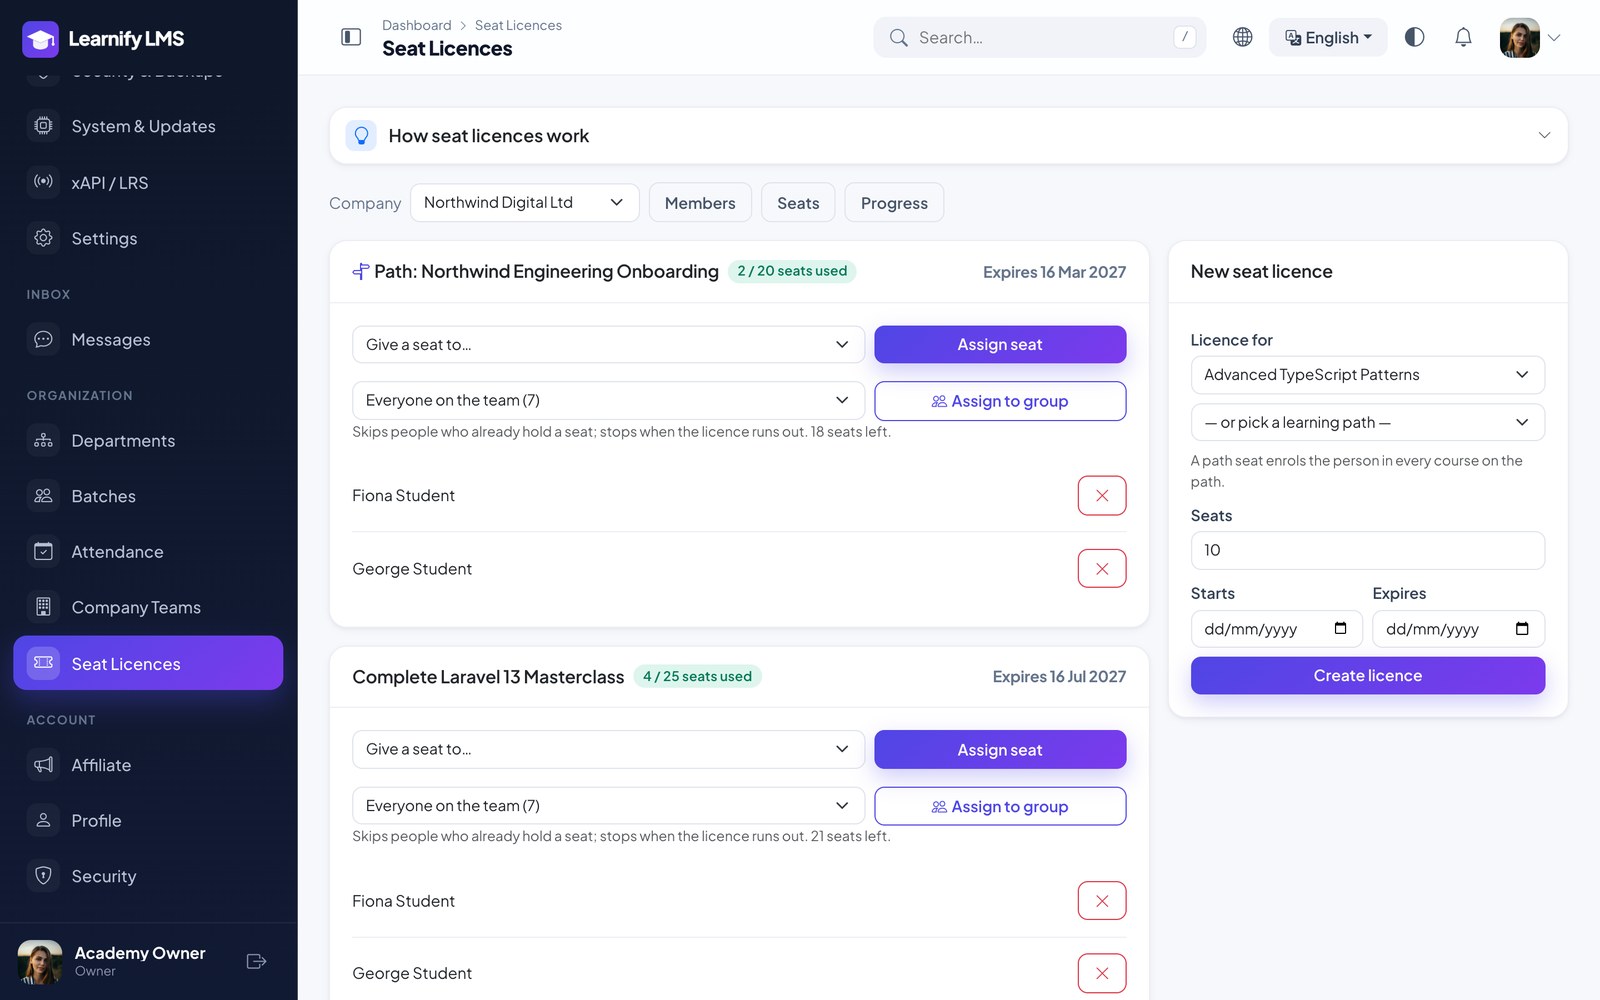
A seat licence is N seats on one course or learning path for one company, with an optional start and expiry date. Assigning a seat enrols that member (a path seat enrols them in every course on the path); taking it back ends their access and frees the seat; removing a member releases every seat they held. Assign to group pushes a licence to a whole department or the whole team in one click, skipping people who already hold a seat and stopping when the seats run out. When a licence expires, everyone enrolled through it loses access on that date. A learning path can be made private to one company (Manage → Learning Paths → Visible to) so internal training never shows in the public catalogue.
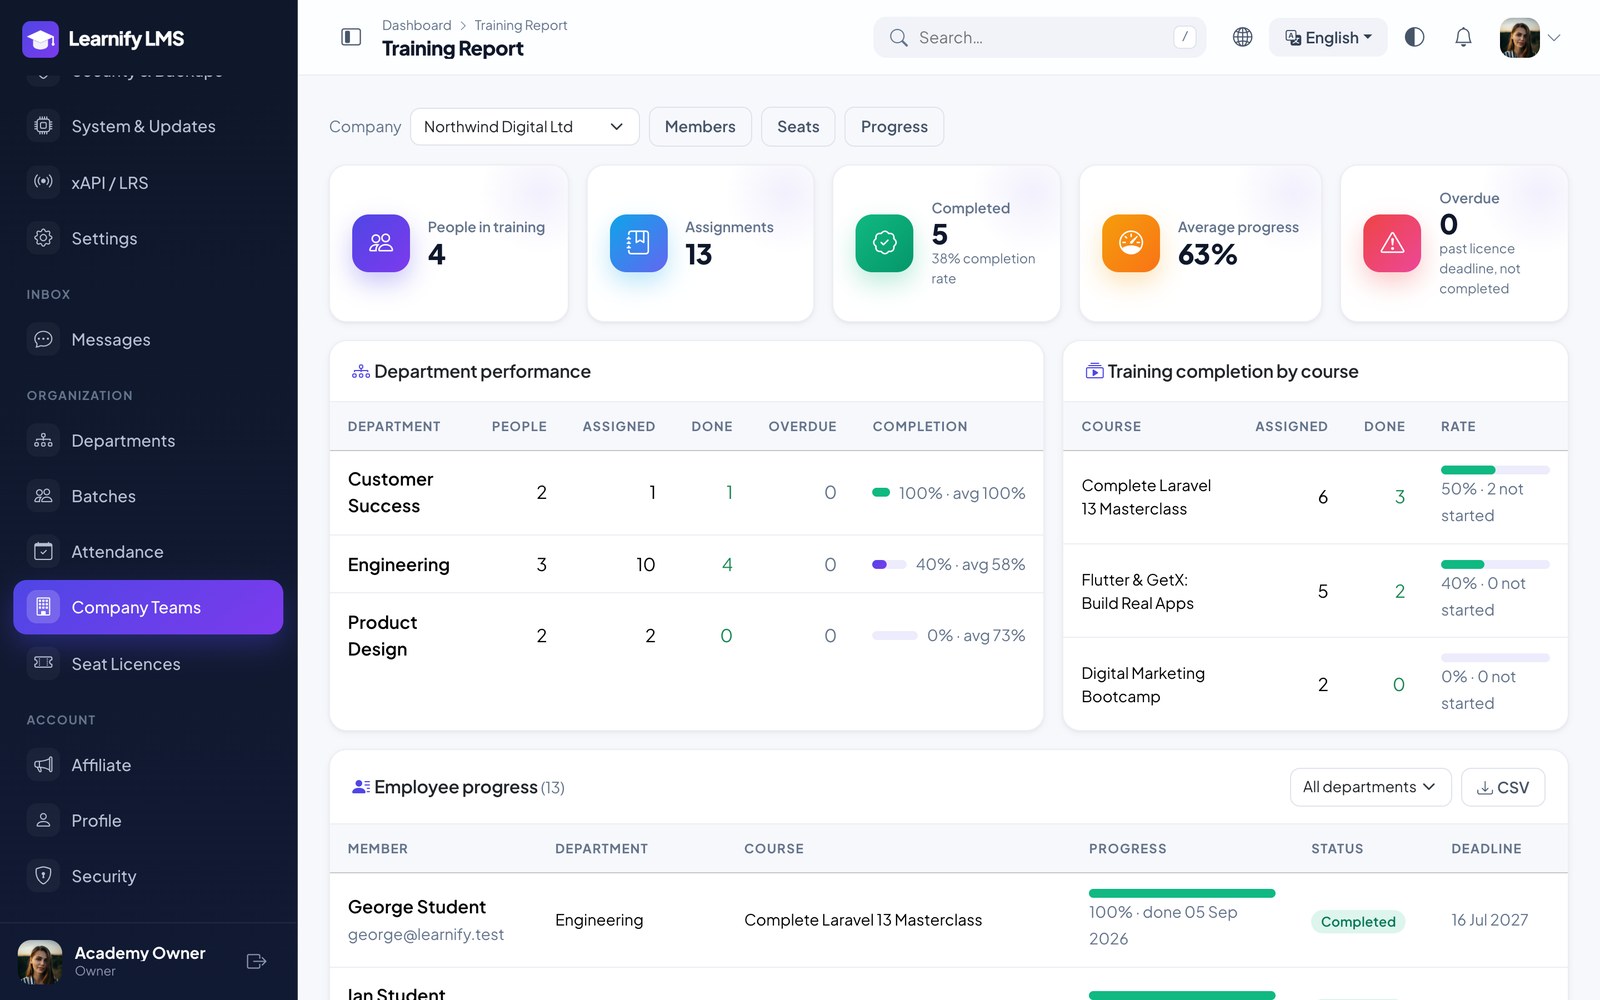
The training report has four parts: headline numbers (people in training, assignments, completed, average progress, overdue), department performance (headcount, assigned, done, overdue, completion rate), completion by course, and the employee rows with a department filter and CSV export. Staff see every company under Organization; a company owner or manager sees only theirs.
Seats assigned to someone with no account yet are reserved — they activate at sign-up.
Creating a company. Staff create and edit companies with New company / Edit company on Organization → Companies; optionally name an owner (the email of an existing account), who then manages the company’s team, seats and progress.
Departments, Batches & Attendance
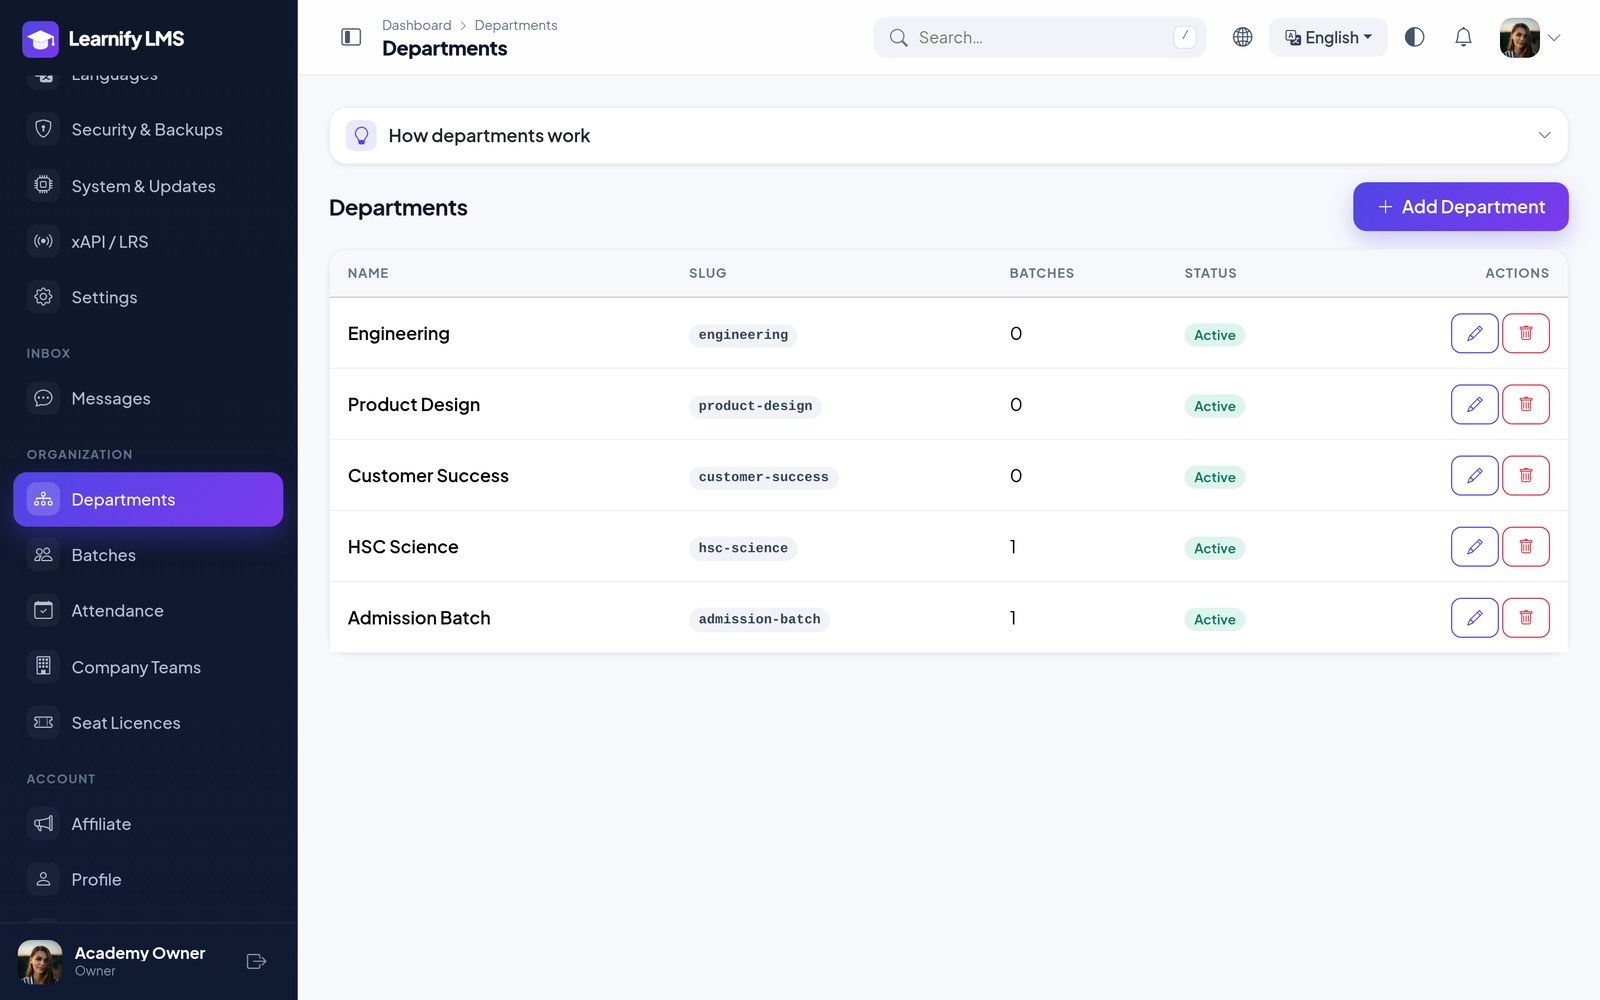
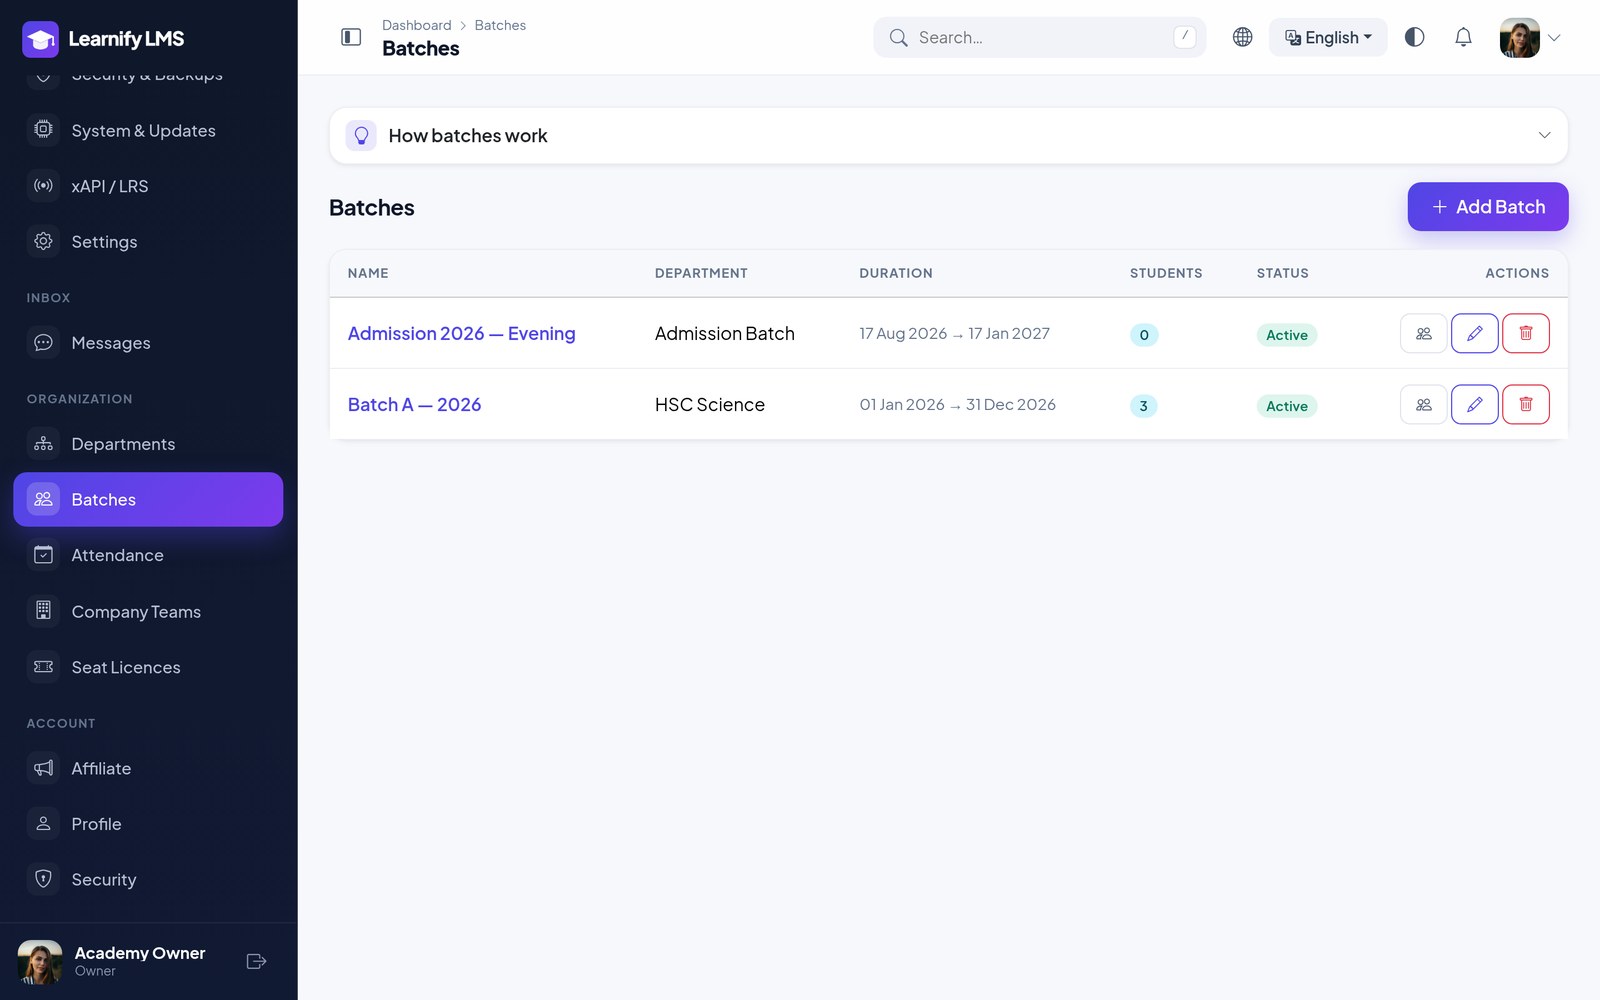
For coaching centres and schools. Departments group batches and staff (Science, Commerce, IT). A batch is a group of students taking a course together on a schedule; add students one by one or import a CSV and they are enrolled in the batch course automatically. Attendance, live classes and fee invoices all hang off the batch.
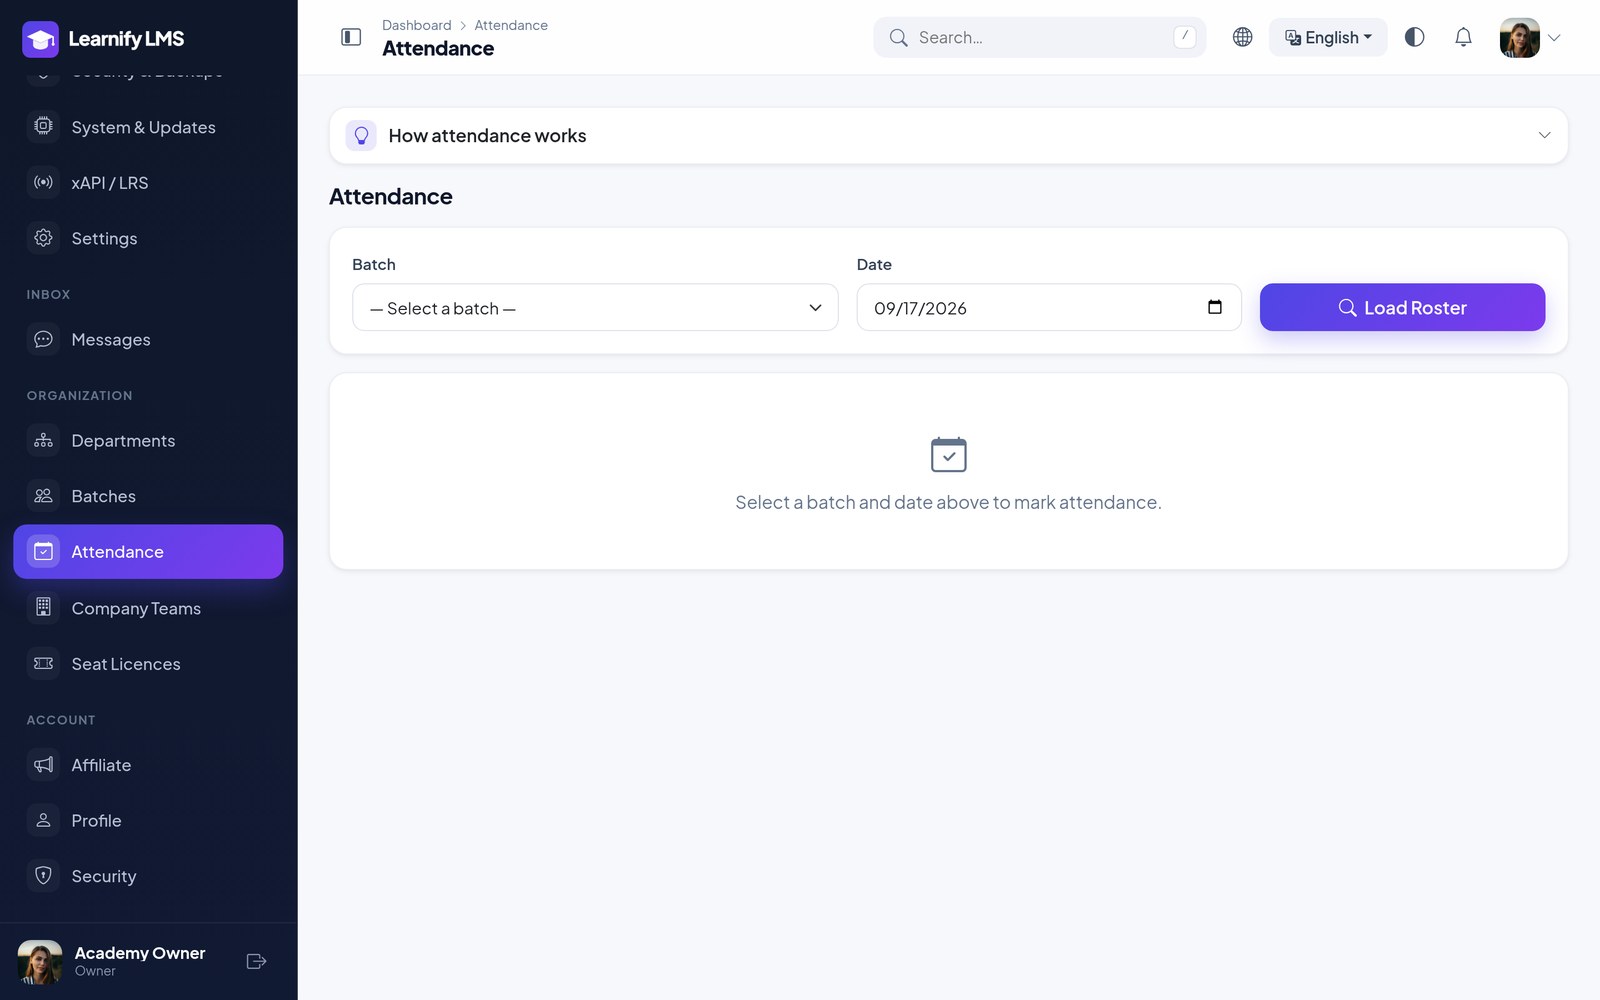
Attendance: pick a batch and date, the roster loads with everyone present, flip anyone to absent or late and save. Live-class joins can fill it in automatically. Percentages roll up per student, batch and month and can be exported; guardians can be texted when a child is marked absent.
Fees, Guardians & SMS
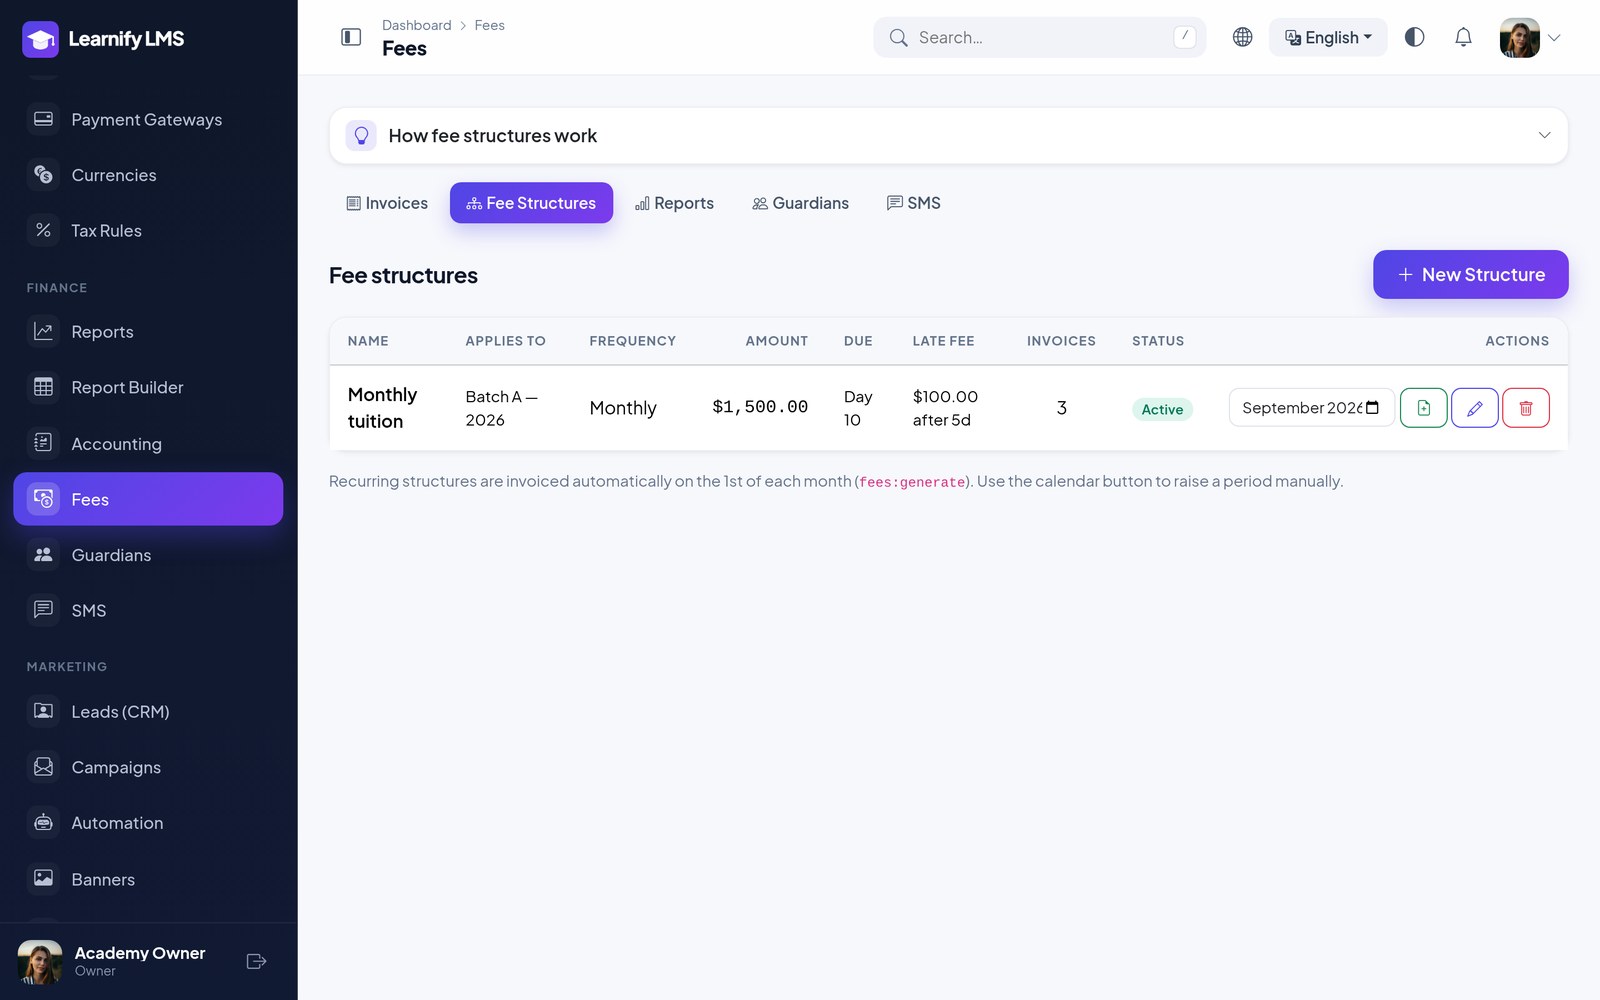
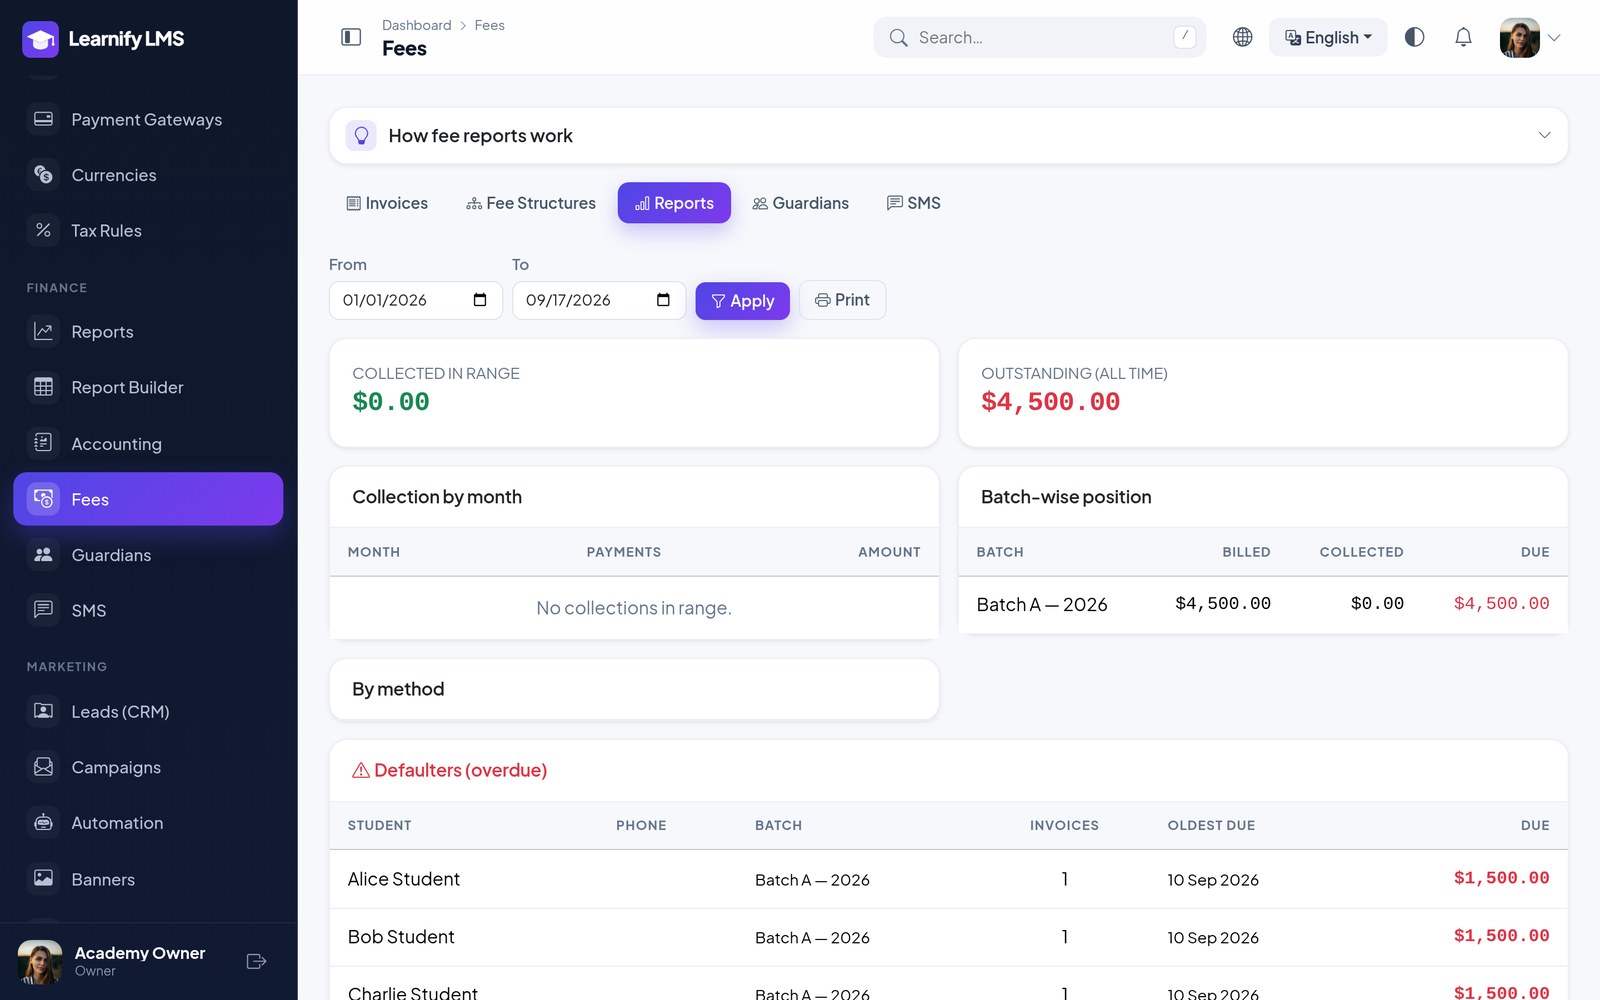
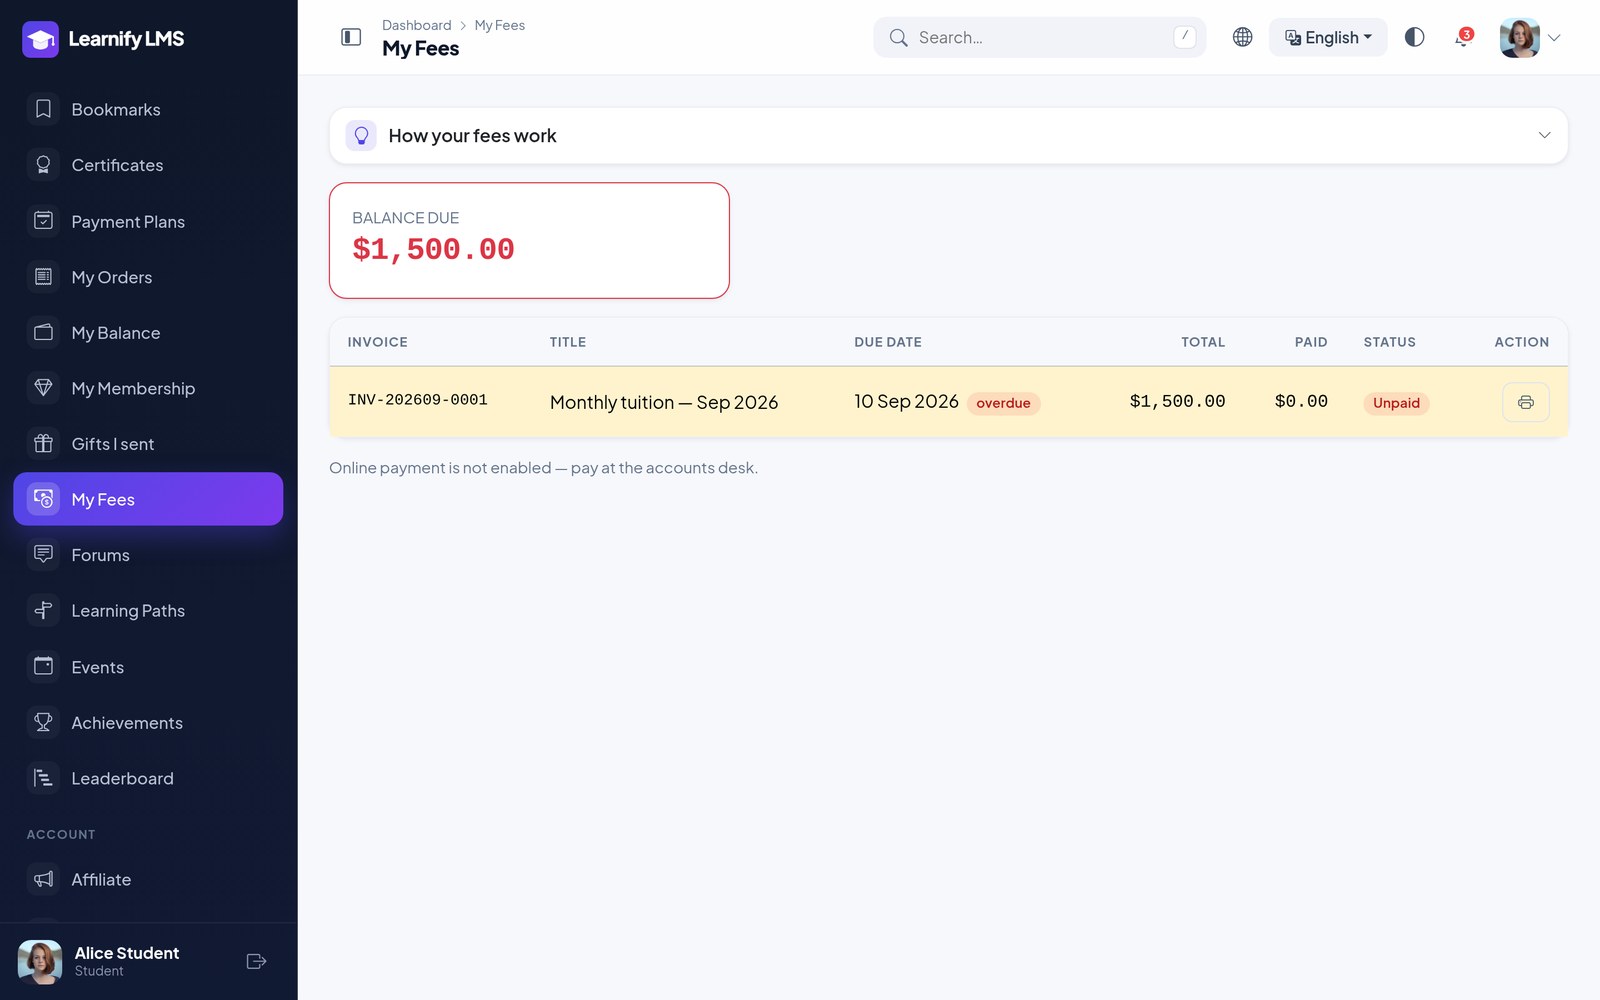
The Fees module bills students on a schedule rather than per course. A fee structure is a named set of heads — admission, monthly, exam, transport — with amounts, a due cycle and a late fee, attached to a batch so every student in it inherits the same fees. Invoices are generated for a batch and period in one go; students or guardians pay online, or the office records a cash / bank payment against the invoice. Overdue invoices trigger reminder email and SMS, and every payment posts to Accounting.
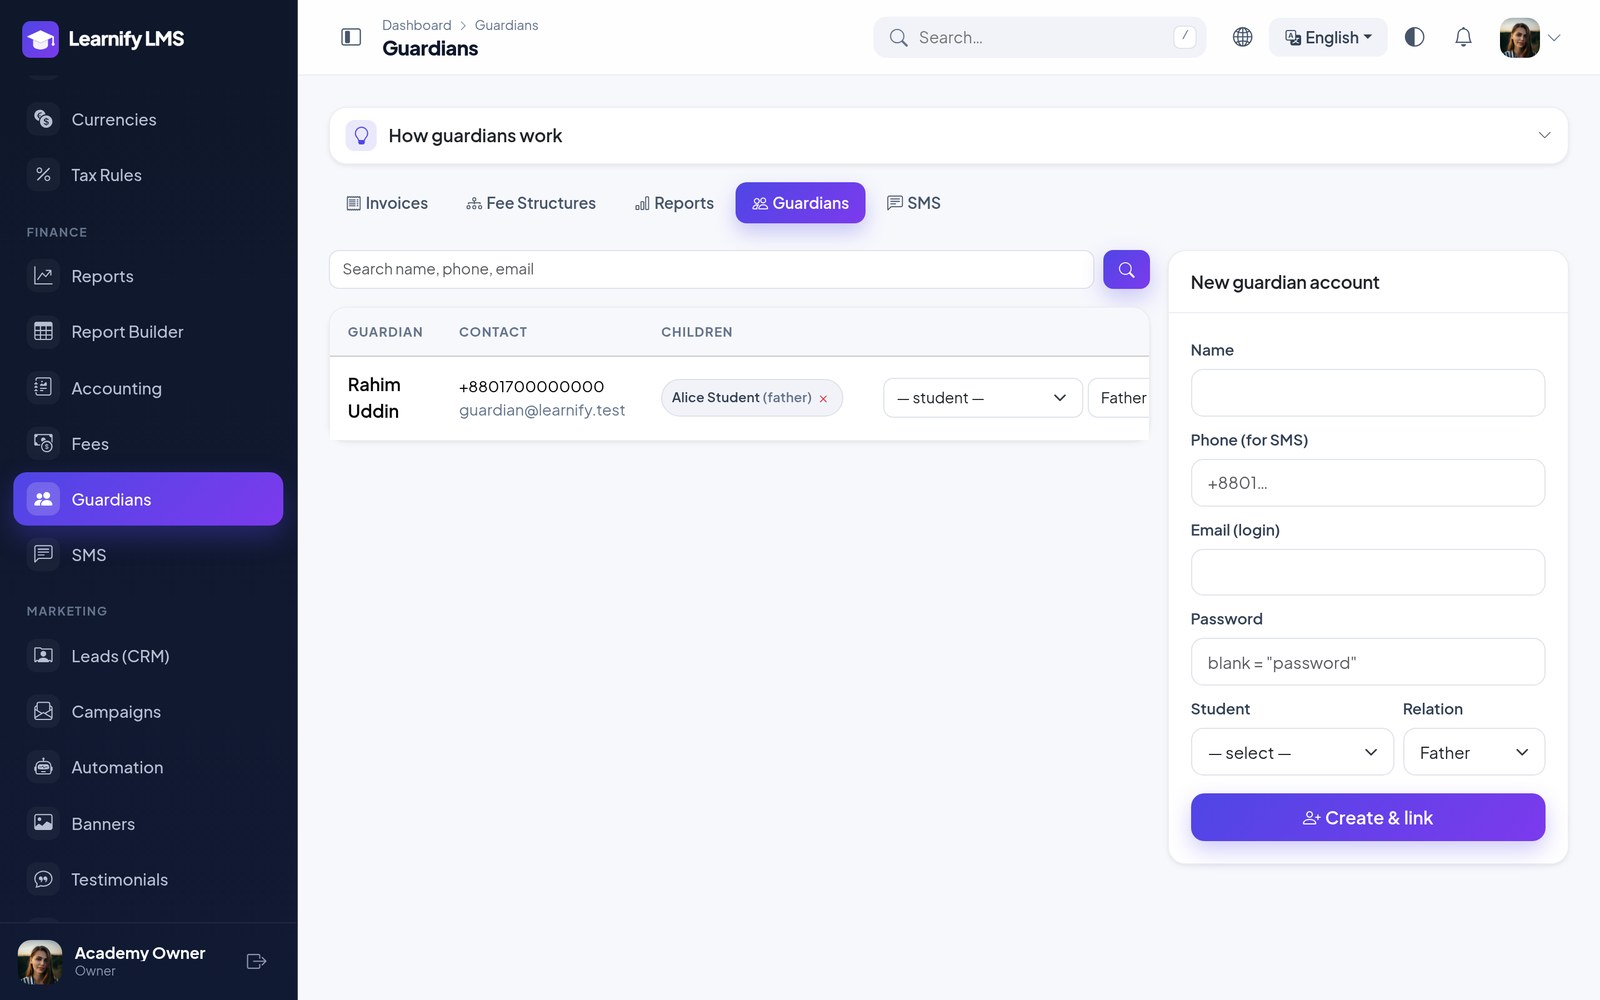
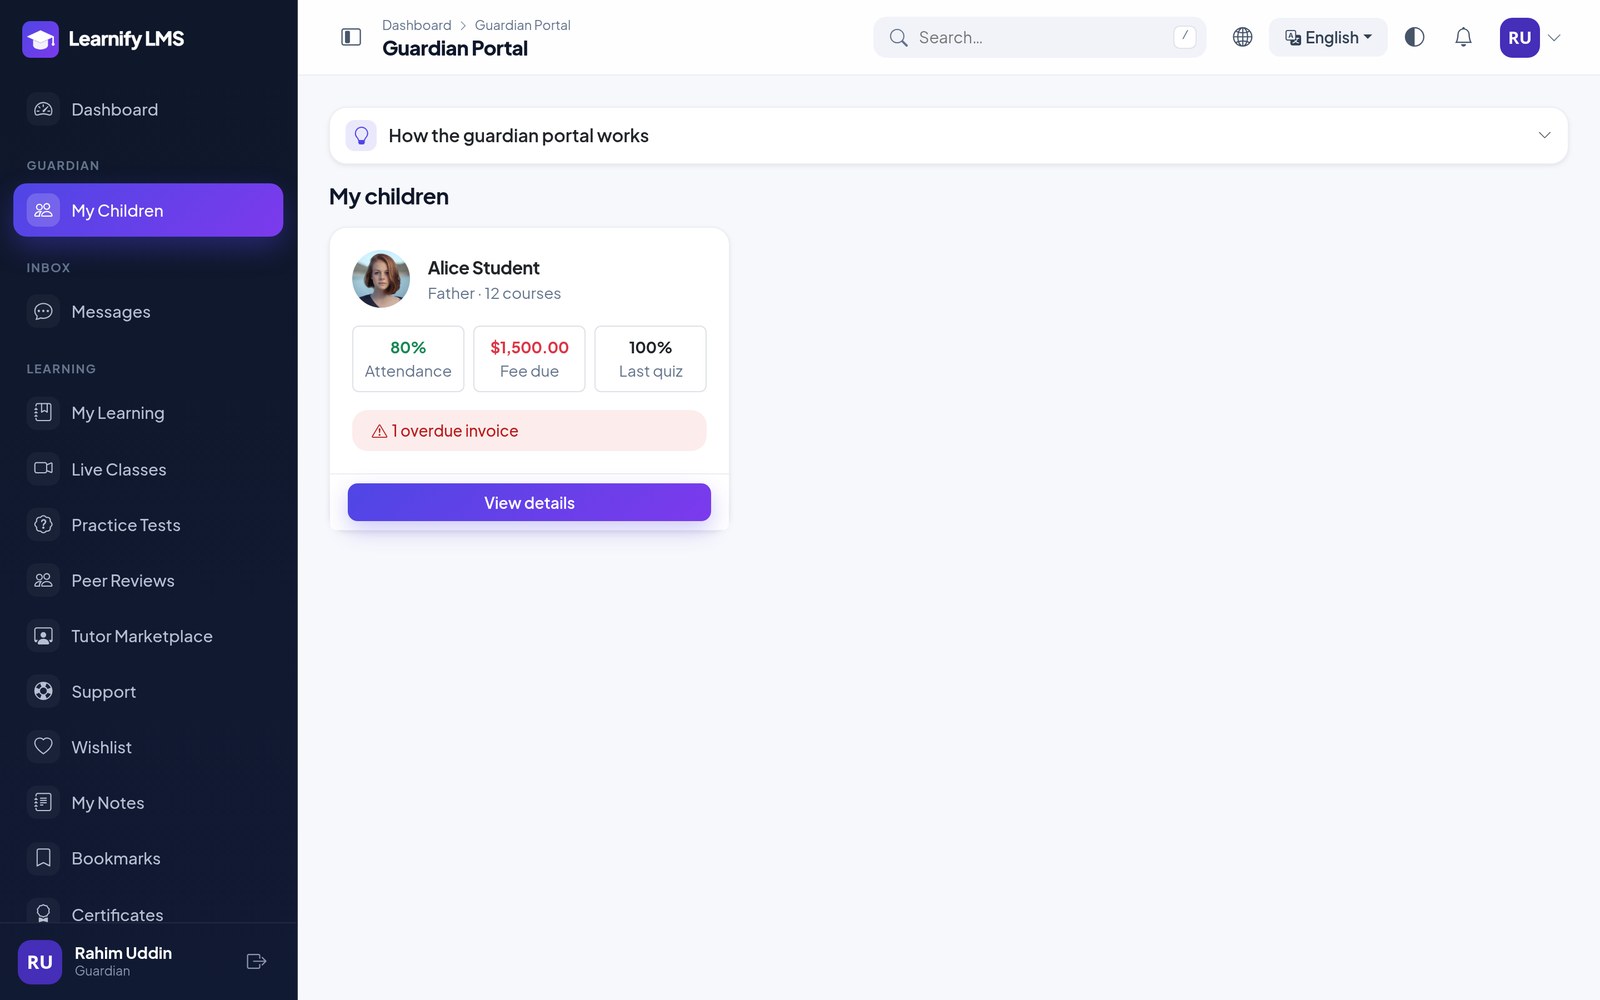
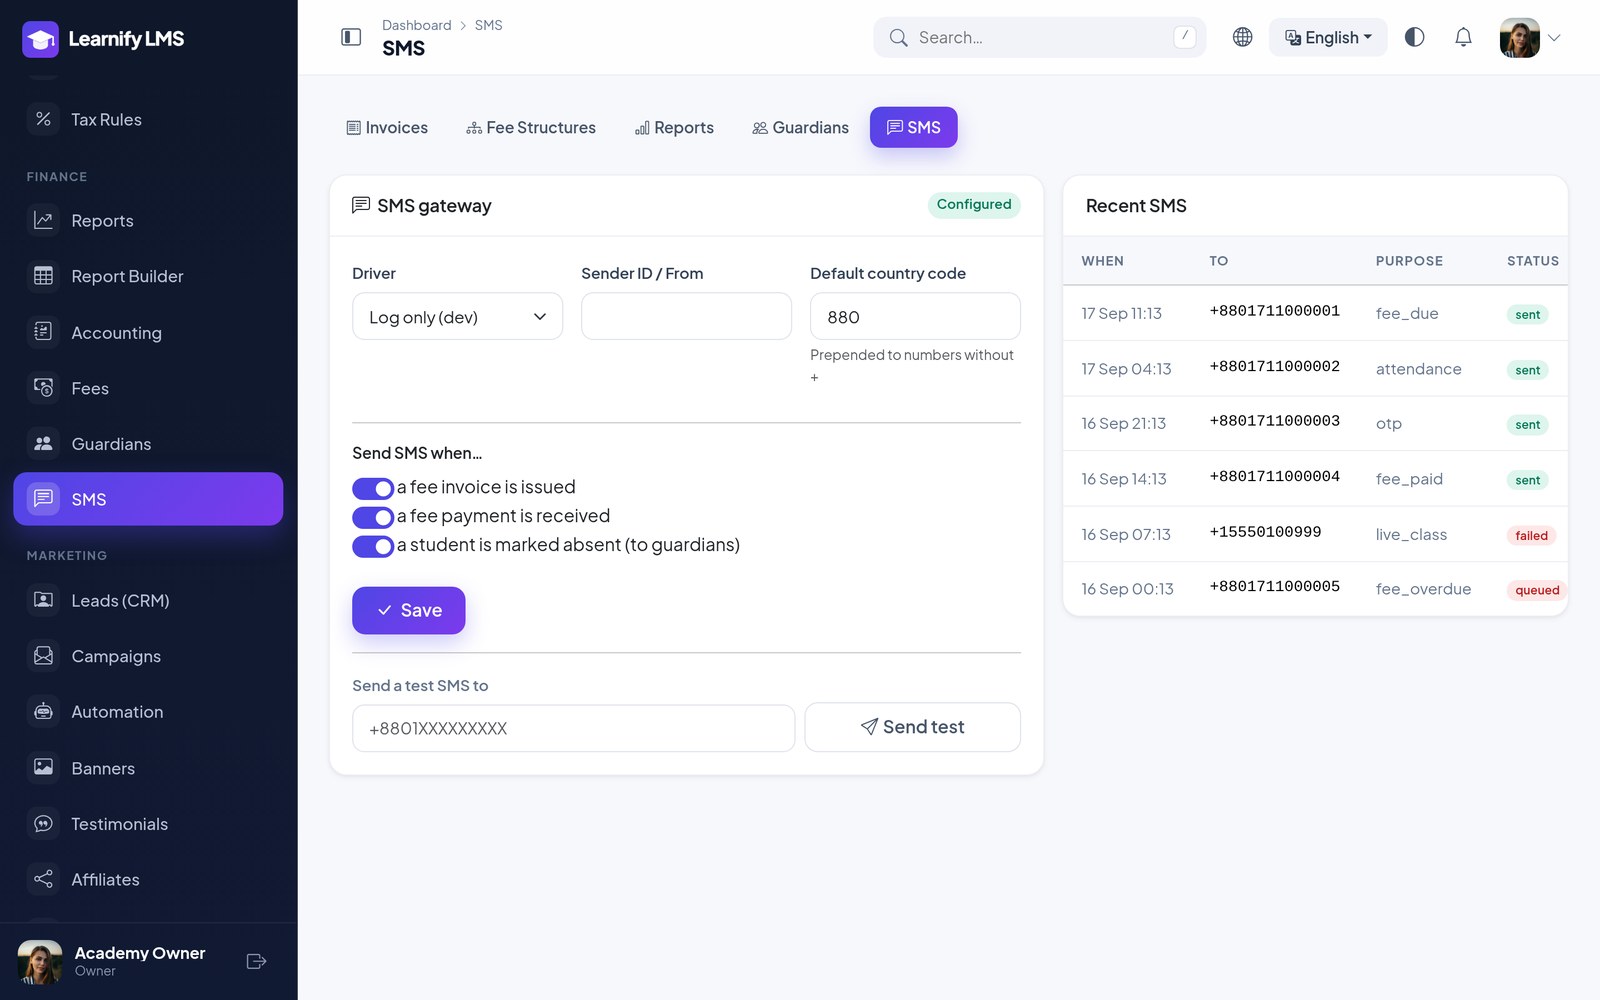
A guardian account is linked to one or more students and signs in to a portal showing attendance, results, progress and fee dues for their children only, with outstanding invoices payable right there. SMS (Twilio or a compatible HTTP gateway) is configured under Finance → SMS: choose which events send a text — new invoice, payment received, marked absent — and review every message in the log with its delivery status.
Campaigns, Leads & Affiliates
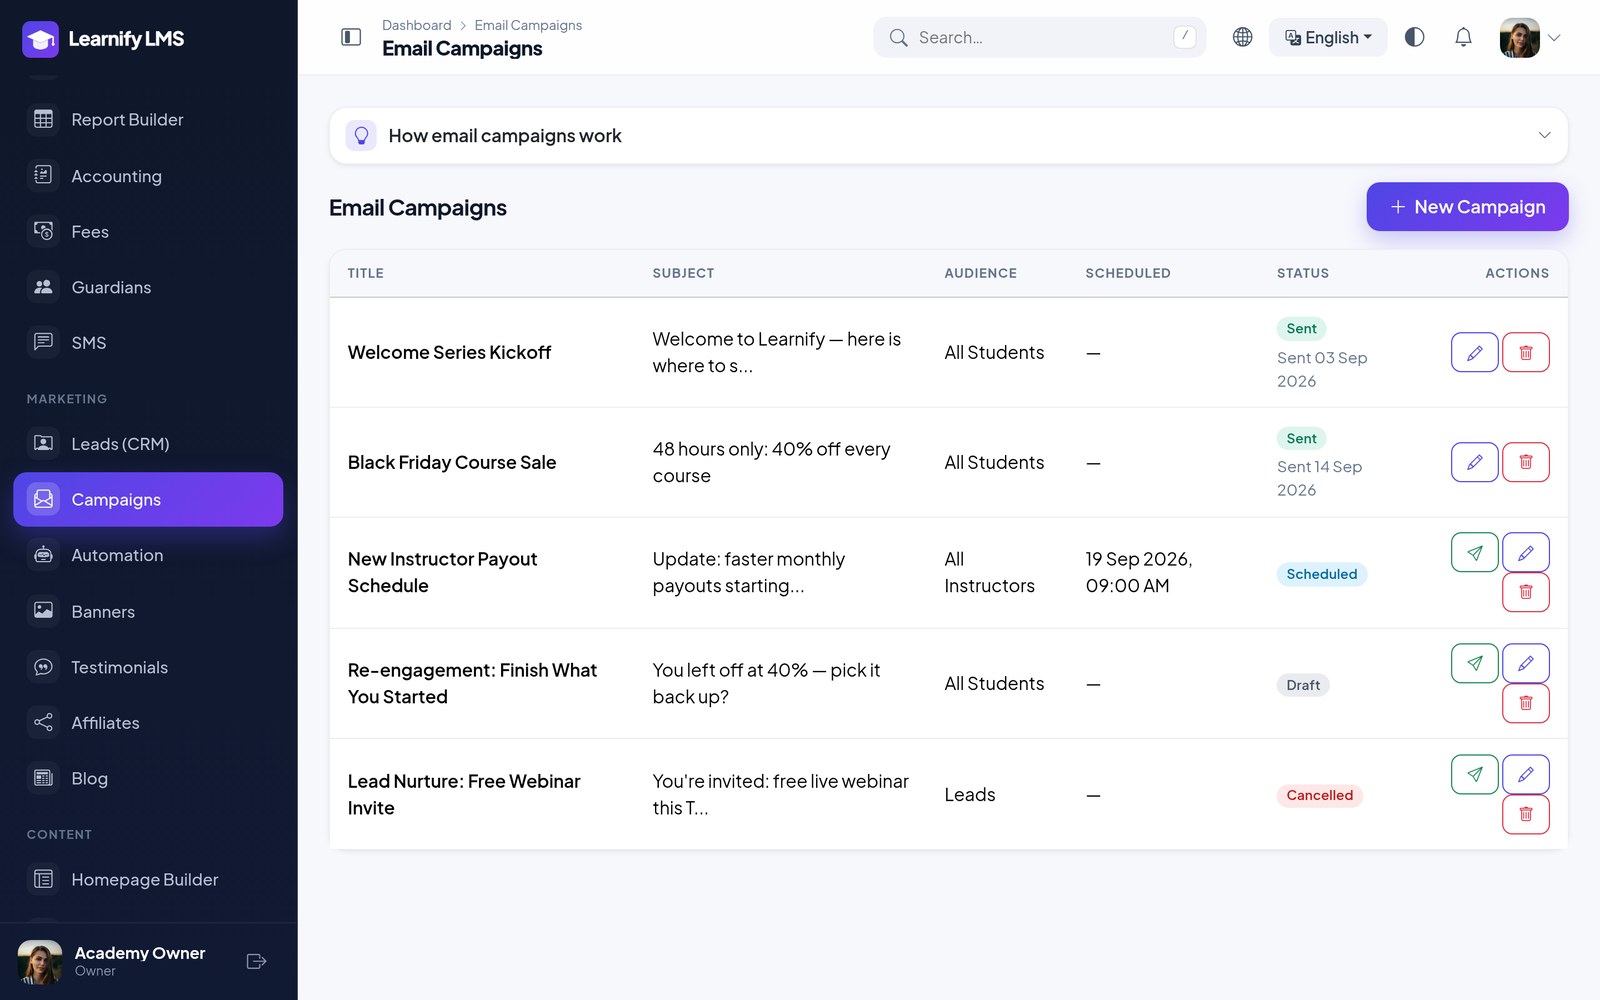
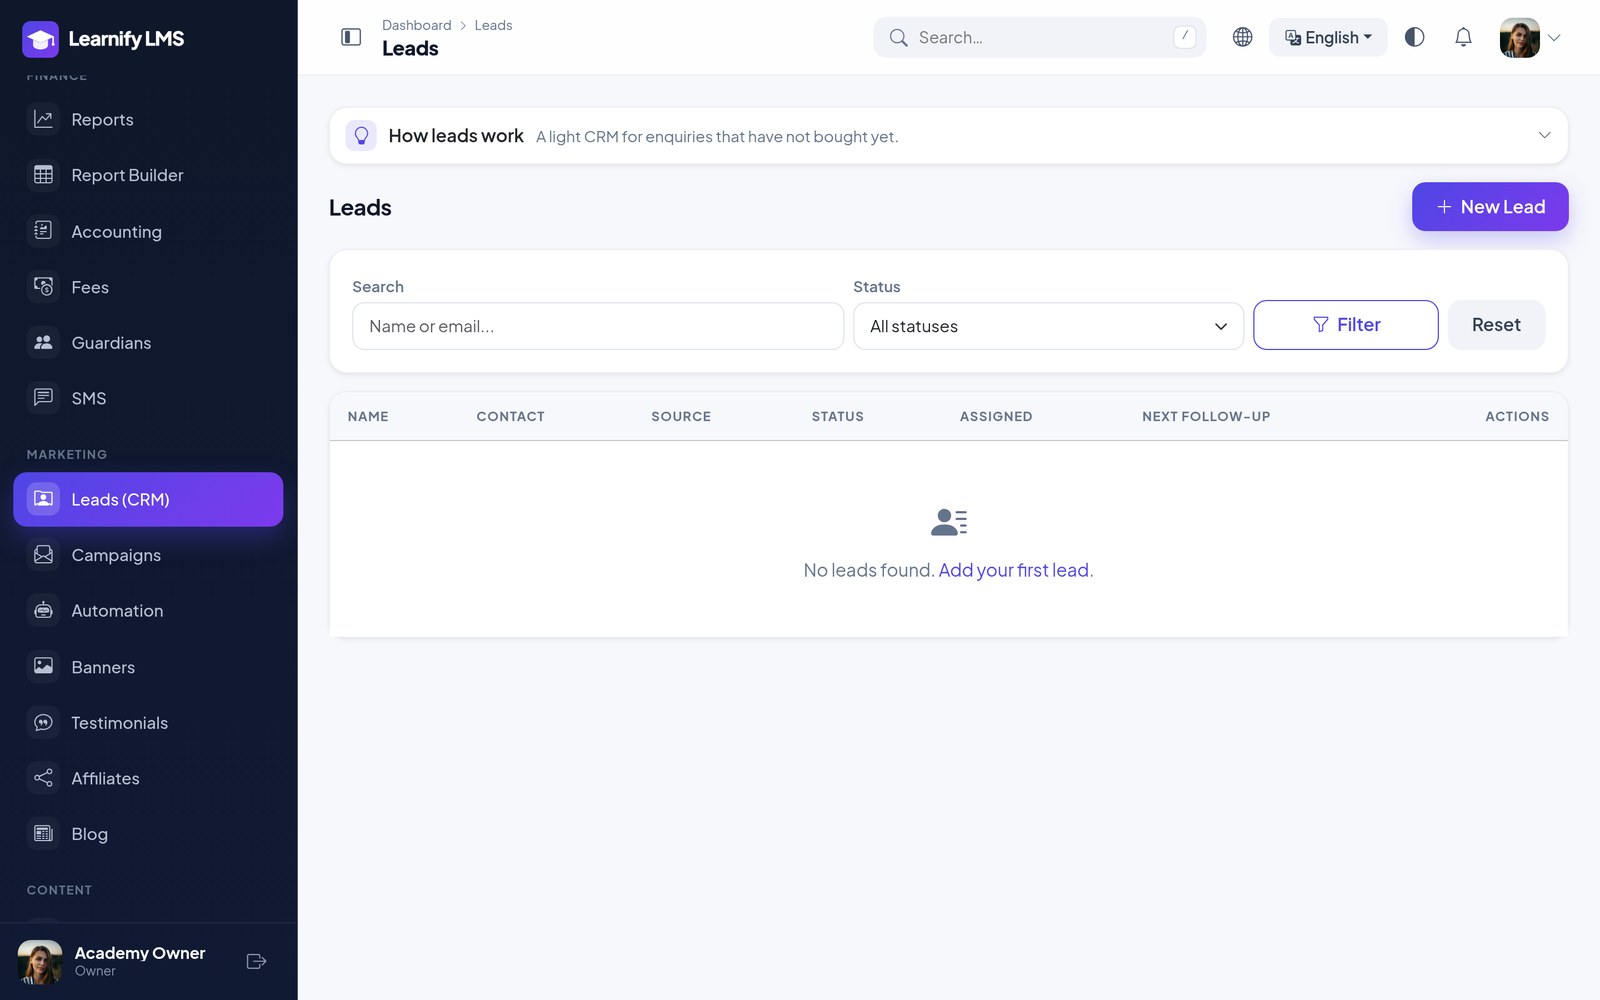
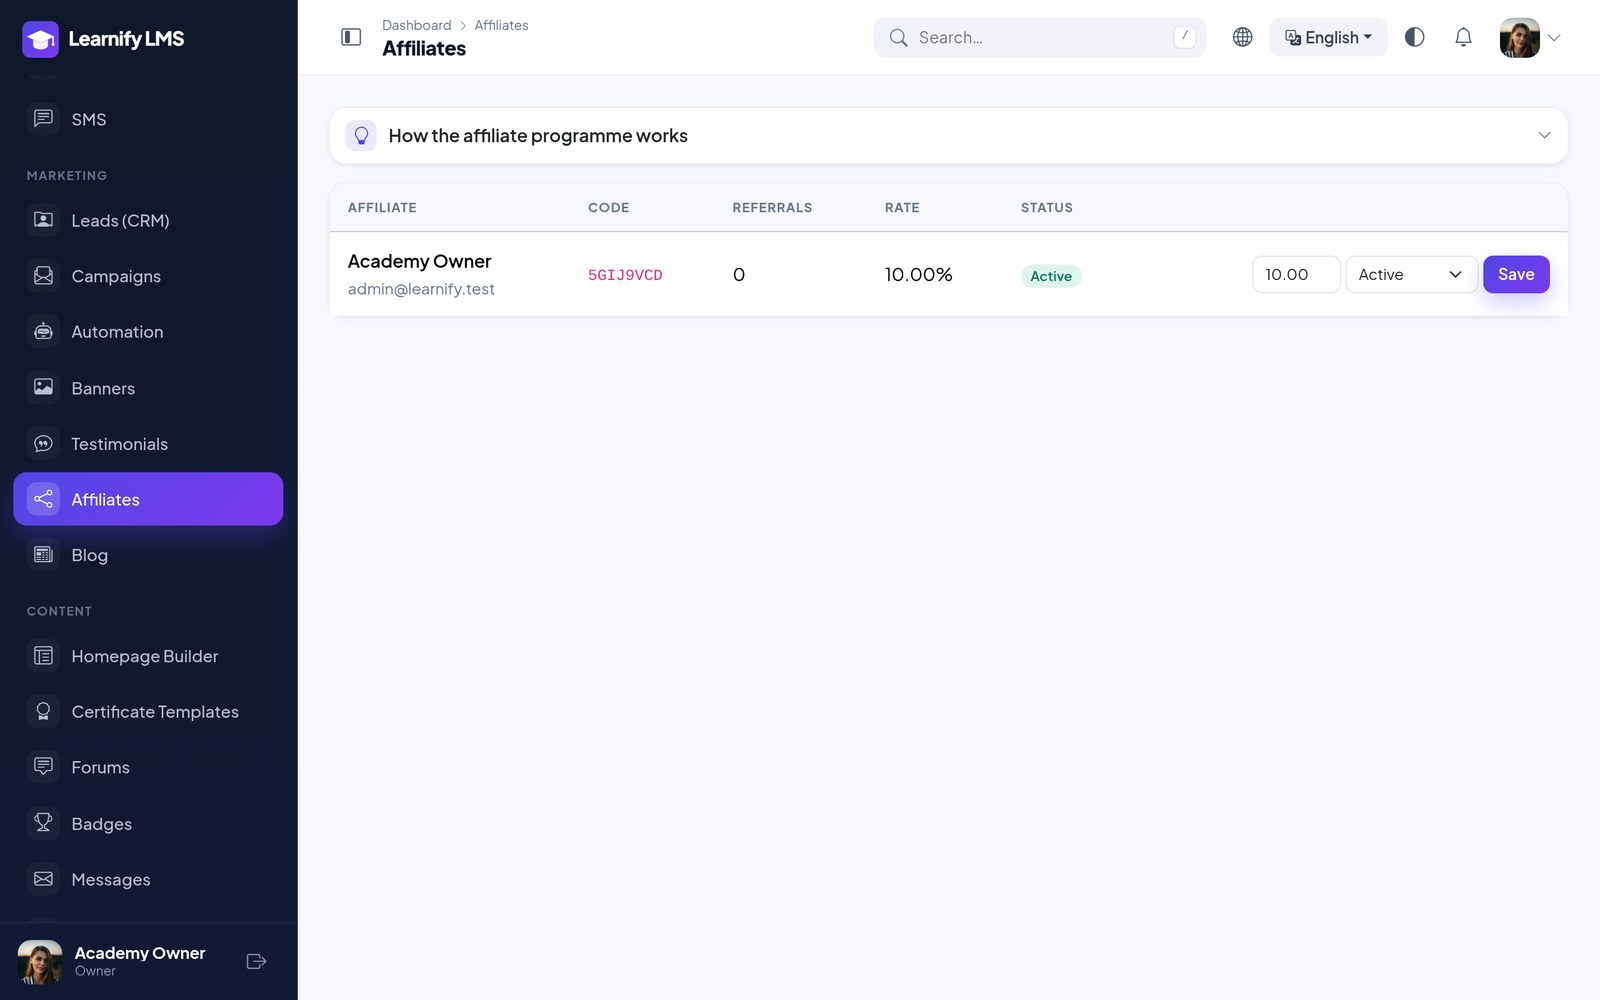
Email campaigns to a segment of your users, a lead CRM for enquiries that have not converted yet, and an affiliate programme that pays a commission on referred sales.
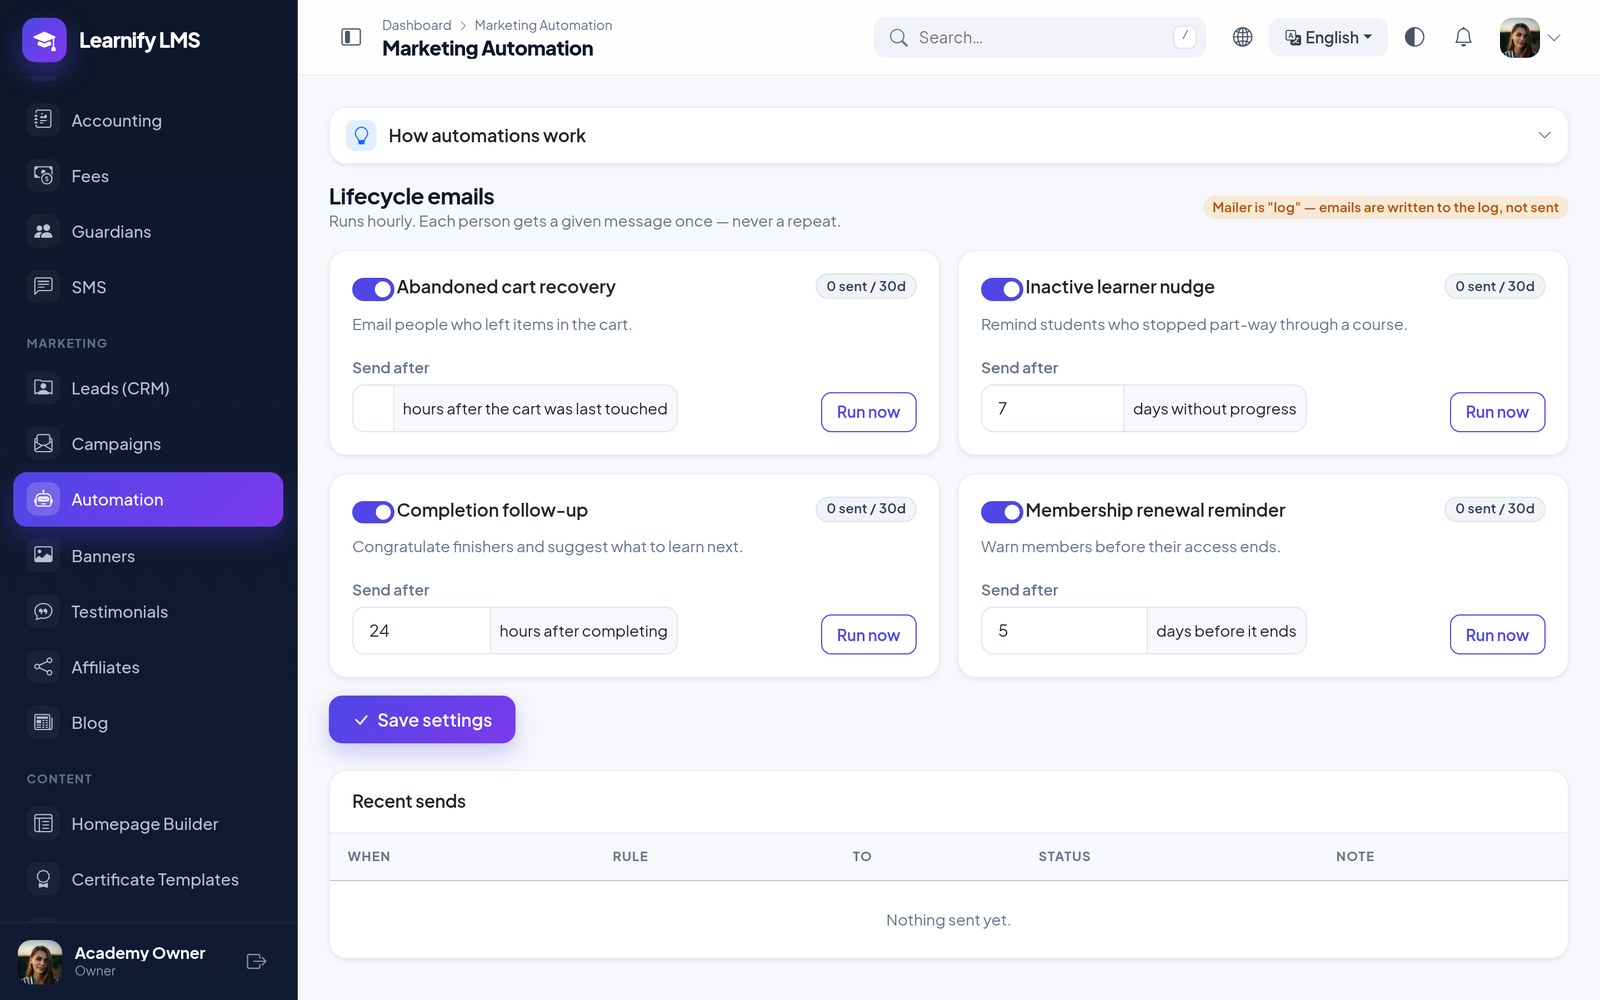
Automation Emails
Marketing → Automation (Automation module) sends the follow-ups you would otherwise forget, each with its own switch and timing:
| Rule | Who gets it |
|---|---|
| Abandoned cart | Anyone with items in the cart and no order after N hours (default 6). |
| Inactive learner | Enrolled students with no lesson activity for N days (default 7). |
| Completion follow-up | Students who finished a course N hours ago (default 24) — ask for a review, suggest the next course. |
| Membership expiring | Members whose plan ends in N days (default 5). |
The scheduler runs them; Run now on the page fires one rule immediately and reports how many emails went out. Every send is logged with the recipient so nobody is chased twice. The wording comes from the notification templates.
Live Classes, Forums & Events
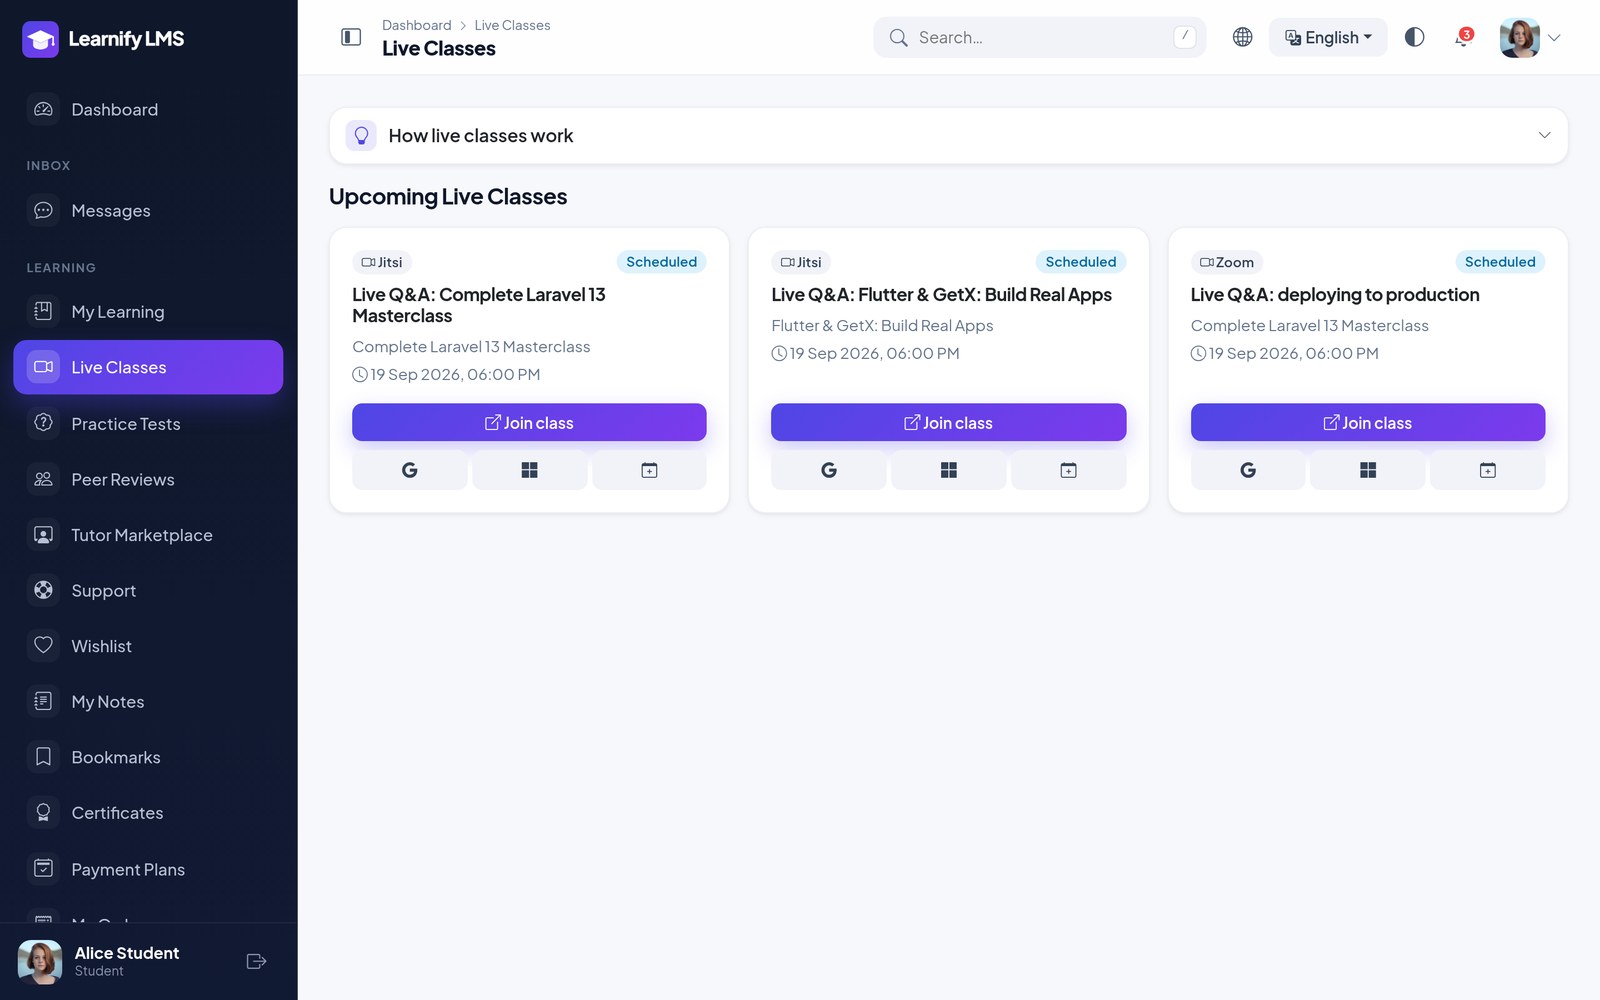
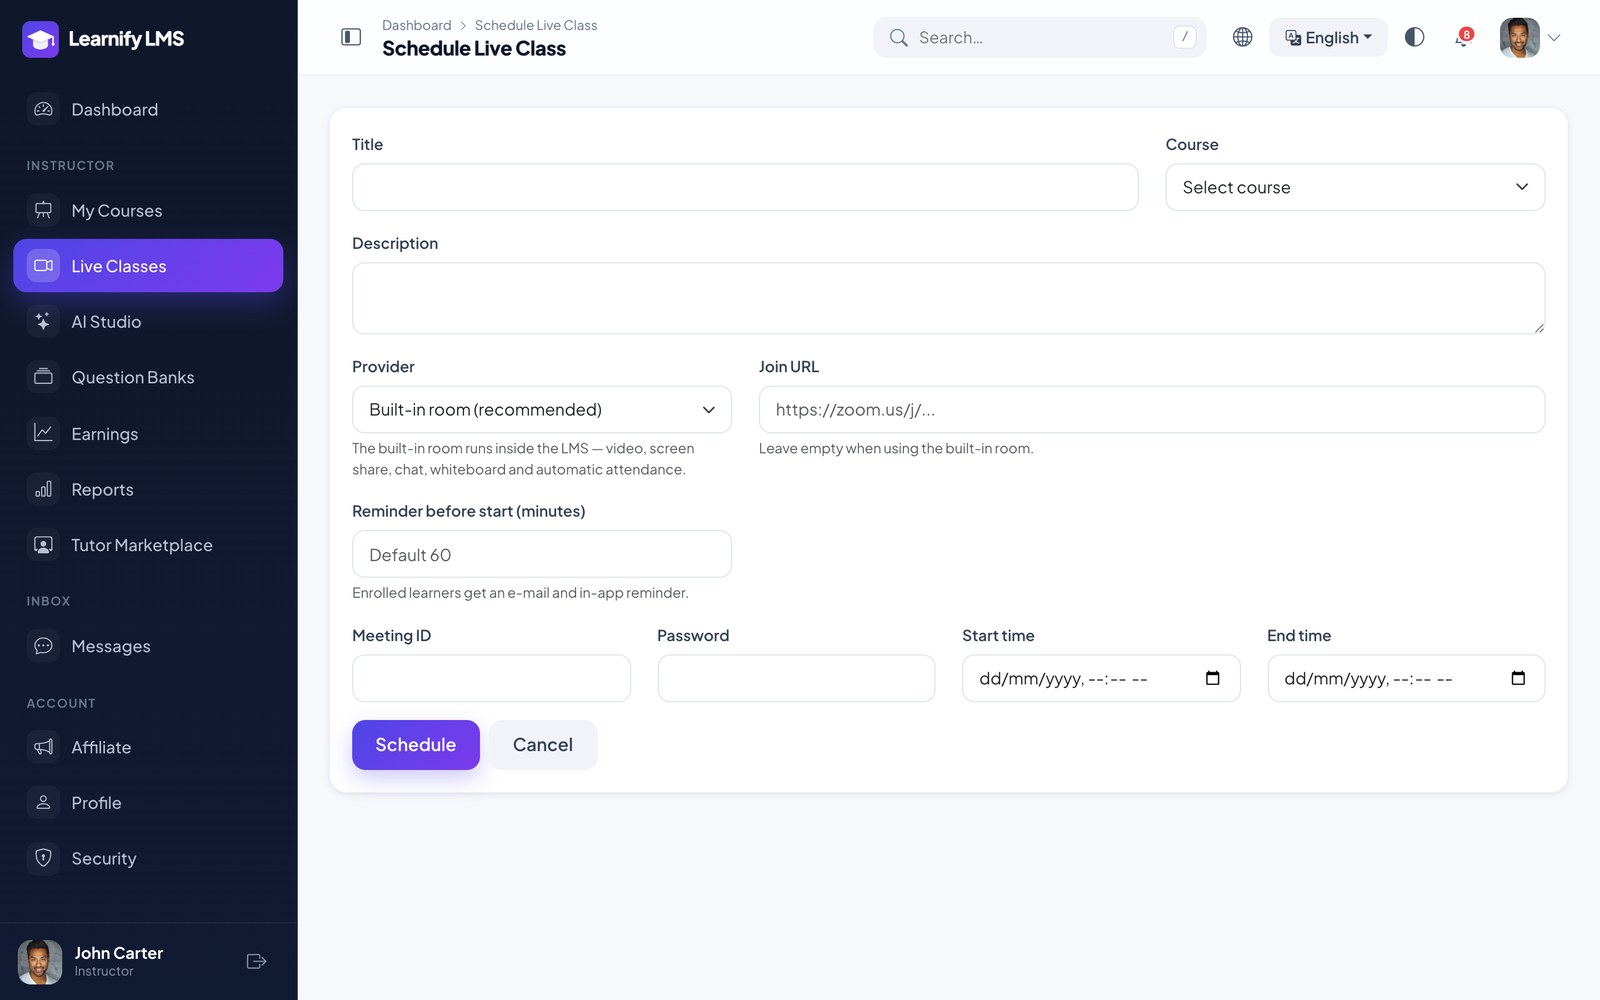
Live classes run over Zoom, Google Meet, Jitsi or the built-in classroom, scheduled against a course, with
attendance recorded and a recording link afterwards. Connect a Zoom Server-to-Server OAuth app
under Settings → Live classroom and the meeting is created for the instructor when they schedule
the class, updated when they move it and deleted with it (the host start link appears on the class). A
Google Meet link is created the same way for instructors who have connected their Google
Calendar. Without an integration, paste the join link. Enrolled students get a new-class email and a
reminder shortly before start (per class, or the academy default in minutes) by email, in-app
and push. Students can connect Google or Microsoft Calendar from the Live Classes page so every scheduled
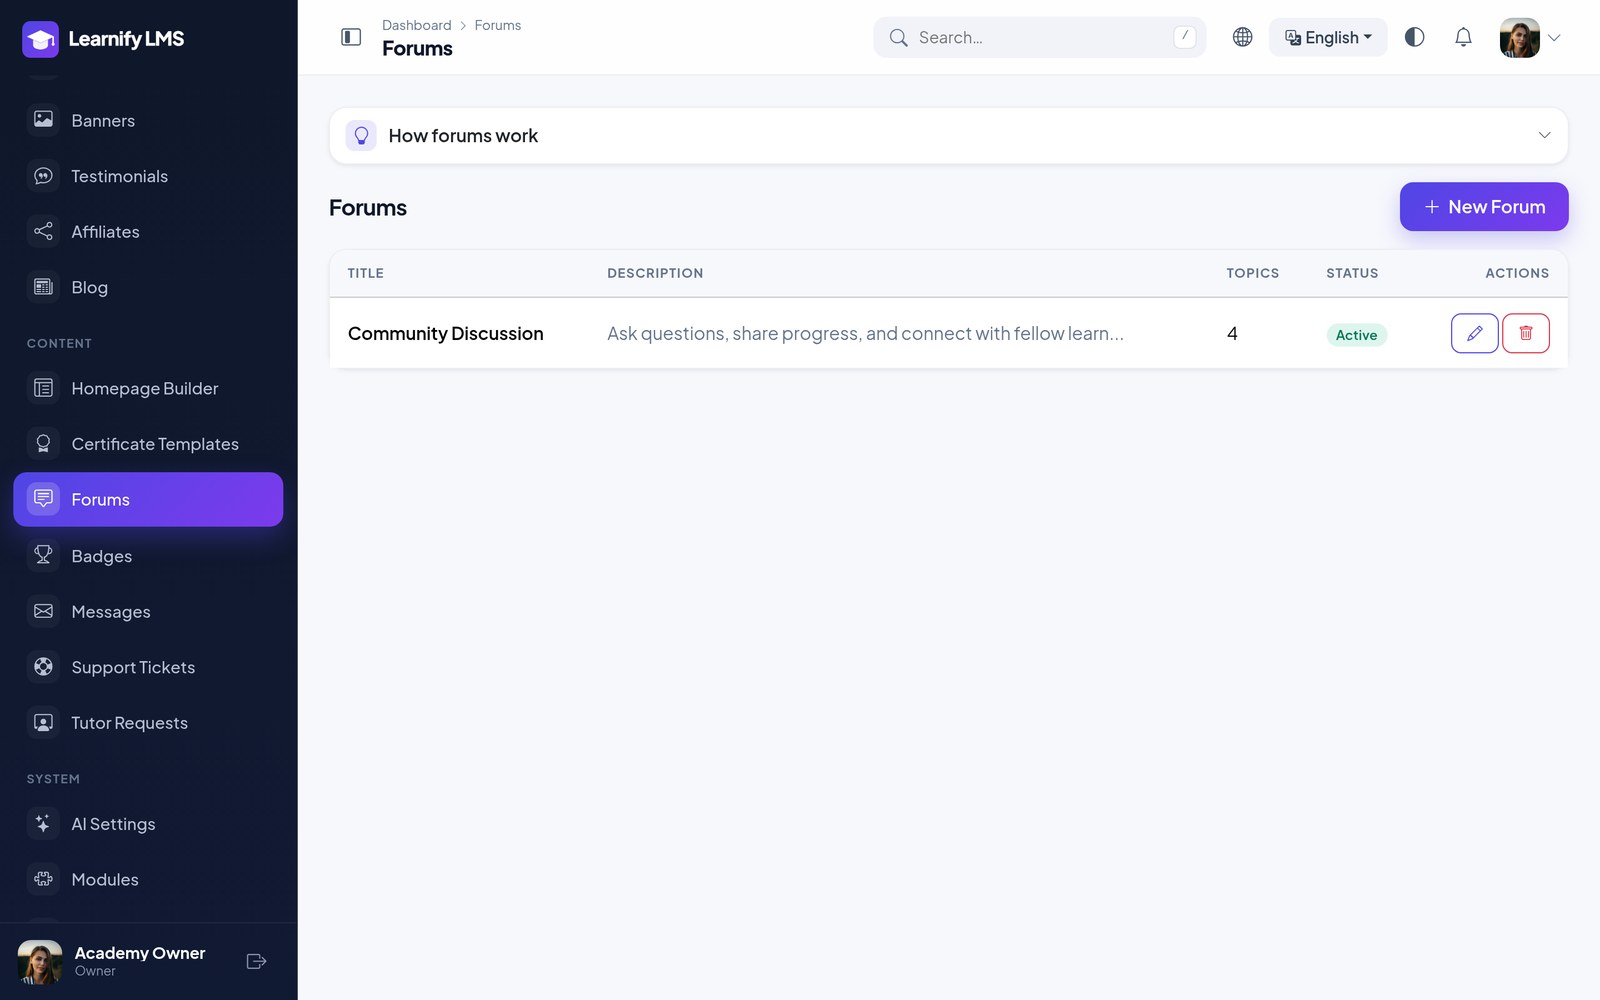
class lands in their own calendar (needs the OAuth client ids in .env). Forums and direct messages
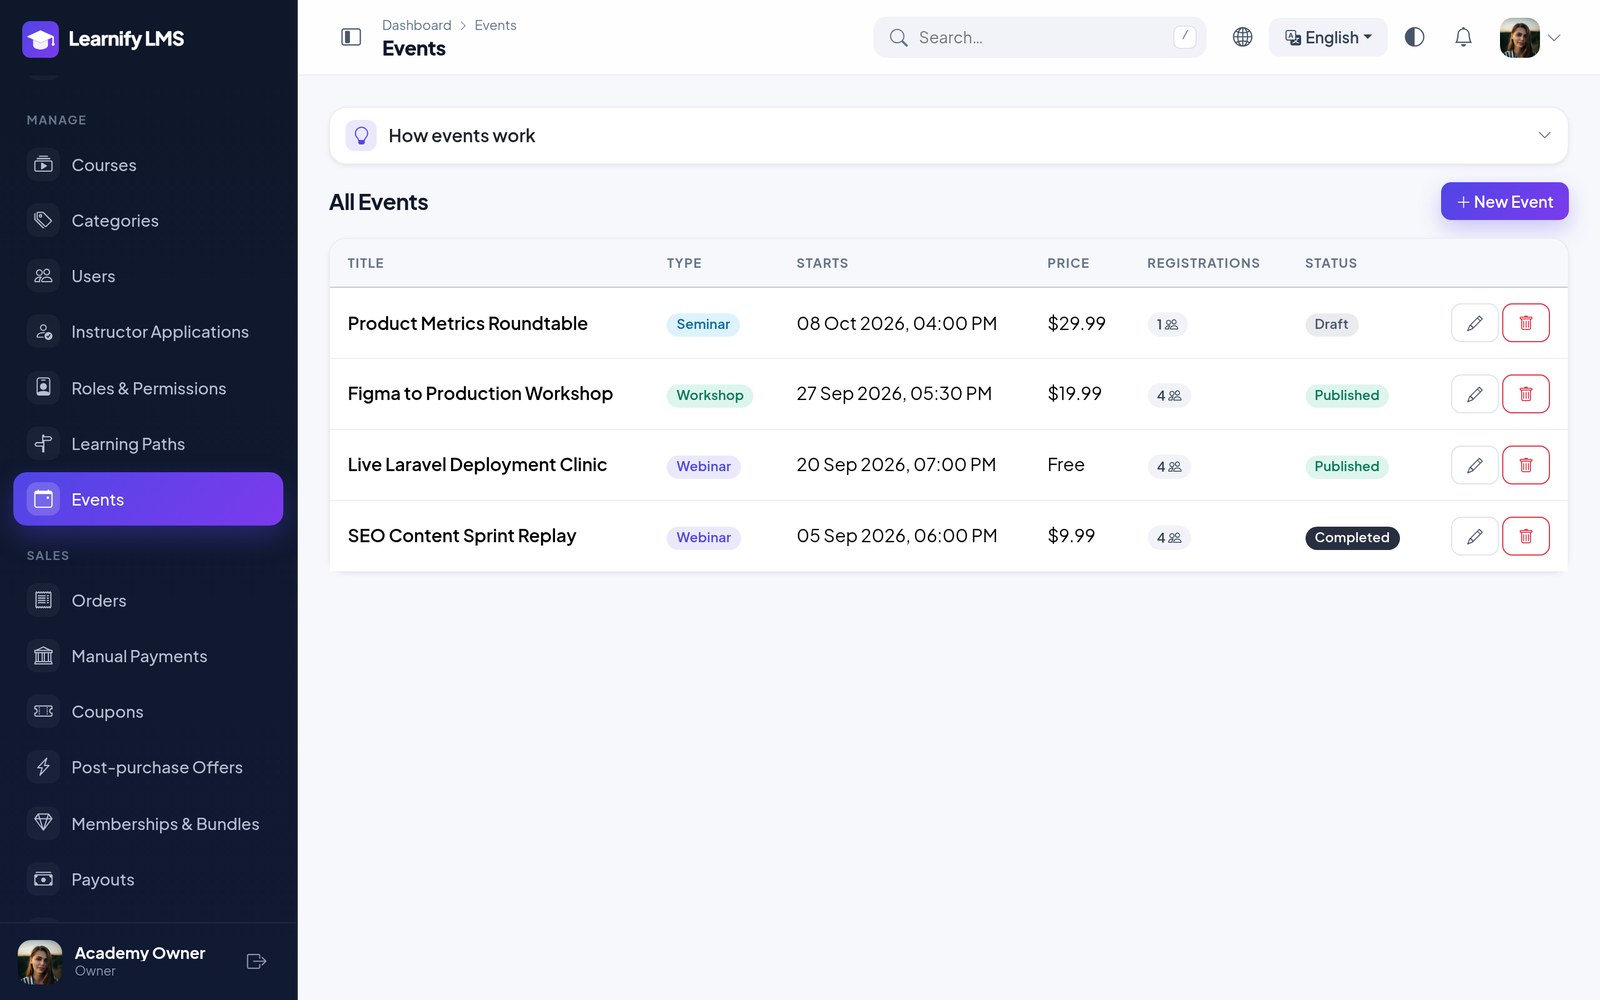
give students somewhere to ask. Events are standalone sessions with their own registrations, free or paid.
Messaging, Support Tickets & Tutor Marketplace
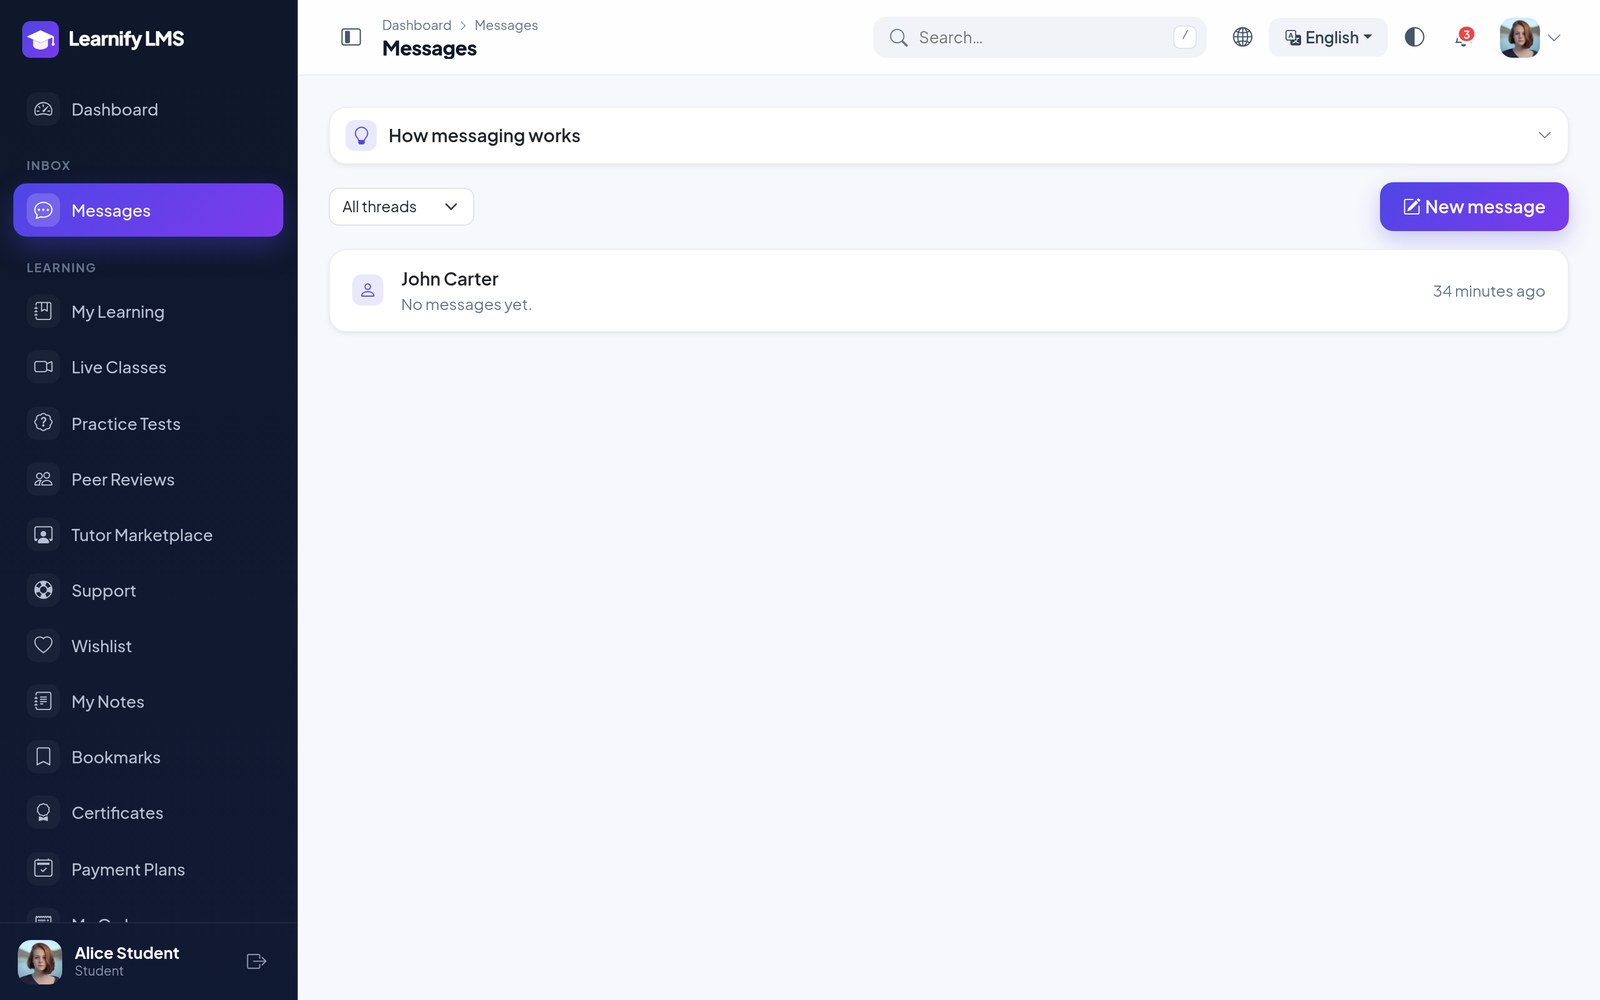
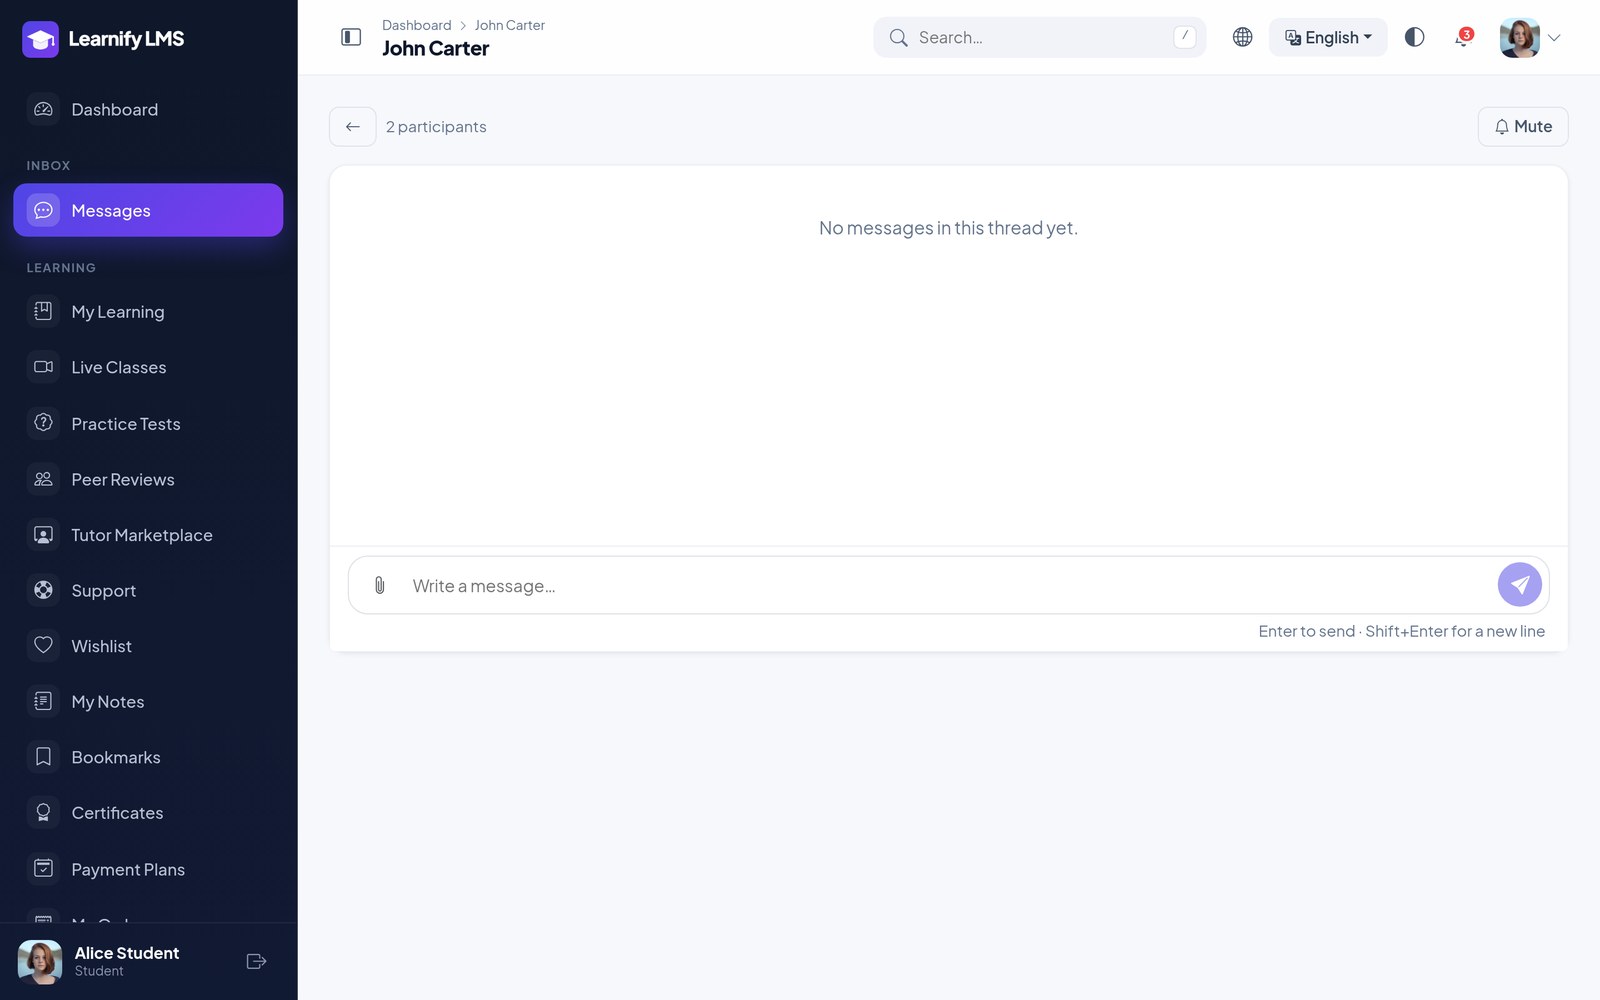
Messaging has three thread types: a direct thread between two people (learners can write to the instructors of courses they are in; instructors to their students), a course group that every enrolled student and the instructor share, and instructor-only announcements. New messages notify in-app and by push unless the thread is muted; attachments up to 10 MB are allowed.
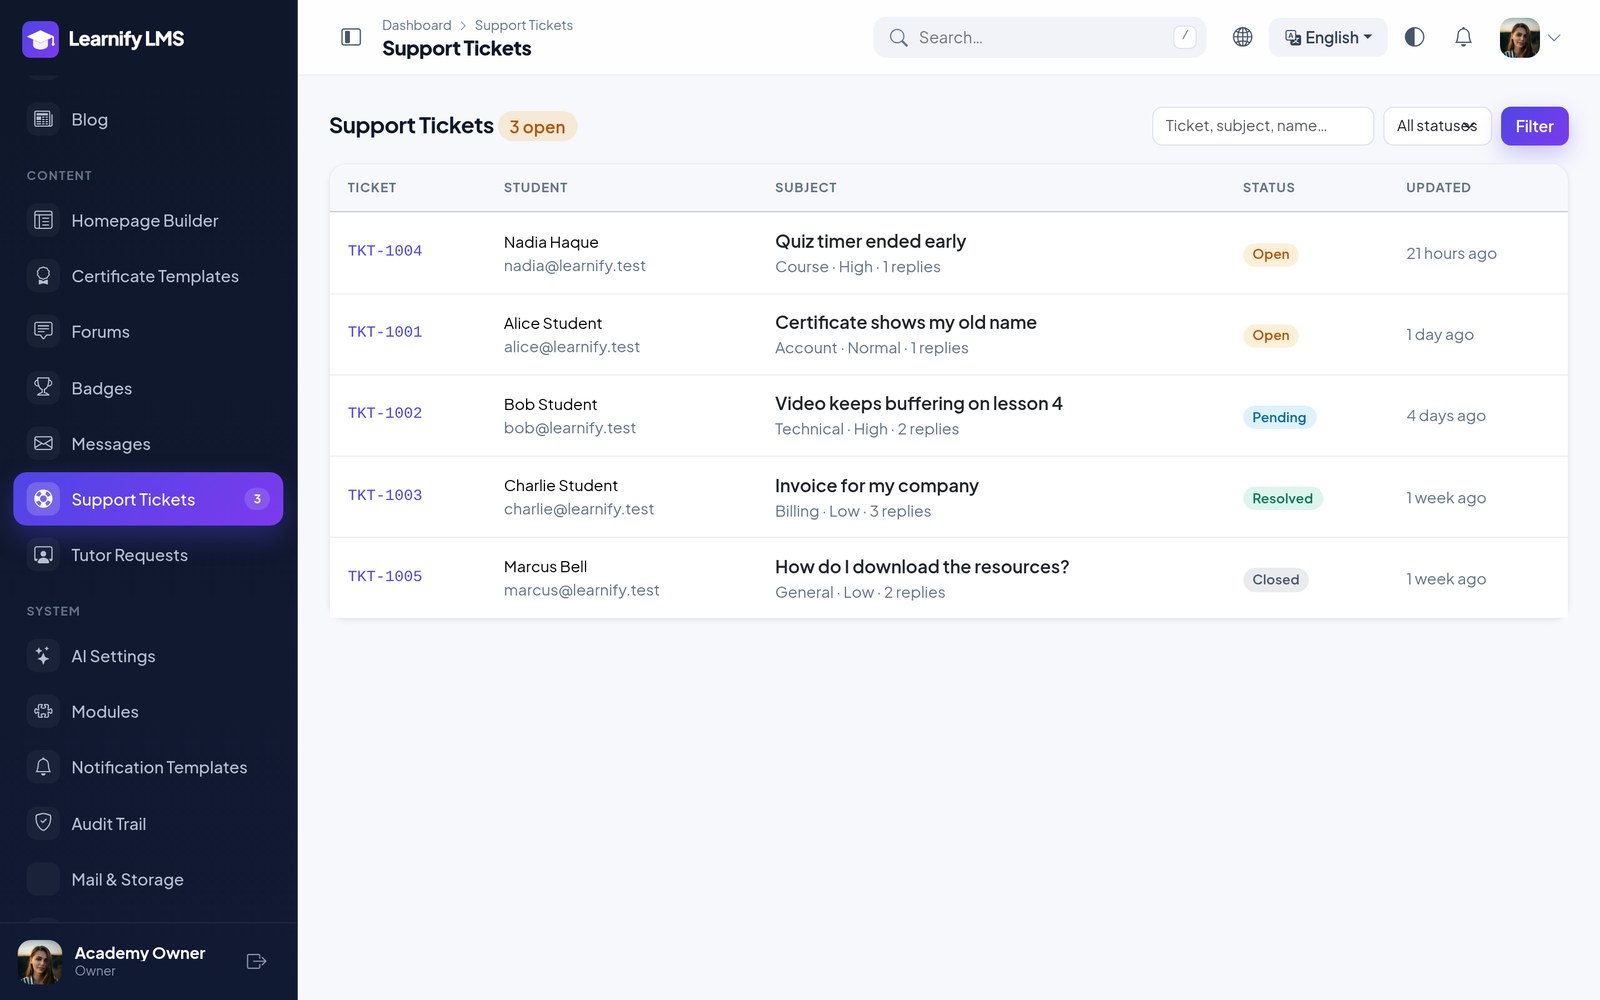
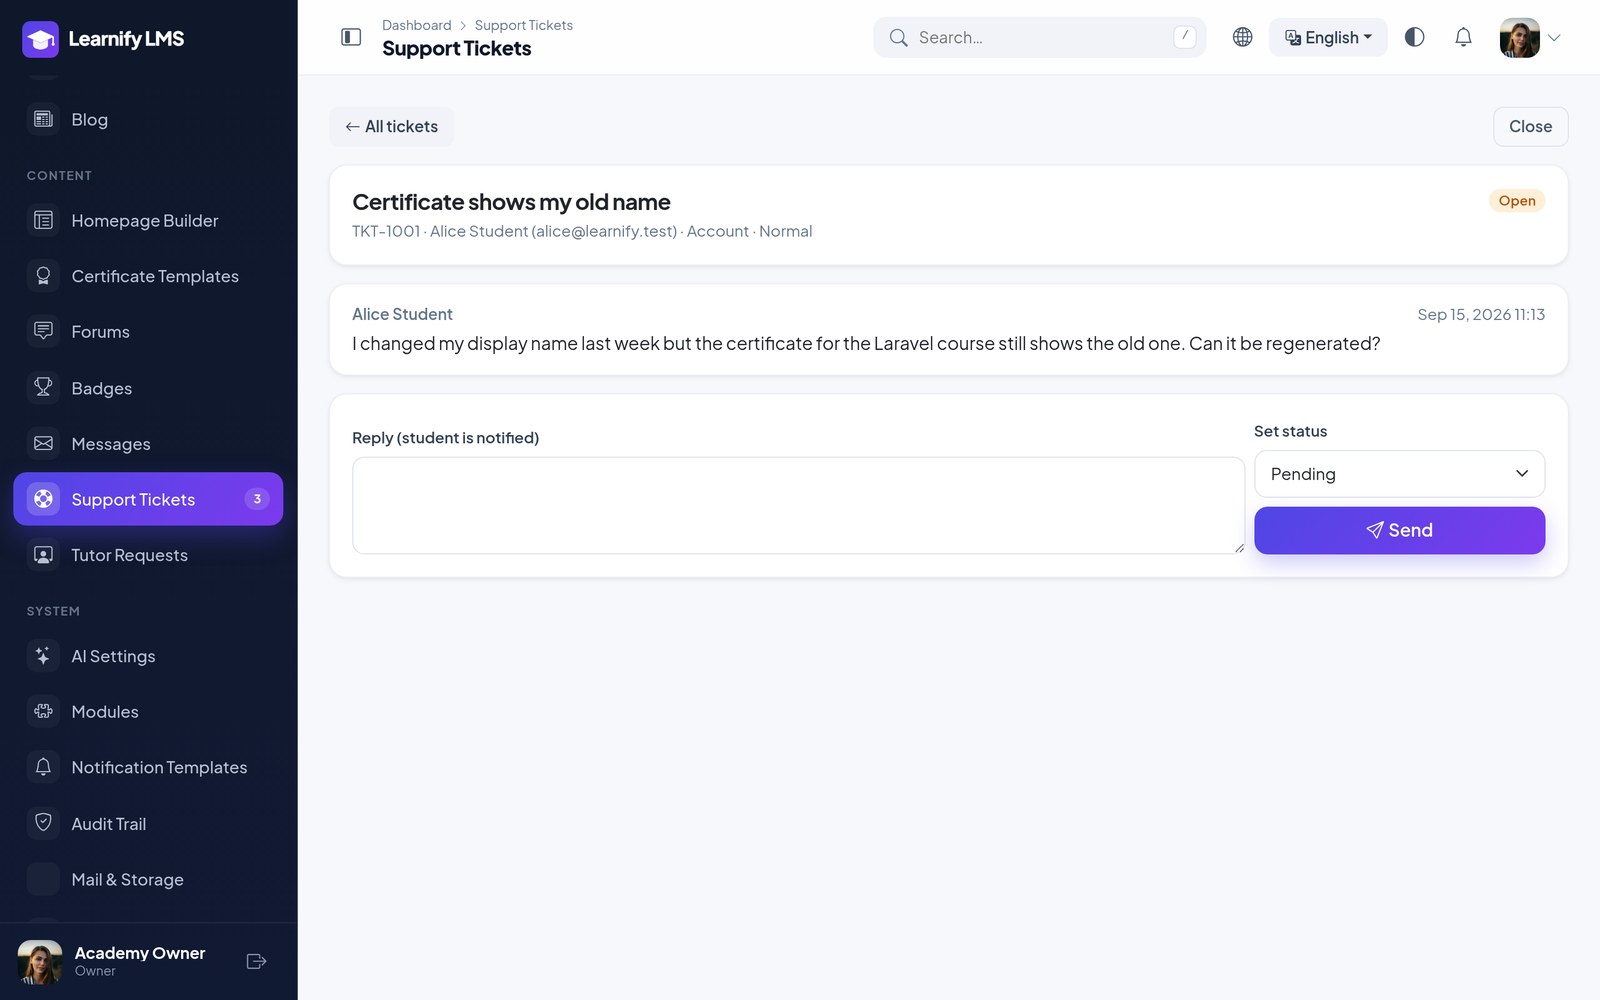
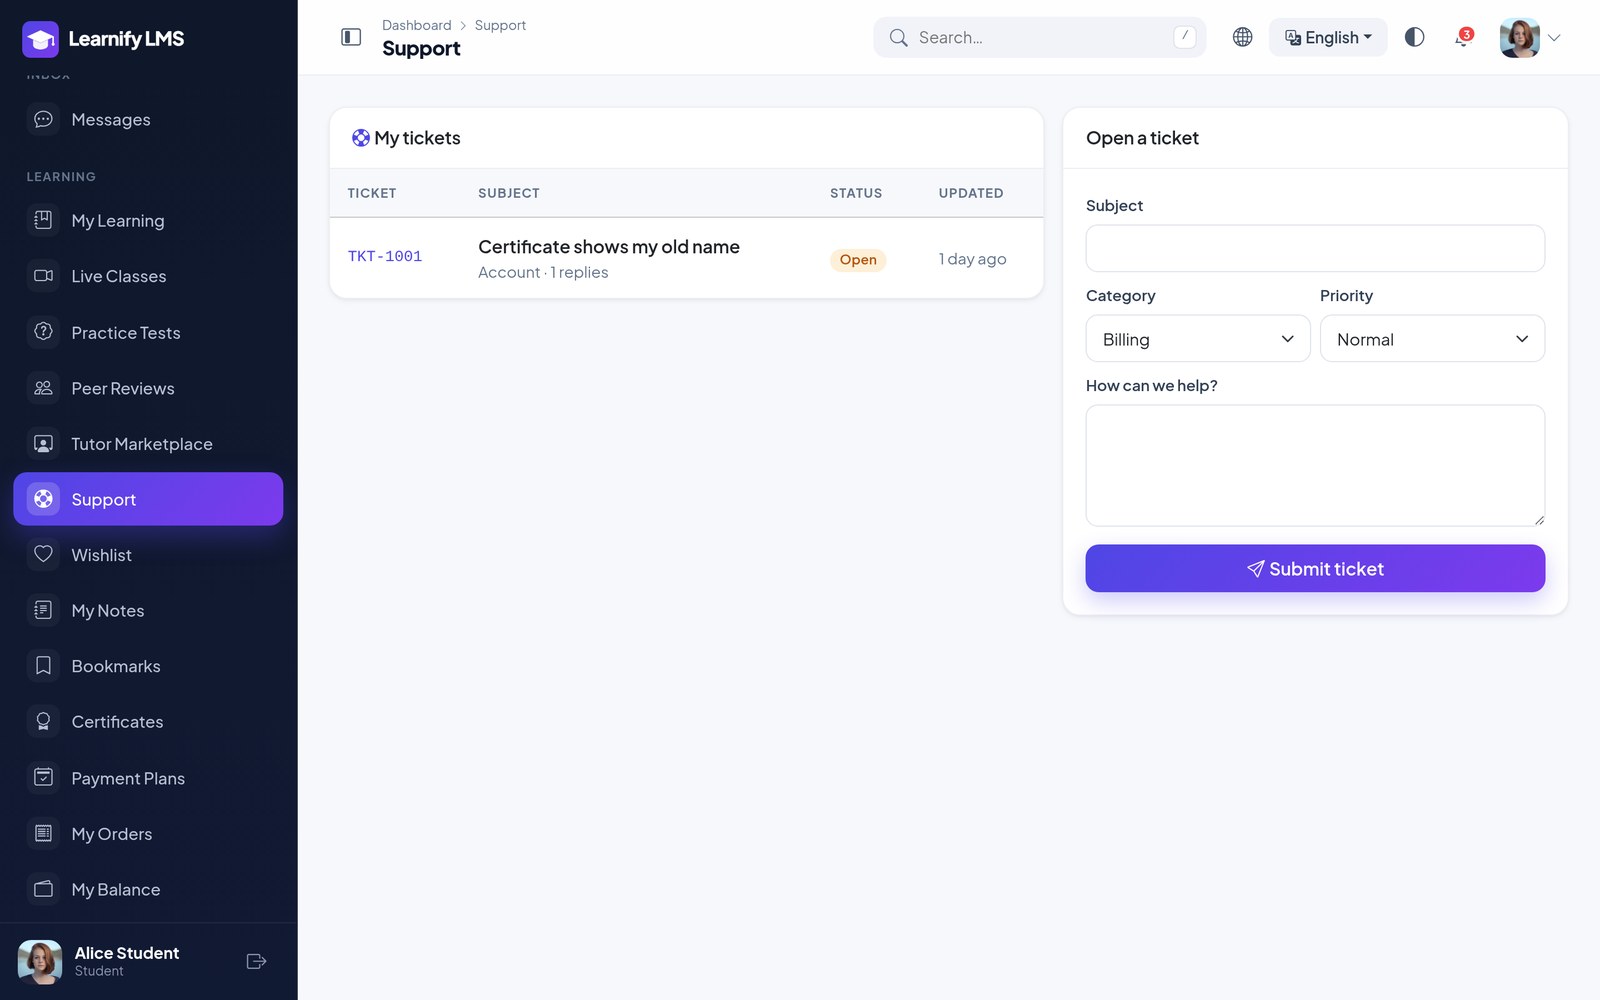
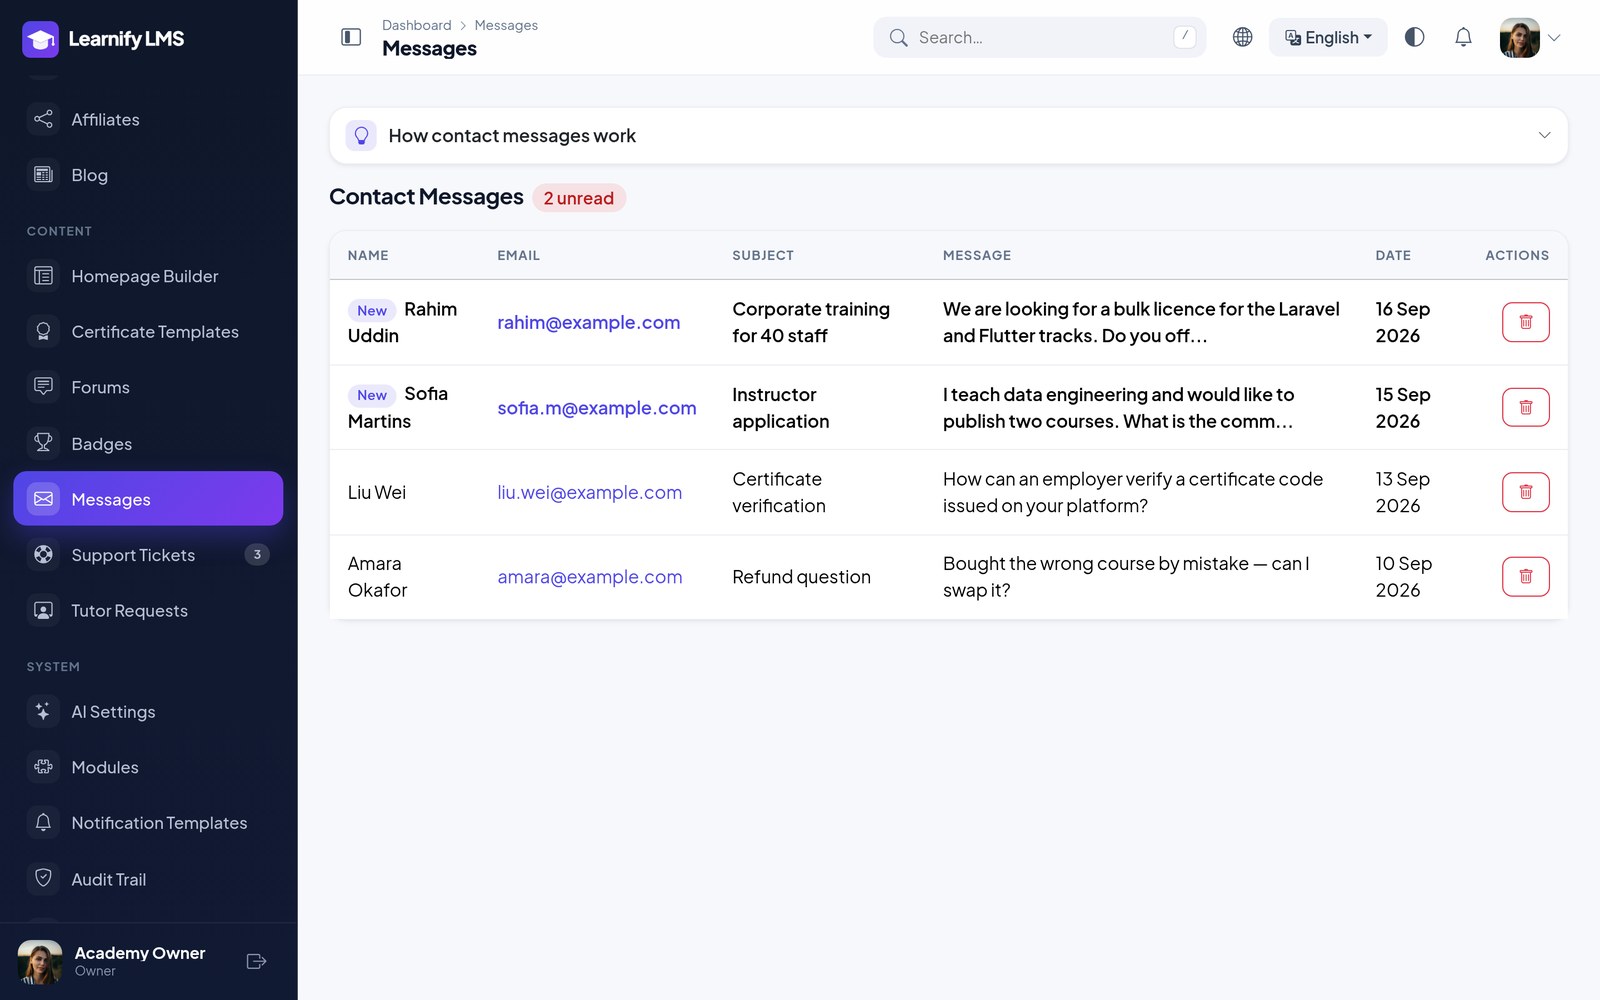
Support tickets give students a proper help desk: a ticket has a category (billing, technical, course, account, general), a priority and a status (open, pending, resolved, closed). Staff answer from Admin → Support Tickets; the student replies from Support and can reopen a closed ticket. Storefront contact-form submissions land separately under Admin → Messages.
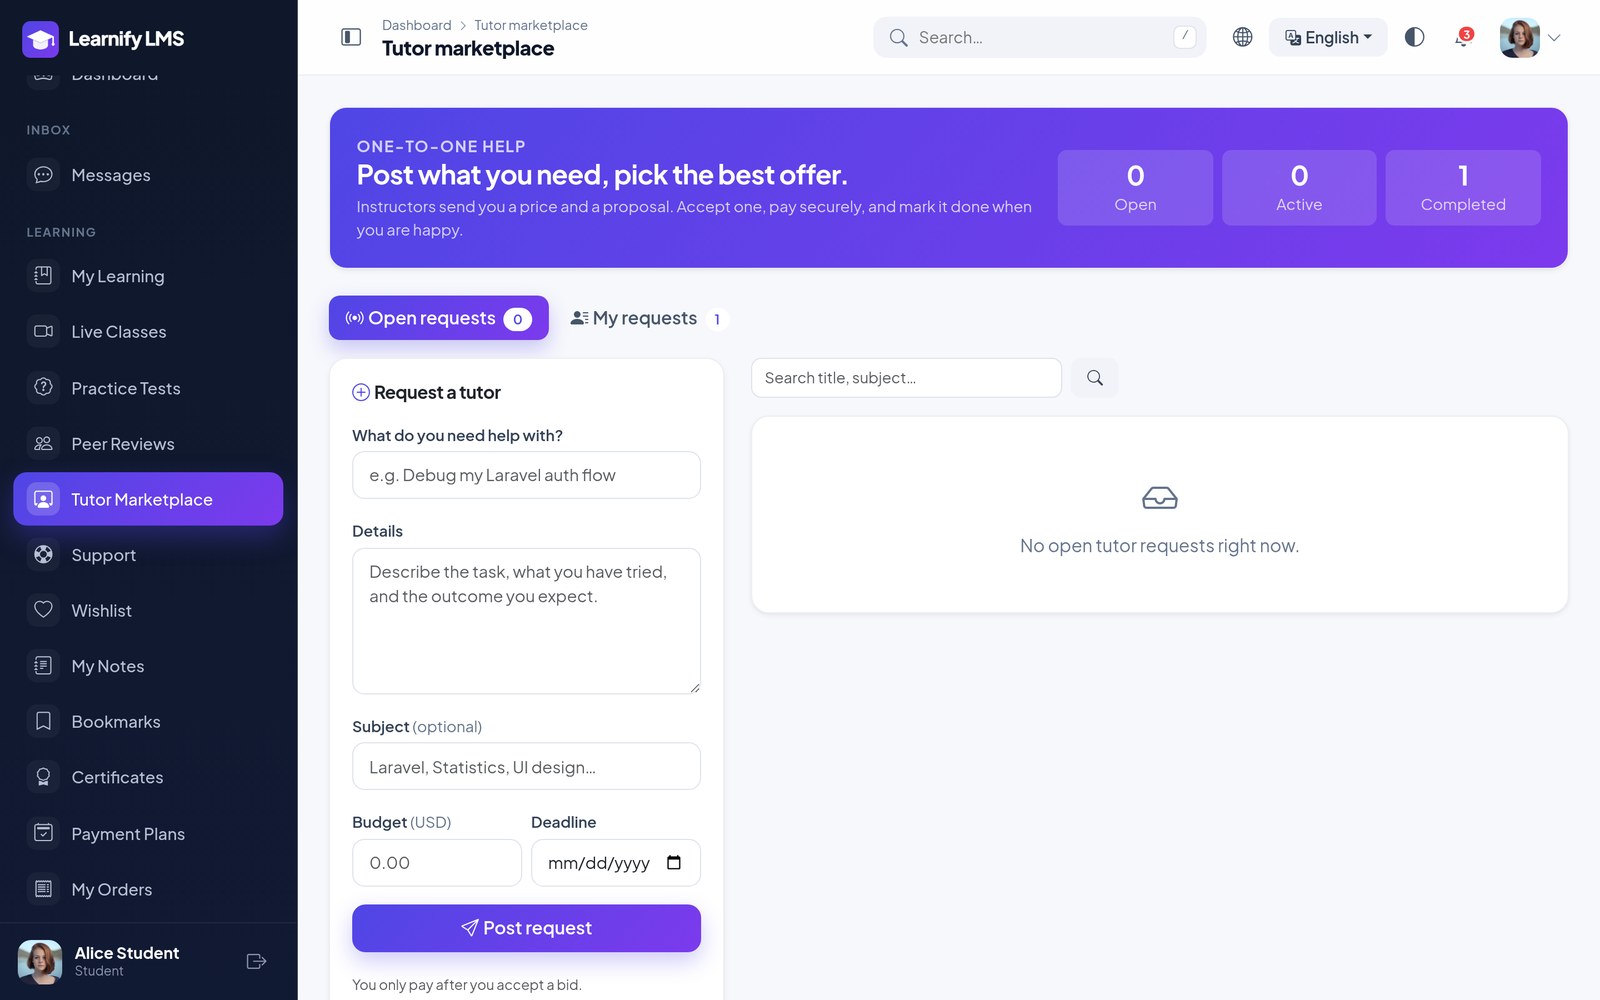
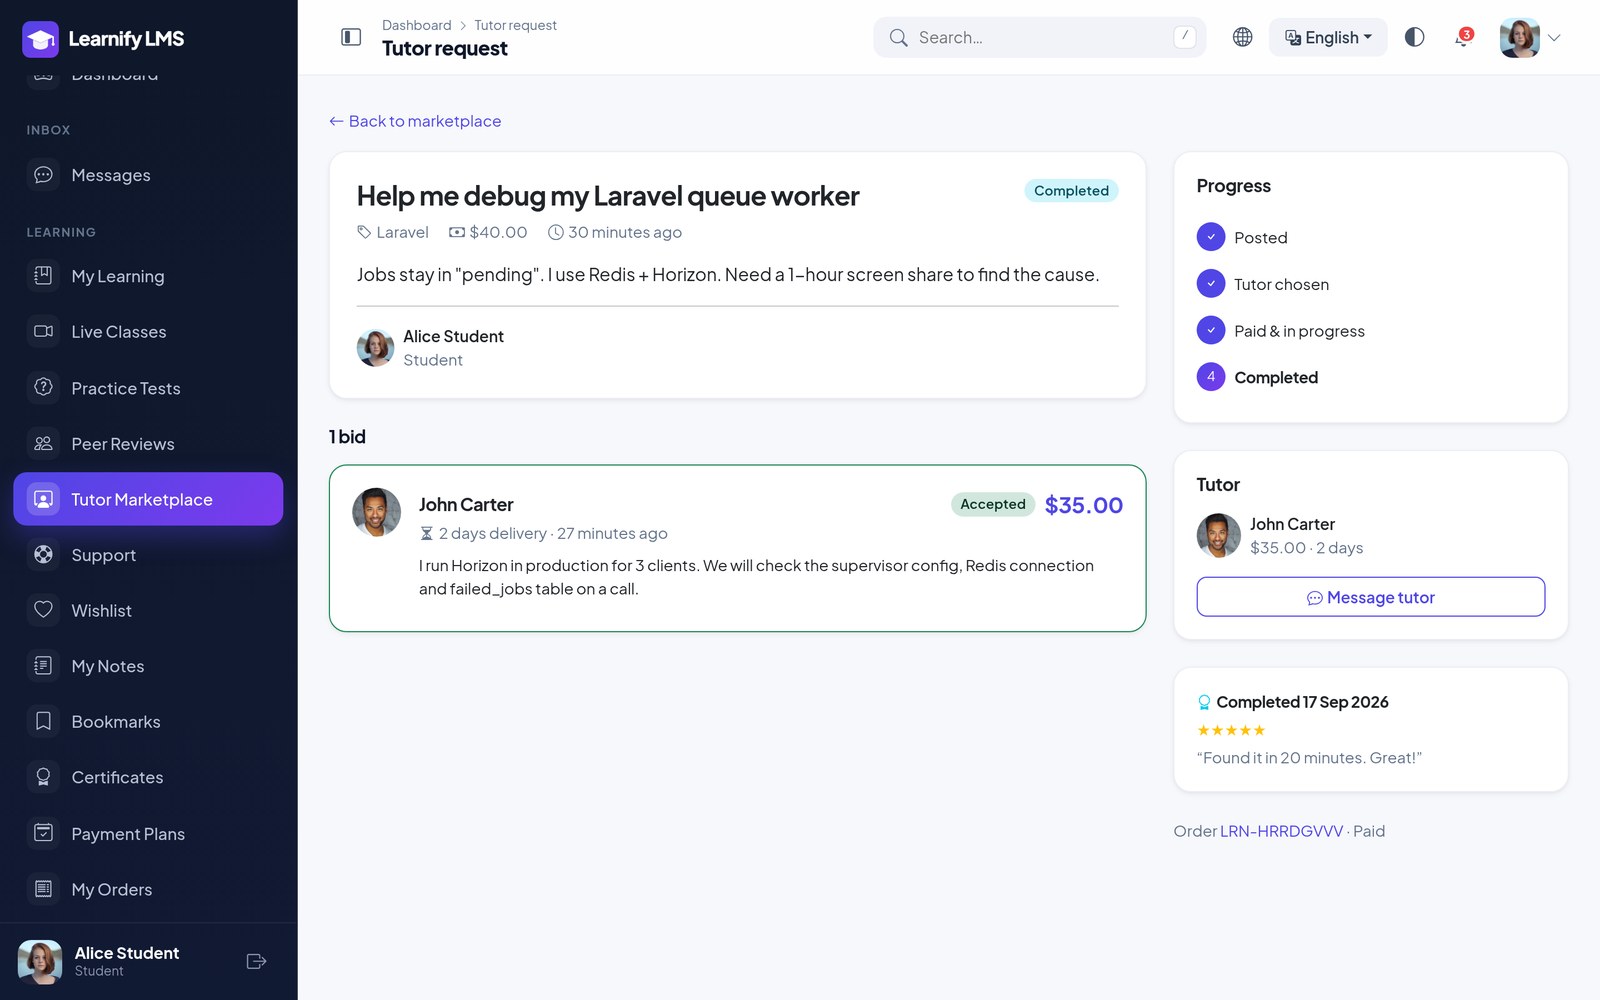
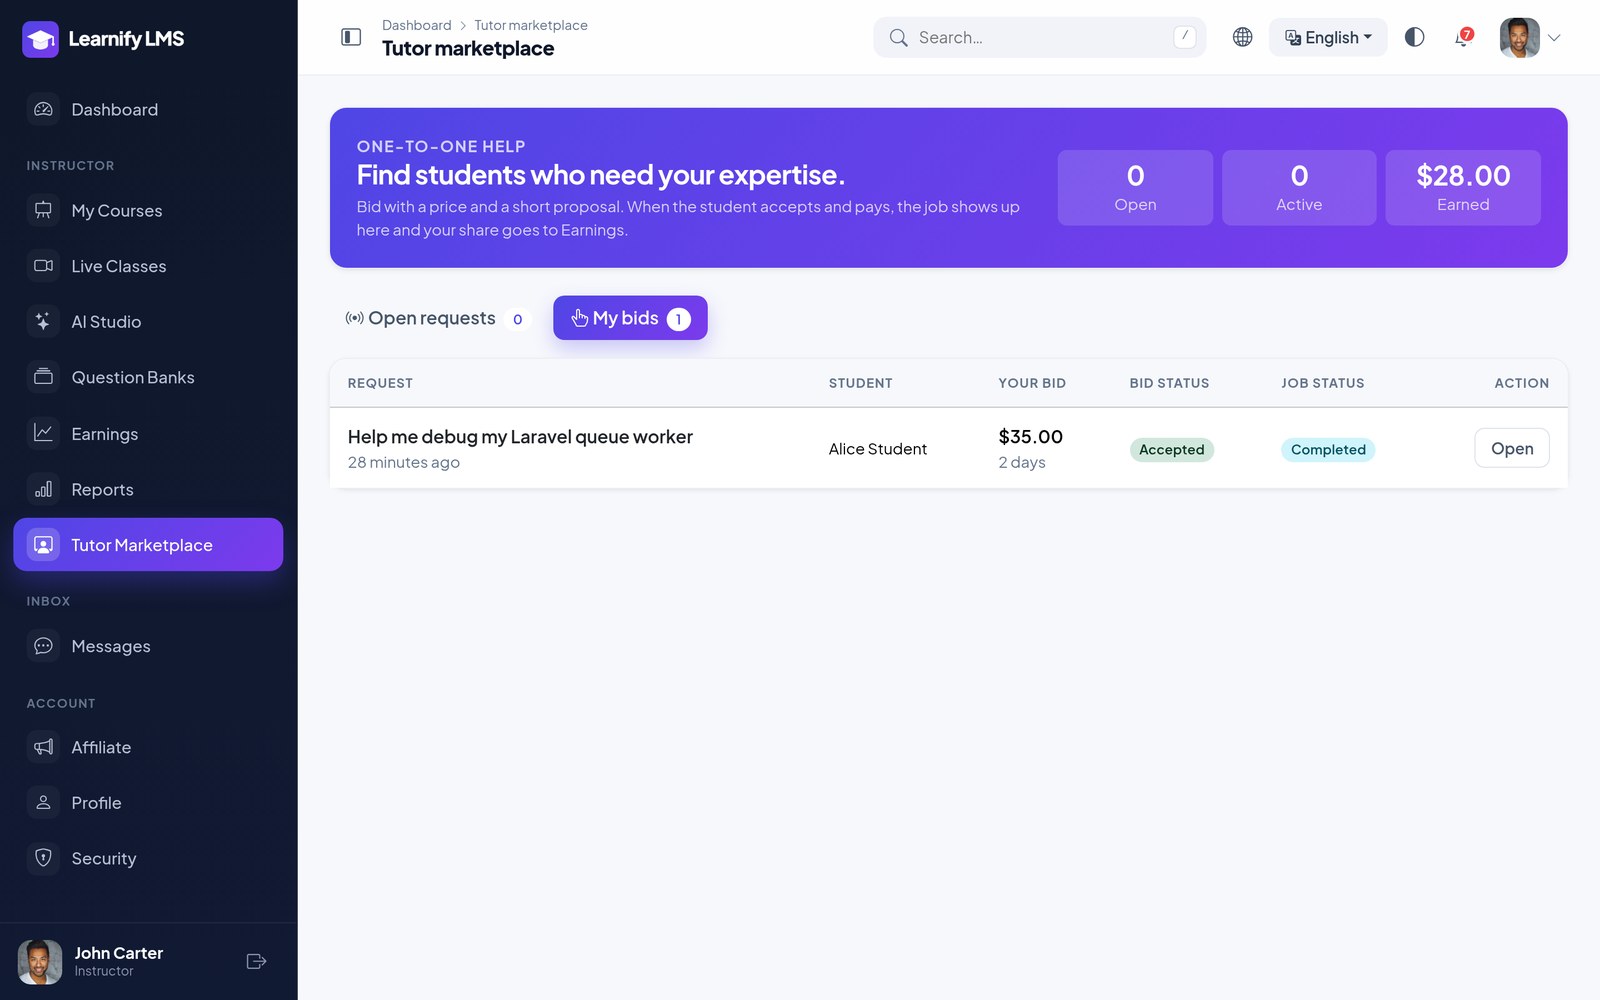
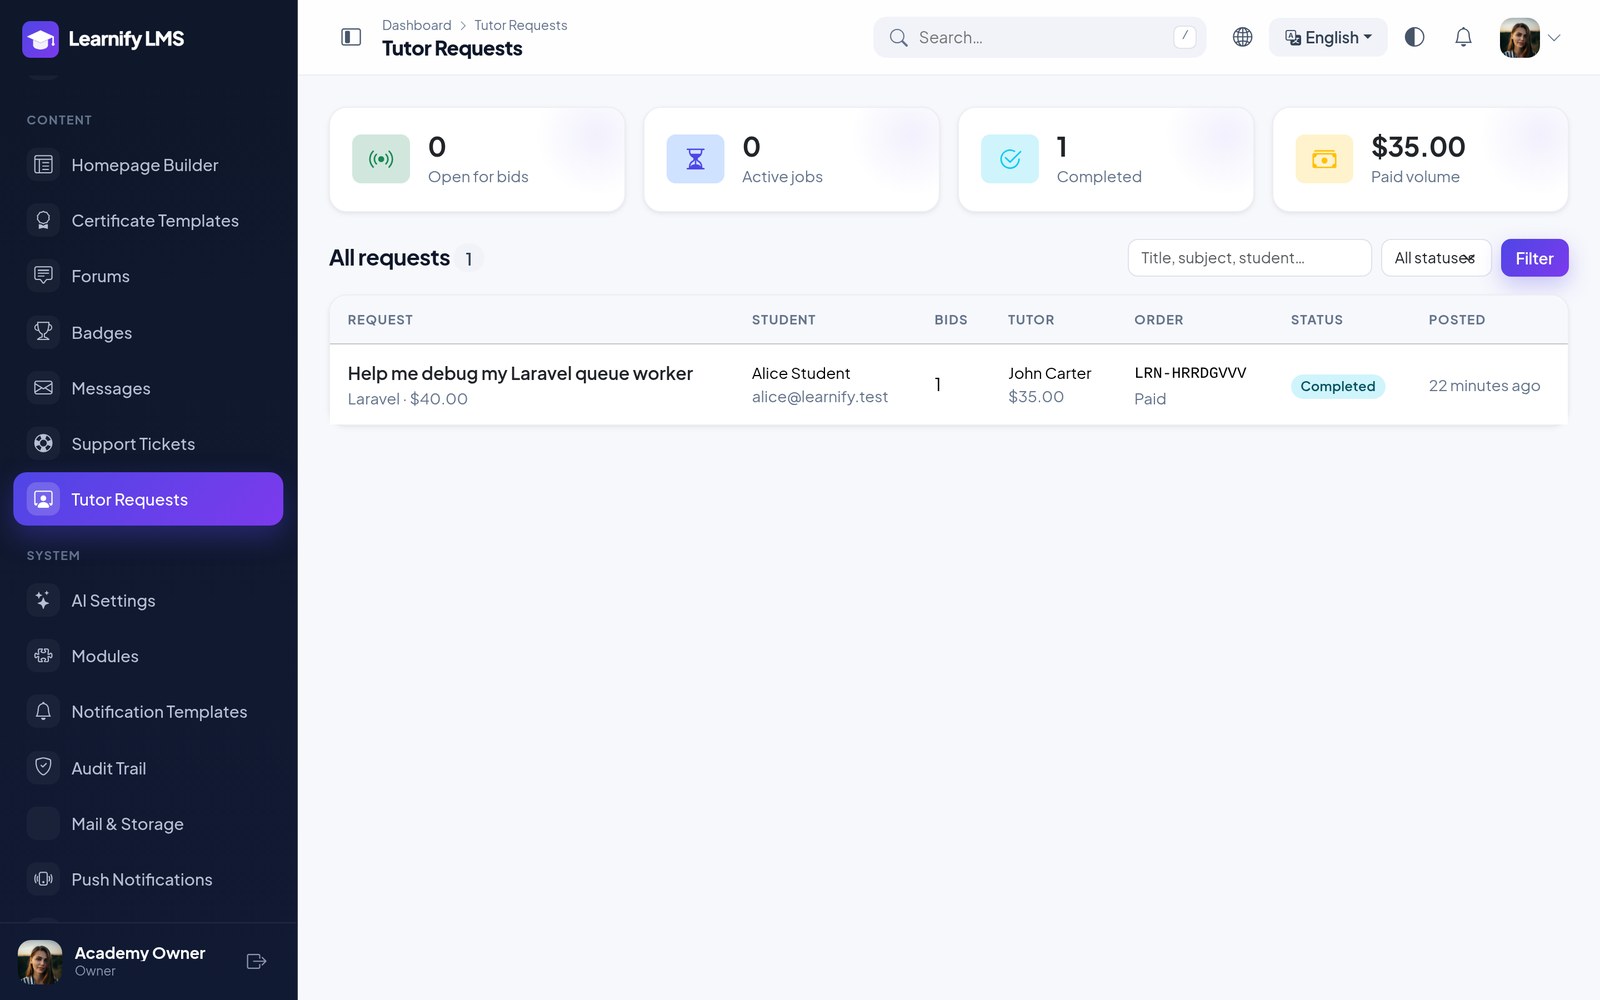
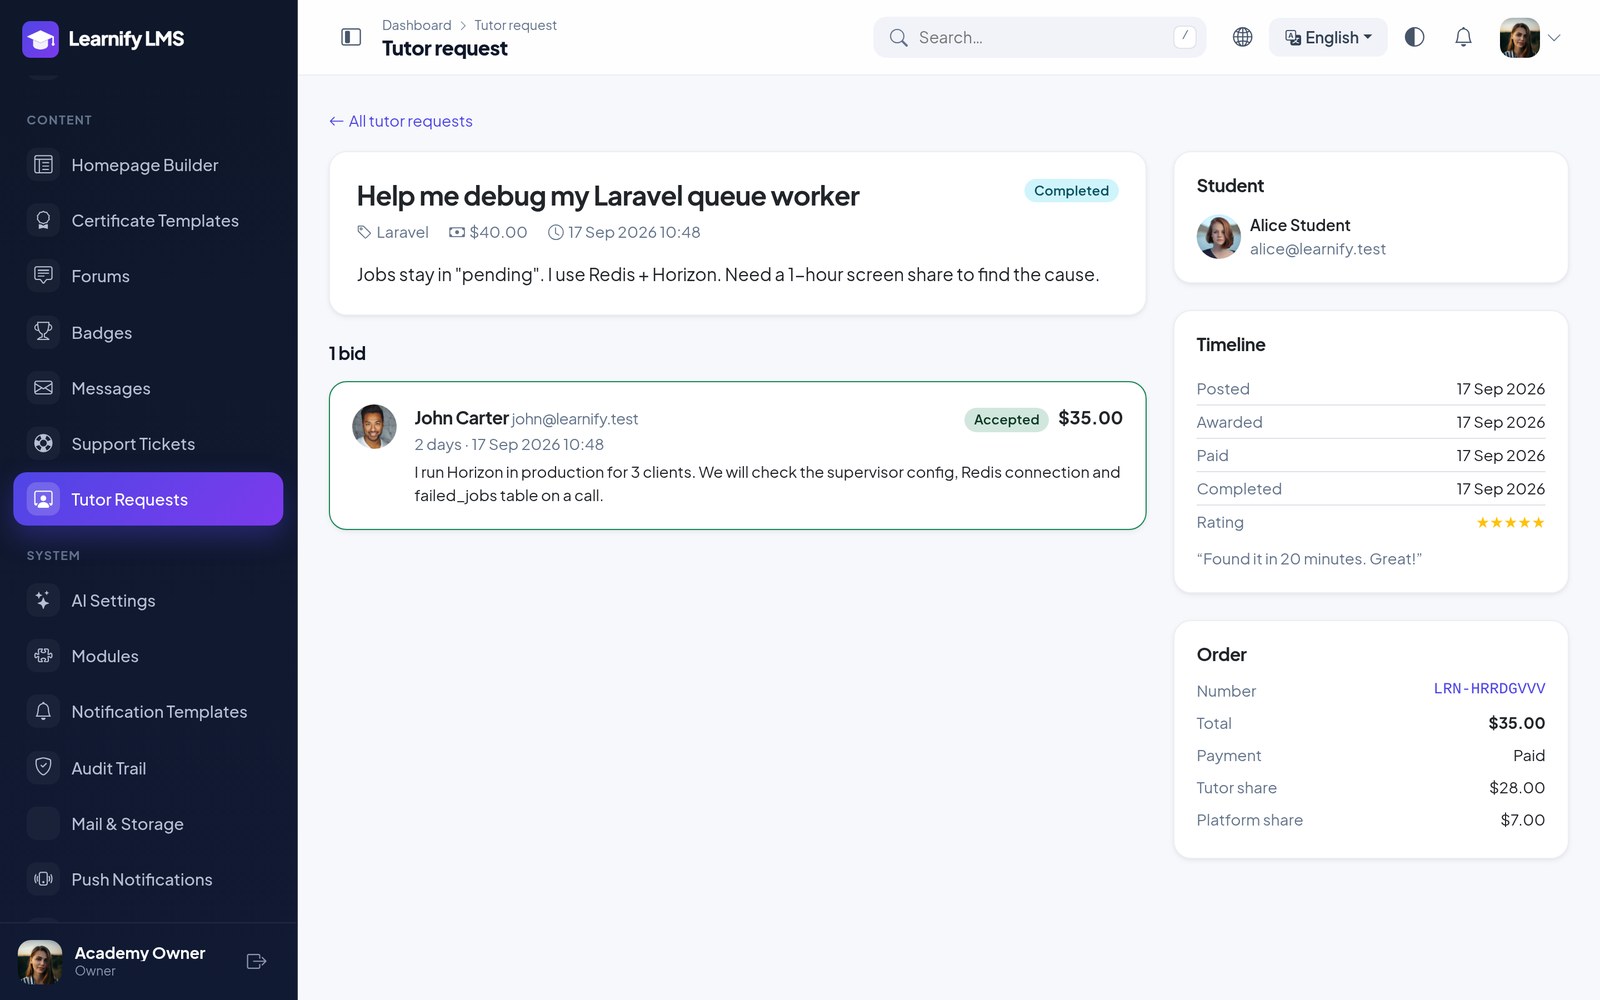
The tutor marketplace lets a student post a request — title, subject, budget, deadline — and instructors bid on it with a price, delivery time and proposal. The student accepts one bid (the rest are declined automatically) and is taken straight to checkout: the bid becomes a normal order paid with any enabled gateway or the learner's balance. Once paid the request is in progress, the tutor is notified, the two can message each other, and the tutor's share (their profile rate, else 100 − admin commission) lands in Earnings like a course sale. The student marks the job complete with an optional star rating. Free bids skip payment. Instructors see all their bids and can withdraw a pending one; admins get Content → Tutor Requests to review every request, bid and order, cancel an unpaid request or delete one.
Private Sessions
Instructors sell one-to-one time slots; learners book, pay and join a private room. Both use Private sessions in their dashboard menu (and in the mobile app’s Profile menu).
Publishing a slot (instructor). Open Private sessions → Publish an available time slot and set the start, end and timezone (it defaults to the device’s), the price (0 for free, in the site currency) and the meeting: the built-in private room or your own Zoom / Meet link (shown only to the booked learner when the session opens). A slot lasts up to eight hours; it cannot overlap another of your slots or one of your live classes. Unbooked slots can be removed.
Booking (learner). From an instructor’s public profile (Book a private session) or Private sessions, pick a slot, optionally say what you need help with, and confirm. Free sessions are confirmed at once; paid ones go through the normal checkout and every gateway, including offline payment with staff verification. The payment can be completed until 15 minutes after the scheduled start.
The session. Join session appears 15 minutes before the start for the learner and the instructor (only for paid / confirmed bookings). After the end the learner presses Mark completed. Cancelling an upcoming paid booking sends it to refund review under Orders → Refunds and frees the slot for someone else.
Bookings also appear under Admin → Instructors → Tutor Requests, where staff can cancel one (the slot is freed and a paid booking goes to refund review; booking history cannot be deleted), and in the order list like any other sale. The instructor’s share follows the usual commission. API: /api/v1/bookings (list, book, join, cancel, complete) and /api/v1/instructor/slots.
Settings
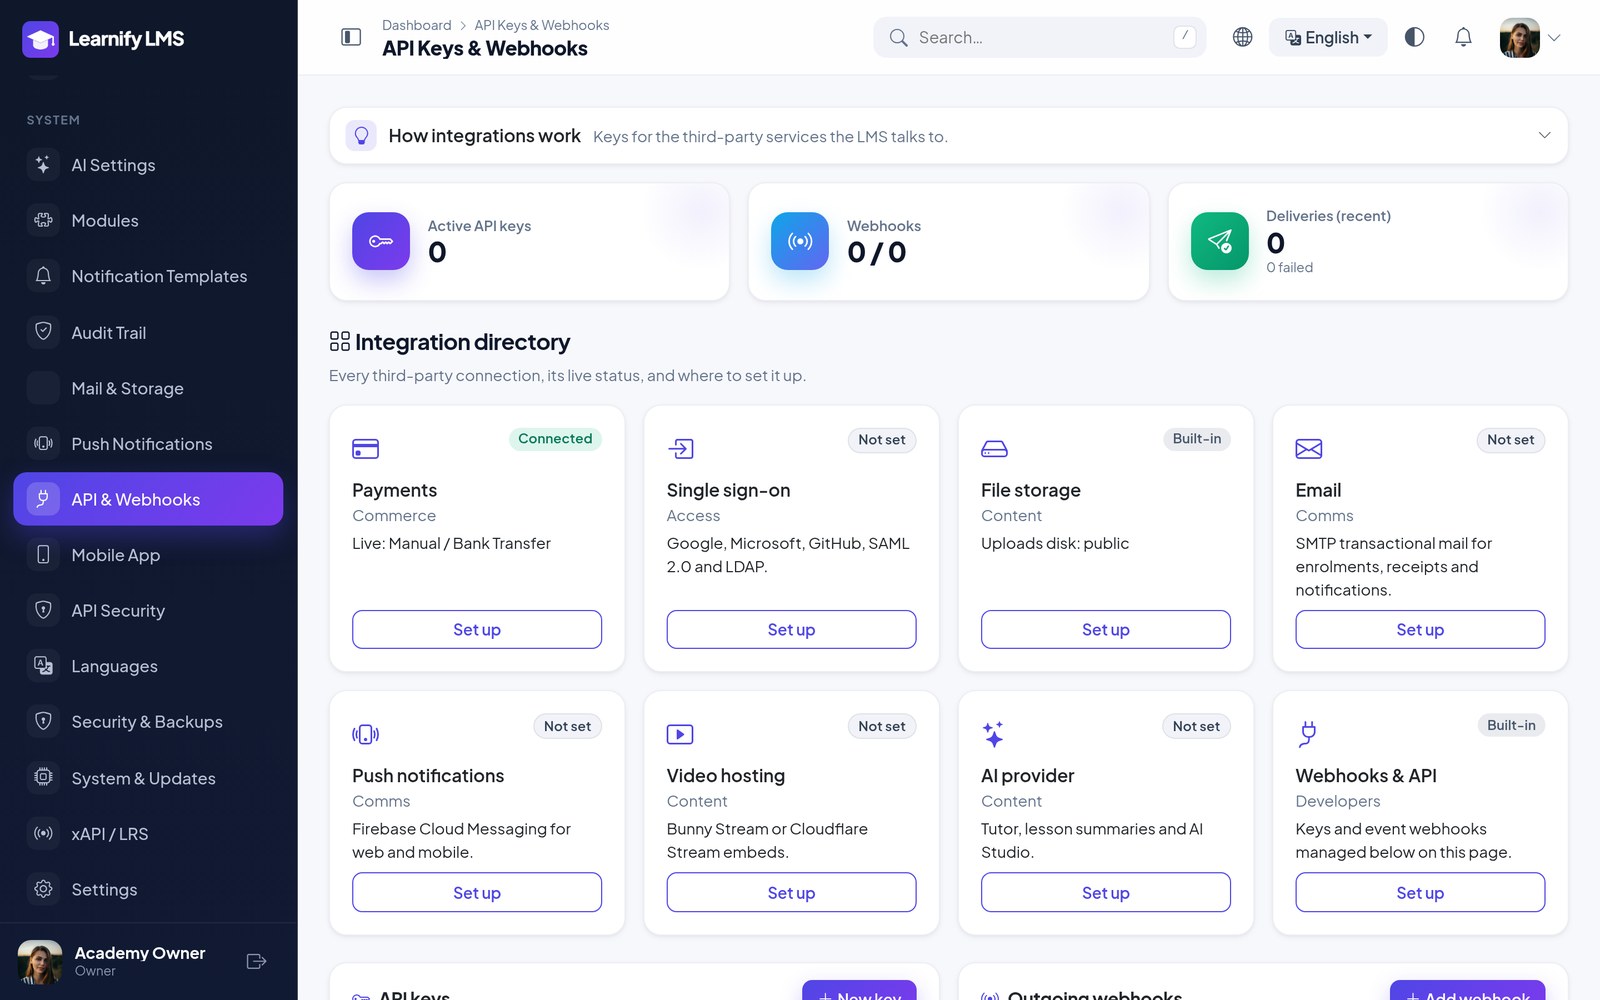
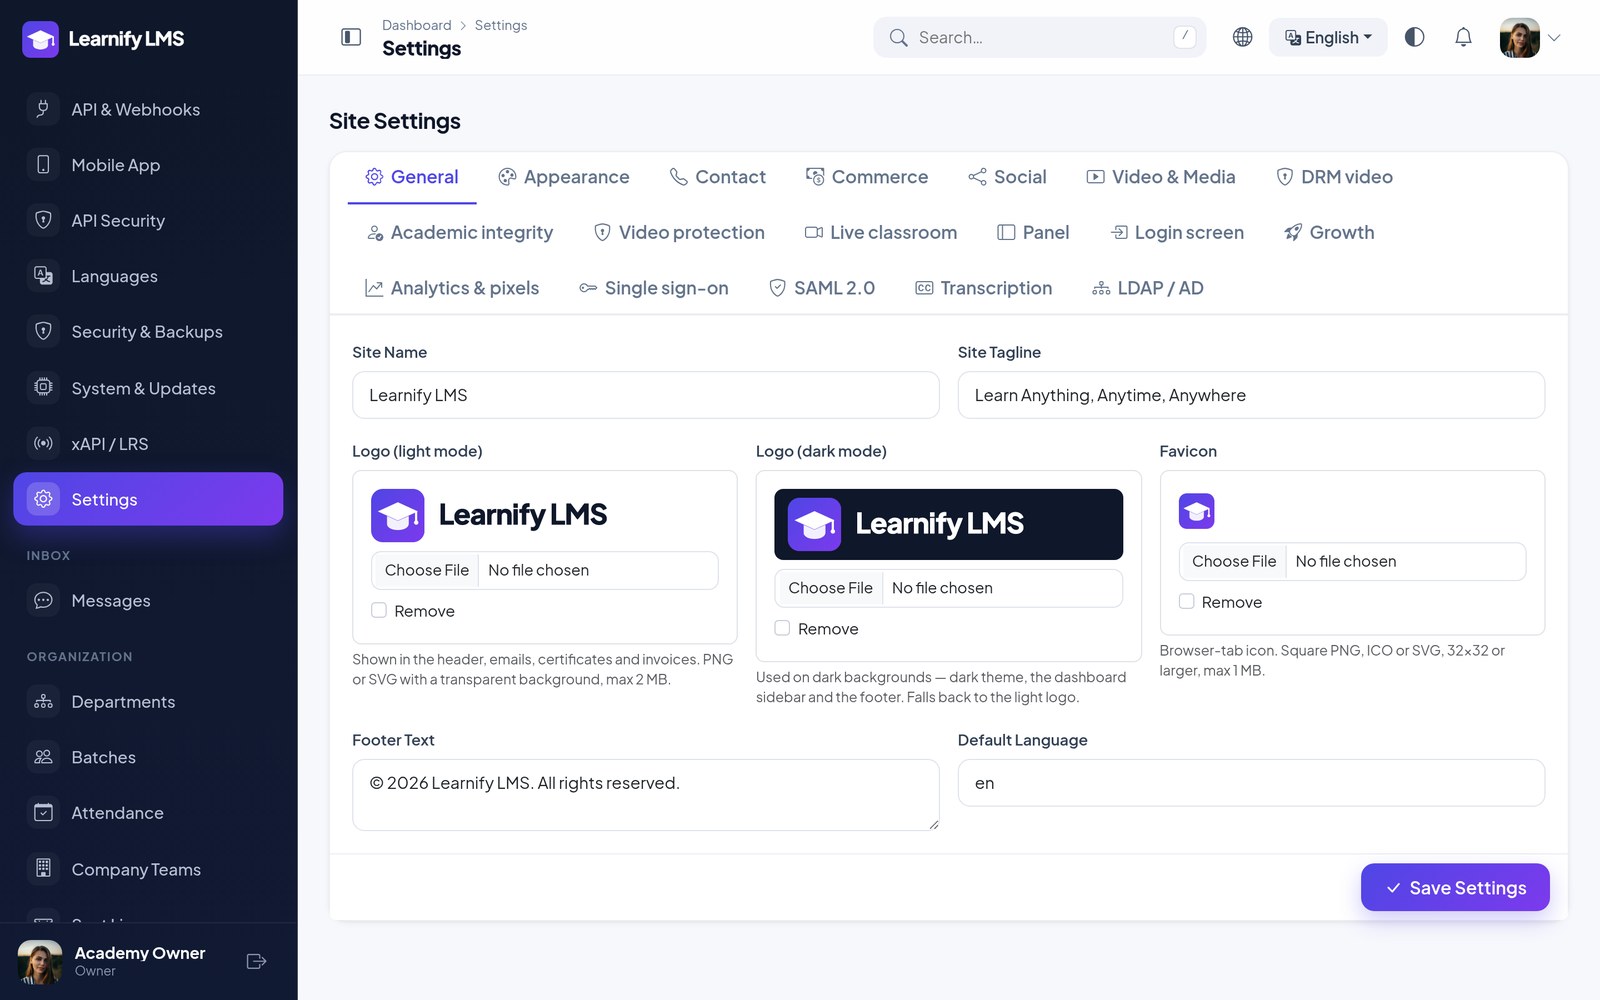
Site name, logo, favicon, contact details, social links, registration rules, default currency, the commission rate, and which features appear on the front end. Mail and storage have their own page; see Common Setup.
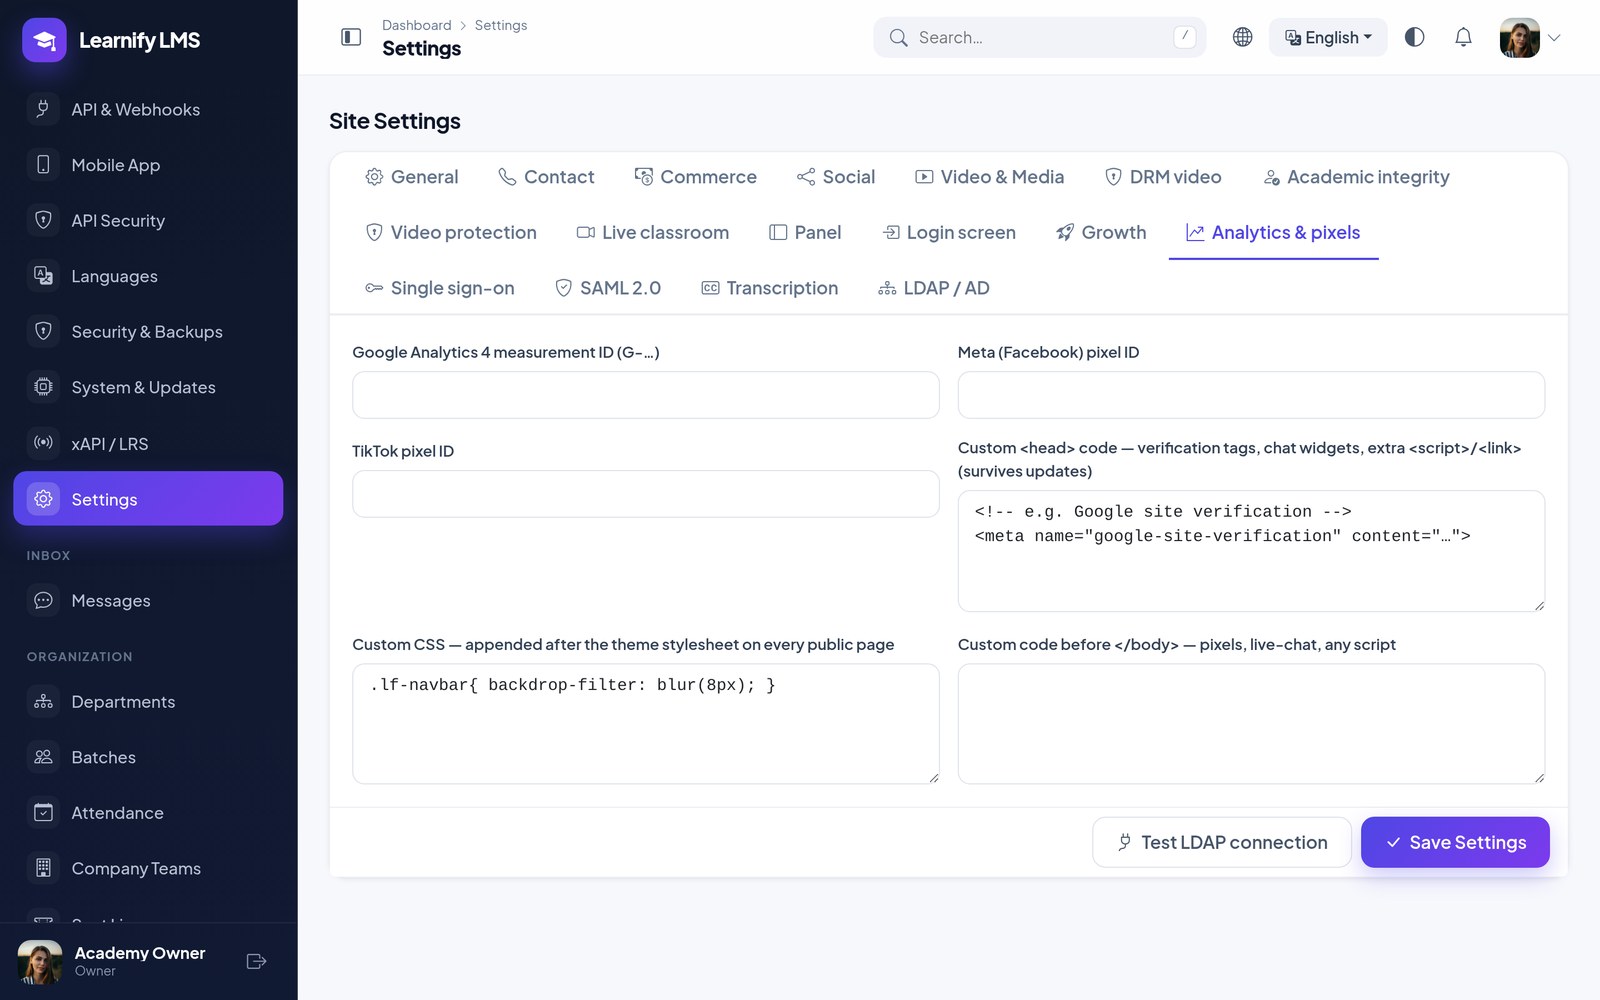
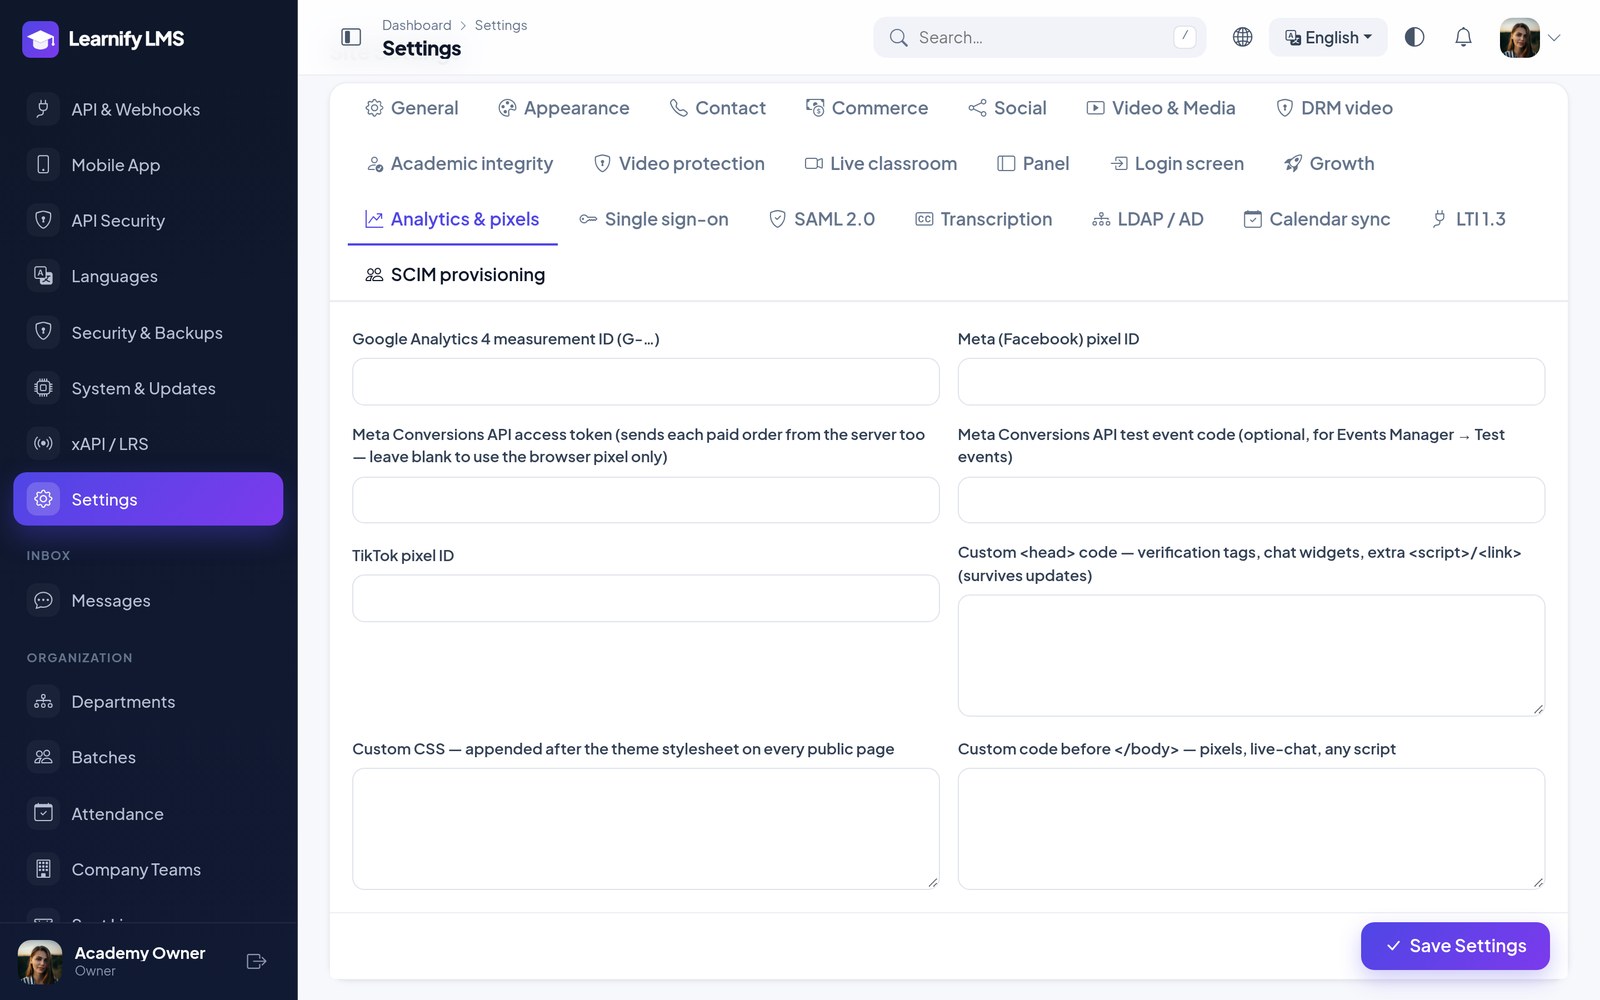
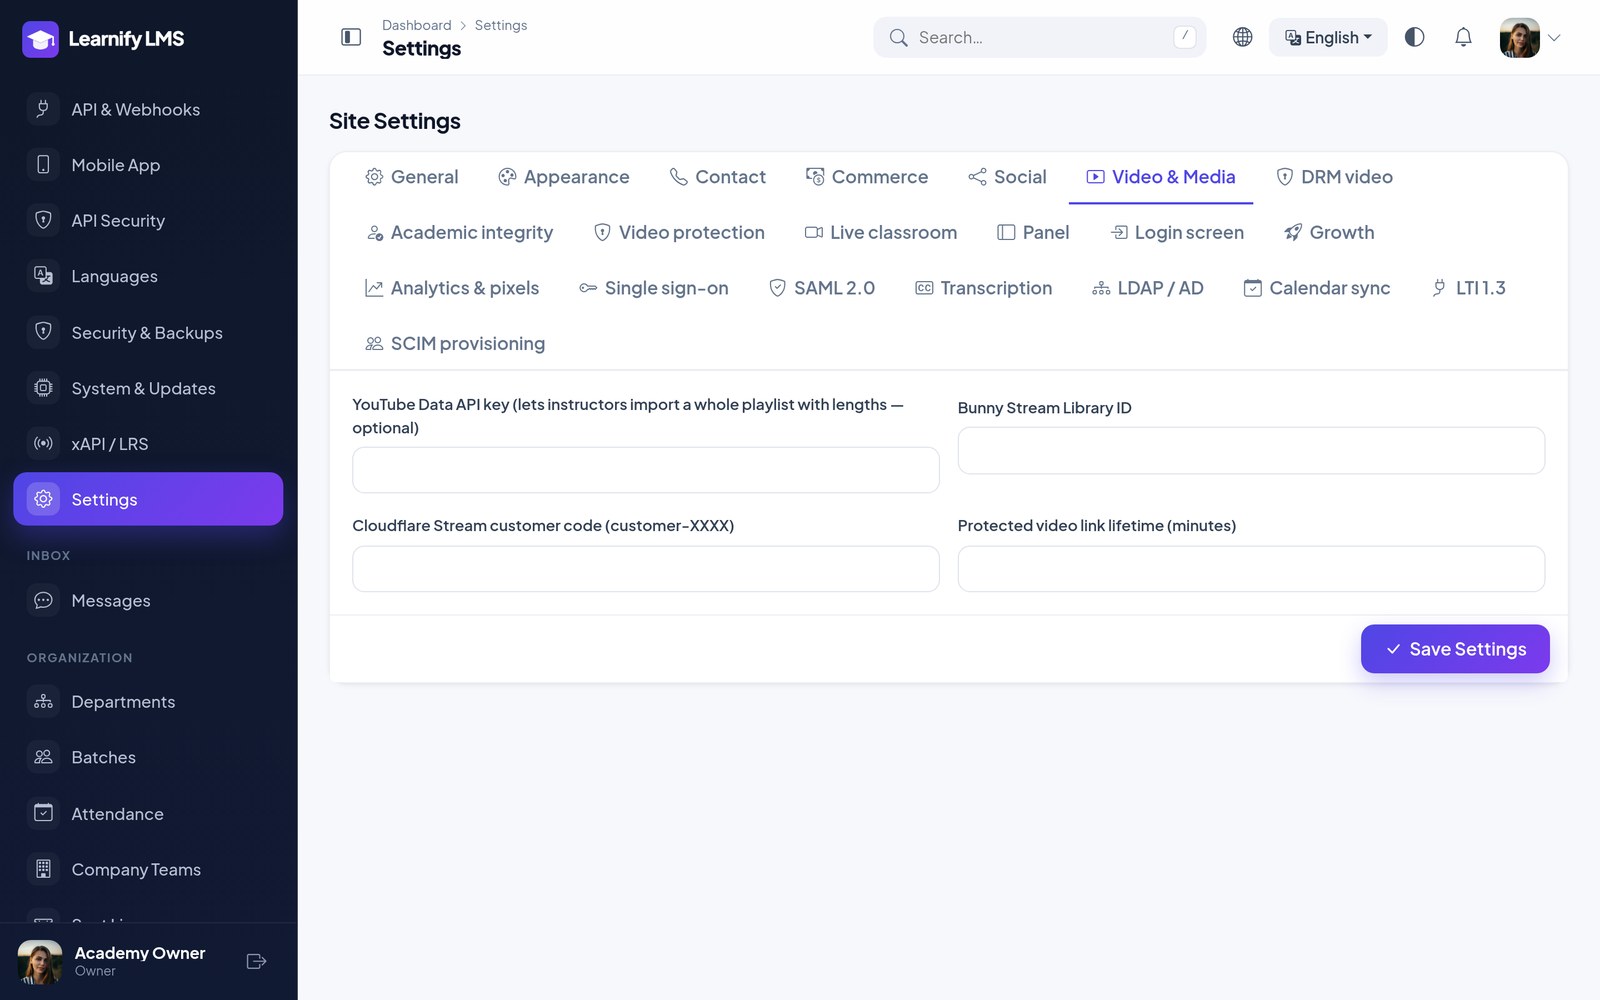
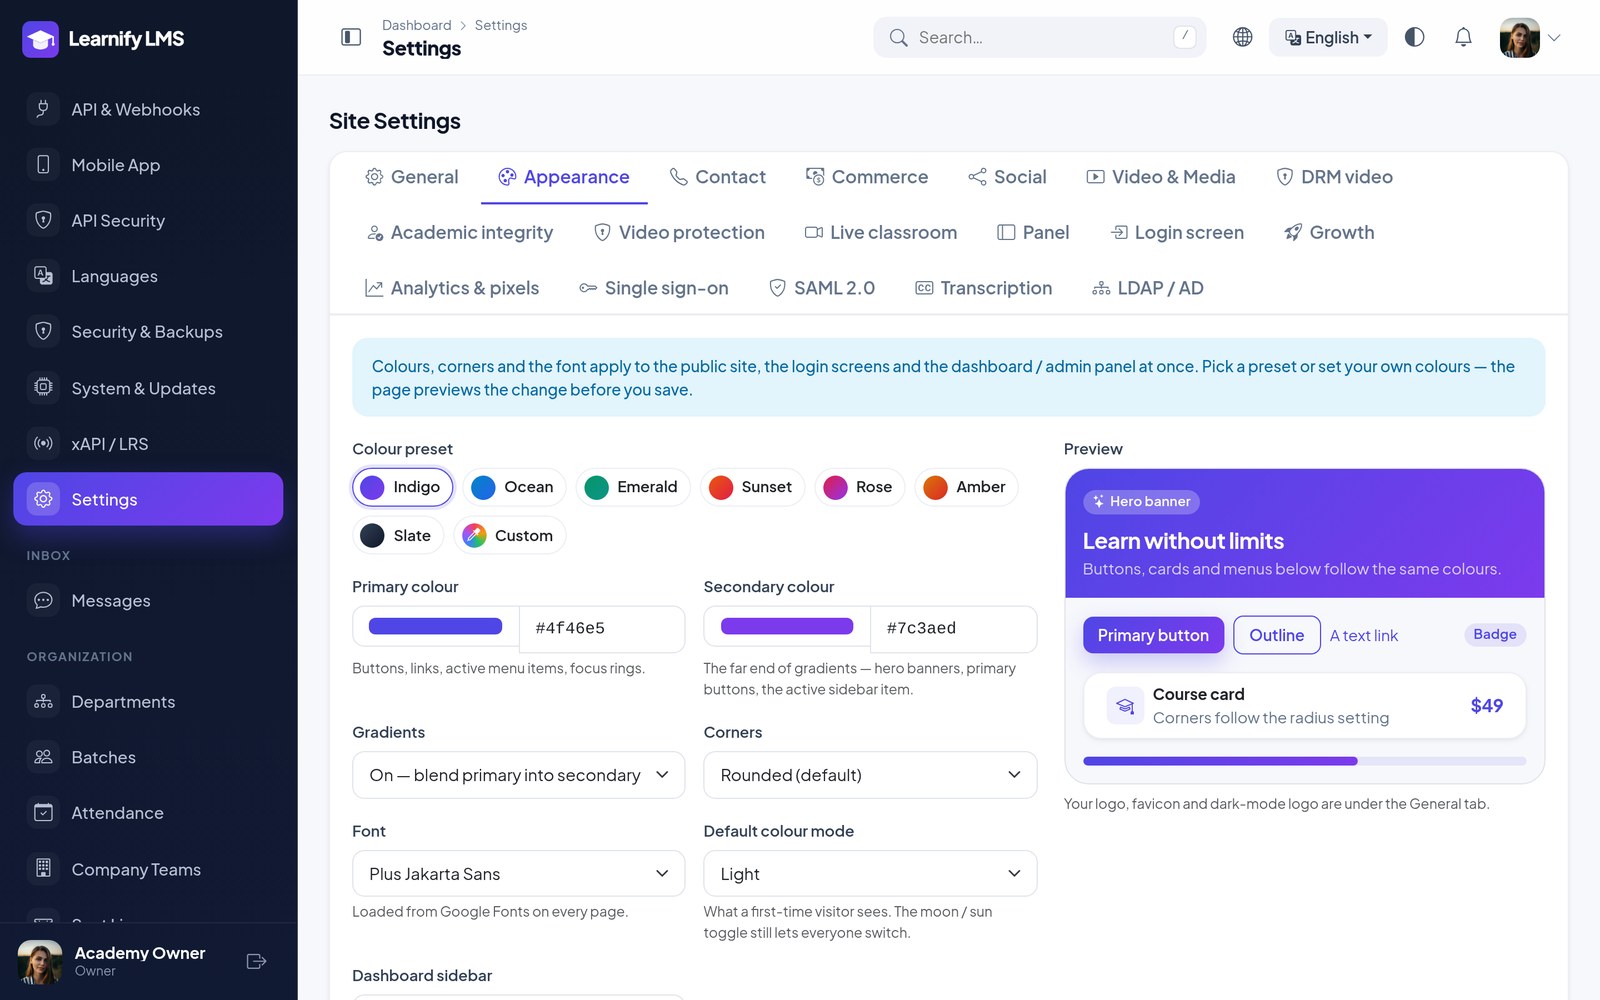
The Settings page is split into tabs. Appearance sets the look of the public site, the login screens and the dashboard / admin panel together: a colour preset or your own primary and secondary colours, gradients on or off, corner radius, font (Google Fonts or the system font), the default light / dark mode and the dashboard sidebar style (dark, brand colour or light), and the website template (Aurora, Academy, Editorial or Nova — see Website Templates). The page previews changes live before you save. Beyond the basics: Commerce (refund window, wallet cash-outs, invite and loyalty bonuses), Video & Media (Bunny / Cloudflare Stream, signed-link lifetime), DRM video (Widevine and FairPlay licence URLs), Video protection (viewer-bound links and a moving forensic watermark), Academic integrity (external similarity and proctoring providers), Live classroom (the built-in Jitsi room, public or your own server), Growth (order bump at checkout, instalment grace days), Analytics & pixels (GA4, Meta — add a Conversions API access token and each paid order is also sent to Meta from the server, de-duplicated with the browser pixel, so ad-blockers no longer hide your sales — TikTok, plus custom head code, custom CSS and custom body code boxes for any other tag, chat widget or style override — stored in the database, so they survive updates), Transcription (Whisper, Deepgram or AssemblyAI to auto-generate subtitles), and the three sign-in tabs described in Sign-in & Directories. Commerce also holds the instructor-approval switch; Contact the invoice address, tax ID and footer; Live classroom the Zoom credentials and the reminder lead time.
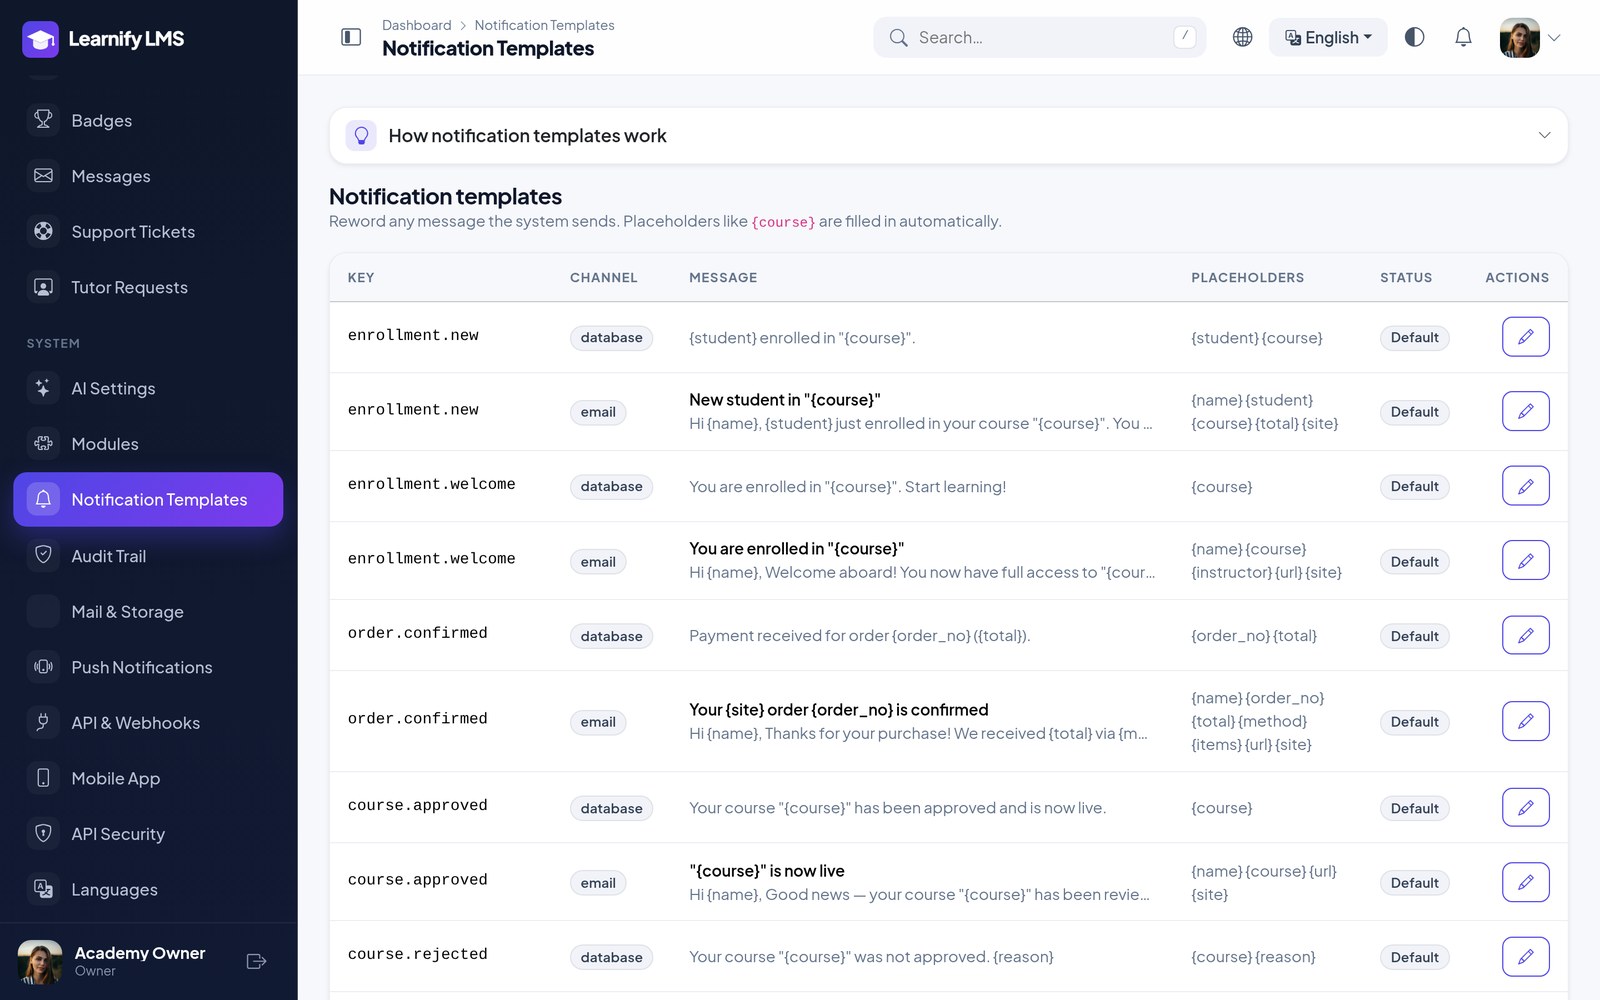
Transactional email. Order receipts, enrolment welcomes, certificate notices, assignment submitted / graded / returned, live-class reminders, payout and refund decisions, instructor-application decisions — each is sent by email, in-app and (with Firebase) push. The wording of every one is editable under Notification Templates, and Mail & Storage has a single switch to turn transactional email off.
Dashboard Look & Sidebar
Customizer. The sliders icon in the dashboard top bar opens a panel for light / dark, brand colour, sidebar style, corners, font and a compact density. Changes preview instantly and are kept per browser; an admin can press Save for everyone to make them the site-wide look (they are written to Settings → Appearance). Under Settings → Panel you can limit the customizer to admins and instructors.
Sidebar. Menus are grouped into collapsible sections; only the section of the page you are on starts open, and opening another closes it. Collapse the sidebar with the button beside the page title: it shrinks to icons, and hovering (or tabbing to) an icon shows its name, its section and any pending count. Prefer the classic list? Choose Flat list under Settings → Appearance.
Phones. Dashboard tables swipe sideways instead of cutting off columns, and on Explore courses the filters open from a Filters button as a bottom sheet.
Modules
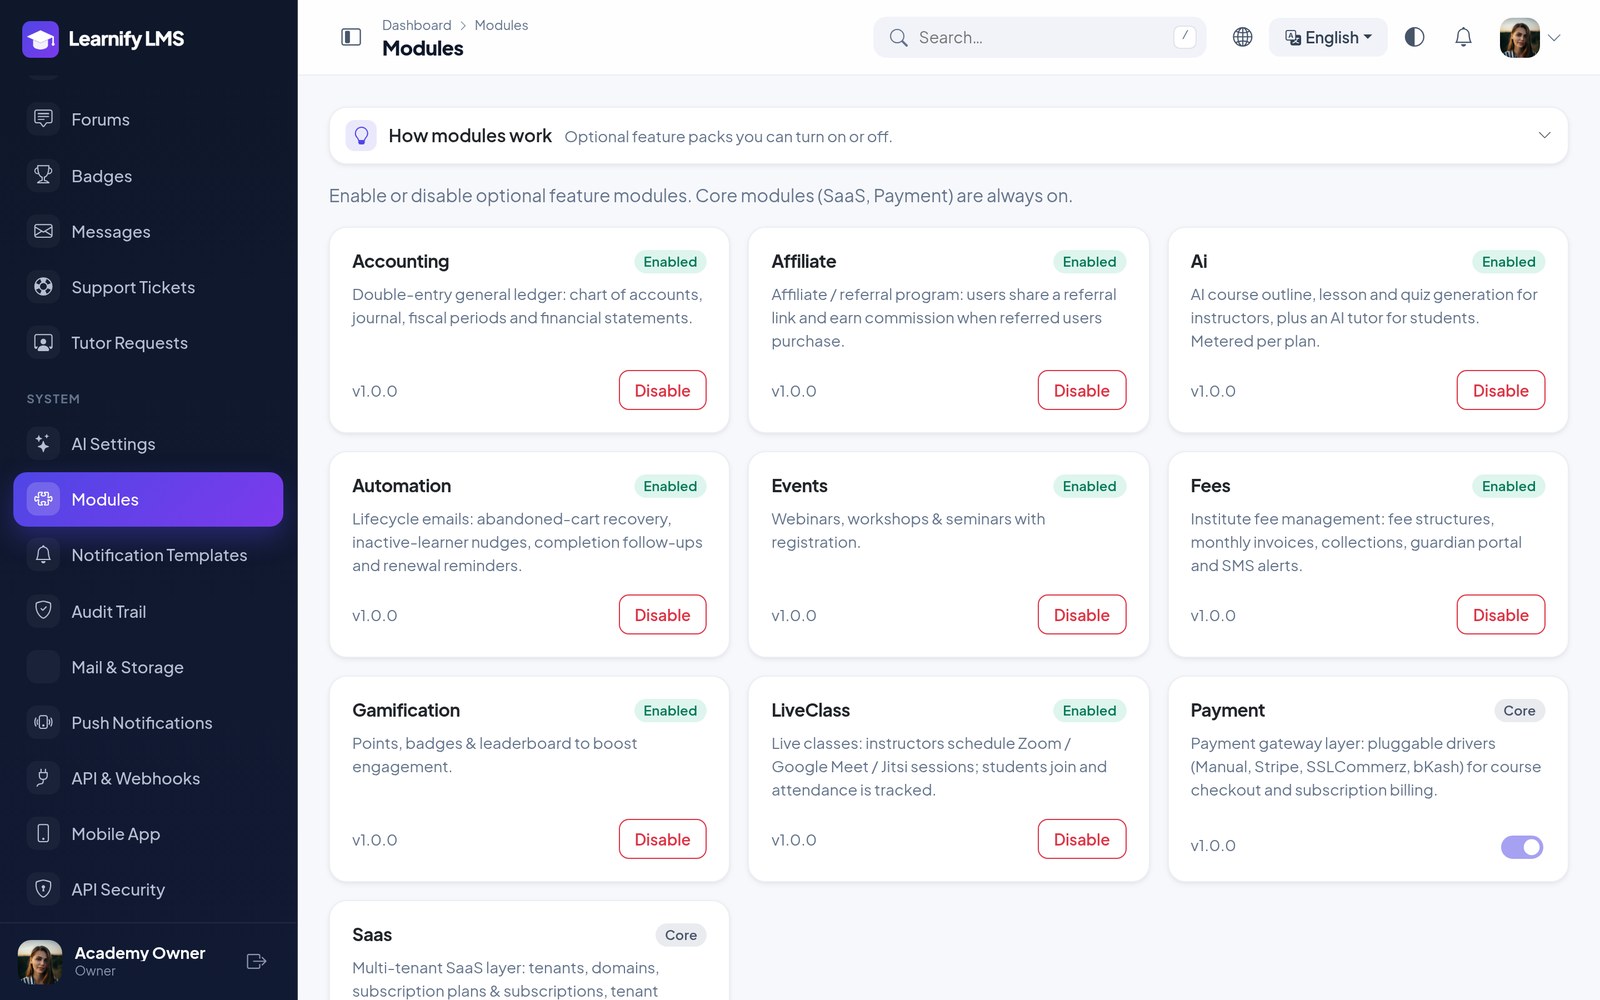
System → Modules turns optional features on and off. A disabled module disappears from the menus, the API and the app — no leftover empty screens.
AccountingAffiliateAIAutomationEventsFeesGamificationLive ClassPayment
Mobile App Settings
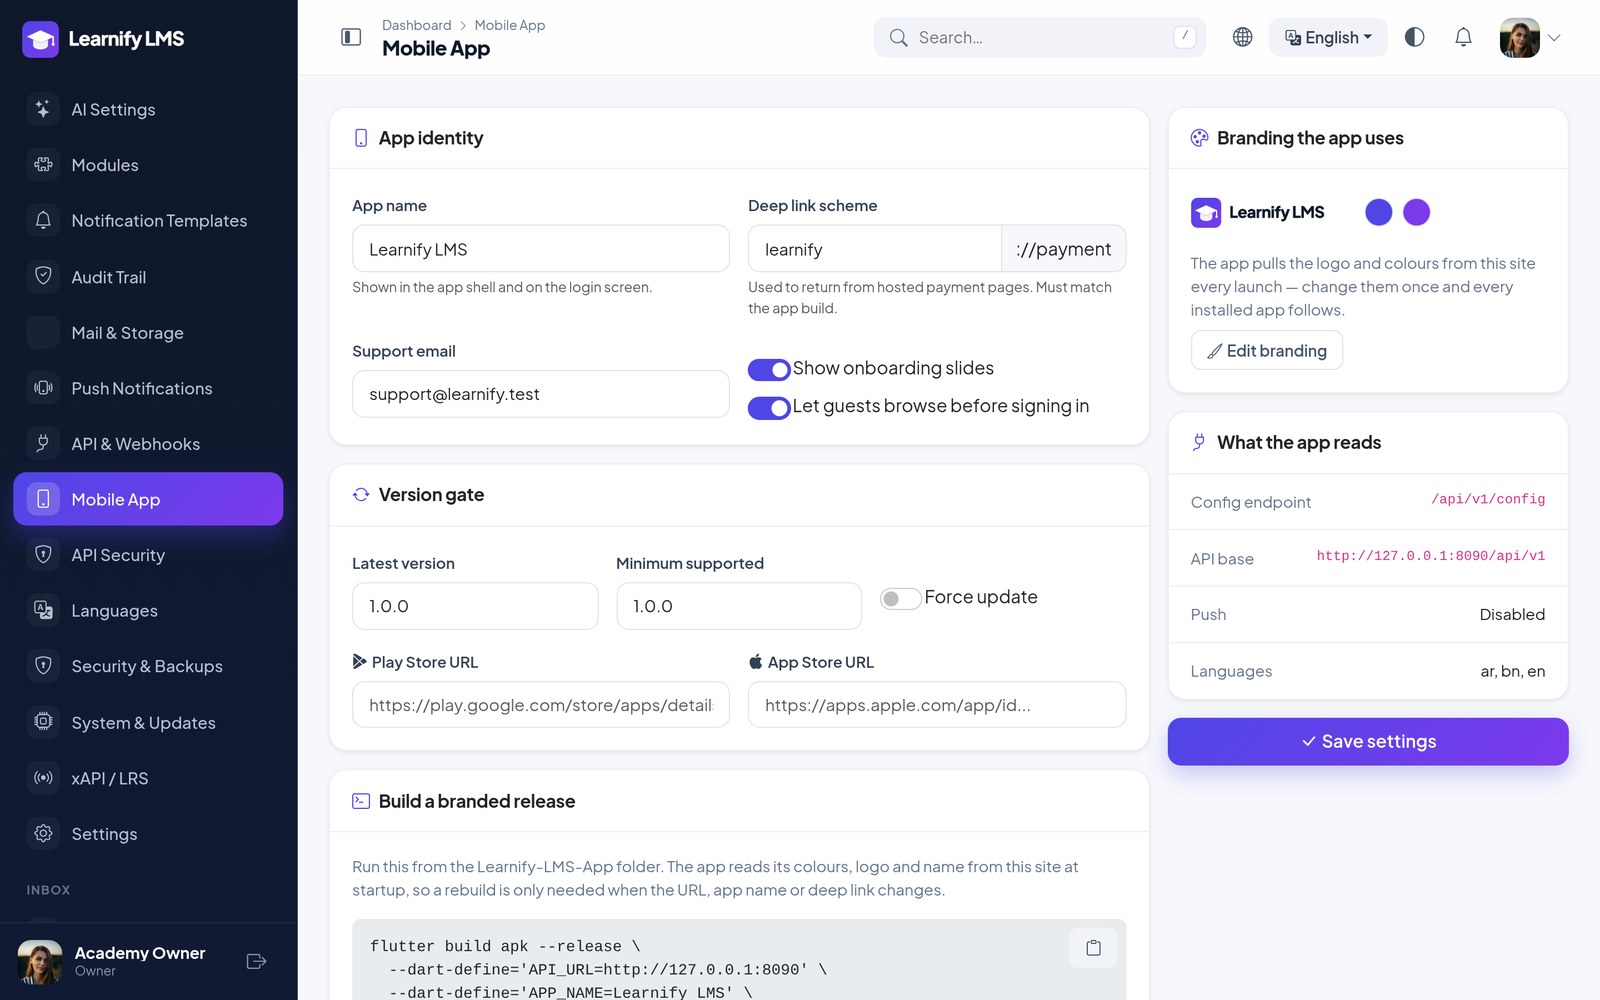
Everything the Flutter app reads at launch: the app name, deep link scheme, support email, whether guests may browse, the onboarding slides, and a version gate that can require an update. Colours come from your branding, so the installed app follows the site without a rebuild. App logo lets you upload a separate mark just for the app (a square 512×512 PNG or WebP fits best) — it appears on the splash screen, the home header and the login screen; leave it empty and the app uses the site logo.
Languages & RTL
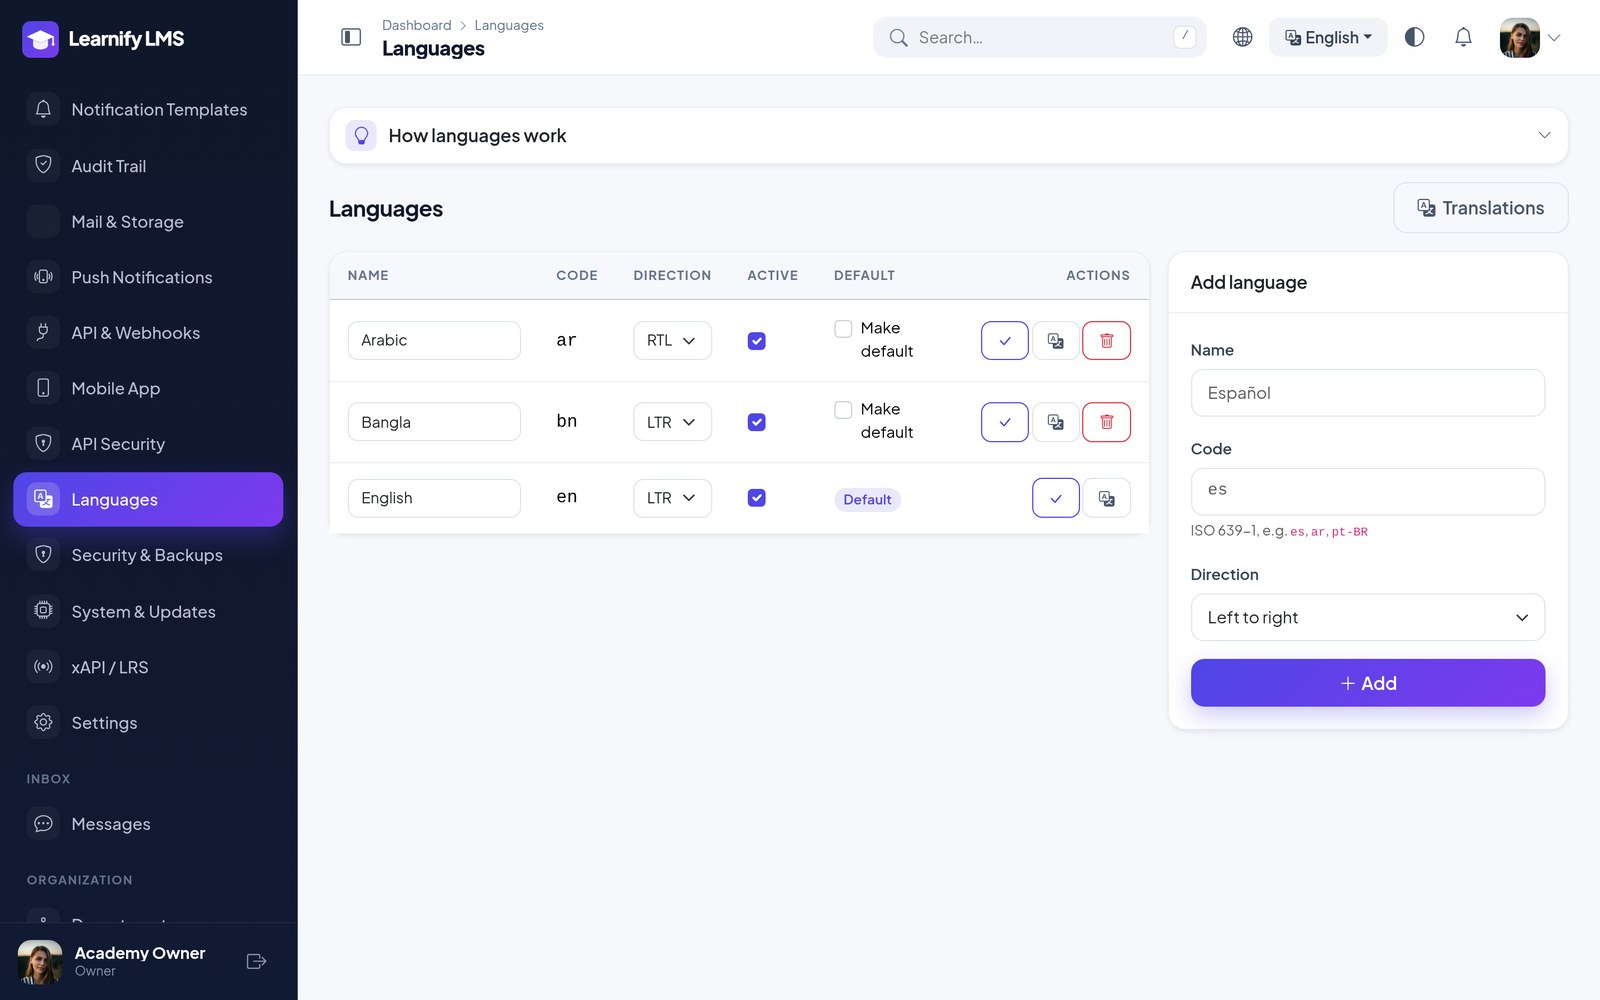
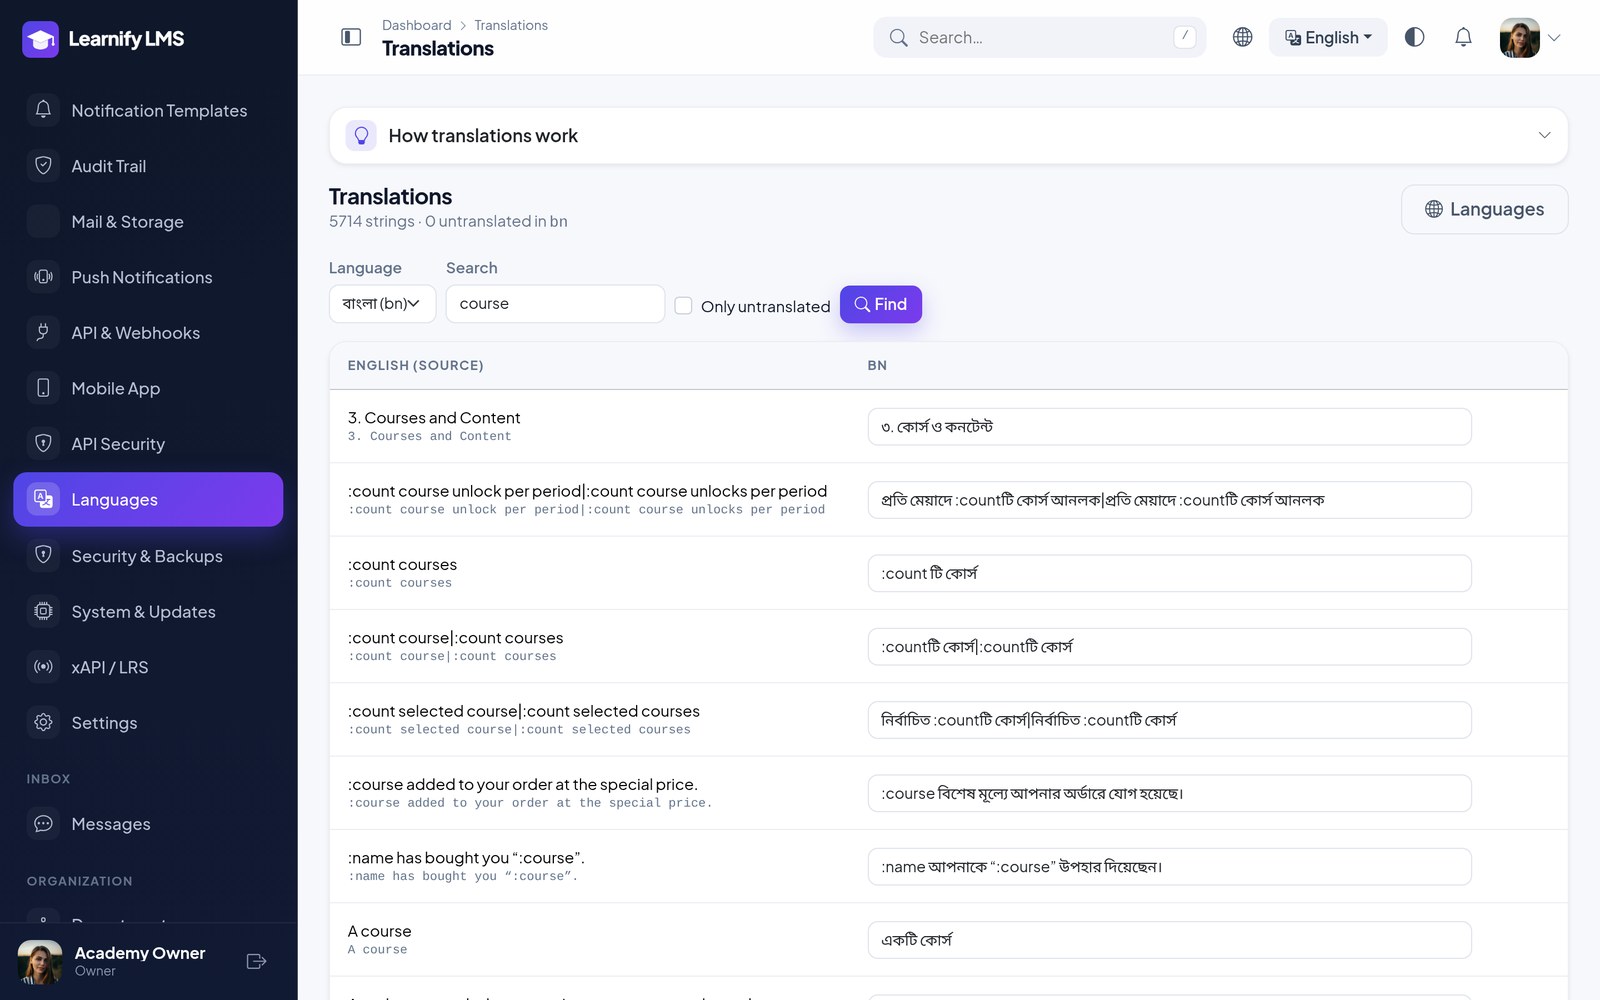
Add a language, then edit its strings in the translation manager — no files to upload. Right-to-left layouts are supported on the website and in the app; setting a language as RTL flips the interface. English, Bangla and Arabic ship fully translated, including validation messages, e-mails and the mobile app. Each visitor picks a language from the navbar; a signed-in user’s choice is remembered, so their e-mails and notifications arrive in it, and the app sends it with every API call. The translation manager saves only the strings you change, page by page, and what you save overrides the shipped text without touching any file, so
Import & export (Languages → Translate): one catalogue covers the website and the mobile app. Download a blank sample, your editable translations (JSON) or a spreadsheet (CSV), fill it offline, then upload it: Preview lists every change before Import. Merge translations overwrites matching strings; Fill missing translations only keeps what you already have. Blank values are skipped, the file’s language must match the selected one, and placeholders such as :name or @n must stay. The app downloads the catalogue from GET /api/v1/translations/{code}, so a language added later works without a new app build.
Security & Backups
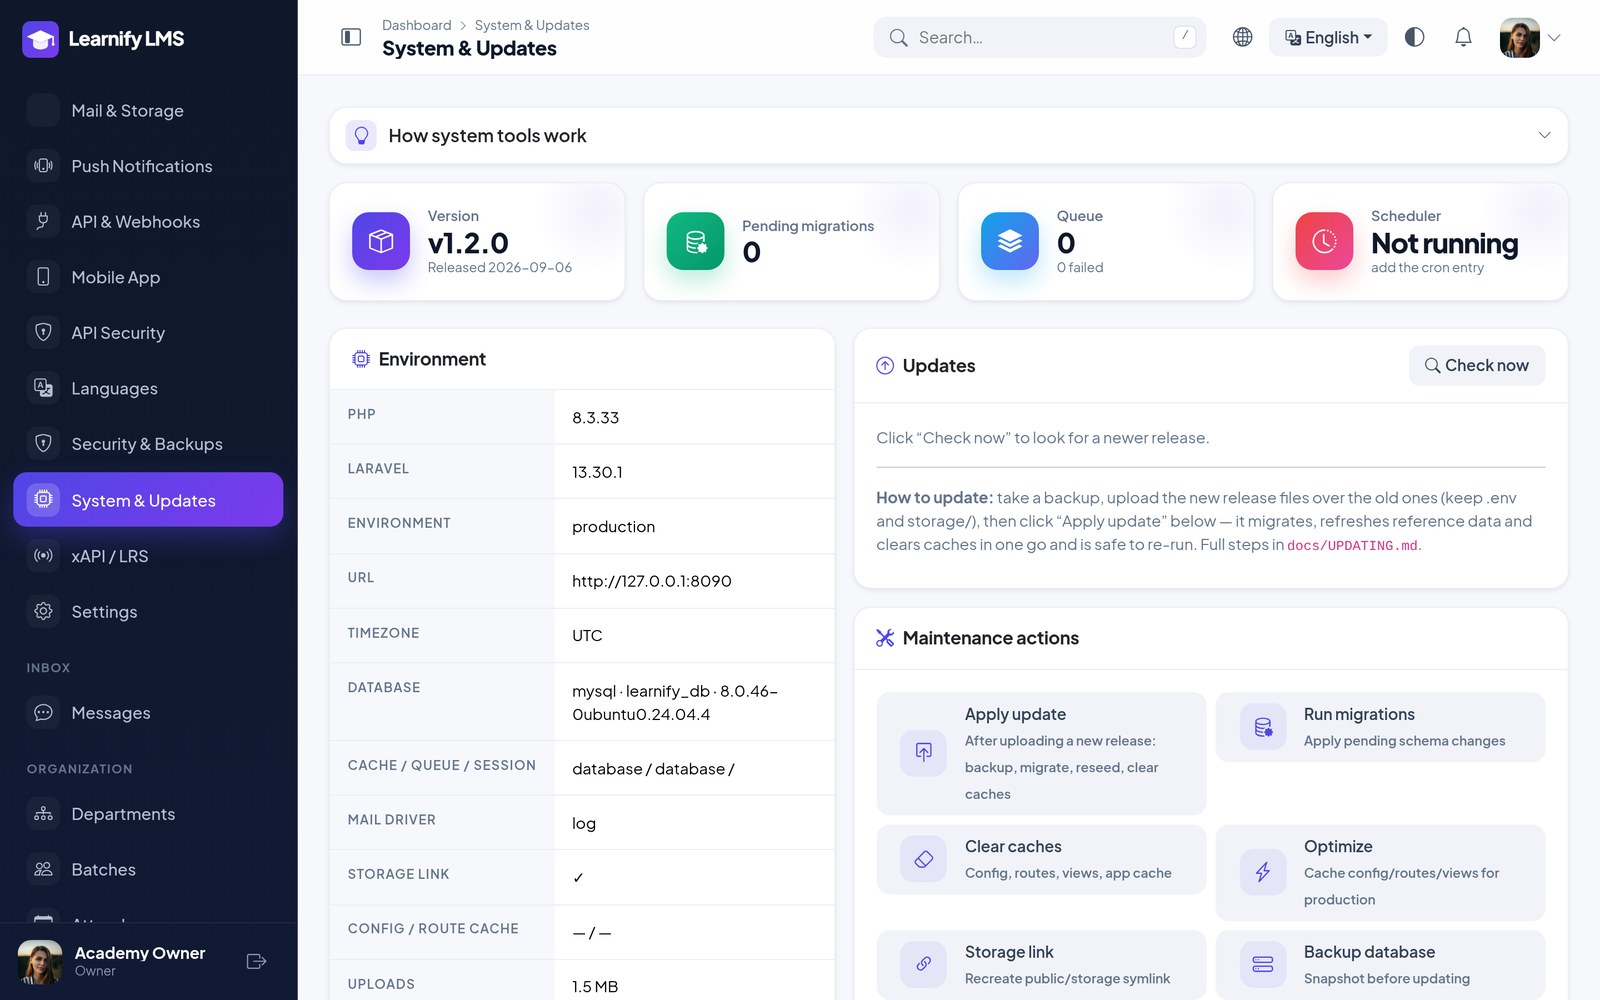
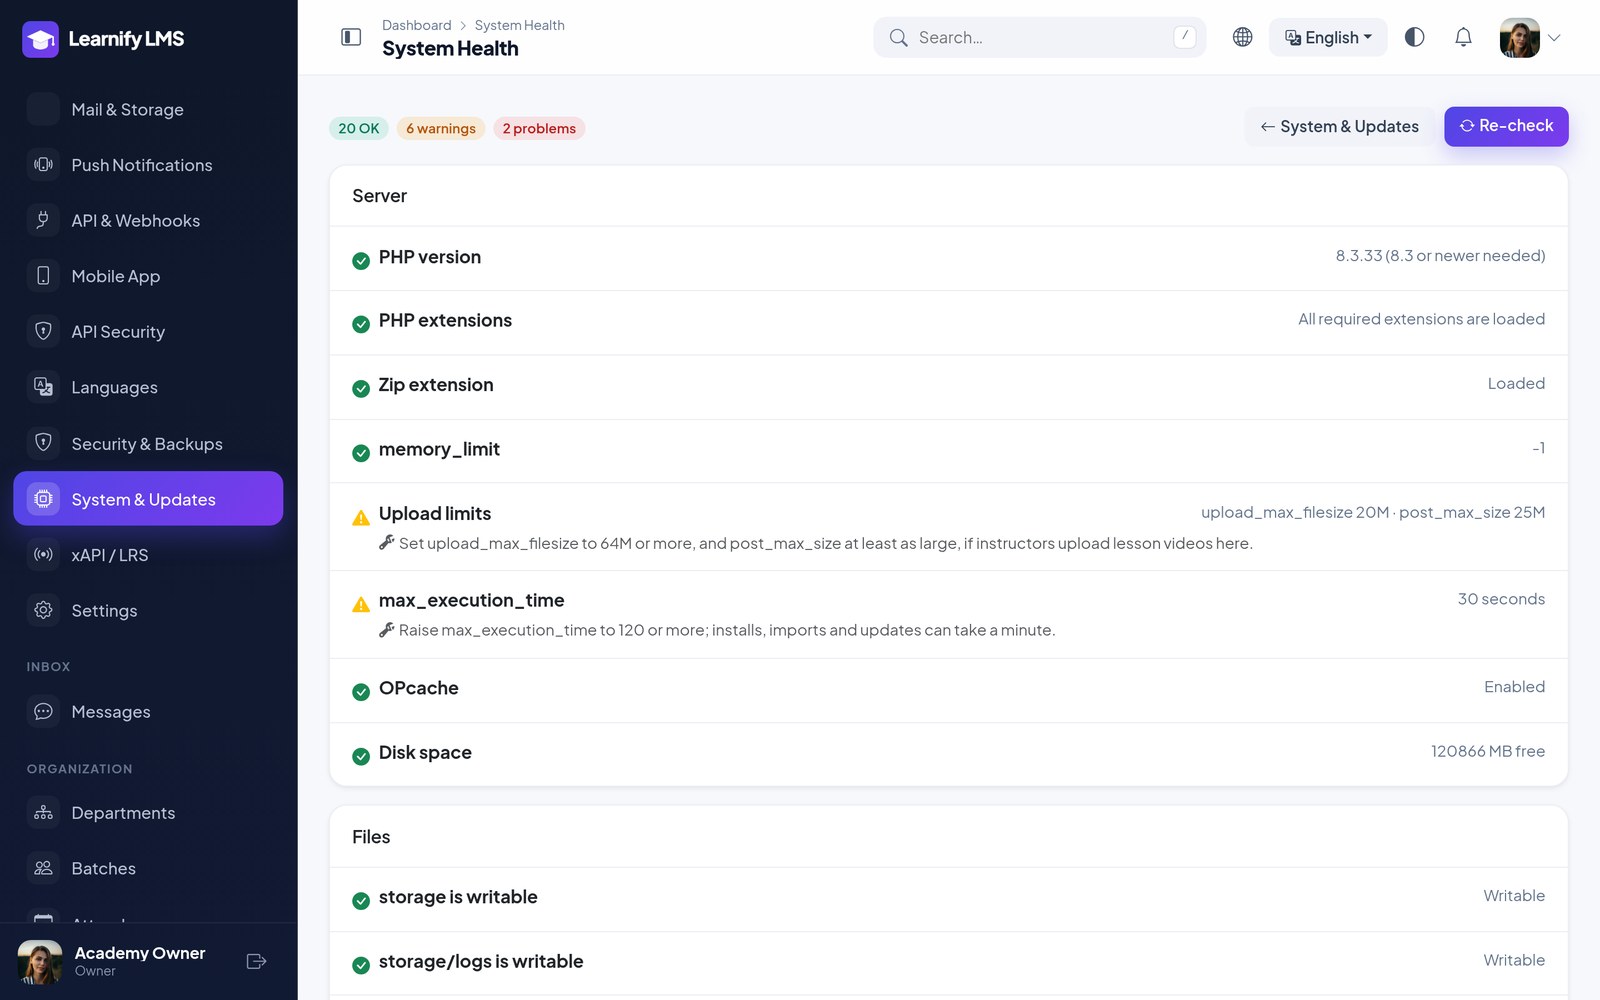
System health. System & Updates → Run health check (or
php artisan learnify:health over SSH) checks PHP version and extensions, writable folders, database,
pending migrations, debug mode, APP_URL, cron, queue, mail, backups and payment gateways, and tells you
how to fix anything that is not green — send the output with a support request.
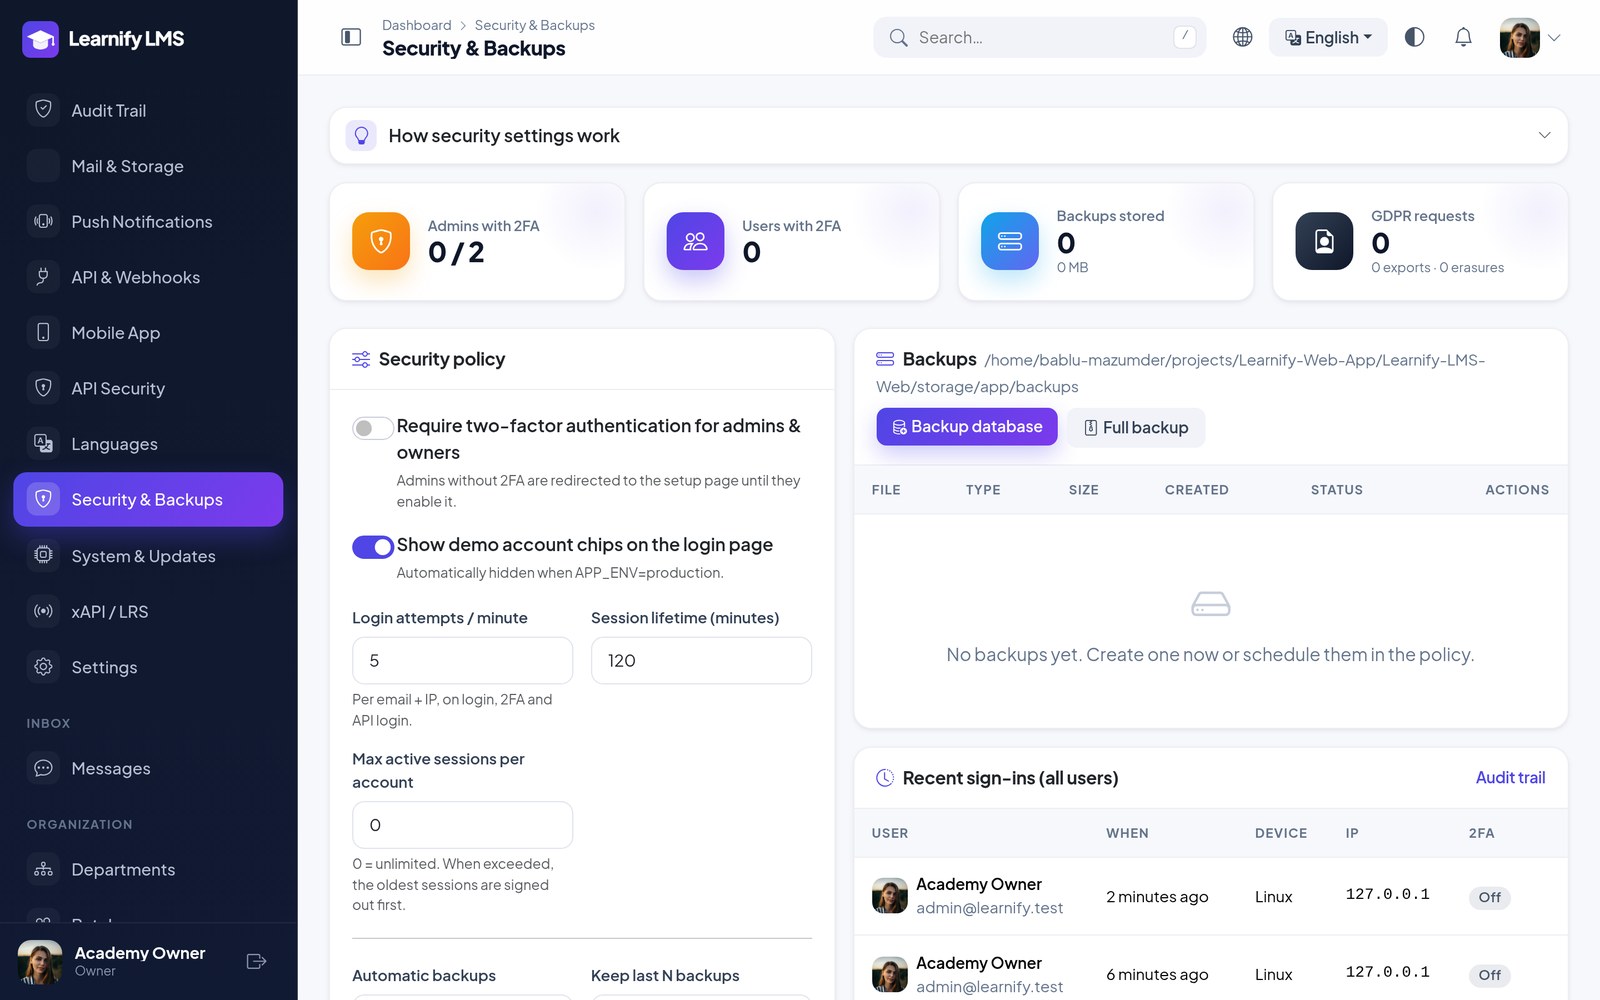
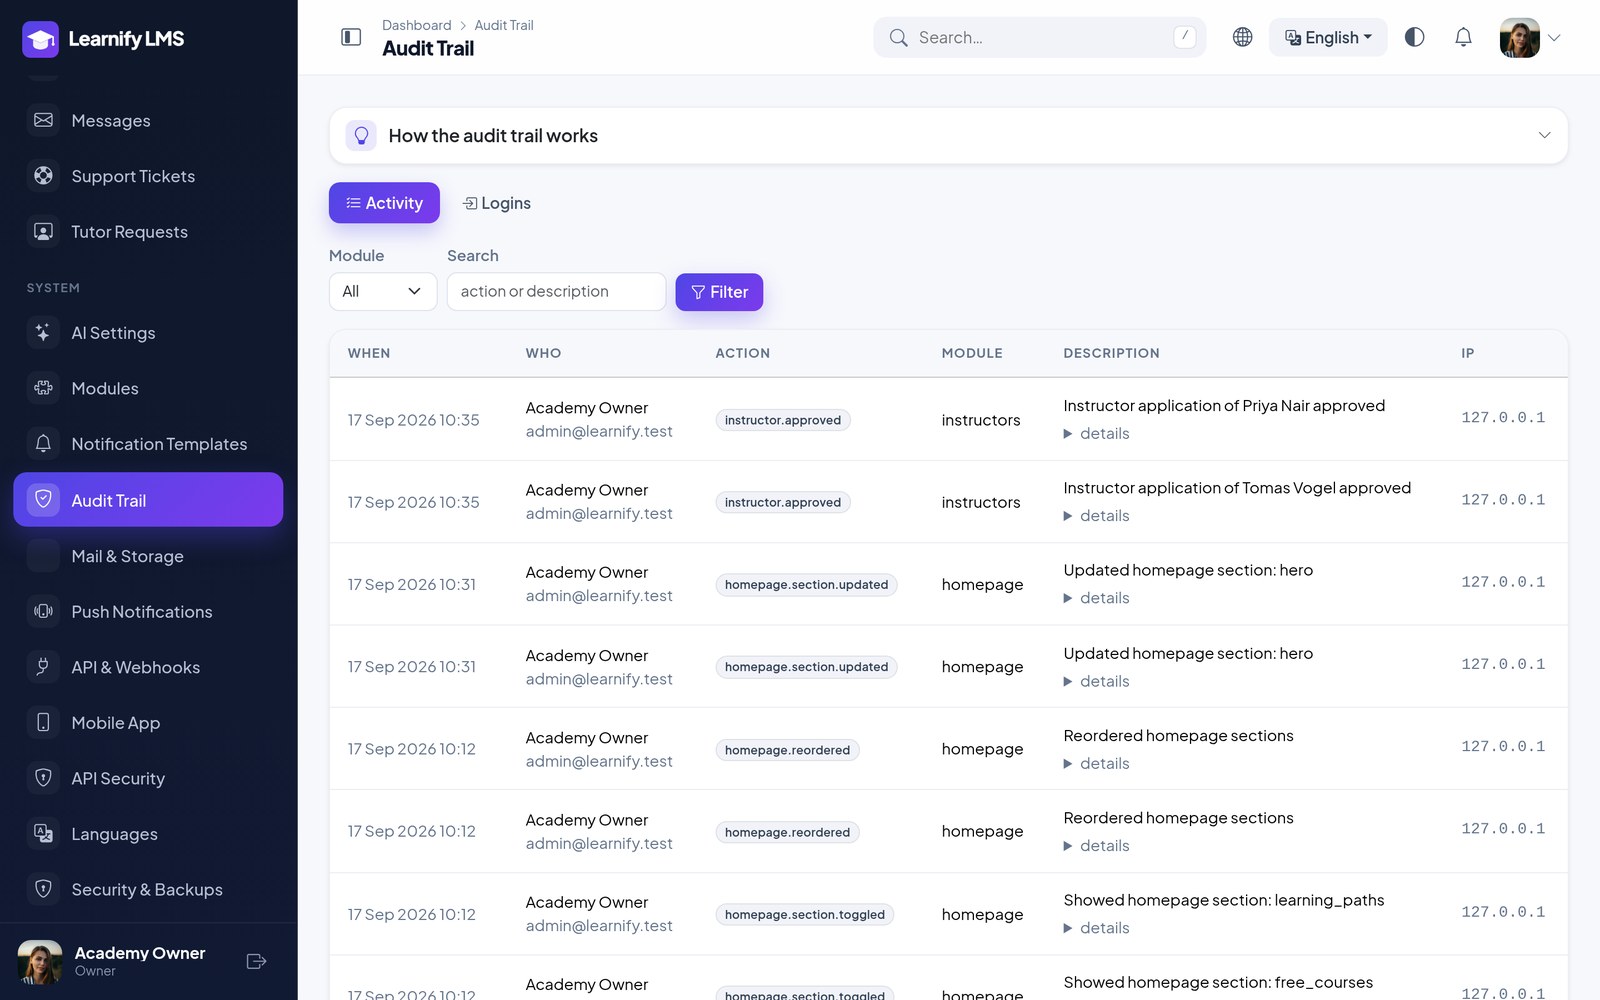
Two-factor authentication with a QR code and single-use backup codes, a login history, an audit trail of what changed and who changed it, GDPR data export and delete requests, and scheduled database and file backups to local or S3 storage.
Change the admin login path and turn on two-factor authentication for every admin before you launch. Both take a minute and remove most of the risk.
Sign-in: Social, SAML & LDAP
Three ways in besides email and password, all configured from Settings with nothing on disk.
| Tab | What it is | You need |
|---|---|---|
| Single sign-on | “Continue with” Google, Microsoft, Facebook or GitHub. Accounts are matched by provider id, then by verified email, so a password user can add a provider later without a duplicate account. | A client id and secret per provider; the callback URL is shown on the tab. |
| SAML 2.0 | Enterprise identity providers — Entra ID / Azure AD, Okta, ADFS, Google Workspace, Keycloak. Single logout in both directions; attribute names and the default role are mappable. | The IdP entity id, sign-in URL and signing certificate. Paste our metadata URL into the IdP. |
| LDAP / AD | Users sign in on the normal form with their directory username; a local account is created on first sign-in and the directory keeps the password. | Host, port, encryption, base DN and a bind account. PHP’s ldap extension. |
Two more for institutions: SCIM 2.0 at /scim/v2 lets an identity provider create, update
and deactivate users automatically (a bearer token you set in Settings → SCIM provisioning), and LTI 1.3 at
/auth/lti lets a course launch from inside Moodle, Canvas or Blackboard (Settings → LTI 1.3).
Both are configured in the admin panel — nothing goes in .env.
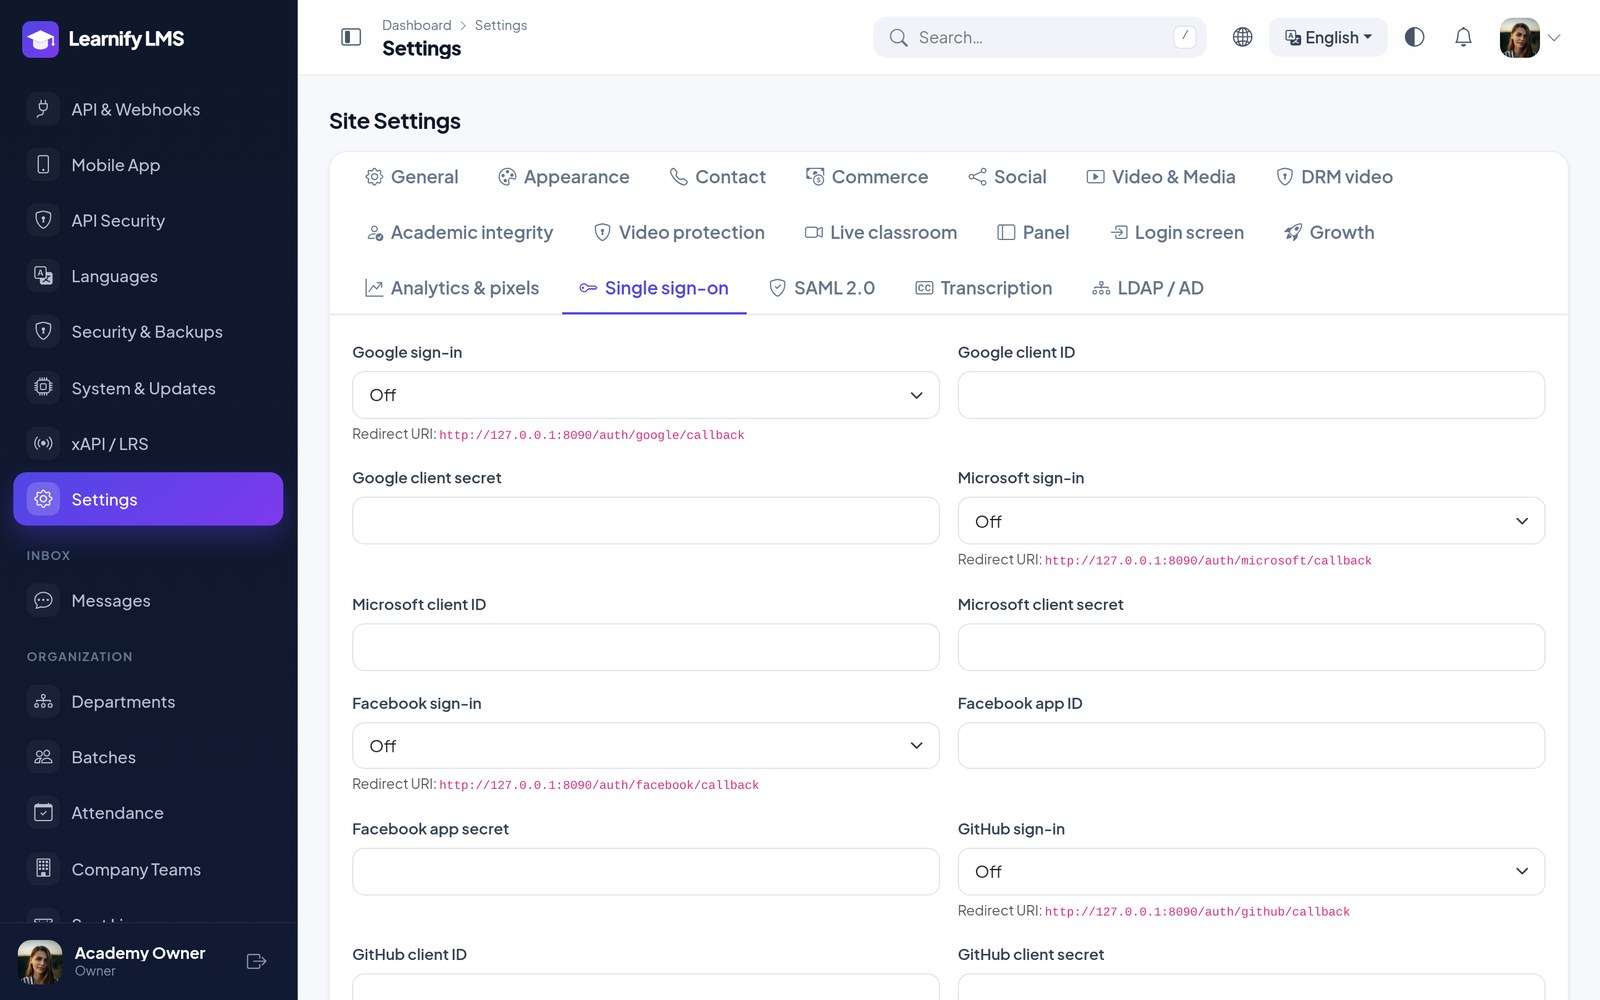
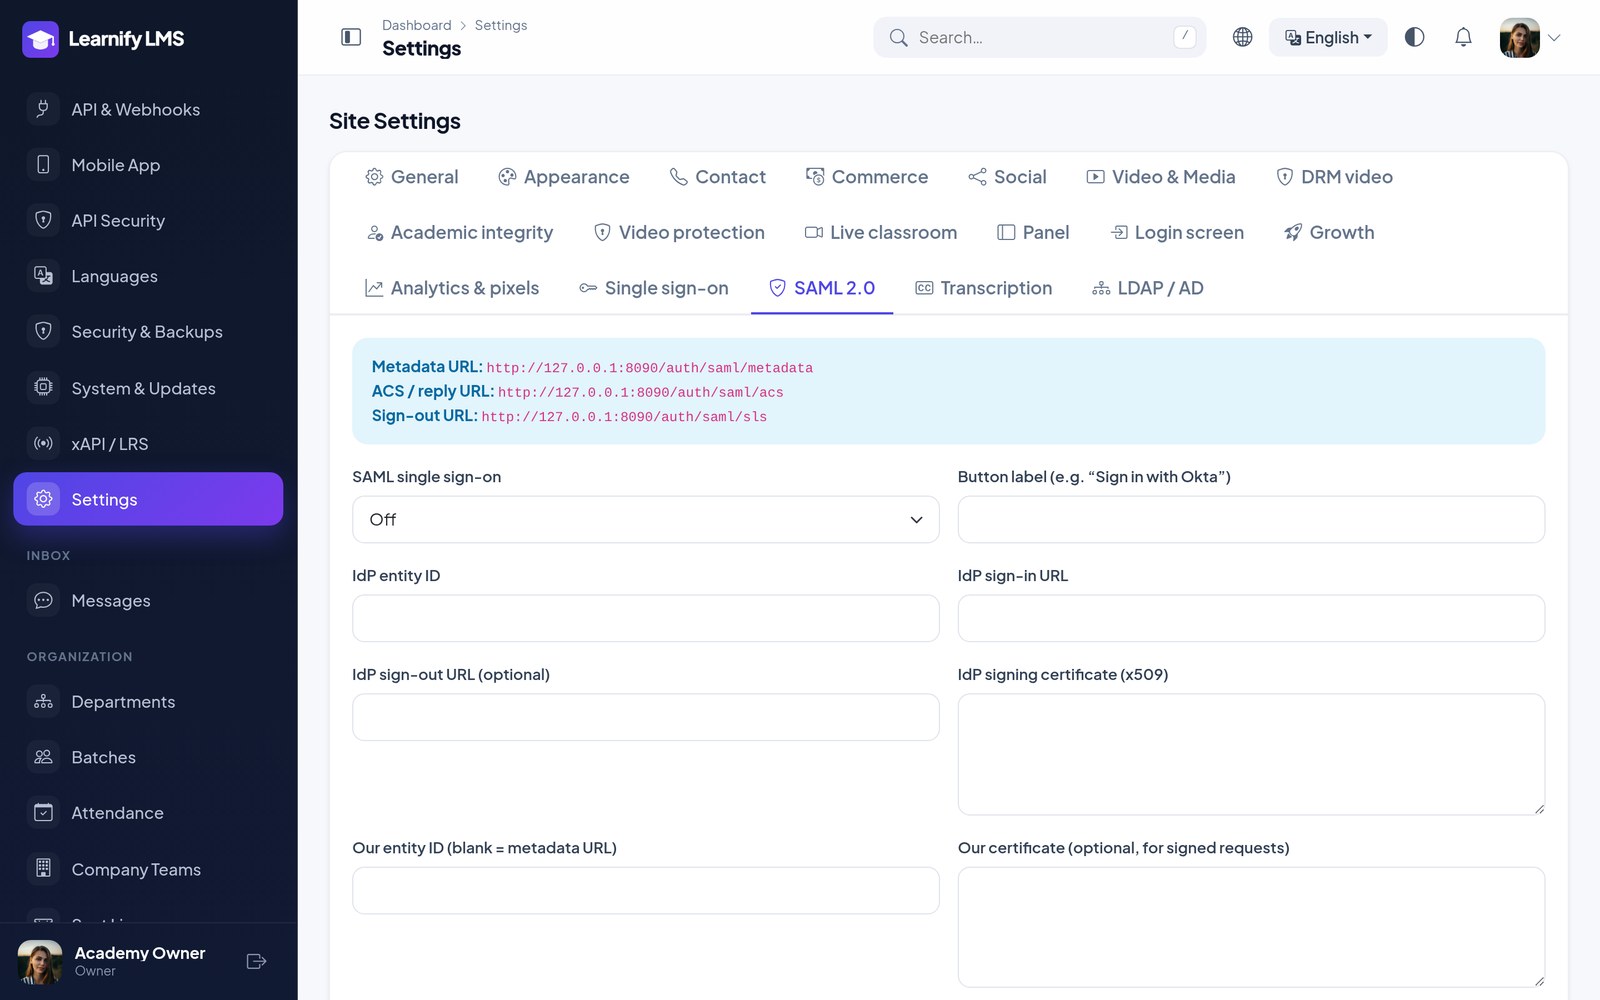
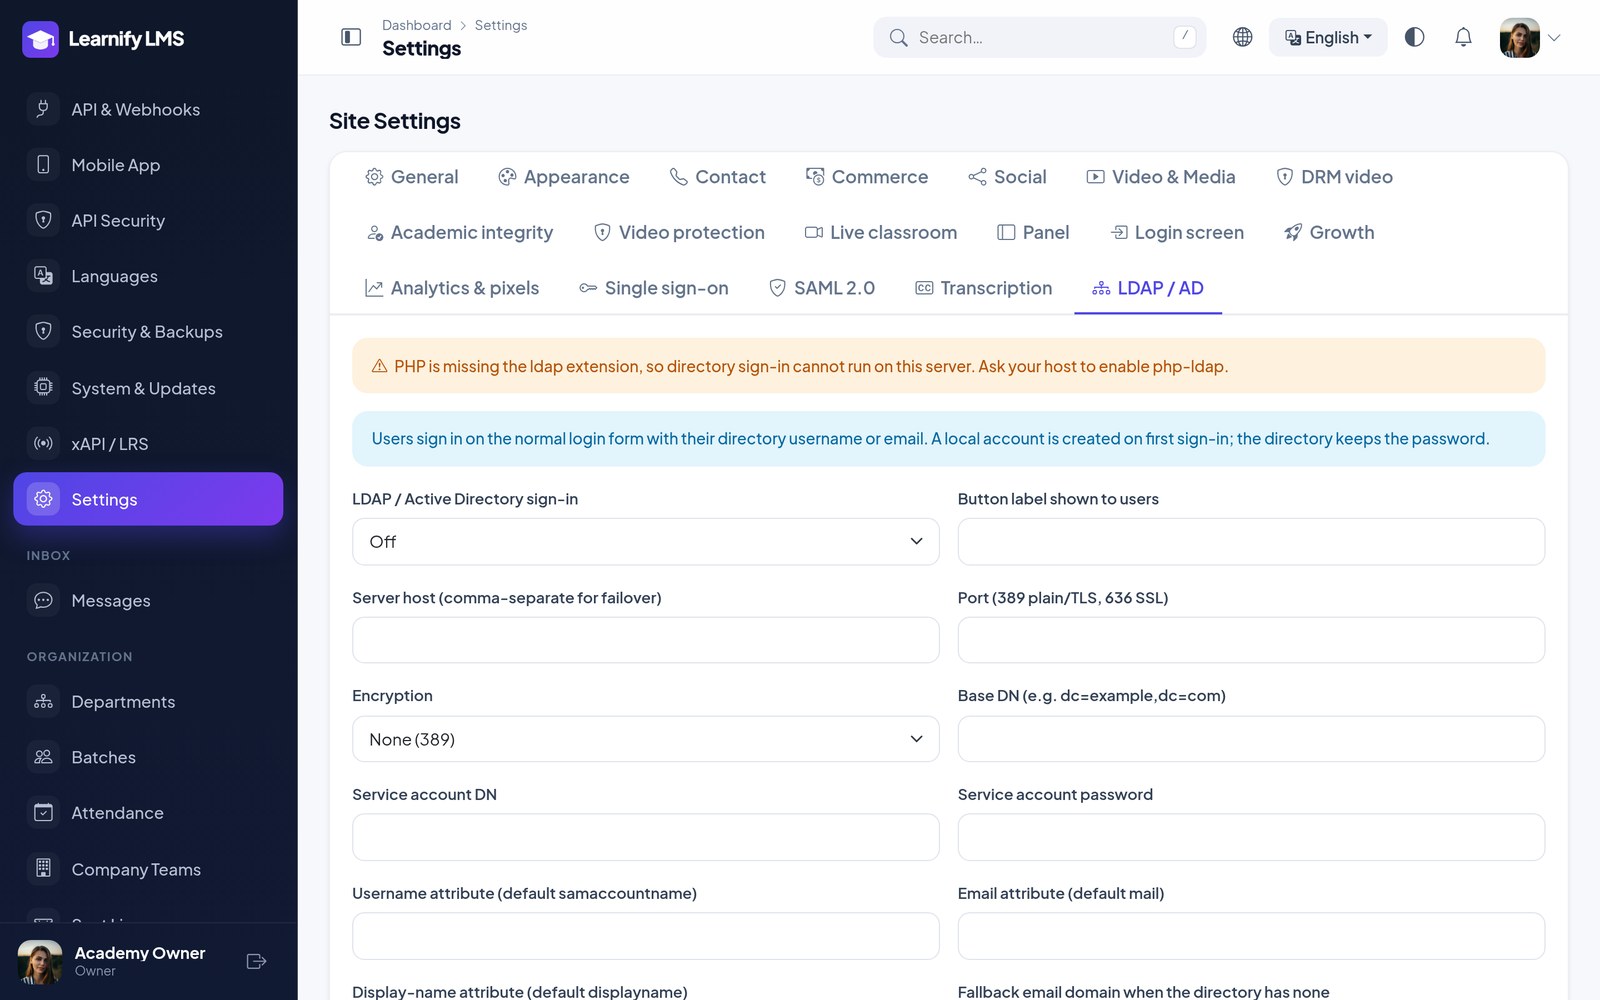
API, Webhooks & xAPI
Issue API keys for server-to-server access, register outgoing webhooks so another system hears about enrolments, orders and completions, and send xAPI (Tin Can) statements to an external LRS.
The mobile app uses the same REST API under /api/v1, authenticated with Sanctum tokens.